Claas Cutterbar Trailer Lexiontucano (724) Combines Operator Manual EN
$50.00
- Model: Cutterbar Trailer Lexiontucano (724) Combines
- Type Of Manual: Operator Manual
- Language: EN
- Format: PDF(s)
- Size: 8.6 MB
File List:
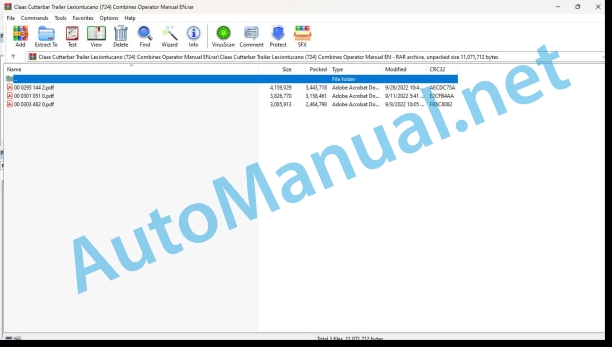
00 0295 144 2.pdf
00 0301 051 0.pdf
00 0303 482 0.pdf
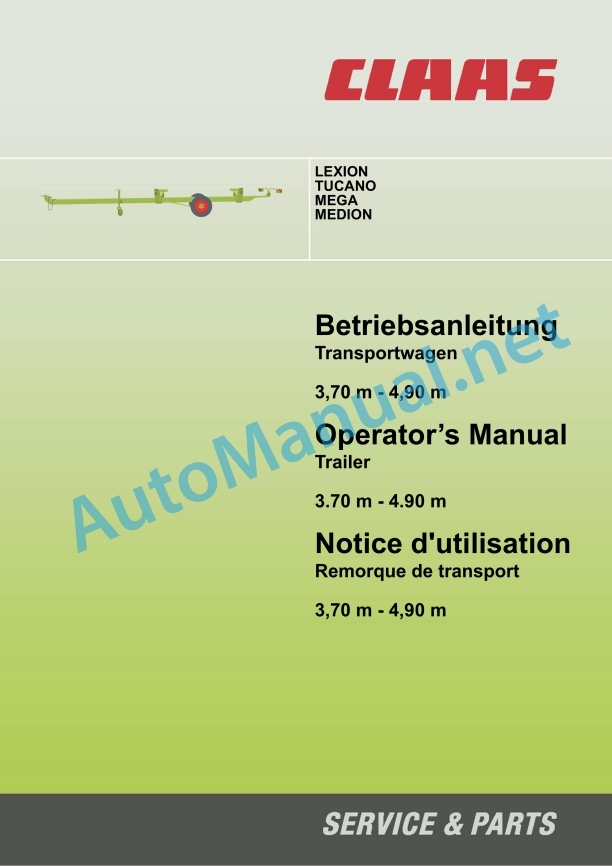
00 0295 144 2.pdf:
1 Instructions
1.1 Allgemeine Hinweise
1.1.1 Handling of the connection
1.1.2 Instructions of the connection
1.1.3 Technical Angaben
1.2 Types and Identifications – Numbers
1.2.1 Errors and technical details
1.2.2 Typenschild Transportwagen
2 bersicht
2.1 Transportwagen 3.7 – 4.9 m
2.1.1 General Transport Wagen
3 Sicherheit
3.1 Allgemeine Hinweise
3.1.1 Sonders on the beach
3.1.2 Allgemeine Sicherheits- und Unfallverhtungs-Vorschriften
3.1.3 Bestimmungsgeme Verwendung
3.1.4 Vernnftigerweise vorhersehbare Fehlanwendung
3.1.5 Authorization and Entsorgung
3.1.6 Hinweise Verwendung Zugdeichsel
3.2 Allgemeine Sicherheitsmanahmen
3.2.1 Lower leg
3.2.2 Flow and water
3.2.3 Vorbeugen von Brand and Explosion
3.2.4 Your Inbetriebnahme
3.2.5 Straenfahrt
3.2.6 Parkinzeichnung von Warn- und Gefahrenhinweisen
4 Zusammenbau
4.1 Allgemeine Hinweise
4.1.1 Hints and Fordring for the Anchorage of the Zugdeichsel
4.2 Transport vehicles outside the vehicle
4.2.1 Deichsel anbauen
4.2.2 Beleuchtungsarm anbauen
5 Technical Dates
5.1 Transportwagen 3.7 – 4.9 m
5.1.1 Zulssige Vorsatzgerte
5.1.2 Instructions
5.1.3 Gewichte
5.1.4 Zugdeichsel
5.1.5 Zurich
5.1.6 Damage
6 Vor Erstinbetriebnahme
6.1 Allgemeine Hinweise
6.1.1 Checklist for the Erstinbetriebnahme
7 Now you can find out more
7.1 Allgemeine Hinweise
7.1.1 Checklist for the Inbetriebnahme
7.1.2 Transport vehicles with all available vehicles
7.1.3 Haltearm einstellen
7.1.4 Adjustment of the einstellen zugfahrzeug
7.1.5 Beleuchtungsarm ausklappen
8 An-/Abbau Transportwagen
8.1 Allgemeines Anbauen/Abbauen
8.1.1 Vorsatzgert auflegen
8.1.2 Vorsatzgert abheben
9 Fahrenheit and Transporter
9.1 Vorbereiten transport
9.1.1 Trans protection
9.1.2 Sttzrad auf Transportstellung einstellen
9.2 Transport vehicles excluded
9.2.1 Sttzrad auf Parking position einstellen
9.2.2 Transport vehicles when transporting vehicles
10 Strung und Abhilfe
10.1 Allgemeine Hinweise
10.1.1 Allgemeine Warnhinweise
10.2 Allgemeine Strung und Abhilfe
10.2.1 Strung and transport vehicles
11 Wartung
11.1 Allgemeine Hinweise
11.1.1 Allgemeine Warnhinweise
11.2 Allgemeine Wartungshinweise
11.2.1 Hinweise Wartung Zugdeichsel
11.2.2 Befestigungsmaterial
11.2.3 Wartungsarbeiten nach dernte
11.3 Wartungstabelle
11.3.1 Wartungsinterval
11.4 Schmierstofftabelle
11.4.1 Schmierstoffe
11.5 Fahrwerk
11.5.1 Radmuttern Anzugsdrehmoment kontrollieren
11.5.2 Radnabe Lagerspiel kontrollieren
11.5.3 Radnabe Lagerspiel einstellen
12 Schmierplan
12.1 Allgemeine Hinweise
12.1.1 Allgemeine Warnhinweise
12.2 Schmiertellen
12.2.1 Schmierinterval
12.2.2 Schmierstellen – General Information
1.1.1 How to use this manual
1.1.2 Validity of instructions
1.1.3 Specifications
1.2 Identification plates and identification numbers
1.2.1 Spare parts and technical questions
1.2.2 Flat identification trailer
2 Overview
2.1 Trailer 3.7 – 4.9 m
2.1.1 Overview of trailer
3 Safety precautions
3.1 General Information
3.1.1 Important information
3.1.2 General safety and accident prevention regulations
3.1.3 Intended use
3.1.4 Reasonable foreseeable misuse
3.1.5 Decommissioning and disposal
3.1.6 Information on drawbar use
3.2 General safety measures
3.2.1 Wheel chocks
3.2.2 Compressed air and water
3.2.3 Fire prevention and explosion prevention
3.2.4 Before every start-up
3.2.5 Road travel
3.2.6 Parking
3.3 Safety rules
3.3.1 Identification of warning and danger signs
4 Assembly
4.1 General Information
4.1.1 Information and requirements for fitting the drawbar
4.2 Assembling the trailer
4.2.1 Installing the drawbar
4.2.2 Installing the lamp arm
5 Specifications
5.1 Trailer 3.7 – 4.9 m
5.1.1 Permissible front attachments
5.1.2 Tires
5.1.3 Weights
5.1.4 Drawbar
5.1.5 Hitch eye
5.1.6 Dimensions
6 Prior to initial operation
6.1 General Information
6.1.1 Initial operation check list
7 Prior to each operation
7.1 General Information
7.1.1 Checklist for putting the machine into operation
7.1.2 Adjusting the trailer to the front attachment width
7.1.3 Adjusting the holding arm
7.1.4 Adjusting the hitching device to the tractor
7.1.5 Folding out the lamp arm
8 Installation and removal of the trailer
8.1 General Installation/Removal
8.1.1 Laying on the front attachment
8.1.2 Lifting the front attachment
9 Driving and transportation
9.1 Preparing transport
9.1.1 Hitching the trailer to the towing vehicle
9.1.2 Setting the land wheel to transport position
9.2 Parking the trailer
9.2.1 Setting the land wheel to park position
9.2.2 Unhitching the trailer from the towing vehicle
10 Faults and remedies
10.1 General Information
10.1.1 General warnings
10.2 General problems and remedies
10.2.1 Trailer problems and remedies
11 Maintenance
11.1 General Information
11.1.1 General warnings
11.2 General maintenance notes
11.2.1 Drawbar maintenance information
11.2.2 Fixing material
11.2.3 Maintenance operations after the harvest
11.3 Maintenance schedule
11.3.1 Service intervals
11.4 Lubricants chart
11.4.1 Lubricants
11.5 Chassis transport
11.5.1 Checking the wheel nuts tightening torque
11.5.2 Checking the wheel hub bearing play
11.5.3 Adjusting the wheel hub bearing play
12 Lubrication chart
12.1 General Information
12.1.1 General warnings
12.2 Lubrication points
12.2.1 Lubrication intervals
12.2.2 Lubrication points – 500 h
1 Introduction
1.1 General advice
1.1.1 Use of the instructions
1.1.2 Validity of the notice
1.1.3 Technical information
1.2 Nameplates and identification numbers
1.2.1 Spare parts and technical questions
1.2.2 Transport trailer nameplate
2 Overview
2.1 Transport trailer 3.7 – 4.9 m
2.1.1 Overview of the transport trailer
3 Safety Tips
3.1 General advice
3.1.1 Important
3.1.2 General safety and accident prevention regulations
3.1.3 Use in accordance with instructions
3.1.4 Clearly non-compliant use
3.1.5 Decommissioning and disposal
3.1.6 Tips for using the drawbar
3.2 General security measures
3.2.1 Shims
3.2.2 Compressed air and water
3.2.3 Fire and explosion prevention
3.2.4 Before commissioning
3.2.5 Traveling on public roads
3.2.6 Park the machine
3.3 Safety information
3.3.1 Marking of warnings and dangers
4 Assembly
4.1 General advice
4.1.1 Notes and requirements for installing the drawbar
4.2 Assemble the transport trailer
4.2.1 Install the drawbar
4.2.2 Installation of the lighting support arm
5 Technical characteristics
5.1 Transport trailer 3.7 – 4.9 m
5.1.1 Acceptable front-end tools
5.1.2 Tires
5.1.3 Weight
5.1.4 Drawbar
5.1.5 Coupling eye
5.1.6 Dimensions
6 Before first commissioning
6.1 General advice
6.1.1 Checklist for initial commissioning
7 Before each commissioning
7.1 General advice
7.1.1 Commissioning checklist
7.1.2 Adjust the transport trailer according to the width of the front implement
7.1.3 Adjust the support arm
7.1.4 Adjust the traction device according to the towing vehicle
7.1.5 Unfold the lighting support arm
8 Installation/removal of the transport trailer
8.1 General: installation/removal
8.1.1 Install the front tool
8.1.2 Lifting the front tool
9 Road driving and transport
9.1 Prepare for transport
9.1.1 Coupling the transport trailer to the towing vehicle
9.1.2 Adjust the support wheel to the transport position
9.2 Storing the transport trailer
9.2.1 Set the support wheel to the parking position.
9.2.2 Uncouple the transport trailer from the towing vehicle
10 Incidents and remedy
10.1 General advice
10.1.1 General safety advice
10.2 General incidents and remedies
10.2.1 Incident and solution, transport trailer
11 Maintenance
11.1 General advice
11.1.1 General safety advice
11.2 General maintenance information
11.2.1 Notes on drawbar maintenance
11.2.2 Fixing material
11.2.3 Post-harvest maintenance work
11.3 Maintenance table
11.3.1 Maintenance frequencies
11.4 Lubricant table
11.4.1 Lubricants
11.5 Chassis
11.5.1 Wheel nuts, check tightening torque
11.5.2 Check hub bearing clearance
11.5.3 Adjusting the wheel hub bearing clearance
12 Lubrication plan
12.1 General advice
12.1.1 General safety advice
12.2 Lubrication points
12.2.1 Lubrication frequency
12.2.2 Lubrication points – 500 h
00 0301 051 0.pdf:
PROFI CAM 3
Table of contents
1 Introduction
1.1 Notes on the manual
1.1.1 Validity of manual
1.1.2 Information about this Operator’s Manual
1.1.3 Symbols and notes
1.1.4 Optional equipment
1.1.5 Qualified specialist workshop
1.1.6 Maintenance information
1.1.7 Warranty notes
1.1.8 Spare parts and technical questions
1.2 Intended use
1.2.1 Intended use
1.2.2 Reasonably foreseeable misuse
2 Safety
2.1 Identifying warnings
2.1.1 Hazard signs
2.1.2 Signal word
2.2 Safety rules
2.2.1 Meaning of Operator’s Manual
2.2.2 Observing safety decals and warnings
2.2.3 Optional equipment and spare parts
3 Product description
3.1 Overview and method of operation
3.1.1 How the PROFI CAM works
3.2 Identification plates and identification number
3.2.1 Position of identification plates
3.2.2 Explanation of PROFI CAM identification plate
3.3 Information on the product
3.3.1 CE marking
4 Operating and control elements
4.1 Camera system
4.1.1 Camera system monitor
4.2 Menu structure
4.2.1 Main menu
4.2.2
4.2.3
4.2.4
4.2.5
4.2.6
5 Technical specifications
5.1 PROFI CAM
5.1.1 Monitor
5.1.2 Camera
5.1.3 Switch box
5.1.4 Degree of protection against foreign bodies and water
6 Preparing the product
6.1 Shutting down and securing the machine
6.1.1 Switching off and securing the machine
6.2 Prior to operation
6.2.1 Carry out prior to operation
6.2.2 Installing the sun protection
6.2.3 Aligning the camera
6.2.4 Connecting the camera electrics
7 Operation
7.1 Monitor
7.1.1 Switching on the monitor
7.1.2 Calling up the menu
7.1.3 Setting a menu item
7.1.4 Setting the image orientation
7.1.5 Setting automatic screen darkening
7.1.6 Image mirroring
7.1.7 Setting the trigger view
7.1.8 Setting the follow-up time for trigger view
7.1.9 Setting the display mode
7.1.10 Activating/deactivating a display mode
8 Faults and remedies
8.1 Electrical and electronic system
8.1.1 Overview of problems on PROFI CAM camera system
8.1.2 Replacing the switch box fuse
9 Maintenance
9.1 Maintenance intervals
9.1.1 Every 10 operating hours or daily
9.2 Camera system
9.2.1 Checking the camera system for dirt
9.2.2 Cleaning the camera
9.2.3 Cleaning the switch box
9.2.4 Cleaning the monitor
10 Placing out of operation and disposal
10.1 General Information
10.1.1 Putting out of operation and disposal
11 Technical terms and abbreviations
11.1 Abbreviations
11.1.1 Units
11.1.2 Abbreviations
11.1.3 Technical terms
00 0303 482 0.pdf:
PROFI CAM 4
Table of contents
1 Introduction
1.1 Notes on the manual
1.1.1 Validity of manual
1.1.2 Information about this Operator’s Manual
1.1.3 Symbols and notes
1.1.4 Optional equipment
1.1.5 Qualified specialist workshop
1.1.6 Maintenance information
1.1.7 Notes on warranty
1.1.8 Spare parts and technical questions
1.2 Intended use
1.2.1 Intended use
1.2.2 Reasonably foreseeable misuse
2 Safety
2.1 Identifying warnings
2.1.1 Hazard signs
2.1.2 Signal word
2.2 Safety rules
2.2.1 Meaning of Operator’s Manual
2.2.2 Structural changes
2.2.3 Optional equipment and spare parts
2.2.4 Operation only following proper putting into operation
2.2.5 Technical status
2.2.6 Respecting technical limit values
Respecting technical limit values
2.2.7 Hazards when driving on roads and fields
3 Product description
3.1 Overview and method of operation
3.1.1 How the PROFI CAM works
3.2 Identification plates and identification number
3.2.1 Identification plates
3.3 Information on the product
3.3.1 CE marking
4 Operating and display elements
4.1 Camera system
4.1.1 Camera system monitor
4.1.2 CEBIS
4.2 Menu structure
4.2.1 Main menu
4.2.2
4.2.3
4.2.4
4.2.5
4.2.6
5 Technical specifications
5.1 PROFI CAM
5.1.1 Monitor
5.1.2 Camera
5.1.3 Switch box
6 Preparing the product
6.1 Switching off and securing the machine
6.1.1 Switching off and securing the machine
6.2 Prior to putting into operation
6.2.1 Carry out prior to operation
6.2.2 Installing the sun protection
6.2.3 Aligning the camera
7 Operation
7.1 Monitor
7.1.1 Switching on the monitor
7.1.2 Calling up the menu
7.1.3 Setting a menu item
7.1.4 Setting the image orientation
7.1.5 Setting automatic screen darkening
7.1.6 Image mirroring
7.1.7 Setting the trigger view
7.1.8 Setting the follow-up time for trigger view
7.1.9 Setting the display mode
7.1.10 Activating/deactivating a display mode
8 Faults and remedies
8.1 Electric and electronic system
8.1.1 Overview of problems on PROFI CAM camera system
9 Maintenance
9.1 Maintenance intervals
9.1.1 Every 10 operating hours or daily
9.2 Camera system
9.2.1 Checking the camera system for dirt
9.2.2 Cleaning the camera
9.2.3 Cleaning the switch box
9.2.4 Cleaning the monitor
10 Putting out of operation and disposal
10.1 General information
10.1.1 Putting out of operation and disposal
11 Technical terms and abbreviations
11.1 Abbreviations
11.1.1 Units
11.1.2 Abbreviations
11.1.3 Technical terms
John Deere Repair Technical Manual PDF
John Deere Transmission Control Unit Component Technical Manual CTM157 15JUL05
John Deere Repair Technical Manual PDF
John Deere Repair Technical Manual PDF
John Deere Repair Technical Manual PDF
John Deere Repair Technical Manual PDF
John Deere Repair Technical Manual PDF
John Deere Repair Technical Manual PDF
John Deere Parts Catalog PDF
John Deere Harvesters 8500 and 8700 Parts Catalog CPCQ24910 Spanish
John Deere Repair Technical Manual PDF


