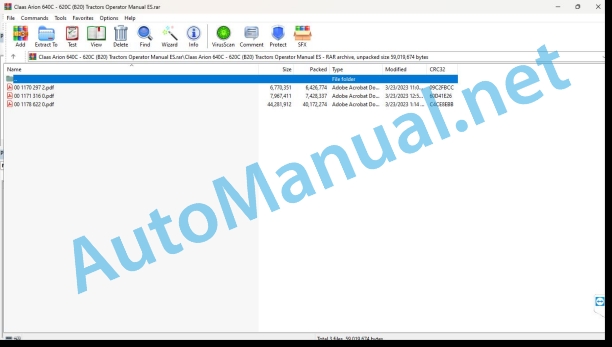
Claas Arion 640C – 620C (B20) Tractors Operator Manual ES
$50.00
- Model: Arion 640C – 620C (B20) Tractors
- Type Of Manual: Operator Manual
- Language: ES
- Format: PDF(s)
- Size: 51.5 MB
File List:
00 1170 297 2.pdf
00 1171 316 0.pdf
00 1178 622 0.pdf
00 1170 297 2.pdf:
AXION 900-800ARION 600-500-400
1. Introduction
1.1 Information regarding the instruction manual
1.1.1 Application of this manual
2 Prepare the tractor
2.1 Assembly and body parts
2.1.1 Legal equipment according to regulation (EU) 167/2013
Tractor with a length greater than 4.6 m: AXION 900, AXION 800, ARION 600 and ARION 500
Tractor with a total width greater than 2.55 m: AXION 900, AXION 800, ARION 600 and ARION 500
CIS tractor with a total width greater than 2.82 m and CEBIS tractor with a total width greater than 2.75 m: AXION 900, AXION 800, ARION 600 and 500
Tractor with a total width greater than 2.55 m: ARION 400
Tractor with a total width less than 2.55 m: ARION 600, 500 and 400
CIS tractor with an overall width of less than 2.82 m: AXION 900, AXION 800, ARION 600 and 500
CEBIS tractor with a total width of less than 2.75 m: AXION 900, AXION 800, ARION 600 and 500
Extension of signage posters
00 1171 316 0.pdf:
AXION 900-800 CEBISARION 600-500 CEBIS
1. Introduction
1.1 Information regarding the instruction manual
1.1.1 Application of this manual
2 Control and display instruments
2.1 CEBIS
2.1.1 Work phases
road mode
Field mode
ISO Terminal Mode
2.1.2 Work phases
ISO Terminal Mode
2.1.3
2.1.4 Menu
00 1178 622 0.pdf:
User manual
1. Introduction
1.1 Information regarding the instruction manual
1.1.1 Use the user manual
Important information about this user manual
Structuring according to tractor subassemblies
Search and find
Direction signs
Specific terminology
Optional equipment and supplementary equipment
1.1.2 Symbols and instructions
Texts and illustrations
Indication of dangers and warnings
1.1.3 Validity of the user manual
1.1.4 Software updates
1.1.5 Transfer of the tractor to a third party
1.1.6 Technical instructions
2 Security
2.1 Safety instructions
2.1.1 Use according to assignment
2.1.2 Use not in accordance with assignment
2.1.3 Safety and accident prevention instructions
2.1.4 Tractor driving
2.1.5 Checking the condition of the tractor
2.1.6 Getting into the cab or getting off the tractor
Climb aboard the tractor
Get off the tractor
2.1.7 Passenger seat
2.1.8 Cabin
Cabin safety structure
Polluted environment
2.1.9 Necessary precautions before start-up
2.1.10 Tool attachment
2.1.11 Adjustment and maintenance work
Particularities of placing the tractor on lifting supports
2.1.12 Use of the front and rear power take-offs
2.1.13 Fuel
2.1.14 Engine coolant
2.1.15 Air conditioning
2.1.16 Electrical system
2.1.17 Applications with front loaders
2.1.18 Forestry applications
2.1.19 Work in fixed position
2.1.20 Implements that work at great depth
2.1.21 Twin wheels
2.2 Safety marking on the tractor
2.2.1 General advice regarding safety markings
2.2.2 Warning symbols
2.3 Safety devices
2.3.1 First aid kit holder
2.3.2 Wheel chocks
2.3.3 Signal triangle
2.3.4 Fire extinguisher support
3 Description of the tractor
3.1 Overview
3.1.1 Right front view
3.1.2 Left rear view
3.2 Identification plates and vehicle identification number
3.2.1 Tractor nameplate
International tractor nameplate (version 1)
International tractor nameplate (version 2)
Eurasian nameplate
Tractor identification number
Type/variant/European version
Tractor serial number
3.2.2 Engine characteristics
Engine nameplate
Anti-pollution control label
3.2.3 Front axle nameplate
3.2.4 Supplementary cabin nameplate
European supplementary nameplate
International supplementary nameplate
Eurasian supplementary nameplate
3.3 TELEMATICS*
3.3.1 TELEMATICS* operating mode
3.3.2 Use SIM card for TELEMATICS*
3.4 GPS PILOT*
3.4.1 GPS PILOT*
3.5 Information on the tractor
3.5.1 Tractor Power Label
4 Control and display instruments
4.1 Cabin and driving position
4.1.1 Right cabin terminal
4.1.2 Right cab pillar
4.1.3 Elevation Control Panel
4.1.4 Dashboard
4.1.5 Dashboard
4.1.6 Main screen
4.1.7 Manual air conditioning control
4.1.8 Controls for working lights, rear windscreen wipers and washer
Version I
Version II
4.1.9 Driving position control levers
Signal lights and acoustic warning
Windshield wipers and washers
4.1.10 Right console socket
4.2 Hydraulic installation
4.2.1 Hydraulic controls
4.3 Electrical and electronic system
4.3.1 External controls
5 Technical data
5.1 ARION 640C – 620C
5.1.1 Dimensions
5.1.2 Weight
5.1.3 Engine
5.1.4 Gearbox
5.1.5 Feed speeds
5.1.6 Front axle
5.1.7 Rear axle
5.1.8 Front track table
Fixed disc rim
Variable disc rim
5.1.9 Rear track table
Fixed disc rim
Variable disc rim
5.1.10 Tire combinations
5.1.11 Brakes
5.1.12 Address
5.1.13 Rear lift
5.1.14 Front hydraulic lift
5.1.15 Rear hitches
5.1.16 Rear PTO
5.1.17 Front power take-off
5.1.18 Main hydraulic circuit (98 l/min)
5.1.19 Main hydraulic circuit (60 l/min)
5.1.20 Combination of auxiliary hydraulic distributors
5.1.21 Electrical circuit
5.1.22 Cabin characteristics
Noise level in the driver’s ears (according to European directive 2009/76)
Noise level in the ears of a passerby (according to European directive 2009/63 Annex VI)
5.1.23 Seat vibration level
5.1.24 Ballast
5.1.25 Maximum allowable towable weights
5.1.26 Load capacities
5.1.27 Lubricants/Hydraulic Oils
5.1.28 Engine coolant
5.1.29 Air conditioning cooling agent
5.1.30 Brake fluid
6 Prepare the tractor
6.1 Engine
6.1.1 Fuel
Quality requirement
Particularities of biofuels
Fuel handling
6.1.2 Filling the fuel tank
6.1.3 Cold Engine Start/Engine Coolant Heater
6.2 Framework
6.2.1 Rear axle track adjustment
6.2.2 Front axle track adjustment
6.2.3 Adjustment of the rotation stops
Jack Placement
Placement of supports
Adjusting the turning stops
6.2.4 General characteristics of the tires
6.2.5 Inflation pressure
Effect on soil compaction
Effect on consumption
6.2.6 Features
Load index
speed index
6.2.7 Severe applications
6.2.8 Use of the wheel chock
6.3 Brake
6.3.1 Brake pedal engagement
6.3.2 Hydraulic trailer brake
6.3.3 Trailer pneumatic brake
Service pneumatic pressure connection
6.4 Address
6.4.1 Steering column
6.4.2 Connect third-party guidance system to steering interface
6.5 Rear linkage
6.5.1 Lifting supports
6.5.2 Mechanical upper connecting rod
6.5.3 Stabilizers
6.5.4 Automatic hooks
6.5.5 External controls
6.5.6 Hitching and unhitching an implement
Hitch Recommendations
Hitching an implement to the rear linkage
Unhooking an implement from the rear linkage
6.6 Front linkage
6.6.1 Mechanical upper connecting rod
6.6.2 Lower cranks
6.6.3 Automatic hooks
6.6.4 Hitching and unhitching an implement
Hitch Recommendations
Disengagement
6.7 Front loader
6.7.1 Mounting the front loader adapter
6.8 Rear PTO
6.8.1 Hitching and unhitching an implement
Connecting and disconnecting the rear power take-off cardan
Disengagement
6.8.2 Replacing the rear power take-off terminal
6.9 Front power take-off
6.9.1 Hitching and unhitching an implement
Disengagement
6.10 Towing device
6.10.1 Recommendations
6.10.2 Calculation of the maximum towable load
6.10.3 Hitching/unhitching an implement
Disengagement
6.10.4 Hitch pin
6.10.5 Oscillating bar
Lateral positions
Longitudinal displacement
Maximum Hitch Sweep Angles
Safety device
Tightening of the jaw
6.10.6 Hitch forks
Fork with bolt
Spindle wear
6.11 Rear hydraulic system
6.11.1 Rear pressure taps
Connection of pressure taps
Disconnection of pressure taps
Free return
6.11.2 Adjustment of the flow rate of the pressure taps
6.11.3 Single acting/double acting adjustment
6.12 Front hydraulic system
6.12.1 Front pressure points
6.13 Electrical and electronic system
6.13.1 Electrical sockets
Exterior electrical outlets
6.13.2 Adjust the low beam headlights
Adjusting the dipped headlights on the engine hood
Cab low beam adjustment
6.14 Cabin and driving position
6.14.1 Cab suspension adjustment
6.14.2 Mirror adjustment
6.14.3 Mechanical Suspension Seat Adjustment
6.14.4 Seat adjustment with air suspension
6.14.5 Armrest
6.14.6 Passenger seat
6.14.7 Refrigerated compartment
6.14.8 Compartments
roof compartment
Compartments on the left
6.14.9 Installation of a control console in the cabin
6.14.10 Route of the cables of a control console
6.15 Assembly and body parts
6.15.1 Opening and closing the hood
6.15.2 Side covers
Disassembly
Mounting
6.15.3 Ballast
6.15.4 Liquid ballast
6.15.5 Balancing the tractor with mounted implements
Summary table
6.15.6 Mass on the front hydraulic linkage
6.15.7 Assembly and disassembly of the front masses
Removable masses
Monobloc mass
6.15.8 Toolbox
6.16 Tractor transport
6.16.1 Tractor transport
6.16.2 Tractor loading and stowage
7 Management
7.1 Engine
7.1.1 Break-in
7.1.2 Start the engine
7.1.3 Accelerator pedal
7.1.4 Hand throttle
7.1.5 Engine stop
7.2 Transmission, clutch and cardan shaft
7.2.1 Protection of mechanical organs
7.2.2 Clutch pedal
7.2.3 Put the transmission in neutral
Put the transmission in neutral
Transmission reactivation
7.2.4 Selection of tractor forward direction
Tractor forward direction reversal lever
7.2.5 Transport Mode
Activating Transport mode
Gear change and speed ranges
7.2.6 Work Mode
Activation of Work mode
Gear change and speed ranges
7.2.7 SPEED MATCHING function
7.2.8 Starting gear
7.2.9 Tortoise gait
7.2.10 Differential lock
7.3 Chassis
7.3.1 Front axle activation
Automatic mode
Permanent mode
7.4 Brake
7.4.1 Service brakes
7.4.2 Parking brake
7.5 Rear linkage
7.5.1 Recommendations
7.5.2 Transport security
7.5.3 Unlocking the rear linkage
7.5.4 Mode selection
7.5.5 Position control
7.5.6 Effort control
7.5.7 Upper stop
7.5.8 Descent speed
7.5.9 Transport buffer
7.6 Front linkage
7.6.1 Recommendations
7.6.2 Transport security
7.6.3 Conversion of the front linkage into single-acting/double-acting
7.6.4 Use of the front linkage
Unlocking the front hydraulic linkage
Front hydraulic lift/lower
7.7 Rear PTO
7.7.1 Recommendations
7.7.2 PTO speed selection
7.7.3 Use of the control in the cabin
7.7.4 Use of external controls
7.7.5 Work in fixed position
7.8 Front power take-off
7.8.1 Recommendations
7.8.2 Use of the control in the cabin
7.8.3 Work in fixed position
7.9 Rear hydraulic system
7.9.1 Association of controls with rear pressure intakes
7.9.2 Using online controls
7.9.3 Locking/unlocking in-line controls
7.9.4 Accumulation of hydraulic flows
Operating principle
Utilization
7.9.5 Work in fixed position
7.10 Front hydraulic system
7.10.1 Association of controls with front pressure intakes depending on version
7.10.2 Using online controls
7.10.3 Locking/unlocking in-line controls
7.10.4 Work in fixed position
7.11 Electrical and electronic system
7.11.1 Manual circuit breaker
7.12 Cabin and driving position
7.12.1 Main screen
Utilization
Clock setting
7.12.2 Manual air conditioning control
Ventilated air flow adjustment
Ventilated air temperature adjustment
Ventilation orientation management
Activation of air cooling
Activation of air recirculation
7.12.3 Monitoring the filling level of the cabin’s external air prefilter
7.12.4 Ceiling light
8 Incident and solution
8.1 Alarms
8.1.1 Primary alarms
8.1.2 Secondary alarms
8.1.3 Other alarms
8.1.4 Steps to resolve various anomalies
8.2 Engine
8.2.1 Failure due to lack of fuel
8.2.2 Startup assistance
Tow-assisted start
Starting assisted by external battery
8.2.3 Decrease in engine performance
8.3 Transmission, clutch and cardan shaft
8.3.1 Undetected driver presence
8.4 Framework
8.4.1 Jack placement
8.4.2 Changing a wheel
8.4.3 Tractor trailer
Trailer with engine running
Trailer with engine off
8.4.4 Unclogging the tractor
Tractor unclogging
Unclogging a tractor by towing
8.5 Electrical and electronic system
8.5.1 Fuses and relays
Preheating relay and fuse
Primary fuse board
Cabin top plate
8.5.2 Instrument panel calibration
8.5.3 Lights overview
8.6 Assembly and body parts
8.6.1 Frontal impact on the monobloc mass located at the front of the tractor
9 Maintenance
9.1 Maintenance instructions
9.1.1 Personal protective equipment
9.1.2 Tractor immobilization and securing
9.1.3 Clean and organize risk areas
9.1.4 Welding instructions
9.1.5 Protection devices on the tractor
9.1.6 Engine
Alternator
Engine lubrication
engine cooling
engine belts
9.1.7 Wheels and tires
9.1.8 Braking system
9.1.9 Pneumatic circuit
9.1.10 Address
9.1.11 Power take-off driven tools
9.1.12 Air conditioning
9.1.13 Hydraulic circuit
9.1.14 Electrical system
9.1.15 Energy accumulators
9.1.16 Spare parts
9.1.17 Greasing
9.1.18 Cleaning and protection
9.1.19 Work at height
9.1.20 Handling of heavy parts
9.1.21 Maintenance operations under the cabin or platform
9.1.22 Lifting the front of the tractor
9.2 Summary of maintenance intervals
9.2.1 Management of maintenance intervals
9.2.2 First 10 hours of service
9.2.3 First 40 hours of service
9.2.4 First 100 hours of service
9.2.5 First 500 hours of service
9.2.6 Every 10 hours of service
9.2.7 Weekly
9.2.8 Every 50 hours of service
9.2.9 Every 100 hours of service
9.2.10 Every 200 hours of service
9.2.11 Every 400 hours of service
9.2.12 Every 500 hours of service
9.2.13 Every 500 hours of service or annually
9.2.14 Every 1000 hours of service
9.2.15 Every 1500 hours of service
9.2.16 Every 1500 hours of service or every two years
9.2.17 Every 2000 hours of service
9.2.18 Every 2000 hours of service or every two years
9.2.19 Every 3000 hours of service
9.2.20 Every 4500 hours of service
9.2.21 Every 4500 hours of service or every five years
9.3 Greasing scheme
9.3.1 Grease points – 50 h
9.3.2 Grease points, 100 h
9.3.3 Grease points – 500 hours or 6 months
9.3.4 Grease points, 500 h
9.4 Engine maintenance operations
9.4.1 Elimination of water present in fuel
Fuel decanter prefilter
Fuel filter
9.4.2 Changing fuel filters
Fuel decanter prefilter
fuel prefilter
Fuel filter
9.4.3 Changing the fuel strainer
9.4.4 Bleeding air from the fuel circuit
9.4.5 Checking the engine oil level
9.4.6 Changing the engine oil
9.4.7 Changing the engine oil filter
9.4.8 Checking the coolant level
9.4.9 Check the tightness of the cooling circuit
9.4.10 Cleaning of refrigerators
9.4.11 Fan control
9.4.12 Check the tightness of the air intake
9.4.13 Changing the engine air filter
9.4.14 Changing the air filter and engine safety cartridge
9.5 Chassis maintenance work
9.5.1 Checking the front axle differential case oil level
9.5.2 Changing the front axle differential case oil
9.5.3 Changing the front axle breather
9.5.4 Checking the oil level of the front axle final reductions
9.5.5 Changing the front axle final reduction oil
9.5.6 Checking the tightness of the wheel discs on the hubs
9.5.7 Checking the tightening of the wheel discs on the rims
TITAN wheels
GKN wheels
9.5.8 Check the condition of the wheels, tires and tire inflation pressure
9.6 Brake maintenance operations
9.6.1 Checking the brake fluid level
9.6.2 Checking the parking brake clearance
9.6.3 Checking the coupling heads of the pneumatic braking system
9.6.4 Checking the trailer air braking system bleed valve
9.6.5 Inspection of compressed air tanks
9.7 Front power take-off maintenance operations
9.7.1 Checking the front power take-off box oil level
9.7.2 Changing the oil in the front power take-off box
9.8 Hitch device maintenance operations
9.8.1 Checking the wear of the coupling devices
hitch ladder
Trailer coupling
Hitch Pin Diameter
Locking bolts
hitch rods
automatic fork
9.9 Hydraulic installation maintenance work
9.9.1 Check the hydraulic circuit.
9.9.2 Checking the hydraulic/transmission oil level
9.9.3 Hydraulic/transmission oil change
9.9.4 Changing the hydraulic circuit oil filters
High pressure hydraulic oil filters (1)
Low pressure hydraulic oil filter (2)
9.9.5 Changing the auxiliary hydraulic circuit shower head
9.9.6 Replacing the rear axle breather
9.9.7 Emptying the oil recovery drums
Front hydraulic coupler oil recovery container
Oil recovery container for rear hydraulic couplers
9.10 Electrical/electronic installation maintenance work
9.10.1 Cleaning and greasing the battery terminals
9.10.2 Check the level of the battery electrolyte solution
9.10.3 Checking the operation and condition of lighting and signaling devices
9.11 Cabin/driving position maintenance operations
9.11.1 Cleaning the cabin exterior air prefilter
9.11.2 Cleaning the cabin air filter
Version I
Version II
9.11.3 Changing the cabin air filter
Version I
Version II
9.11.4 Cleaning the cabin air recirculation filter
9.11.5 Changing the cabin air recirculation filter
9.11.6 Putting the air conditioning into operation
9.11.7 Checking the window washer fluid level
9.12 Bodywork maintenance operations
9.12.1 Cleaning the calender grates
9.12.2 Checking the tightness of the engine hood
9.12.3 Checking the tightening of the front weight fixing screws
9.13 Parking
9.13.1 Parking instructions
Long term parking
New commissioning
10 Decommissioning and waste disposal
10.1 Information about the machine
10.1.1 Disposal and waste disposal
11 Technical dictionary and abbreviations
11.1 Technical dictionary and abbreviations
11.1.1 Technical terms
11.1.2 Abbreviations
John Deere Repair Technical Manual PDF
John Deere POWERTECH E 4.5 and 6.8 L Diesel Engines TECHNICAL MANUAL 25JAN08
John Deere Parts Catalog PDF
John Deere Harvesters 8500 and 8700 Parts Catalog CPCQ24910 Spanish
John Deere Repair Technical Manual PDF
John Deere Repair Technical Manual PDF
John Deere Application List Component Technical Manual CTM106819 24AUG20
John Deere Repair Technical Manual PDF
John Deere DF Series 150 and 250 Transmissions (ANALOG) Component Technical Manual CTM147 05JUN98
John Deere Repair Technical Manual PDF
John Deere Diesel Engines PowerTech 4.5L and 6.8L – Motor Base Technical Manual 07MAY08 Portuguese
John Deere Repair Technical Manual PDF
John Deere Repair Technical Manual PDF


