Claas Crop Tiger Terra Trac (070) Combines Operator Manual ES
$50.00
- Model: Crop Tiger Terra Trac (070) Combines
- Type Of Manual: Operator Manual
- Language: ES
- Format: PDF(s)
- Size: 10.4 MB
File List:
00 0292 470 1.pdf
00 0292 470 1.pdf:
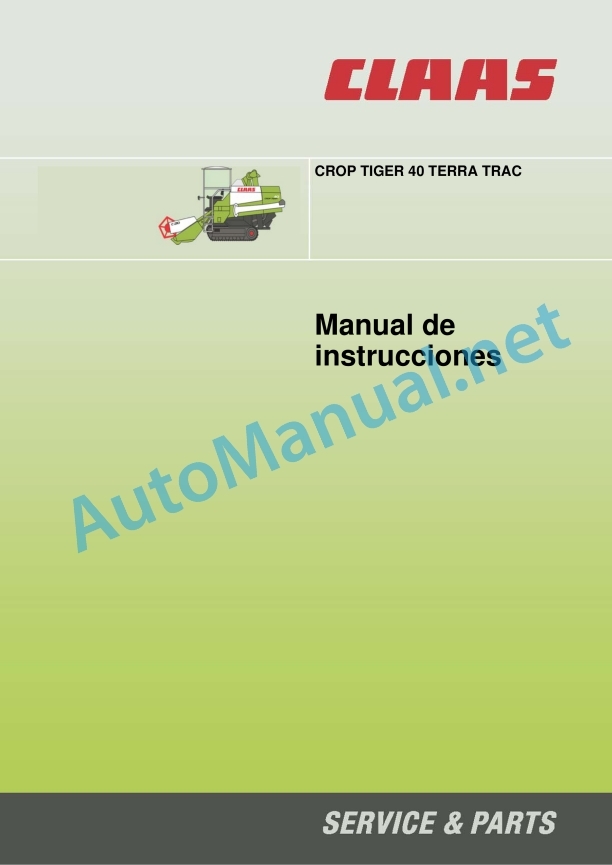
CROP TIGER 40 TERRA TRAC
1 Regarding this instruction manual
1.1 General data
1.1.1 Validity of the manual
1.1.2 Use of the manual
1.1.3 Technical specifications
2 Security
2.1 Safety measures for use
2.1.1 Important
2.1.2 General safety and accident prevention instructions
2.1.3 Intended use
2.1.4 Reasonably foreseeable misuse
2.1.5 Precautionary measures
2.1.6 Diesel engine
2.1.7 Heads
2.1.8 Grain recovery
2.1.9 Adjustment and maintenance tasks
2.1.10 Antifreeze
2.1.11 Battery disconnection
2.1.12 Compressed air and water
2.1.13 Risk of injury from hydraulic fluid
2.1.14 Burn prevention
2.1.15 Oils
2.1.16 Prevention of fires and explosions
2.1.17 Pipes, tubes and hoses
2.1.18 Before each start-up
2.1.19 Commissioning of the machine
2.1.20 Transportation of people
2.1.21 Abandonment of the machine
2.2 Safety measures in this manual
2.2.1 Marking of warning and danger messages
2.3 Graphic danger symbols
2.3.1 General instructions on safety labels
2.3.2 Head
2.3.3 Engine
2.3.4 Transmissions
2.3.5 Driver’s position
2.3.6 Power supply unit
2.3.7 Threshing organs
2.3.8 Harvest container/straw container
2.3.9 Grain recovery
3 Machine Description
3.1 CROP TIGER 40 – type 070
3.1.1 General view of the machine, front and left
3.1.2 General view of the machine, rear and right
3.1.3 General view of the head
3.2 Identification plates and identification numbers
3.2.1 Spare parts and technical queries
3.2.2 Machine identification plate
3.2.3 Engine identification plate
3.3 Structure and operation
3.3.1 Machine structure
3.3.2 Machine working mode
4 Control and display instruments
4.1 Driver’s position
4.1.1 General view of the driver’s position
4.1.2 Control console
4.1.3 Display panel
4.1.4 Head lever
4.1.5 Ignition contact
4.1.6 Access ladder
5 Technical data
5.1 CROP TIGER 40 – type 070
5.1.1 General instructions
5.1.2 Dimensions of mounting parts/machine body
5.1.3 Weight of assembly parts/machine body
5.1.4 Head
5.1.5 Engine
5.1.6 Chassis
5.1.7 Chassis track width
5.1.8 Transmissions
5.1.9 Electrical/electronic equipment
5.1.10 Power supply unit
5.1.11 Threshing organs
5.1.12 Separation
5.1.13 Cleaning unit
5.1.14 Harvest container/straw container
5.1.15 Grain recovery
6 Preparation of the machine
6.1 General data
6.1.1 General warnings before first start-up
6.1.2 Checklist before first start-up
6.2 Head
6.2.1 Head alignment
6.2.2 Placing the crop dividers (optional)
7 Management
7.1 General data
7.1.1 General warnings
7.1.2 Checklist for daily commissioning
7.1.3 Before field work
7.1.4 Preparation for movement to the ground
7.1.5 Adjustment of the machine to the crop
7.1.6 Threshing table
7.1.7 Checking the harvester
7.2 Engine
7.2.1 Diesel engine speed adjustment
7.2.2 Starting the diesel engine
7.2.3 Stopping the diesel engine
7.2.4 Refueling the machine
7.2.5 Filling the air tank
7.3 Chassis
7.3.1 Driving the machine
7.3.2 Driving behavior
7.4 Brake
7.4.1 Machine braking
7.5 Address
7.5.1 Machine address
7.6 Driver’s position
7.6.1 Driver’s seat adjustment
7.7 Head
7.7.1 Head removal
7.7.2 Head installation
7.7.3 Adjusting the reel tines
7.7.4 Horizontal adjustment of the reel
7.7.5 Adjustment of the feed auger scraper profile
7.7.6 Feed auger finger adjustment
7.7.7 Reel peripheral speed adjustment
7.7.8 Head connection
7.7.9 Head disconnection
7.8 Threshing organs
7.8.1 Removing the threshing rotor
7.8.2 Installation of the threshing rotor
7.8.3 Threshing rotor variants
7.8.4 Installation/removal of stone catcher and stone catcher feed plate (optional)
7.8.5 Removal of the threshing concave
7.8.6 Threshing concave variants
7.8.7 Installation of the threshing concave
7.8.8 Threshing concave clearance adjustment
7.8.9 Connection of threshing units
7.8.10 Disconnection of threshing devices
7.8.11 Installation of deburring bars (optional equipment)
7.8.12 Adjust the speed of the threshing rotor
7.8.13 Removal of the material screwed into the threshing rotor
7.9 Cleaning
7.9.1 Screen adjustment
7.9.2 Fan speed adjustment
7.9.3 Reduction of fan air flow
7.10 Grain collection
7.10.1 Emptying the grain tank
7.10.2 Opening/closing the grain tank cover
8 Incident and solution
8.1 General data
8.1.1 General warnings
8.2 Driver’s position
8.2.1 Opening the basic central connection box
8.2.2 Closing the basic central junction box
8.2.3 Basic central junction box fuses
8.3 Head
8.3.1 Head
8.4 Power set
8.4.1 Power supply unit: faults and solutions
8.5 Threshing organs
8.5.1 Threshing organs: failures and solutions
8.5.2 Threshing rotor
8.6 Separation
8.6.1 Separation system: failures and solutions
8.7 Cleaning
8.7.1 Cleaning: errors and solutions
9 Maintenance
9.1 General data
9.1.1 General warnings
9.1.2 Head
9.1.3 Cleaning the engine compartment and danger areas
9.1.4 Strap
9.1.5 Screws
9.1.6 Greasing
9.1.7 Cleaning of lubricants
9.1.8 Track undercarriage
9.1.9 Hydraulic system
9.1.10 Electrical system
9.1.11 Protection devices
9.1.12 Spare parts
9.1.13 Imbalance
9.1.14 Lifting the machine with a jack
9.1.15 Welding work on the combine
9.1.16 Winter Combine Harvester Storage Tips
9.1.17 Coolant
9.2 Maintenance tables
9.2.1 Maintenance intervals
9.3 Lubricant tables
9.3.1 Lubricants
9.4 Greasing scheme
9.4.1 Lubrication intervals
9.4.2 Lubrication points – 10 hours, left side
9.4.3 Lubrication points – 50 hours, left side
9.4.4 Lubrication points – 50 hours, right side
9.4.5 Lubrication points – 100 hours, left side
9.4.6 Lubrication points – 100 hours, right side
9.5 Head
9.5.1 Adjust the reel sliding torque
9.6 Engine
9.6.1 Overview of the TATA 497 TC 48/99 engine
9.6.2 Overview of refrigeration units
9.6.3 Cleaning the surroundings of the diesel engine
9.6.4 Draining fuel from the fuel tank
9.6.5 Cleaning the fuel tank filler screen
9.6.6 Bleeding the fuel system
9.6.7 Draining condensation from the water separator
9.6.8 Replacing the fuel filter
9.6.9 Checking the diesel engine oil level
9.6.10 Replacing the diesel engine oil and oil filter
9.6.11 Diesel engine valve adjustment
9.6.12 Checking the coolant level in the radiator
9.6.13 Checking the coolant mixing ratio
9.6.14 Changing the radiator coolant
9.6.15 Draining the water cooler coolant
9.6.16 Filling the radiator with coolant
9.6.17 Cleaning the radiator screen
9.6.18 Cleaning the cooling unit
9.6.19 Replacing the coolant hoses
9.6.20 Cleaning/replacing the diesel engine air filter
9.6.21 Replacing the safety filter element of the diesel engine air filter
9.6.22 Cleaning the diesel engine air filter intake screen
9.6.23 Replacing the air intake hoses
9.6.24 Tightening the air intake hose clamps
9.7 Chassis
9.7.1 Tension Release of Track Undercarriage Rubber Tracks
9.7.2 Checking the track undercarriage gearbox oil level
9.7.3 Draining track undercarriage gearbox oil
9.7.4 Adding oil to the track undercarriage gearbox
9.8 Drives
9.8.1 Left side transmission diagram CROP TIGER 40 TERRA TRAC
9.8.2 Right side transmission diagram CROP TIGER 40 TERRA TRAC
9.8.3 Chain removal (K1)
9.8.4 Placement and adjustment of the chain (K1)
9.8.5 Belt removal (R2)
9.8.6 Strap placement and adjustment (R2)
9.8.7 Belt removal (R3)
9.8.8 Strap placement and adjustment (R3)
9.8.9 Chain removal (K4)
9.8.10 Chain placement and adjustment (K4)
9.8.11 Belt removal (R10)
9.8.12 Strap placement (R10)
9.8.13 Belt adjustment (R10)
9.8.14 Chain removal (K11)
9.8.15 Placement and adjustment of the chain (K11)
9.8.16 Belt removal (R12)
9.8.17 Strap placement (R12)
9.8.18 Belt adjustment (R12)
9.8.19 Belt removal (R13)
9.8.20 Strap placement (R13)
9.8.21 Belt adjustment (R13)
9.8.22 Belt removal (R14)
9.8.23 Strap placement and adjustment (R14)
9.8.24 Belt removal (R15)
9.8.25 Strap placement and adjustment (R15)
9.8.26 Belt removal (R16)
9.8.27 Strap placement (R16)
9.8.28 Belt adjustment (R16)
9.8.29 Belt removal (R17)
9.8.30 Belt placement (R17)
9.8.31 Belt adjustment (R17)
9.8.32 Belt removal (R18)
9.8.33 Strap placement (R18)
9.8.34 Belt adjustment (R18)
9.8.35 Chain removal (K19)
9.8.36 Chain placement and adjustment (K19)
9.9 Hydraulic installation
9.9.1 Checking the hydraulic system oil level
9.9.2 Replacing oil/oil filter/clean air filter filter element
9.10 Electrical/electronic installation
9.10.1 Checking the battery acid level
9.11 Power set
9.11.1 Adjustment of feed chains
9.12 Threshing organs
9.12.1 Cleaning the stone catcher
9.12.2 Threshing concave clearance adjustment
9.13 Separation
9.13.1 Cleaning the auger chute
9.13.2 Checking the deflector screen
9.14 Cleaning
9.14.1 Cleaning the fan
9.14.2 Cleaning the preparation table
9.14.3 Cleaning the sieves
9.15 Grain recovery
9.15.1 Return Lifter Chain Adjustment
9.15.2 Grain Elevator Chain Adjustment
9.15.3 Cleaning the grain tank
10 Decommissioning and waste disposal
10.1 General data
10.1.1 Out of service and disposal
John Deere Repair Technical Manual PDF
John Deere Application List Component Technical Manual CTM106819 24AUG20
John Deere Repair Technical Manual PDF
John Deere Repair Technical Manual PDF
John Deere Repair Technical Manual PDF
John Deere 16, 18, 20 and 24HP Onan Engines Component Technical Manual CTM2 (19APR90)
John Deere Repair Technical Manual PDF
John Deere Repair Technical Manual PDF
John Deere Repair Technical Manual PDF
John Deere POWERTECH E 4.5 and 6.8 L Diesel Engines TECHNICAL MANUAL 25JAN08
John Deere Repair Technical Manual PDF
John Deere 18-Speed PST Repair Manual Component Technical Manual CTM168 10DEC07


