Claas Jaguar 980-930 (494) Forage Harvesters Operator Manual ES
$50.00
- Model: Jaguar 980-930 (494) Forage Harvesters
- Type Of Manual: Operator Manual
- Language: ES
- Format: PDF(s)
- Size: 70.1 MB
File List:
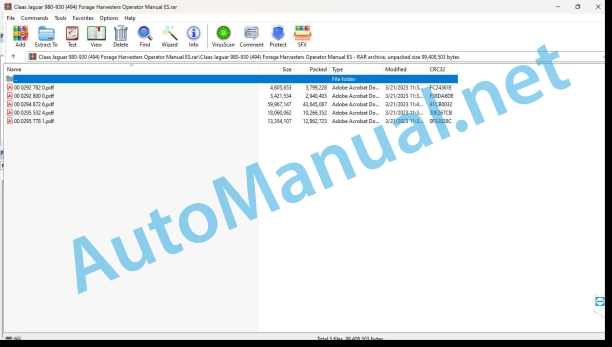
00 0292 782 0.pdf
00 0292 800 0.pdf
00 0294 872 6.pdf
00 0295 532 4.pdf
00 0295 778 1.pdf
00 0292 782 0.pdf:
JAGUAR 980 – 930
Regarding this instruction manual
General data
Manual validity
Security
To especially take into account
Signage of warning and danger indications
Machine preparation
Turn off the machine and secure it
Turn off the machine and secure it
Grain tank unloading
Corn-Cracker (optional equipment)
Assemble the Corn-Cracker (optional equipment)
Adjust the type of Corn-Cracker
CEBIS management
Sharpen / bedknife menu
Maintenance
Power set
Transport roller down, adjust scraper
Adjusting the V-MAX chopper blades
Adjust the bedknife
Replacing the V-MAX chopper blades
Adjust the base position of the bedknife
Remove/assemble the bedknife
00 0292 800 0.pdf:
JAGUAR 980 – 930
1 Regarding this instruction manual
1.1 General data
1.1.1 Validity of the manual
2 Preparation of the machine
2.1 Turn off the machine and secure it
2.1.1 Turn off the machine and secure it
2.2 Unloading the grain tank
2.2.1 Assemble the HD discharge elbow extension
3 Maintenance
3.1 Chop
3.1.1 Renew the V-MAX chopper blades
00 0295 532 4.pdf:
JAGUAR 980 – 930
Regarding this instruction manual
General data
Manual validity
Control and display instruments
Driver’s cabin/platform
General view driver’s platform
Control desk (until machine no. …)
Control desk (from machine no.: …)
Cab roof control elements (up to machine no. …)
Control elements cab roof (from machine no. …)
Control elements column B (up to machine no. …)
Control elements column B (from machine no. …)
gear lever
Multifunctional controller
Central reporter
Multifunctional switch
TELE CAM screen (supplementary equipment)
Operating elements and display
On-board information system control desk
Advance screen
Harvest Screen
CEBIS direct menu switch
Direct menu HOTKEY switch
CEBIS failure types
Indicator cell symbols
Driving and transportation
Prepare for road traffic
Prepare the field trip
Park the machine
Maneuver the machine
Work application
Start field work
CEBIS management
CEBIS general instructions
Validity
Main menu
Header menu
Driving menu
AUTO PILOT Menu
chopped menu
Sharpen / bedknife menu
Performance measurement menu
Counter menu
Maintenance / diagnostic menu
CEBIS Menu
Adjust the speed of the diesel engine
DYNAMIC POWER
Connect DYNAMIC POWER
Connect the diesel engine
Disconnect the diesel engine
Check brake pressure switch
Connect the parking brake
Disengage the parking brake
Brake the machine with the drive lever
Brake the machine with the foot brake
put a gear
POWER TRAC (optional equipment)
Connect the POWER TRAC (optional equipment)
Disconnect POWER TRAC (optional equipment)
Connect the tempomat (additional equipment)
Disconnect the tempomat (additional equipment)
AUTO PILOT (supplementary equipment)
Setting AUTO PILOT (supplementary equipment)
Connect AUTO PILOT (supplementary equipment)
Disconnect AUTO PILOT (supplementary equipment)
Connect the tire pressure adjustment equipment (supplementary equipment)
Disconnect the tire pressure adjustment equipment (supplementary equipment)
Hydraulic installation
Anti-vibration system
Connect the anti-vibration
ground guide
Select ground guidance
Cutting height adjustment
Activate the cutting height adjustment
Record the cutting height adjustment value
Disable cutting height adjustment
Cutting height preselection
Activate cutting height preselection
Record the cutting height preset value
Deactivate cutting height preselection
Adjust AUTO CONTOUR sensitivity
Power set
Program the zero point of the performance measurement
Connect the power unit
Disconnect the power unit
Connect investment
Connect the chopper unit
Disconnect the chopper unit
Adjust chopping length
Sharpen the chopper blades
Grain tank unloading
Electrically adjust the distance of the Corn-Cracker (optional equipment)
Electrically adjust the gap size of the discharge accelerator drum (optional equipment)
discharge elbow
Raise discharge elbow
Turn the discharge elbow
Lower the discharge elbow
Park the discharge elbow (supplementary equipment)
Connect the automatic discharge elbow turning system (supplementary equipment)
Automatic rotation of the discharge elbow (supplementary equipment) record the rotation position
Connect OPTI FILL
Disconnect OPTI FILL
Connect the silage additive equipment
Disconnect the silage additive equipment
AUTO FILL (supplementary equipment)
Adjust AUTO FILL
Connect AUTO FILL
Position the transport trailer
AUTO FILL chamber (supplementary equipment)
Disconnect AUTO FILL
00 0295 778 1.pdf:
1. Introduction
1.1 General instructions
1.1.1 Using the instructions
1.1.2 Validity of instructions
1.1.3 Technical data
1.2 Identification plates and identification numbers
1.2.1 Spare parts and technical issues
1.2.2 Identification plate
2 Security measures
2.1 General instructions
2.1.1 Especially important
2.1.2 Use according to the destination
2.2 Safety instructions
2.2.1 Warning and danger signs
2.3 Warning symbols
2.3.1 General information on warning symbols
2.3.2 Adapter
3 Supply set
3.1 LEXION head adapter
3.1.1 Rear mounting kit
4 Assembly
4.1 Prepare the assembly
4.1.1 Putting the machine out of service
4.1.2 Check the supply set
4.2 Assemble the machine assembly
4.2.1 Assemble the hydraulic system (only JAGUAR type 492/493)
4.2.2 Assemble the electrical installation (only JAGUAR type 492/493)
4.2.3 Assemble the installation (only JAGUAR type 494)
4.2.4 Shortening the power take-off adapter (only JAGUAR type 493/494)
4.2.5 Pre-assemble the multiple coupling
4.2.6 Assemble the reel circumferential speed cable set (cutting mechanism only, type 492/493 only)
4.2.7 Prepare and perform a functional test
5 Technical data
5.1 JAGUAR – LEXION head adapter – TYPE 492 / 493 / 494
5.1.1 Measurements
5.1.2 Weights
5.1.3 Allowed heads
6 Before first start-up
6.1 General instructions
6.1.1 General warning instructions Before initial start-up
6.1.2 Checklist for first start-up
7 Before each start-up
7.1 General instructions
7.1.1 General warning instructions Before each start-up
7.1.2 Commissioning checklist
8 Mount/dismount the front implement
8.1 General instructions
8.1.1 General warning instructions Mounting/dismounting the head
8.2 Mount the adapter
8.2.1 Connect the cable set (only JAGUAR type 494)
8.2.2 Removing the quick coupler (only JAGUAR type 493/494)
8.2.3 Mount the adapter
8.3 Assemble the head
8.3.1 Assemble CONSPEED
8.3.2 Assembling the cutting mechanism (foldable)
8.4 Disassemble the adapter
8.4.1 Disconnect the cable set (only JAGUAR type 494)
8.4.2 Disassemble the adapter
8.4.3 Installing the quick coupler (only JAGUAR type 493/494)
9 Operational service
9.1 General instructions
9.1.1 General warning instructions Use at work
9.2 Driver’s cabin/platform
9.2.1 Control elements
10 Failures and solutions
10.1 General instructions
10.1.1 General warning information Incident and solution
10.2 Assembled parts / machine housing
10.2.1 Adjust the lock
11 Maintenance
11.1 General instructions
11.1.1 General warning instructions Maintenance
11.2 General maintenance warnings
11.2.1 Fixing material
11.2.2 Maintenance work at the end of the harvest
11.2.3 Tightening torques for metric regulation thread
11.2.4 Tightening torques for metric fine thread
11.2.5 Tightening torques for hydraulic screw connections with adjusting ring DIN 3861
11.2.6 Tightening torques for hydraulic screw connections and air conditioning screw connections with conical seal and toroidal seal DIN 3865
11.3 Maintenance table
11.3.1 Maintenance intervals
11.4 Lubricant table
11.4.1 Lubricants
11.5 Gearbox/clutch
11.5.1 Check the drive gear oil level
11.5.2 Fill drive gear oil
11.5.3 Drain oil from the drive gear
11.5.4 Check the output gear oil level
11.5.5 Fill oil in the output gear
11.5.6 Drain oil from output gear
12 Greasing scheme
12.1 General instructions
12.1.1 General warning instructions Greasing scheme
12.2 Grease points
12.2.1 Greasing intervals
12.2.2 Grease points – 100 h
Alphabetical index
John Deere Repair Technical Manual PDF
John Deere Repair Technical Manual PDF
John Deere Repair Technical Manual PDF
John Deere Application List Component Technical Manual CTM106819 24AUG20
John Deere Repair Technical Manual PDF
John Deere Repair Technical Manual PDF
John Deere 16, 18, 20 and 24HP Onan Engines Component Technical Manual CTM2 (19APR90)
John Deere Repair Technical Manual PDF
John Deere PowerTech M 10.5 L and 12.5 L Diesel Engines COMPONENT TECHNICAL MANUAL CTM100 10MAY11
John Deere Repair Technical Manual PDF
John Deere POWERTECH E 4.5 and 6.8 L Diesel Engines TECHNICAL MANUAL 25JAN08
John Deere Repair Technical Manual PDF
John Deere Repair Technical Manual PDF

