Claas Lexion 630-620 (C63) Combines Operator Manual EN
$50.00
- Model: Lexion 630-620 (C63) Combines
- Type Of Manual: Operator Manual
- Language: EN
- Format: PDF(s)
- Size: 322 MB
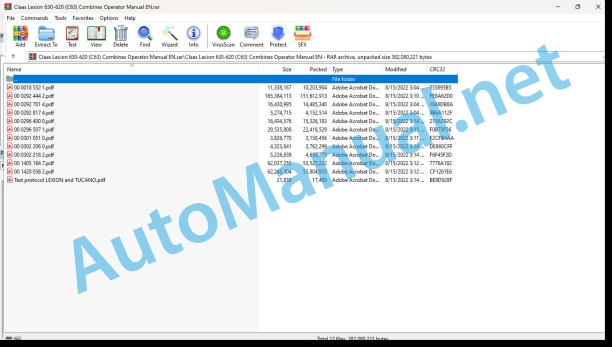
File List:
00 0018 552 1.pdf
00 0292 444 2.pdf
00 0292 701 4.pdf
00 0292 817 4.pdf
00 0296 400 0.pdf
00 0296 507 1.pdf
00 0301 051 0.pdf
00 0302 206 0.pdf
00 0302 218 2.pdf
00 1405 184 7.pdf
00 1420 056 2.pdf
Test protocol LEXION and TUCANO.pdf
00 0018 552 1.pdf:
TELEMATICS Website
Table of contents
1 About this Concise Operator’s Manual
1.1 Notes on the manual
1.1.1 Validity of manual
1.1.2 Notes regarding the Concise Operator’s Manual
1.1.3 Notes on warranty
2 Safety
2.1 Intended use
2.1.1 Proper use
3 Product description
3.1 Overview and method of operation
3.1.1 TELEMATICS product variants
3.1.2 TONI (TELEMATICS on implements)
3.1.3 Fleet View
3.1.4 TELEMATICS basic
3.1.5 TELEMATICS advanced
3.1.6 TELEMATICS professional
3.1.7 TELEMATICS app
4 Operating and control elements
4.1 TELEMATICS overview
4.1.1 Illustration conventions of buttons and navigation elements
4.1.2 Symbols and colours
4.2 Menu structure
4.2.1 Start screen
4.2.2 TELEMATICS website site map
4.2.3 Main menu overview
4.2.4
4.2.5
4.2.6
00 0292 701 4.pdf:
LEXION 760 MONTANALEXION 670 MONTANALEXION 630 MONTANA
Table of contents
1 To this Operator’s Manual
1.1 Notes on the manual
1.1.1 Validity of manual
1.1.2 Notes for the Operator’s Manual supplement
1.1.3 See the Operator’s Manual of the machine
1.1.4 Symbols and notes
1.1.5 Optional equipment
1.1.6 Qualified specialist workshop
1.1.7 Notes on maintenance
1.1.8 Warranty notes
1.1.9 Technical specifications
1.1.10 Spare parts and technical questions
2 Safety
2.1 Identifying warnings
2.1.1 Hazard signs
2.1.2 Signal word
2.2 Safety rules
2.2.1 Operation with slope compensation
2.3 Safety decals on the machine
2.3.1 Notes on safety decals
2.3.2 Safety decals on cab / on operator’s platform
3 Operating and display elements
3.1 Cab and operator’s platform
3.1.1 Operator’s platform
3.1.2 Operating panel
3.1.3 MONTANA control system control panel
4 Technical specifications
4.1 LEXION
4.1.1 Dimensions
Measurement conditions
4.1.2 Grain tank unloading tube dimensions
Measurement conditions
4.1.3 Turning circle diameter
Measuring conditions
4.1.4 Weights
Machine weight
Measurement conditions
Equipment variant weight
4.1.5 Sound pressure level and vibrations
4.1.6 CATERPILLAR C-13 diesel engine
4.1.7 Diesel engine CATERPILLAR C-9.3
4.1.8 Chassis
Ground speed
Measurement conditions
Properties
Tyre air pressure tables
4.1.9 Track width
Wheel track table 1
Wheel tread table 2
Wheel track table 3
Wheel track table 4
Wheel track table 5
Wheel track table 6
Wheel tread table 7
4.1.10 Brake
4.1.11 Steering
4.1.12 Electrical/electronic equipment
4.1.13 Crop feeding
4.1.14 Feeder unit
Measurement conditions
4.1.15 Threshing mechanism
Threshing mechanism properties
Preconcave
Main concave
Disawning
4.1.16 Separation
Separation system
Rotor separation system
Straw walker separating system
4.1.17 Cleaning unit
Cleaning system
Cleaning unit
4.1.18 Grain delivery
Grain tank capacity
Measuring conditions
Unloading capacity (maximum)
Grain delivery
4.2 Operating utilities
4.2.1 Lubricants
5 Machine preparation
5.1 Switching off and securing the machine
5.1.1 Shutting down and securing the machine
5.2 Prior to putting into operation
5.2.1 Prior to initial operation
5.3 Access to workplace and maintenance positions
5.3.1 Folding the ladder steps
5.3.2 Moving the access ladder
5.4 Front attachment
5.4.1 Installing universal drive shaft
5.4.2 Removing universal drive shaft
5.4.3 Mounting the multi-coupler
5.4.4 Dismounting the multi-coupler
5.5 Chassis
5.5.1 Jacking up the machine
5.5.2 Jacking up the machine for swinging the rear axle
5.5.3 Procedure for adjusting the rear axle track width
5.5.4 Adjusting the rear axle track width
5.5.5 Adjusting the rear axle track width
5.5.6 Adjusting the rear axle track width
5.5.7 Adjusting the rear axle track width
5.5.8 Select drilled holes on the adjustable element
5.6 Hydraulic system
5.6.1 Checking the front attachment load relief pressure accumulator
5.7 Assembly parts and machine body
5.7.1 Preassembling the access ladder
5.7.2 Installing the ladder
5.7.3 Fitting the additional weights for folding front attachments
5.8 Feed rake conveyor
5.8.1 Adjusting the feeder chain height
5.9 Threshing mechanism
5.9.1 Drum inspection cover
6 Operation
6.1 Gearbox, clutch and universal drive shaft
6.1.1 Engaging the differential lock
6.2 Chassis
6.2.1 Shifting gears
6.2.2 Engaging 4-TRAC*
6.2.3 Disengaging 4-TRAC*
6.2.4 MONTANA control system
6.2.5 Checking the MONTANA functions
6.2.6 Switching on the MONTANA control system
6.2.7 Lowering the machine fully before driving on the road
6.2.8 Moving the machine into the neutral position
6.2.9 Manual axle control
6.2.10 Manual front attachment control
6.2.11 Automatic mode
6.2.12 Changing the cutting angle/tilt (lateral levelling) in automatic mode
6.3 Brake
6.3.1 Applying the parking brake
6.3.2 Releasing the parking brake
7 Faults and remedies
7.1 Chassis
7.1.1 Chassis problems and remedies
7.2 Gearbox, clutch and universal drive shaft
7.2.1 Engaging the manual gearbox neutral position mechanically
7.3 Brake
7.3.1 Releasing the parking brake mechanically
7.3.2 Releasing the parking brake mechanically
7.4 Electric and electronic system
7.4.1 MONTANA control system problems and remedies
7.5 Feeder unit
7.5.1 Problems with and remedies for the feeder unit
8 Maintenance
8.1 Maintenance intervals
8.1.1 Before the harvest
8.1.2 Every 10 operating hours or daily
8.1.3 Every 50 operating hours
8.1.4 Every 100 operating hours
8.1.5 Every 500 operating hours or annually
8.2 Lubrication chart
8.2.1 Lubricating the grease points on the left every 100 operating hours
8.2.2 Lubricating the grease points on the right every 100 operating hours
8.2.3 Lubricating the grease points on the left every 500 operating hours
8.2.4 Lubricating the grease points on the right every 500 operating hours
8.3 Chassis
8.3.1 Check fastening of tyres
Drive axle
Steering axle
8.3.2 Checking the differential and axle carrier unit oil level
8.3.3 Changing the differential and axle carrier unit oil
Draining the oil
Topping up oil
8.3.4 Checking the oil level of drive axle wheel pivots
8.3.5 Changing the drive axle wheel pivot oil
Draining the oil
Topping up oil
8.3.6 Greasing the slewing rings of wheel pivots
8.3.7 Adjusting the wheel pivot linkages
8.3.8 Checking the oil level of the drive axle manual gearbox
8.3.9 Changing the drive axle manual gearbox oil
Draining the oil
Topping up oil
8.3.10 Checking the oil level of drive axle final drives
8.3.11 Changing the drive axle final drive oil
Draining the oil
Topping up oil
8.4 Brake
8.4.1 Checking the foot brake pressure warning
8.5 Feeder unit
8.5.1 MONTANA feeder housing – adjusting the feeder chains
8.5.2 Adjusting the basic setting of the cutting angle
8.5.3 Adjusting the basic setting of lateral position
00 0292 817 4.pdf:
CEBIS MOBILE
Table of contents
1 Introduction
1.1 Notes on the manual
1.1.1 Validity of manual
1.1.2 Information about this Operator’s Manual
1.1.3 Symbols and notices
1.1.4 Optional equipment
1.1.5 Notes on warranty
1.1.6 Spare parts and technical questions
2 Safety
2.1 Identifying warnings
2.1.1 Hazard signs
2.1.2 Signal word
2.2 Safety rules
2.2.1 Meaning of Operator’s Manual
2.2.2 Optional equipment and spare parts
3 Product description
3.1 Overview and method of operation
3.1.1 Overview of CEBIS MOBILE terminal
3.1.2 CEMOS function
3.2 Optional equipment
3.2.1 CRUISE PILOT*
3.2.2 CEMOS AUTO SEPARATION*
3.2.3 CEMOS AUTO CLEANING*
3.2.4 4D slope-dependent rotor cover plate control*
3.2.5 4D slope-dependent cleaning system control*
3.2.6 GRAIN QUALITY CAMERA*
3.3 Identification plates and identification number
3.3.1 Position of CEBIS MOBILE identification plate
4 Operating and control elements
4.1 CEBIS MOBILE onboard computer
4.1.1 Terminal
4.2 CEMOS
4.2.1 Main menu
4.2.2
4.2.3
4.2.4
4.2.5
4.2.6 Overview of harvest display
4.2.7 Status display symbols
5 Operation
5.1 Preparing fieldwork
5.1.1 Preparing optimisation
5.2 CEBIS MOBILE onboard computer
5.2.1 Switching on CEMOS
5.2.2 Starting CEMOS
5.2.3 Activating the application
5.2.4 Calling up the menu
5.3 CEMOS
5.3.1 Making system settings
5.3.2 Changing the harvesting conditions or machine equipment
5.3.3 Making the machine settings
5.3.4 Switching on machine observation
5.3.5 Starting optimisation
5.3.6 Evaluating optimisation
5.4 CEMOS AUTOMATIC
5.4.1 Setting the CEBIS display
5.4.2 Switching CEMOS AUTOMATIC* on
5.4.3 Setting the optimisation strategy*
5.4.4 Calibrating the longitudinal inclination sensor*
5.4.5 Activating CEMOS AUTOMATIC*
5.4.6 Switching CEMOS AUTOMATIC* off
00 0296 400 0.pdf:
TERRA TRAC track roller unitGeneration II
Table of contents
Introduction
General information
Validity of manual
Handling of this manual
Texts and figures
Document structure based on subassemblies
Search and find
Directions
Abbreviations
Technical terms
General repair instructions
Technical specifications
Information on economic repairs
Self-locking bolts
Liquid locking compound
Ferrule fittings
Screwing in
Non-tight ferrule connection
Sealing cone fittings
Hydraulic hose lines
Hose placement
Spare parts
Torque settings
Tightening torques for metric standard threads
Tightening torque for metric fine threads
Tightening torques for hydraulic screw fittings with ferrule DIN 3861
Tightening torques for hydraulic screw fittings and air conditioner screw fittings with O-ring and sealing cone DIN 3865
Tightening torques for SDS hydraulic male connectors
Tightening torques for direction-adjustable SDE hydraulic male connectors
Tightening torques for hydraulic swing fittings
Tightening torques for hollow screws DIN 7643
Tightening torques for brake line screw fittings
CCN explanation
CCN (CLAAS Component Number)
Electric systems standard
Overview
Hydraulic system standard
Overview
CCN (CLAAS Component Number)
General information
Of special importance
Identification of warning and danger signs
General safety and accident prevention regulations
First aid measures
Risk of injury from hydraulic fluid
Leaving the machine
Putting the machine out of operation
Jacking up the machine
Adjustment and maintenance operations
Hydraulic accumulators
Battery isolating switch
Welding work
03 Chassis
0355 Track roller unit
Overview of TERRA TRAC track roller unit
Removal/Installation
Overview of TERRA TRAC track roller unit
Removal/Installation
TERRA TRAC track roller unit rubber tracks
Work preparation
Installation
TERRA TRAC track roller unit rubber tracks
Work preparation
Special tool
Installation
TERRA TRAC track roller unit support wheels
Work preparation
Disassembly
Assembly
Installation
TERRA TRAC track roller unit support wheels
Work preparation
Disassembly
Assembly
Installation
TERRA TRAC track roller unit bearing unit
Work preparation
Installation
TERRA TRAC track roller unit rocker arm
Work preparation
Disassembly
Assembly
Installation
TERRA TRAC track roller unit gearbox
Work preparation
Special tool
Disassembly
Assembly
Installation
Rubber track tension hydraulic cylinder (3071)
Work preparation
Special tool
Removing the hydraulic cylinder
Installing the hydraulic cylinder
00 0296 507 1.pdf:
LEXION 770 – 620
Table of contents
Introduction
General Information
Validity of manual
Handling the manual
Texts and figures
Document structure based on the assembly structure
Search and find
Directions
Abbreviations
Technical terms
General repair instructions
Technical specifications
Information on proper repairs
Self-locking bolts
Liquid locking compound
Steel roller chains
Tensioning
Chain connector
Taper ring fasteners
Dismounting
Installation
Gib head key joints
Dismounting
Assembly
Lock collar bearing
Dismounting
Installation
Adapter sleeve bearings
Dismounting
Installation
Chuck bushing
Dismounting
Installation
Circlips
Ferrule fittings
Screwing in
Non-tight ferrule connection
Sealing cone fittings
Hydraulic hoses
Hose placement
Treatment of sealing faces
Spare parts
Torque settings
Tightening torques for metric standard threads
Tightening torques for metric fine thread screws
Tightening torques for hydraulic screw fittings and air conditioner screw fittings with sealing cone and O-ring according to DIN 3865
Tightening torques for hydraulic screw fittings with ferrule according to DIN 3861
Tightening torques for SDS hydraulic male connectors
Tightening torques for hydraulic swivel fittings
Tightening torques for hollow screws DIN 7643
Tightening torques for direction-adjustable SDE hydraulic male connectors
Tightening torques for brake line screw fittings
Tightening torques for worm drive hose clamps
Tightening torque for spring-loaded worm drive hose clamps
Tightening torques for tyres
CCN explanation
CCN (CLAAS Component Number)
Electric systems standard
Hydraulic system standard
CCN (CLAAS Component Number)
General Information
Of special importance
Identification of warning and danger signs
General safety and accident prevention regulations
First aid measures
Danger of injury from hydraulic liquid
Leaving the machine
Putting the machine out of operation
Jacking up the machine
Adjustment and maintenance operations
Welding work
03 Chassis
0315 Drive axle
Drive axle
Technical specifications
Axle body
Technical specifications
Installation instructions
Axle rocker
Work preparation
Special tool
Technical specifications
Disassembly
Assembly
Installation
Wheel hub
Work preparation
Special tool
Technical specifications
Disassembly
Assembly
Installation
Differential
Work preparation
Special tool
Technical specifications
Disassembly
Assembly
Installation
Adjusting the axial play of shift dogs
Manual gearbox
Work preparation
Special tool
Technical specifications
Disassembly
Assembly
Installation
Gearbox shifting hydraulic cylinder (3063)
Technical specifications
Shifter rail installation instructions
Installation instructions for seals
0330 Driven steering axle, rear
Identifying the rear drive axle
Rear drive axle
Technical specifications
Installation
Axle body
Work preparation
Special tool
Technical specifications
Disassembly
Assembly
Installation
Wheel hub
Work preparation
Special tool
Technical specifications
Removing the wheel hub completely
Installing the wheel hub completely
Disassembly
Assembly
Stub axle
Work preparation
Special tool
Technical specifications
Installation
Floating axles
Technical specifications
Installation
Track rods
Work preparation
Special tool
Technical specifications
Installation
Adjusting the track and the steering angle
Axle drive valve block
Technical specifications
Installation
Axle drive hydraulic motor (2003, 2004)
Work preparation
Special tool
Technical specifications
Installation
0330 Driven steering axle, rear
Identifying the rear drive axle
Rear drive axle
Special tool
Technical specifications
Installation
Axle body
Work preparation
Special tool
Technical specifications
Applies to tyre pressure control system
Disassembly
Assembly
Installation
Applies to tyre pressure control system
Wheel hub
Work preparation
Special tool
Technical specifications
Removing the wheel hub completely
Applies to tyre pressure control system
Installing the wheel hub completely
Applies to tyre pressure control system
Disassembly
Assembly
Stub axle
Work preparation
Special tool
Technical specifications
Installation
Floating axles
Work preparation
Special tool
Technical specifications
Installation
Track rods
Work preparation
Technical specifications
Installation
Adjusting the track and the steering angle
Differential
Work preparation
Technical specifications
Disassembly
Assembly
Differential
Work preparation
Technical specifications
Disassembly
Assembly
Installation
Axle drive valve block
Technical specifications
Installation instructions
Four-wheel clutch shifting cylinder (3002)
Technical specifications
Installation instructions
Axle drive hydraulic motor (2068)
Work preparation
Technical specifications
Installation
0365 Tyre pressure control system
Tyre pressure control system
Work preparation
Special tool
Technical specifications
Installation
0370 Slope regulation
Slope control hydraulic cylinder
Work preparation
Technical specifications
04 Brake
0405 Service brake
Brake mechanism
Technical specifications
Installation
Spring accumulator cylinder
Work preparation
Technical specifications
Installation
Cylinder stroke basic adjustment
Checking the cylinder stroke
Deactivating the brake
Activating the brake
05 Steering
0505 Steering
Steering hydraulic cylinder (3023)
Work preparation
Technical specifications
Installation
Steering hydraulic cylinder (3023)
Technical specifications
Installation
0510 Automatic steering
AUTO PILOT steering angle sensor (B006)
Technical specifications
AUTO PILOT steering angle sensor (B006)
Technical specifications
00 0301 051 0.pdf:
PROFI CAM 3
Table of contents
1 Introduction
1.1 Notes on the manual
1.1.1 Validity of manual
1.1.2 Information about this Operator’s Manual
1.1.3 Symbols and notes
1.1.4 Optional equipment
1.1.5 Qualified specialist workshop
1.1.6 Maintenance information
1.1.7 Warranty notes
1.1.8 Spare parts and technical questions
1.2 Intended use
1.2.1 Intended use
1.2.2 Reasonably foreseeable misuse
2 Safety
2.1 Identifying warnings
2.1.1 Hazard signs
2.1.2 Signal word
2.2 Safety rules
2.2.1 Meaning of Operator’s Manual
2.2.2 Observing safety decals and warnings
2.2.3 Optional equipment and spare parts
3 Product description
3.1 Overview and method of operation
3.1.1 How the PROFI CAM works
3.2 Identification plates and identification number
3.2.1 Position of identification plates
3.2.2 Explanation of PROFI CAM identification plate
3.3 Information on the product
3.3.1 CE marking
4 Operating and control elements
4.1 Camera system
4.1.1 Camera system monitor
4.2 Menu structure
4.2.1 Main menu
4.2.2
4.2.3
4.2.4
4.2.5
4.2.6
5 Technical specifications
5.1 PROFI CAM
5.1.1 Monitor
5.1.2 Camera
5.1.3 Switch box
5.1.4 Degree of protection against foreign bodies and water
6 Preparing the product
6.1 Shutting down and securing the machine
6.1.1 Switching off and securing the machine
6.2 Prior to operation
6.2.1 Carry out prior to operation
6.2.2 Installing the sun protection
6.2.3 Aligning the camera
6.2.4 Connecting the camera electrics
7 Operation
7.1 Monitor
7.1.1 Switching on the monitor
7.1.2 Calling up the menu
7.1.3 Setting a menu item
7.1.4 Setting the image orientation
7.1.5 Setting automatic screen darkening
7.1.6 Image mirroring
7.1.7 Setting the trigger view
7.1.8 Setting the follow-up time for trigger view
7.1.9 Setting the display mode
7.1.10 Activating/deactivating a display mode
8 Faults and remedies
8.1 Electrical and electronic system
8.1.1 Overview of problems on PROFI CAM camera system
8.1.2 Replacing the switch box fuse
9 Maintenance
9.1 Maintenance intervals
9.1.1 Every 10 operating hours or daily
9.2 Camera system
9.2.1 Checking the camera system for dirt
9.2.2 Cleaning the camera
9.2.3 Cleaning the switch box
9.2.4 Cleaning the monitor
10 Placing out of operation and disposal
10.1 General Information
10.1.1 Putting out of operation and disposal
11 Technical terms and abbreviations
11.1 Abbreviations
11.1.1 Units
11.1.2 Abbreviations
11.1.3 Technical terms
00 0302 206 0.pdf:
LEXION 780-620
Table of contents
Introduction
General information
Using the manual
Text and figures
Document structure based on sub-assemblies
Search and find
Directions
Abbreviations
Technical terms
Validity of manual
General information
Important
Hazard signs
Signal word
General safety and accident prevention regulations
Combine-harvester safety and accident prevention regulations
First aid measures
Leaving the machine
Adjusting and maintenance work
Danger of injury from hydraulic liquid
Battery isolating switch
Jacking up the machine
Putting the machine out of operation
04 Brake
0415 Parking brake
Parking brake
Technical specifications
Work preparation
Special tool
Removing the brake pads
Installing the brake pads
Removing the brake disc
Installing the brake disc
Remove the floating caliper.
Installing the floating caliper
Checking the residual thickness of brake linings and the piston stroke
Venting the parking brake
Adjusting the parking brake
00 0302 218 2.pdf:
LEXION 780-405
Table of contents
Introduction
General information
Validity of manual
Using the manual
Text and figures
Document structure based on sub-assemblies
Search and find
Directions
Abbreviations
Technical terms
Tightening torques
Tightening torques for metric standard threads
Tightening torques for metric fine thread
Tightening torques for hydraulic screw fittings with ferrule according to DIN 3861
General information
Important
Hazard signs
Signal word
General safety and accident prevention regulations
Combine-harvester safety and accident prevention regulations
First aid measures
Crop / straw discharge
Leaving the machine
Adjusting and maintenance work
Danger of injury from hydraulic liquid
Battery isolating switch
Putting the machine out of operation
08 Drives
0841 Threshing mechanism drive
Driven pulley of belt (R52)
Technical specifications
Work preparation
Special tool
Disassembly
Assembly
Installation
Lubricating interval
0842 Separation drive
Driven pulley of belt (R41)
Technical specifications
Work preparation
Special tool
Disassembly
Assembly
Installation
Lubricating interval
00 1405 184 7.pdf:
GPS PILOT
Table of contents
1 Introduction
1.1 General information
1.1.1 Validity of Manual
1.1.2 Information about this Operator’s Manual
1.1.3 Symbols and notes
1.1.4 Optional equipment
1.1.5 Qualified specialist workshop
1.1.6 Maintenance notes
1.1.7 Notes on warranty
1.1.8 Spare parts and technical questions
1.1.9 Licensing for road traffic
Sample report
Clearance certificate
General operating permit
1.2 Intended use
1.2.1 Intended use of GPS PILOT
1.2.2 Reasonably foreseeable misuse
2 Safety
2.1 Identifying warnings
2.1.1 Hazard signs
2.1.2 Signal word
2.2 Safety rules
2.2.1 Meaning of Operator’s Manual
2.2.2 Update of terminal software
2.2.3 Requirements made on all persons working with the product
2.2.4 Hazard areas
Hazard areas
2.2.5 Interaction between the control terminal and the machine or tractor
2.2.6 Structural changes
2.2.7 Optional equipment and spare parts
2.2.8 Use of USB devices
2.2.9 Operation only following proper putting into operation
2.2.10 Technical status
2.2.11 Hazard from damage on the product
2.2.12 Respecting technical limit values
Respecting technical limit values
2.2.13 Preparing the product for road travel
2.2.14 Hazards when driving on the road and on the field
2.2.15 Electrocution by electrical system
2.2.16 Potentially fatal electric shock from overhead lines
2.2.17 Liquids under pressure
2.2.18 Maintenance operations and repair work
2.2.19 Driving with the GPS PILOT
Road travel
Fieldwork
3 Product description
3.1 Overview and method of operation
3.1.1 Overview of GPS PILOT – Hydraulic system
3.1.2 Overview of GPS PILOT – Steer ready
3.1.3 Overview of GPS PILOT FLEX
3.1.4 Overview of GPS PILOT ex works
3.1.5 Overview of terminal S7
3.1.6 Overview of navigation computer (ECU)
3.1.7 Electric steering wheel
3.1.8 Overview of correction signals
EGNOS/WAAS/MSAS
Omnistar HP / XP / G2
RTK FIELD BASE and BASELINE HD
RTK FARM BASE
3.1.9 Module overview
BASELINE HD
RTK FIELD BASE
RTK (Motorola)
RTK FARM BASE
3.2 Safety devices
3.2.1 Automatic cut-out when the maximum speed is exceeded
3.2.2 Automatic cut-out when the speed falls below the minimum
3.2.3 Seat contact switch
3.2.4 Manual override
Electric steering wheel
3.3 Optional equipment
3.3.1 GPS L2*
3.3.2 GLONASS*
3.3.3 TURN IN*
3.3.4 AUTO TURN*
3.4 Identific
John Deere Repair Technical Manual PDF
John Deere Repair Technical Manual PDF
John Deere Transmission Control Unit Component Technical Manual CTM157 15JUL05
John Deere Repair Technical Manual PDF
John Deere Repair Technical Manual PDF
John Deere Repair Technical Manual PDF
John Deere PowerTech M 10.5 L and 12.5 L Diesel Engines COMPONENT TECHNICAL MANUAL CTM100 10MAY11
John Deere Repair Technical Manual PDF
John Deere Repair Technical Manual PDF
John Deere Repair Technical Manual PDF
John Deere Repair Technical Manual PDF
John Deere POWERTECH E 4.5 and 6.8 L Diesel Engines TECHNICAL MANUAL 25JAN08
John Deere Repair Technical Manual PDF

