Claas Liner 2800 (987) Swathers Operator Manual ES
$50.00
- Model: Liner 2800 (987) Swathers
- Type Of Manual: Operator Manual
- Language: ES
- Format: PDF(s)
- Size: 23.3 MB
File List:
00 0295 084 6.pdf
00 0295 084 6.pdf:
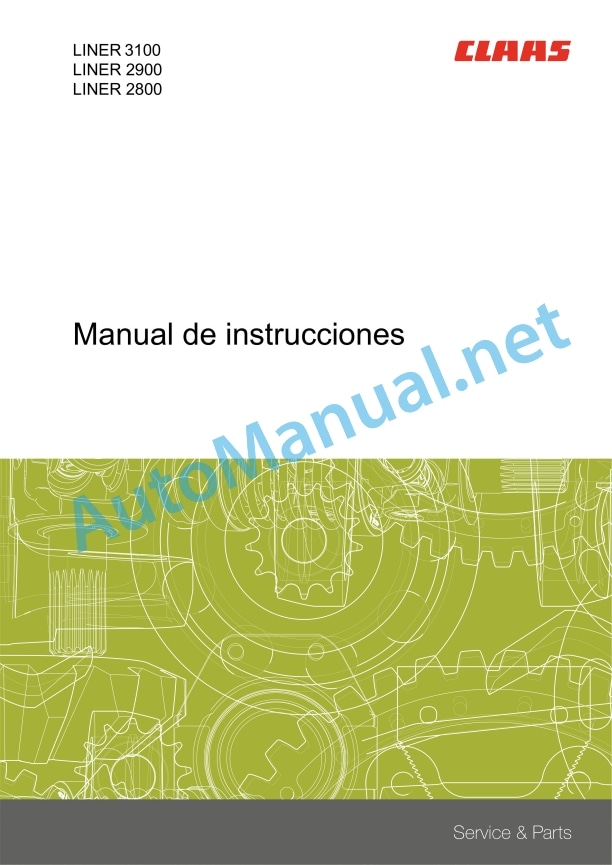
LINER3100LINER 2900LINER 2800
1. Introduction
1.1 Information regarding the instruction manual
1.1.1 Validity of the manual
1.1.2 Information relating to this instruction manual
1.1.3 Symbols and indications
1.1.4 Optional equipment
1.1.5 Qualified specialized workshop
1.1.6 Information regarding warranty
1.1.7 Spare parts and technical issues
1.2 Proper application of the machine
1.2.1 Proper machine application
1.2.2 Logically foreseeable inappropriate application
2 Security
2.1 Recognize warning signs
2.1.1 Danger symbols
2.1.2 Keyword
2.2 Safety instructions
2.2.1 Meaning of the instruction manual
2.2.2 Observe graphic danger symbols and alarm indications
2.2.3 Requirements for all people working with the machine
2.2.4 Children in danger
2.2.5 Danger zones
2.2.6 Position yourself between the tractor and the machine
2.2.7 Accompanying persons
2.2.8 Couple the tractor with the machine
2.2.9 Risk of injury due to rotating shafts
2.2.10 Construction changes
2.2.11 Optional equipment and spare parts
2.2.12 Control of the machine in operation
2.2.13 Operation only after correct commissioning
2.2.14 Technical status
2.2.15 Danger due to machine breakdowns
2.2.16 Comply with technical limit values
2.2.17 Danger due to coasting parts
2.2.18 Keep protective devices operational
2.2.19 Personal protective equipment
2.2.20 Wear appropriate clothing
2.2.21 Remove dirt and loose objects
2.2.22 Prepare the machine for road traffic
2.2.23 Dangers when driving on the road and in the countryside
2.2.24 Park the machine safely
2.2.25 Parking without supervision
2.2.26 Unsuitable consumables
2.2.27 Safe handling of consumables and auxiliary materials
2.2.28 Environmental protection and waste disposal
2.2.29 Fire protection
2.2.30 Deadly electrical discharge through overhead lines
2.2.31 Behavior in the case of an overhead line voltage transfer and lightning strike
2.2.32 Liquids under pressure
2.2.33 Hot surfaces
2.2.34 Work only on the stopped machine
2.2.35 Maintenance work and repair work
2.2.36 Machine parts and lifted loads
2.2.37 Danger from welding work
2.3 Safety signage
2.3.1 Structure of graphic hazard symbols
2.3.2 Position of warning symbols on the machine
2.3.3 Position of warning symbols on the machine
3 Machine Description
3.1 Summary and operation
3.1.1 Machine overview
3.1.2 Machine operating mode
3.2 Optional equipment
3.2.1 CLAAS STANDARD TERMINAL*
3.2.2 Mechanical individual lifting of the swath rotors
3.2.3 Individual electro-hydraulic* lifting of the swath rotors
3.2.4 Hydraulic adjustment* of the height of the swath rotors
3.2.5 Hydraulic connection parts 3 components*
3.2.6 Insertable fork 8 components*
3.2.7 Rear tandem axles
3.2.8 Spare wheel 16×6.5-8*
3.2.9 Wheel weights
3.2.10 Side marker lights*
3.2.11 Legal technical equipment of the European Union*
3.2.12 Legal technical equipment for Switzerland*
3.3 Identification plates and vehicle identification number
3.3.1 Machine identification plate
3.3.2 Machine identification plate
3.4 Machine information
3.4.1 Adhesive on the machine
4 Control and display instruments
4.1 Control elements
4.1.1 Control panel for individual elevation of the swath rotors*
4.1.2 Windrower rotor
4.1.3 Hydraulic hose
4.1.4 Support leg
4.2 Indicator elements
4.2.1 Swath rotor chassis
4.2.2 Windrower rotor
4.3 CLAAS STANDARD TERMINAL
4.3.1 Summary of keys and LEDs
4.4 ISOBUS screen
4.4.1 Screen summary
4.4.2 Menu bar
4.4.3 Status bar
4.5 ISOBUS work menu
4.5.1
4.5.2
5 Technical data
5.1 LINER 3100
5.1.1 Dimensions
5.1.2 Weights
5.1.3 Tractor requirements
5.1.4 Version
5.1.5 Tire pressure
5.1.6 Noise level
5.1.7 Lubricants
5.2 LINER 2900
5.2.1 Dimensions
5.2.2 Weights
5.2.3 Tractor requirements
5.2.4 Version
5.2.5 Tire pressure
5.2.6 Noise level
5.2.7 Lubricants
5.3 LINER 2800
5.3.1 Dimensions
5.3.2 Weights
5.3.3 Tractor requirements
5.3.4 Version
5.3.5 Tire pressure
5.3.6 Noise level
5.3.7 Lubricants
6 Preparation of the machine
6.1 Turn off the machine and secure it
6.1.1 Shut down and secure the machine and tractor
6.1.2 Secure the lifted machine
6.2 Adapt the tractor
6.2.1 Assemble the CLAAS STANDARD TERMINAL*
6.2.2 Assemble COMMUNICATOR II*
6.2.3 Check the tractor power take-off protection device
6.3 Adapt the machine
6.3.1 Check the length of the cardan shaft
Shortest working position of the cardan shaft
Longest working position of the cardan shaft
6.3.2 Adapt the length of the cardan shaft
6.3.3 Assemble the cardan shaft to the machine
6.3.4 Additional weights*
6.4 Hooking up the machine
6.4.1 Remove the security lock*
6.4.2 Attach the hitch bracket
6.4.3 Assemble the cardan shaft
6.4.4 Attach the safety chain*
6.4.5 Place the support leg upwards
6.4.6 Attach the hydraulic hose
6.4.7 Assemble the control panel for individual elevation of the swath rotors*
6.4.8 Plug in the lighting cable
6.4.9 Attach the pull rope
6.4.10 Connect the CLAAS STANDARD TERMINAL*
6.4.11 Connect COMMUNICATOR II*
On tractors without ISOBUS socket
On tractors with ISOBUS socket
6.4.12 Save the shims
6.5 Unhooking the machine
6.5.1 Put the shims underneath
6.5.2 Unhook the pull rope
6.5.3 Unplug lighting cables
6.5.4 Unplugging the CLAAS STANDARD TERMINAL*
6.5.5 Unplug COMMUNICATOR II*
6.5.6 Disconnect the hydraulic hose
6.5.7 Remove the control panel for individual elevation of the swath rotors*
6.5.8 Unhooking the safety chain*
6.5.9 Dismantle the cardan shaft
6.5.10 Unhook the coupling bracket
6.5.11 Engage the safety lock*
6.6 Prepare for road traffic
6.6.1 Folding the protective stirrup
6.6.2 Remove the tine holder
6.6.3 Remove the tine arms
6.6.4 Fold the machine into transport position
6.6.5 Insert the protective bars
6.6.6 Close the stopcock
6.6.7 Check before driving on the road
6.7 Prepare the working position
6.7.1 Remove protective bars
6.7.2 Open the stopcock
6.7.3 Deploy the machine to the working position
6.7.4 Assemble the tine holders
6.7.5 Assemble the tine arms
6.7.6 Deploy the protective stirrup
6.8 Load the machine
6.8.1 Lift the machine
7 Management
7.1 Driving on the road
7.1.1 Circulation on public roads
7.2 Settings for use at work
7.2.1 Adjust the swath rotor
Basic adjustment of tandem axles
7.2.2 Adjust the swath rotor
7.2.3 Adjust the raking height
7.2.4 Adjusting the row former
7.2.5 Adjust the position for headboards
7.2.6 Setting the working width and row width
7.2.7 Adjust the steering stop
7.3 Use at work
7.3.1 Fold the machine into transport position
7.3.2 Fold the machine into transport position
7.3.3 Deploy the machine to the working position
7.3.4 Deploy the machine to the working position
7.3.5 Using the machine
7.3.6 Adapt the power take-off speed
7.3.7 Observe the stop angle
7.3.8 Make rows
7.3.9 Straw rows
7.3.10 Set the individual elevation of the swath rotors*
Work with a single swath rotor
Working with the right swath rotor
Working with the left swath rotor
7.3.11 Raise the swath rotors to the headland position
7.4 Connect/disconnect CLAAS STANDARD TERMINAL
7.4.1 Turn on the Terminal
7.4.2 Turn off the terminal
7.4.3 Terminal – automatic shutdown
7.5 Working position CLAAS STANDARD TERMINAL
7.5.1 Lower all rotors
7.5.2 Raise all rotors (automation for the ends of the plot)
7.5.3 Raise/lower individual rotors (individual lifting of each rotor)
7.6 CLAAS STANDARD TERMINAL, working width
7.6.1 Increase/reduce working width
7.7 CLAAS STANDARD TERMINAL, raking height
7.7.1 Increase/decrease raking height
7.8 CLAAS STANDARD TERMINAL, transport position
7.8.1 Fold in transport position
7.9 ISOBUS control
7.9.1 Description
General indications
7.9.2 Clarifications of ISOBUS terms
7.10 Turn the ISOBUS terminal on and off
7.10.1 Before turning on the terminal
7.10.2 Turn on the terminal
7.10.3 Start the control program
7.10.4 Turn off the terminal
7.11 ISOBUS transport position
7.11.1 Fold in transport position
7.11.2 Deploy from transport position
7.12 ISOBUS working position
7.12.1 Raise/lower the swath rotors
7.12.2 Raise/lower the swath rotors individually (individual lifting)
Left swath rotor
Right swath rotor
7.13 ISOBUS working width
7.13.1 Increase/reduce working width
7.14 Raking height* ISOBUS
7.14.1 Increase/decrease raking height*
Left raking height
Right raking height
Left and right raking height
8 Incident and solution
8.1 Chassis
8.1.1 Change the wheel on the transport chassis
8.1.2 Change the feeler wheel
Rear tandem axle*
8.1.3 Faults in the feeler wheels
8.1.4 The machine advances offset with respect to the tractor
Adjust the drawbar
8.1.5 Large tire wear
Adjust convergence
8.2 Electrical installation
8.2.1 Electrical installation
8.2.2 Defective bulb
8.2.3 Defective bulbs
8.3 Windrower rotor
8.3.1 Hydraulic installation
8.4 Emergency management
8.4.1 Indications regarding emergency management
8.4.2 Summary of hydraulic valves
8.4.3 Work steps to be carried out before emergency handling
8.4.4 Manually operate hydraulic valves
8.4.5 Raise the swath rotor to the transport position
8.4.6 Lower the swath rotor to the working position
8.5 ISOBUS error indications
8.5.1 Alarm messages
8.5.2 Error code table
9 Maintenance
9.1 Summary of maintenance intervals
9.1.1 Before harvest
9.1.2 After the first 10 hours of service
9.1.3 After the first 50 hours of service
9.1.4 Every 8 hours of service or daily
9.1.5 Every 20 hours of service
9.1.6 Every 50 hours of service
9.1.7 Every 100 hours of service
9.1.8 Every 250 hours of service
9.1.9 Every 500 hours of service or annually
9.1.10 Every 5 years
9.1.11 After harvest
9.2 Gearbox
9.2.1 Check the tightness of the gear
9.2.2 Check the timing gear oil level
9.2.3 Change the timing gear oil
9.2.4 Check the swath gear oil level
9.2.5 Change the swath gear oil
9.2.6 Check the swath gear screws
9.3 Clutch
9.3.1 Check the overload clutch
9.3.2 Check the overload clutch
9.3.3 Ventilate the friction clutch
9.3.4 Clean the cardan shaft friction clutch
9.3.5 Clean the cardan shaft locking clutch
9.4 Cardan shaft
9.4.1 Maintenance of cardan shafts
9.4.2 Check the cardan shaft nuts
9.5 Chassis
9.5.1 Check tire pressure
9.5.2 Check the wheel nuts on the transport chassis
9.6 Hydraulic installation
9.6.1 Check the hydraulic hoses
9.6.2 Check the pressure accumulator*
9.7 Framework
9.7.1 Check the hitch bar
9.7.2 Check the fixation of the chassis
9.8 Windrower rotor
9.8.1 Check the screws of the swath rotor attachment
9.8.2 Check the swath gear screws
9.8.3 Check the discharge springs
9.8.4 Check the spring
9.8.5 Check the tines
9.9 Assembly and body parts
9.9.1 Eliminate crop remains
9.9.2 Clean the machine
9.9.3 Maintain the machine
9.9.4 Check the fixing material
9.9.5 Prevent frost damage
9.10 LINER 3100 lubrication diagram
9.10.1 Grease the lubrication points every 20 hours
9.10.2 Grease the lubrication points every 50 hours
9.10.3 Grease the grease points every 100 hours
9.10.4 Grease the grease points every 250 hours
9.11 LINER 2900 / 2800 lubrication diagram
9.11.1 Grease the lubrication points every 20 hours
9.11.2 Grease the lubrication points every 50 hours
9.11.3 Grease the grease points every 100 hours
9.11.4 Grease the lubrication points every 250 hours
10 Decommissioning and waste disposal
10.1 General information
10.1.1 Decommissioning and waste disposal
11 EC declaration of conformity
11.1 LINER 3100 / 2900 / 2800
11.1.1 EC declaration of conformity
12 Technical dictionary and abbreviations
12.1 Terms and explanations
12.1.1 Technical vocabulary
12.1.2 Abbreviations
John Deere Repair Technical Manual PDF
John Deere Repair Technical Manual PDF
John Deere Repair Technical Manual PDF
John Deere Diesel Engines PowerTech 4.5L and 6.8L – Motor Base Technical Manual 07MAY08 Portuguese
John Deere Repair Technical Manual PDF
John Deere Repair Technical Manual PDF
John Deere Repair Technical Manual PDF
John Deere Repair Technical Manual PDF
John Deere Transmission Control Unit Component Technical Manual CTM157 15JUL05
John Deere Repair Technical Manual PDF
John Deere Repair Technical Manual PDF


