 Forage Harvesters Operator Manual ES 1")
 Forage Harvesters Operator Manual ES 2")

John Deere Repair Technical Manual PDF


John Deere Repair Technical Manual PDF
John Deere Application List Component Technical Manual CTM106819 24AUG20


John Deere Repair Technical Manual PDF
John Deere Repair Technical Manual PDF


John Deere Repair Technical Manual PDF
John Deere 18-Speed PST Repair Manual Component Technical Manual CTM168 10DEC07


John Deere Repair Technical Manual PDF
John Deere Parts Catalog PDF
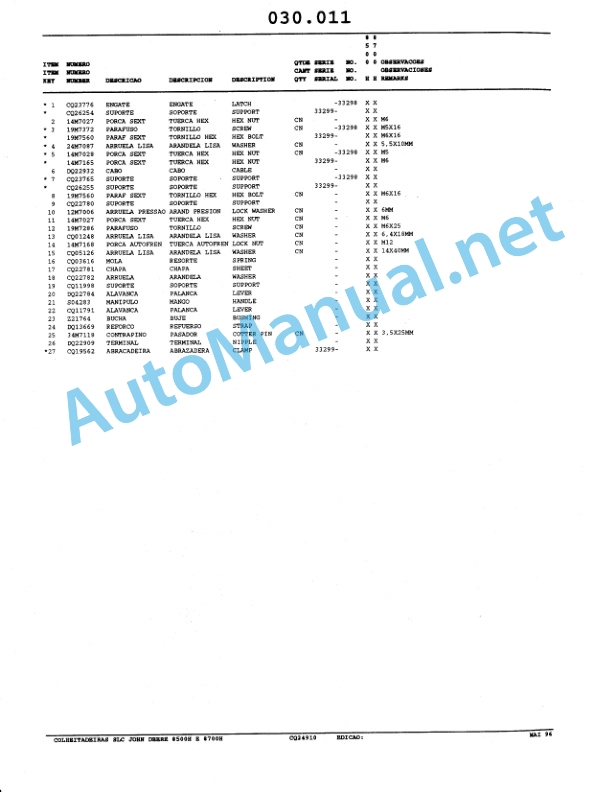
John Deere Harvesters 8500 and 8700 Parts Catalog CPCQ24910 Spanish


John Deere Repair Technical Manual PDF
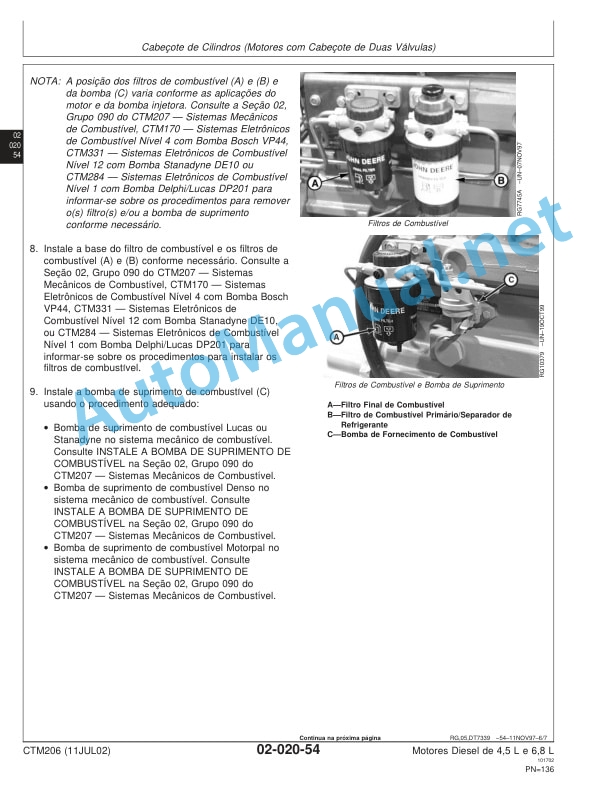
John Deere POWERTECH E 4.5 and 6.8 L Diesel Engines TECHNICAL MANUAL 25JAN08


%20Forage%20Harvesters%20Operator%20Manual%20ES&url=https://automanual.net/doc/claas-pick-up-380-300-profi-i36-forage-harvesters-operator-manual-es/&media=https://automanual.net/wp-content/uploads/2024/04/claas-pick-up-380-300-profi-i36-forage-harvesters-operator-manual-es-1.jpg)
%20Interim%20Tier%204%20Stage%20III%20B%20Component%20Technical%20Manual%20CTM104754%2025%20July%202012%20Portuguese&url=https://automanual.net/doc/john-deere-powertech-m-6068-oem-diesel-engines-above-130-kw-174-hp-compo-technical-manual-ctm104754-25jul12-portuguese/&media=https://automanual.net/wp-content/uploads/2023/08/john-deere-powertech-6068-engines-above-130-kw-174-hp-interim-tier-4-stage-iii-b-component-technical-manual-ctm104754-25-july-2012-portuguese-1.jpg)
%20Component%20Technical%20Manual%20CTM205%20February%202015%20Russian&url=https://automanual.net/doc/john-deere-diesel-engines-4-5l-and-6-8l-component-technical-manual-ctm205-01feb15-russian/&media=https://automanual.net/wp-content/uploads/2023/08/john-deere-diesel-engines-45-l-and-68-l-primary-engine-component-technical-manual-ctm205-february-2015-russian-1.jpg)
John Deere Repair Technical Manual PDF
John Deere Diesel Engines POWERTECH 2.9 L Component Technical Manual CTM126 Spanish