Claas Avero 240 (451) Combines Technical System EN
$300.00
- Model: Avero 240 (451) Combines
- Type Of Manual: Technical System
- Language: EN
- Format: PDF(s)
- Size: 37.8 MB
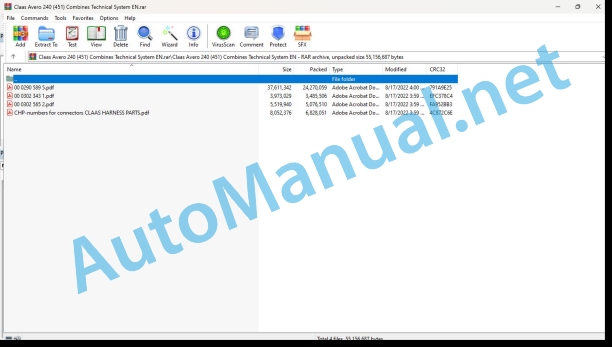
File List:
00 0290 589 5.pdf
00 0302 343 1.pdf
00 0302 565 2.pdf
CHP-numbers for connectors CLAAS HARNESS PARTS.pdf
00 0290 589 5.pdf:
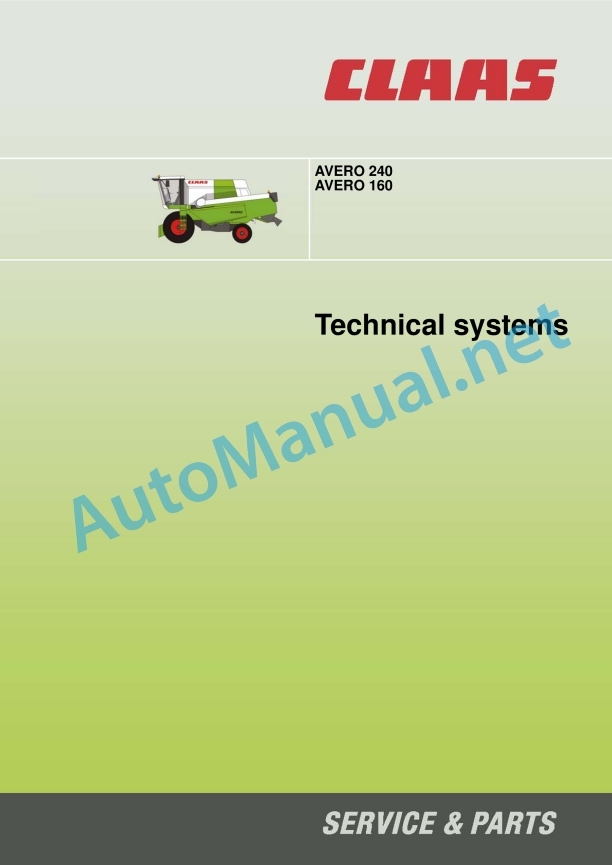
AVERO 240
AVERO 160
Table of contents
CCN explanation
CCN (CLAAS Component Number)
Electric systems standard
Overview
Hydraulic system standard
Overview
CCN (CLAAS Component Number)
CCN Index
Introduction
Safety rules
Safety and hazard precautions
Validity of manual
Validity of manual
01 Engine
0150 Engine attachment parts
Starting the diesel engine
Measured values table
Description of function
0155 Engine control
Diesel engine monitoring
Measured values table
Description of function
Diesel engine fault codes – J 1939 / Engine diagnosis / Component position
CATERPILLAR C6.6
Fault code
03 Chassis
0335 Ground drive
Hydrostatic ground drive, mechanically controlled
Description of function
Ground drive hydraulic circuit diagram
Pump unit, motor unit – hydrostatic ground drive
05 Steering
0505 Steering
Steering system – General
Neutral function diagram
Steering-actuated function diagram
09 Hydraulic system
0920 Valves
Main valve
Grain tank unloading tube valve block
Threshing drum variable-speed drive valve block
Front attachment dampening valve block
Steering (Orbitrol) valve block
Low-pressure hydraulic system valve block
Reel drive valve block
AUTOCONTOUR / reversing valve block
0980 Hydraulic circuit diagram
Vehicle hydraulic system circuit diagrams
Overall hydraulics circuit diagram, without retrofit kit for rotary chaff screen
Overall hydraulics circuit diagram, with retrofit kit for rotary chaff screen
Testing and measuring
Front attachment hydraulics circuit diagrams
Cutterbar C370-C490 (type 527) – Reel adjustment
VARIO cutterbar V540-V900 (type 716) – Reel adjustment
VARIO cutterbar V540-V1050 (type 716) – Rape cutter drive
Folding cutterbar 450-540 (type 713)
10 Electrical / Electronic equipment
1010 Central electrics
Basic central terminal compartment
Roof central terminal compartment
Fuse assignment:Roof central terminal compartment
1012 Modules / sensors
Module overview
Overview of module positions
Module A008 – AUTO CONTOUR (CAC)
Module pin assignment A008 – AUTO CONTOUR (CAC)
Module A012 – Speed-loss monitor (SMM)
Module A015 – Engine control module
Module pin assignment of engine control module A015
Module A052 – Multifunction handle (MHM)
Module A060 – Hydraulic control (HYD)
Module A101 – Dashboard (DBD)
1015 Wiring harnesses
Multicoupler
Front attachment multicoupler
Machine multicoupler
Description of function
1080 Electronic circuit diagram
Introduction into circuit diagrams
Overview of designations
CLAAS cable marking
Wire colours
Overview of CAN Bus system
Electric circuit diagrams (SCM) for machines up to serial no. 45100050
SCM 01 – Multicoupler
SCM 02 – Electric power supply – Starting the diesel engine
SCM 03 – Power supply of modules
SCM 04 – Road travel
SCM 05 – Threshing mechanism
SCM 06 – Power supply of sensors
SCM 07 – Earth supply
SCM 08 – CAN 0 – Vehicle CAN / CAN 1-J1939
SCM 09 – CAN2 front CAN
SCM 10 – Diesel engine speed adjustment – Diesel engine control
SCM 11 – Diesel engine monitoring
SCM 12 – Engage front attachment clutch – Reverse front attachment
SCM 13 – Raise / lower front attachment
SCM 14 – Folding the front attachment
SCM 15 – Reel speed adjustment
SCM 16 – Reel adjustment
SCM 17 – Table adjustment
SCM 18 – Rape cutter
SCM 19 – Master valve, hydraulic system monitoring
SCM 20 – Speed monitoring
SCM 21 – Threshing drum speed adjustment
SCM 22 – Fan speed adjustment
SCM 23 – Machine monitoring
SCM 24 – Throughput monitoring
SCM 25 – Swing grain tank unloading tube – Grain tank unloading
SCM 26 – Grain tank full indicator – Warning beacons
SCM 27 – Brake light
SCM 28 – Reversing horn
SCM 29 – Air conditioner
SCM 30 – Windscreen wiper – Windscreen washer
SCM 31 – Main lighting circuit – Side light
SCM 32 – Drive lights
SCM 33 – Main work light circuit
SCM 34 – Grain tank – returns – sieve pan work lights
SCM 35 – Turn signal indicator
SCM 36 – Instrument lighting
SCM 37 – Cab equipment
SCM 38 – Service sockets
SCM 39 – Spare (options)
SCM 40 – Overview of modules
SCM 41 – Overview of connectors
Electric circuit diagrams (SCM) for machines from serial no. 45000011 / 45100051
SCM 01 – Multicoupler
SCM 02 – Electric power supply – starting the diesel engine
SCM 03 – Power supply of modules
SCM 04 – Road travel
SCM 05 – Threshing mechanism
SCM 06 – Power supply of sensors
SCM 07 – Earth supply
SCM 08 – CAN0 (Vehicle CAN) / CAN1 (J1939 CAN)
SCM 09 – CAN2 (Front CAN)
SCM 10 a – Diesel engine speed adjustment – diesel engine control unit (20 km/h)
SCM 10 b – Diesel engine speed adjustment – diesel engine control unit (25 km/h)
SCM 11 – Diesel engine monitoring
SCM 12 – Engage front attachment clutch – Reverse front attachment
SCM 13 a – Raise / lower front attachment with AUTO CONTOUR
SCM 13b – Raise / lower front attachment without AUTO CONTOUR
SCM 14 – Folding the front attachment
SCM 15 – Reel speed adjustment
SCM 16 – Reel adjustment
SCM 17 – Table adjustment
SCM 18 – Rape cutter
SCM 19 – Master valve, hydraulic system monitoring
SCM 20 – Speed monitoring
SCM 21 – Threshing drum speed adjustment
SCM 22 – Fan speed adjustment
SCM 23 – Machine monitoring
SCM 24 – Throughput monitoring
SCM 25 – Swing grain tank unloading tube – Grain tank unloading
SCM 26 – Grain tank full indicator – Warning beacons
SCM 27 – Brake light
SCM 28 – Reversing horn
SCM 29 – Air conditioner
SCM 30 – Windscreen wiper – Windscreen washer
SCM 31 – Main lighting circuit – Side light
SCM 32 – Drive lights
SCM 33 – Main work light circuit
SCM 34 – Grain tank – returns – sieve pan work lights
SCM 35 – Turn signal indicator
SCM 36 – Instrument lighting
SCM 37 – Components fitted in the cab
SCM 38 – Service sockets
SCM 39 – Spare (options)
SCM 40 – Overview of modules
SCM 41 – Overview of connectors
SCM 44- Wheel position indicator
Front attachment circuit diagrams – Soybean cutterbar (type 440)
T440 01 – Multicoupler
T440 02 – Reel
T440 03 – Autocontour
T440 04 – Lighting
T440 05 – AUTOPILOT
Front attachment circuit diagrams – Standard – Cutterbar (type 527)
T527 01 – Multicoupler
T527 02 – Reel
T527 03 – Autocontour
T527 04 – AUTOPILOT
Front attachment circuit diagrams – Folding cutterbar (type 713)
T713 01 – Multicoupler
T713 02 – Reel
T713 03 – Folding the front attachment
T713 04 – Autocontour
T713 05 – Lighting
T713 06 – AUTOPILOT
Front attachment circuit diagrams – Standard – Cutterbar (type 715)
T715 01 – Multicoupler
T715 02 – Reel
T715 03 – Rape cutter
T715 04 – Autocontour
T715 05 – AUTOPILOT
Front attachment circuit diagrams – VARIO – Cutterbar (type 716)
T716 00 – Overview of modules
T716 01 – Multicoupler
T716 02 – Power supply of modules / CAN Bus
T716 03 – Reel
T716 04 – Cutting table adjustment
T716 05 – Rape cutter
T716 06 – Autocontour
T716 07 – AUTOPILOT
Connector database (CHP CLAAS)
Example of representation of key numbers (CHP)
Connector representation (CHP)
12 Cab / Operator’s platform
1230 Seat
Seat contact
Measured values table
Description of function
1240 Air condition
Air conditioner function
Measured values table
Description of function
20 Crop feeding
2002 Front attachment
Raise/lower front attachment
Measured values table
Description of function
Main valve
Front attachment ON/OFF
Description of function
Front attachment reversing
Measured values table
Description of function
Front attachment dampening
Measured values table
Description of function
Front attachment dampening valve
Accumulator pressure filling instructions
Manual cross levelling
Measured values table
Description of function
AUTO CONTOUR / reversing valve block
2010 Cutterbar table
VARIO cutting table adjustment
Measured values table
Reel adjustment function description
2015 Reel / Crop guard
Raise/lower reel
Measured values table
Reel adjustment function description
Horizontal reel adjustment
Measured values table
Reel adjustment function description
Reel speed adjustment, automatic reel speed
Measured values table
Reel adjustment function description
26 Ground guidance
2605 Auto-Contour
AUTO CONTOUR (CAC) / CONTOUR
Measured values table
Setting of CAC sensor band sensors
Description of function
AUTO CONTOUR / reversing valve block
Accumulator pressure filling instructions
41 Threshing mechanism
4100 Threshing mechanism
Threshing mechanism ON / OFF
Measured values table
Description of function
4120 Threshing drum
Threshing drum speed adjustment
Measured values table
Description of function
61 Grain delivery
6120 Grain tank unloading
Grain tank unloading
Measured values table
Description of function
Swinging the grain tank unloading tube
Measured values table
Description of function
Diagnosis by fault codes
FMI failure code (Failure Mode Indicator)
FMI failure code (Failure Mode Indicator)
FMI 00 (Signal too high)
FMI 01 (Signal too low)
FMI 02 (Erratic signal)
FMI 03 (Voltage too high)
FMI 04 (Voltage too low)
FMI 05 (Current too low)
FMI 06 (Current too high)
FMI 07 (Mechanical failure)
FMI 08 (Abnormal frequency signal)
FMI 09 (Communication error)
FMI 10 (Rate of signal change too fast)
FMI 11 (multiple faults)
FMI 12 (ECU defective)
FMI 13 (Signal outside of calibration range)
FMI 16 (Parameter not available)
FMI 17 (ECU not responding)
FMI 18 (Power supply failure)
FMI 19 (Software conditions not met)
FMI 95 (no signal change)
FMI 96 (CAN Bus system defective)
FMI 97 (Erratic condition)
FMI 98 (Warning)
FMI 99 (Info)
Fault codes
AVERO error code list
Overview of error codes
Position of components
Hydraulic system
Valve blocks
1000 Oil reservoir / filter / oil cooler
2000 Pump / motor
3000 Hydraulic cylinders
4000 Restrictor / orifice plate
5000 Accumulators
6000 Valves – mechanically actuated
7000 Valves – hydraulically actuated
8000 Couplings / connections
9000 Measuring points / gauges
Electric system
A Terminal / modules
B Sensors
C Electrical / electronic devices
E Lighting
G Voltage sources
H Signal devices / light
K Relays
M Motor (electric)
R Potentiometer / resistor
S Switch / pushbutton – Cab operation
U Switch – External operation
V Electronic components
X Connectors
Y Solenoid coil
Z Actual value switch
Central terminal compartment
Earth points
00 0302 343 1.pdf:
PROFI CAM 3
Table of contents
General information
Marking of warnings and hazard prevention notes
First-aid measures
CCN explanation
CCN (CLAAS Component Number)
Electric system standard
Overview
Hydraulic system standard
Overview
CCN (CLAAS Component Number)
10 Electrical / Electronic equipment
1030 Board computer / Indicators
Camera system
Description of function
1097 Testing / Measuring / Adjusting
Testing / measuring / adjusting the PROFI CAM
Checking the fuse in the video channel select box (C102)
Testing the video camera connector (C055)
1098 Fault / remedy
Fault / remedy PROFI CAM
The video monitor (C101) shows no image or cannot be switched on (indicator light fails to light up)
Video monitor (C102) displays a blue image either permanently or temporarily
The video monitor image is blurred
Replacing the fuse in the video channel select box (C102)
Connection and connecting cable with video camera (C055)
00 0302 565 2.pdf:
Sensor system
Table of contents
CCN explanation
CCN (CLAAS Component Number)
Electric system standard
Overview
Hydraulic system standard
Overview
CCN (CLAAS Component Number)
Introduction
Safety rules
Safety and hazard information
10 Electrical / Electronic equipment
1097 Testing / Measuring / Adjusting
Test report of the angle sensor (0011780.x)
Application of test report
Required tools
Test report of the angle sensor (0011780.x)
Testing / Measuring / Adjusting of angle sensor (0011780.x)
1. Reason for test
2. Mechanical test of angle sensor
3. Electric test with CDS
4. Electric test with multimeter
5. Mechanical test of connecting cable
Completing the machine
Test report of position and speed sensors
Application of test report
Required tools
Sensor variants
Part numbers of speed sensors
Part number of position sensor
Test report of position and speed sensors
Testing / measuring / adjusting of position and speed sensors
1. Reason for test
2. Mechanical test
3. Electric test with CDS
4a. Installation dimensions
Check of installation dimension
Installation dimensions of gearbox speed sensor (0011 799.x) and cam speed sensor (0011 810.x)
Installation dimension of position sensor (0011 815.x)
4b. Installation position
Centring of sensor
Metal-free zone
5. Electric test with multimeter
Voltage measurement
Direction of rotation and speed sensor (0011 605.x)
Measured values table
6. Mechanical test of connecting cable
Completing the machine
Test report of the urea sensor (00 0773 207 x)
Application of test report
Required tools
Parts number of the urea sensor
Test report of the urea sensor
Testing / measuring / adjusting urea sensor
1. Reason for test
2. Mechanical test
3. Mechanical test of connecting cable
4. Electric test with multimeter
5. Component test with the CDS
CHP-numbers for connectors CLAAS HARNESS PARTS.pdf:
CLAAS HARNESS PARTS
Table of contents
10 Electrical / Electronic equipment
1081 Overview of connectors
CLAAS HARNESS PARTS (CHP)
John Deere Repair Technical Manual PDF
John Deere Diesel Engines POWERTECH 2.9 L Component Technical Manual CTM126 Spanish
New Holland Service Manual PDF
John Deere Repair Technical Manual PDF
John Deere Transmission Control Unit Component Technical Manual CTM157 15JUL05
John Deere Repair Technical Manual PDF
John Deere Repair Technical Manual PDF
John Deere Repair Technical Manual PDF
John Deere Repair Technical Manual PDF
John Deere Repair Technical Manual PDF
John Deere PowerTech M 10.5 L and 12.5 L Diesel Engines COMPONENT TECHNICAL MANUAL CTM100 10MAY11
John Deere Repair Technical Manual PDF
John Deere POWERTECH E 4.5 and 6.8 L Diesel Engines TECHNICAL MANUAL 25JAN08
John Deere Repair Technical Manual PDF

