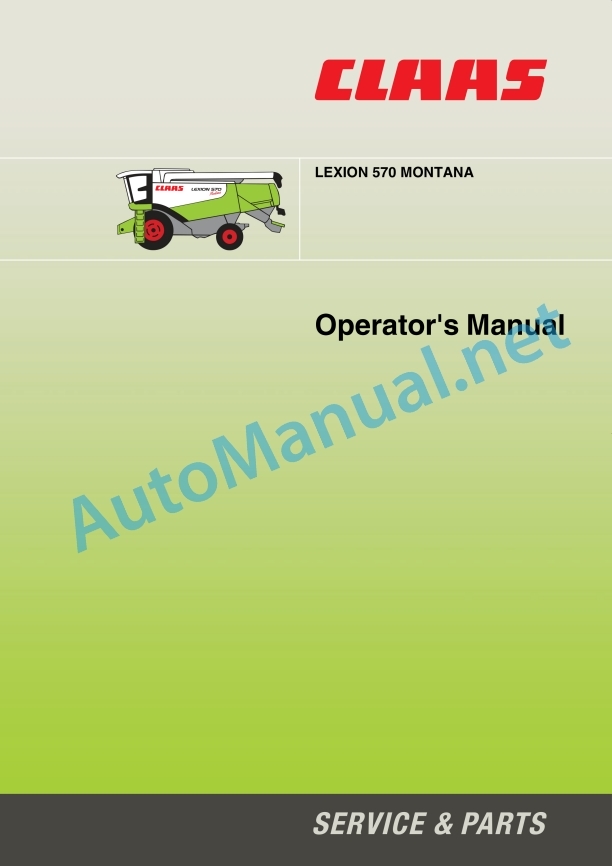
Claas Lexion 570 Montana (581) Combines Operator Manual EN
$50.00
- Model: Lexion 570 Montana (581) Combines
- Type Of Manual: Operator Manual
- Language: EN
- Format: PDF(s)
- Size: 378 MB
File List:
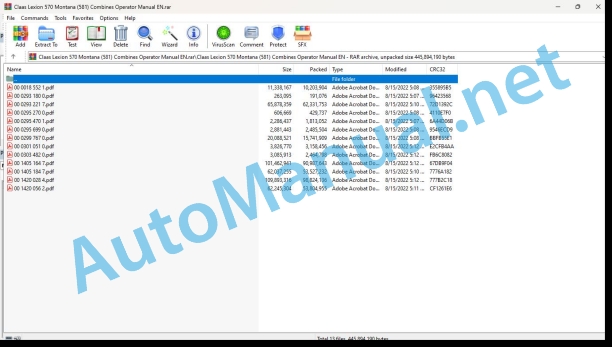
00 0018 552 1.pdf
00 0293 180 0.pdf
00 0293 221 7.pdf
00 0295 270 0.pdf
00 0295 470 1.pdf
00 0295 699 0.pdf
00 0299 767 0.pdf
00 0301 051 0.pdf
00 0303 482 0.pdf
00 1405 164 7.pdf
00 1405 184 7.pdf
00 1420 028 4.pdf
00 1420 056 2.pdf
00 0018 552 1.pdf:
TELEMATICS Website
Table of contents
1 About this Concise Operator’s Manual
1.1 Notes on the manual
1.1.1 Validity of manual
1.1.2 Notes regarding the Concise Operator’s Manual
1.1.3 Notes on warranty
2 Safety
2.1 Intended use
2.1.1 Proper use
3 Product description
3.1 Overview and method of operation
3.1.1 TELEMATICS product variants
3.1.2 TONI (TELEMATICS on implements)
3.1.3 Fleet View
3.1.4 TELEMATICS basic
3.1.5 TELEMATICS advanced
3.1.6 TELEMATICS professional
3.1.7 TELEMATICS app
4 Operating and control elements
4.1 TELEMATICS overview
4.1.1 Illustration conventions of buttons and navigation elements
4.1.2 Symbols and colours
4.2 Menu structure
4.2.1 Start screen
4.2.2 TELEMATICS website site map
4.2.3 Main menu overview
4.2.4
4.2.5
4.2.6
00 0293 180 0.pdf:
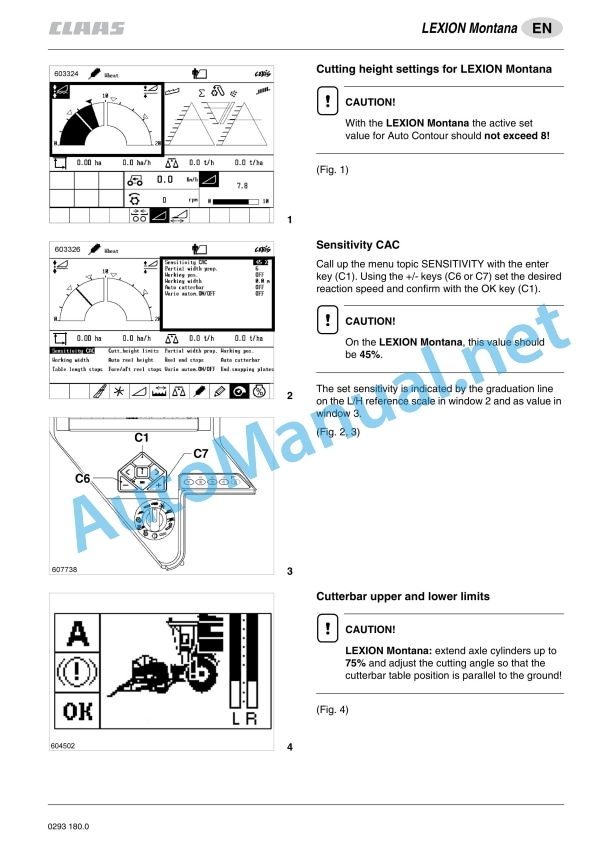
Cutting height settings for LEXION Montana
Sensitivity CAC
Cutterbar upper and lower limits
Adjusting the drop rate of the front attachment
Front attachment floatation springs
00 0293 221 7.pdf:
1 Introduction
1.1 General Information
1.1.1 How to use this manual
1.1.2 Validity of instructions
2 General Information
2.1 Road traffic
2.2 Important notice
2.3 Identification plate / Serial number
2.3.1 Identification plate / Serial number
2.3.2 Identification plate
2.3.3 Machine serial number
2.3.4 Engine serial number
2.3.5 Straw chopper identification plate
2.3.6 Cab serial number
2.4 Attachment parts / machine body
2.4.1 Access to the workplace and maintenance areas
3 Safety Rules
3.1 Safety rules
3.1.1 General information
3.1.2 Identification of warning and danger signs
3.1.3 Intended use
3.1.4 Reasonable foreseeable misuse
3.1.5 General safety and accident prevention regulations
3.1.6 Transporting passengers, instructor, operating personnel
3.1.7 Driving operations
3.1.8 Automotive operation of combine harvester
3.1.9 Leaving the combine harvester
3.1.10 Front attachments (cutterbar etc.) and other components
3.1.11 Air conditioner
3.1.12 Maintenance
3.1.13 Basic rule
3.1.14 Accumulators
3.1.15 Levelling mechanism
3.1.16 Decommissioning and disposal
3.1.17 Cylinder safety lock
3.1.18 Fire extinguisher
3.1.19 Battery isolating switch
3.1.20 Wheel chocks
3.1.21 Jack up the machine
3.1.22 Loading and tying down the machine
3.1.23 Hydraulic system
3.1.24 Danger of injury due to escaping hydraulic liquid
3.1.25 Accumulators
3.1.26 Relieving the concave adjustment accumulator
3.2 Safety decals with pictorials
3.2.1 General instructions for warning signs
3.2.2 Safety decals
4 Specifications
4.1 CLAAS LEXION 570 Montana
4.1.1 Cab / Operator’s platform
4.1.2 Cutterbar
4.1.3 Threshing mechanism
4.1.4 Separation
4.1.5 Cleaning (Standard cleaning system)
4.1.6 Cleaning (JET STREAM cleaning system)
4.1.7 Grain delivery
4.1.8 Engine
4.1.9 Chassis
4.1.10 Tyres and tyre pressures
4.1.11 Torque settings of wheel bolts
4.1.12 Track width
4.1.13 Transport position / Working position
4.1.14 Weights
4.1.15 Safety features
5 Prior to operation
5.1 General Information
5.1.1 Initial operation check list
5.1.2 Loading and tying down the machine
5.2.1 Cab with automatic air conditioner
5.2.2 Automatic air conditioner
5.2.3 Putting the automatic air conditioner into operation
5.2.4 Setting the cab temperature
5.2.5 Manually setting the evaporator blower speed
5.2.6 Activating ECON operating mode
5.2.7 Deactivating ECON operating mode
5.2.8 REHEAT operation (Dehumidify cab windows)
5.2.9 Displaying the outside temperature
5.2.10 Changing the temperature display to _x001E_Fahrenheit
5.2.11 Floor heating
5.2.12 Display of malfunction – Error in thermometer F0 (cab, blue)
5.2.13 Display of malfunction – Error in thermometer F1 (exhaust, yellow)
5.2.14 Display of malfunction – Error in thermometer F2 (outside, red)
5.2.15 Cab with air conditioner (Standard version)
5.2.16 Putting the air conditioning system into operation
5.2.17 Heater
5.2.18 Floor heating
5.2.19 REHEAT operation (Dehumidify cab windows)
5.2.20 Problem, possible cause or remedy – air conditioner system
5.2.21 Cooling box
5.2.22 Cooling unit (option)
5.2.23 Cooling bag (option)
5.2.24 Ice bucket (option)
5.2.25 Windscreen washer
5.2.26 Crop inspection
5.2.27 Opening and closing the cab roof
5.2.28 Cab emergency exit
5.2.29 Operators platform overvie2.30 Control console
5.2.31 Screen (vehicle information display)
5.2.32 Screen (harvest display)
5.2.33 Keys C / Rotary switch D
5.2.34 Integrated Montana control system
5.2.35 Integrated Montana control in the switch console
5.2.36 Checking Montana functions
5.2.37 Manually checking Montana functions
5.2.38 Activating the integrated Montana control
5.2.39 Fully lowering the machine prior to road travel
5.2.40 Parking the machine
5.2.41 Switching the front attachment automatic system on / off
5.2.42 Manual axle control
5.2.43 Moving the machine to neutral position
5.2.44 Manual front attachment control
5.2.45 Correcting / saving the front attachment cutting angle and the front attachment lateral levelling (Montana) in automatic mode
5.2.46 Ignition switch
5.2.47 Multifunction switch
5.2.48 Vehicle information unit
5.2.49 Multifunction handle
5.2.50 Steering column justment
5.2.51 Steering wheel height adjustment
5.2.52 Central terminal compartment
5.2.53 Contents – Central terminal compartment (up to serial no. …)
5.2.54 Fuses (up to serial no. …)
5.2.55 Relays (up to serial no. …)
5.2.56 Contents – Central terminal compartment (from serial no. …)
5.2.57 Fuses (from serial no. …)
5.2.58 Relays (from serial no. …)
5.2.59 Operators seat
5.2.60 Operator’s seat, mechanical
5.2.61 Air-suspended driver’s seat
5.3 Lighting and socket outlets
5.3.1 Headlights, working lights, mirrors
5.3.2 Sidefinder (option)
5.3.3 Pathfinder lighting
5.3.4 Side position lights in case of excess width
5.3.5 Socket outlet 12 V
5.3.6 CDS 5000 diagnosis connection socket outlet
5.4 Access ladder
5.4.1 Access and ladder extension
5.4.2 Pre-assembling the front ladder (from serial no. …)
5.4.3 Installing the front ladder
5.4.4 Folding the ladder steps
5.4.5 Rotating the front ladder
5.6 Rear ladder
5.5 Side panels
5.5.1 Opening and closinge panels and the tailgate
5.5.2 Opening the tailgate
5.5.3 Adjusting the gripping height of the side panels
5.5.4 Adjusting the side panel lock
5.5.5 Tool cabinet
5.6 Mud guards / Side panels / Hitch block / Transport trailer
5.6.1 Installing the mudguards
5.6.2 Fitting the hitch block
5.6.3 Converting the transport trailer to suit the machine
5.7 Rear axles (Standard cleaning system)
5.7.1 Rear axle overview
5.7.2 Rear drive axle 000 694 642 3
5.7.3 Rear axle 000 769 640 4
5.7.4 Converting the rear drive axle 000 694 642 3 from transport to working position
5.7.5 Rear drive axle 000 694 642 3 – Adjusting the track width
5.7.6 Converting the rear axle 000 769 640 4 from transport to working position
5.7.7 Rear axle 000 769 640 4 – Adjusting the track width
5.8 Rear axles (JET STREAM cleaning system)
5.8.1 Rear axle overview
5.8.2 Rear drive axle 000 694 895 1
5.8.3 Rear axle 000 769 105 0
5.8.4 Converting the rear drive axle 000 694 895 1 from transport to working position
5.8.5 Converting the rear axle 000 769 105 0 from transport to working position
5.9 Additional rear axle weights
5.9.1 Additional rear axle weights LEXION 570 Montana
5.9.2 Liquid filling of rear axle tyres
5.10 Cutterbar hydraulic cylinders
5.10.1 Cutterbar hydraulic cylinder with springs
5.10.2 Number of cutterbar cylinders (LEXION 570 Montana)
5.10.3 Installing the cutterbar floatation springs hydraulic cylinder
5.11 Grain tank
5.11.1 Closing the grain tank drain holes
5.12 Driving the combine with mechanical control
5.12.1 Checking indicator lights
5.12.2 Driving machine
5.12.3 Ground speed control lever variants
5.12.4 Engine speed rotary switch
5.12.5 Medium engine idle speed
5.12.6 Starting the engine
5.12.7 Forward travel / reverse travel
5.12.8 Gear selection
5.12.9 Setting the ground speed control lever to move easily
5.12.10 Setting the ground speed control lever to move easily
5.12.11 Hydrostatic ground drive
5.12.12 Stopping
5.12.13 Machine driving characteristics
5.12.14 Handling with cutterbar trailer
5.12.15 Steering
5.12.16 Coupling / decoupling brake pedals of the foot brake
5.12.17 Applying / releasing the parking brake
5.12.18 Releasing the parking brake mechanically
5.12.19 Checking the wheel chocks / brake shoes
5.12.20 Manoeuvring the machine
5.12.21 Stopping the engine
5.12.22 Parking the machine
5.12.23 Engaging / disengaging the CLAAS 4-Trac system
5.12.24 Towing the machine
5.12.25 Gear shift mechanism – emergency operation
5.12.26 Differential lock
5.13 CLAAS Autopilot (Maize picker)
5.13.1 Putting the CLAAS Autopilot into operation
5.14 CLAAS Autopilot (Grain cutterbar)
5.14.1 Adjusting the directional stability of the combine harvester
5.14.2 Setting the laser sensor in the field
5.14.3 Rough adjustment
5.14.4 Fine adjustment
5.14.5 Laser sensor (crop edge has moved out of visible range)
5.14.6 Adjusting the right laser sensor (accessory)
5.14.7 Putting the CLAAS Autopilot into operation
5.14.8 Use in rape with left side cutter
5.15 Information about hitching / unhitching trailers
5.15.1 General information
5.15.2 General safety instructions
5.15.3 Hitching the trailer
5.15.4 Unhitching the trailer
6 Installing and removing the cutterbar
6.1 Installing the cutterbar
6.1.1 Tilting the cutterbar from transport position
6.1.2 Adjusting the cutterbar cross levelling hydraulic cylinder (up to serial no. …)
6.1.3 Adjusting the cutterbar cross levelling hydraulic cylinder (from serial no. …)
6.1.4 Attaching the front attachment
6.1.5 Locking cutterbars and maize pickers (Cutterbars without Auto Contour)
6.1.6 Connecting the universal drive shaft
6.1.7 Mounting the stands
6.2 Removing the cutterbar
6.2.1 Removing the universal coupling
6.2.2 Removing the universal drive shaft
6.2.3 Opening the cutterbar locking
6.2.4 Laying down the cutterbar on the ground
6.2.5 Placing the cutterbar on the cutterbar trailer
7 CEBIS operation (Version 8.23)
7.1 CLAAS CEBIS on-board information system
7.2 CEBIS monitor and rotary switch
7.2.1 C keys
7.2.2 Rotary switch D
7.2.3 Flagging Box
7.2.4 Multifunction handle
7.2.5 Monitor areas E (Harvest display)
7.3 Rotary switch D
7.4 Prior to initial operation
7.5 Vehicle information display
7.6 Harvest display
7.7 Montana control system
7.7.1 Axle control mode
7.7.2 Cutting angle control
7.7.3 Lateral levelling control
7.7.4 Montana axle end stops
7.7.5 Cutting angle limits
7.7.6 Lateral levelling limits
7.7.7 Display period
7.8 CLAAS CRUISE PILOT
7.8.1 Maximum ground speed
7.8.2 Zero throughput
7.9 Yield mapping
7.10 Flagging
7.11 GPS
7.11.1 Mapping ON/OFF
7.11.2 Mapping monitor
7.11.3 Load GPS data
7.12 Preset reel values
7.12.1 Horizontal reel position
7.12.2 Reel speed
7.12.3 Reel height
7.13 Preset front attachment values
7.13.1 Snapping plate clearance
7.13.2 Cutterbar table length
7.13.3 CAC settings
7.13.4 CAC setting for LEXION Montana
7.14 Partial width selection
7.15 Yield meter
7.15.1 Components
7.15.2 Basic settings and calibration
7.15.3 Preparations for yield measuring
7.15.4 Moisture measurement ON/OFF, Moisture correction, Storage moisture
7.15.5 A quick way to obtain reasonable measuring data
7.16 Yield measuring
7.16.1 Calibration factor
7.16.2 Yield zero point measuring
7.16.3 Test-weighing
7.16.4 Weight measured
7.16.5 Moisture correction
7.16.6 Moisture measurement ON/OFF
7.16.7 Zero angle
7.16.8 Storage moisture
7.16.9 Display dry yield
7.17 Crop-dependent settings
7.17.1 List of crops
7.17.2 Cleaning by blowing
7.18 Recording
7.18.1 Planned records
7.18.2 Start / Stop
7.18.3 Completed records
7.18.4 Daily recorder
7.18.5 Total recorder
7.18.6 Crop recorder
7.18.7 Copying the chip card
7.19 Adjustments
7.19.1 Cutterbar
7.19.2 Speeds
7.19.3 Tachometer
7.19.4 Separation
7.19.5 CEBIS
7.19.6 Maintenance
7.19.7 Operator’s manual
7.19.8 Code protection
7.20 Engine loading
7.20.1 Engine diagnosis
7.21 Alarms
7.22 Messages
7.23 Fault / Remedy – Yield meter
7.24 Guideline values for pulses/100 m
8 Operation – Basic machine
8.1 Feed rake conveyor
8.1.1 Feeder chain height adjustment (up to serial no. …)
8.1.2 Feeder chain height adjustment (from serial no. …)
8.1.3 Feeder chain safety feature
8.1.4 Drum inspection cover
8.1.5 Front attachment reverser
8.1.6 Checking the setting of the cutterbar floatation springs
8.1.7 Cutting height indicator
8.1.8 Spring pressure indicator
8.1.9 Blocking the front attachment floatation springs (Mechanical blocking)
8.1.10 Unlocking the front attachment floatation springs (Mechanical blocking)
8.1.11 Setting the drop rate of the front attachment
8.1.12 Engaging the front attachment (switch console, up to serial no. …)
8.1.13 Engaging the front attachment (switch console, from serial no. …)
8.1.14 Disengaging the front attachment (switch console)
8.1.15 Disengaging the front attachment (multifunction handle)
8.2 Threshing mechanism
8.2.1 Stone trap (large stone trap)
8.2.2 Engaging the threshing mechanism
8.2.3 Disengaging the threshing mechanism
8.2.4 Threshing drum
8.2.5 Cleaning the threshing mechanism
8.2.6 Concave setting
8.2.7 Central concave readjustment
8.2.8 Readjusting the left concave
8.2.9 Adjusting the oil pressure of the concave adjustment accumulators
8.2.10 Basic concave setting
8.2.11 Designations and dimensions for grain concave / maize concave
8.2.12 Adjusting the concave position sensor
8.2.13 Threshing drum speed
8.2.14 Drum drives
8.2.15 Two-step variable-speed drive
8.2.16 Removing and installing the preconcave segments (large stone trap)
8.2.17 Concave segment
8.2.18 Removing a concave segment (large stone trap)
8.2.19 Installing the concave segment (large stone trap)
8.2.20 Disawner plates
8.2.21 Unslugging the threshing drum
8.3 Universal rotor
8.3.1 Axial rotors
8.3.2 Axial rotors variable-speed drive (option)
8.3.3 Axial rotors step drive
8.3.4 Universal rotors speed table
8.3.5 Closing the separating grates
8.3.6 Replacing separating grates by dummy concaves (option)
8.3.7 Closing the separating grates electrically with flaps (option)
8.3.8 Removing and installing the dummy concaves / separating grates
8.3.9 Removing the dummy concaves / separating grates
8.3.10 Installing the dummy concaves / separating grates
8.3.11 Axial rotor straw blockage warning signal
8.3.12 Rotors performance monitor
8.3.13 Rotor sensors
8.4 Cleaning (Standard cleaning system)
8.4.1 Cleaning unit
8.4.2 Preparation floor
8.4.3 Frogmouth sieves
8.4.4 Electric sieve adjustment
8.4.5 Removing the sieves
8.4.6 Installing the sieves
8.4.7 Tightening torques of axial mountings for the upper and lower sieves
8.4.8 Sieves – Basic adjustment
8.4.9 Harvesting without lower sieves
8.4.10 Covering the returns pan
8.4.11 Cleaning fan
8.4.12 Adjusting the fan speed adjustment
8.4.13 Under-ventilated cleaning step
8.4.14 Adjusting the pre-separation deflector
8.4.15 Wind board
8.4.16 Fan shutters for threshing grass seed and similar crops (accessory)
8.4.17 3-D cleaning system
8.4.18 Returns
8.4.19 Inspecting the returns
8.4.20 Upper sieve performance monitor
8.4.21 Sieve pan sensor
8.5 Cleaning (JET STREAM cleaning system)
8.5.1 Cleaning unit
8.5.2 Preparation floor
8.5.3 Frogmouth sieves
8.5.4 Electric sieve adjustment
8.5.5 Removing the sieves
8.5.6 Installing the sieves
8.5.7 Tightening torques of axial mountings for the upper and lower sieves
8.5.8 Sieves – Basic adjustment
8.5.9 Harvesting without lower sieves
8.5.10 Covering up the return pan (accessory for maize)
8.5.11 Cleaning fan
8.5.12 Adjusting the fan speed adjustment
8.5.13 Fitting the fan speed adjustment for grass seed threshing
8.5.14 Under-ventilated cleaning step
8.5.15 3-D cleaning system
8.5.16 Returns
8.5.17 Inspecting the returns
8.5.18 Upper sieve performance monitor
8.5.19 Sieve pan sensor
8.6 Grain delivery
8.6.1 Augers and auger troughs
8.6.2 Elevators
8.6.3 Grain tank
8.6.4 Grain tank extension
8.6.5 Unloading the grain tank
8.6.6 Emergency unloading grain tank cover
8.6.7 Grain tank unloading aid (accessory)
8.6.8 Grain tank unloading tube
8.6.9 Swinging the grain tank unloading tube out and in
8.6.10 Grain tank unloading tube transport position
8.6.11 Cleaning covers on the grain tank unloading tube
8.6.12 Shear bolt for grain tank unloading
8.6.13 Engaging and disengaging grain tank unloading
8.6.14 Grain tank access
8.6.15 Automatic chain lubrication – grain tank unloading (accessory)
8.6.16 Grain tank fill indicator
8.7 Straw chopper with radial spreader
8.7.1 Straw chopper
8.7.2 Checks prior to putting the straw chopper with radial spreader into operation
8.7.3 Putting the straw chopper into operation (swinging the radial spreader to chopping position)
8.7.4 Putting the straw chopper out of operation (swinging the radial spreader to swathing position)
8.7.5 Swinging the radial spreader to cutterbar trailer transport position
8.7.6 Adjusting the cross knife (straw chopper with radial spreader)
8.7.7 Adjusting the length of cut (straw chopper with radial spreader)
8.7.8 Activating the rasp bar (accessory) (straw chopper with radial spreader)
8.7.9 Adjusting the spreading width of radial spreader
8.7.10 Adjusting the spreading width centralising switch of radial spreader
8.7.11 Converting the radial spreader (spreader disc) to grain
8.7.12 Converting the radial spreader (spreader disc) to maize
8.7.13 Reducing the chopper speed
8.8 Straw chopper with standard spreader
8.8.1 Straw chopper
8.8.2 Checks prior to putting the straw chopper with standard spreader into operation
8.8.3 Straw chopper with standard spreader
8.8.4 Putting the straw chopper into operation (swinging the standard spreader to chopping position)
8.8.5 Putting the straw chopper out of operation (swinging the standard spreader to swathing position)
8.8.6 Swinging the standard spreader to cutterbar trailer transport position
8.8.7 Adjusting the cross knife (straw chopper with standard spreader)
8.8.8 Adjusting the length of cut (straw chopper with standard spreader)
8.8.9 Activating the rasp bar (accessory) (straw chopper with standard spreader)
8.8.10 Adjusting the standard spreader spreading width (up to serial no. …)
8.8.11 Adjusting the standard spreader spreading width (from serial no. …)
8.8.12 Adjusting the height of standard spreader
8.8.13 Adjusting the spreading width centralising switch of standard spreader
8.8.14 Reducing the chopper speed
8.9 Chaff spreader (up to serial no. …)
8.9.1 Chaff spreader (up to serial no. …)
8.9.2 Adjusting the spreading width of chaff spreader
8.9.3 Folding the chaff spreader open
8.9.4 Folding in the chaff spreader (working position)
8.10 Chaff spreader (from serial no. …)
8.10.1 Chaff spreader (from serial no. …)
8.10.2 Adjusting the spreading width of chaff spreader
8.10.3 Swinging the chaff spreader to the rear
8.10.4 Swinging the chaff spreader to the front
8.10.5 Removing the chaff spreader feed pan
8.10.6 Installing the chaff spreader feed pan
8.10.7 Grain / maize chaff spreader
8.11 Uni-spreader
8.11.1 Uni-spreader
8.11.2 Swinging the uni-spreader to the rear
8.11.3 Swinging the uni-spreader to the front
8.11.4 Removing the uni-spreader feed pan
8.11.5 Installing the uni-spreader feed pan
8.11.6 Converting the uni-spreader to grain
8.11.7 Converting the uni-spreader to maize
8.12 Straw spreader
8.12.1 Straw spreader
8.12.2 Adjusting the spreading width
8.12.3 Fitting the spreader blades
8.13 LEXION 570 / 570 Montana sieve charts and suggested combine adjustments (standard cleaning system)
8.13.1 LEXION 570 / 570 Montana sieve chart (standard cleaning system)
8.13.2 LEXION 570 / 570 Montana suggested combine adjustments (standard cleaning system)
8.14 LEXION 570 / 570 C / 570 Montana sieve charts and suggested combine adjustments (JET STREAM cleaning system)
8.14.1 LEXION 570 / 570 C / 570 Montana sieve charts (JET STREAM cleaning system)
8.14.2 LEXION 570 / 570 C / 570 Montana suggested combine adjustments (JET STREAM cleaning system)
8.15 Disawning
8.15.1 Disawner plates
8.15.2 Concave segment
8.15.3 Rotor cover plates
8.16 Problem, cause and / or remedy – Basic machine
8.16.1 Front attachment
8.16.2 Montana functions
8.16.3 Threshing mechanism
8.16.4 Cleaning unit
8.16.5 Grain delivery
8.16.6 Straw / Putting down the material
9 Maintenance – Basic machine
9.1 Important maintenance instructions
9.1.1 Important maintenance instructions and safety rules
9.1.2 Front attachment
9.1.3 Correct tension of steel roller chains
9.1.4 Belts
9.1.5 Variable-speed drives
9.1.6 Bolts
9.1.7 Lubrication
9.1.8 Brakes
9.1.9 Wheels / tyres
9.1.10 Hydraulic system
9.1.11 Cleanliness of lubricants
9.1.12 Electrical system
9.1.13 Air conditioner
9.1.14 Safety guards / spare parts
9.1.15 Unbalance
9.1.16 Welding work (up to serial no. …)
9.1.17 Welding work (from serial no. …)
9.2 Maintenance schedules
9.2.1 Basic machine maintenance schedule
9.3 Lubricants charts
9.3.1 Lubricants
9.4 Hydraulic system
9.4.1 Accumulators
9.4.2 Checking the oil level
9.4.3 Hydraulic oil change
9.4.4 Changing the hydraulic oil filter
9.4.5 Saturation of hydraulic oil filter (from serial no. …)
9.4.6 Replacing the return filter (up to serial no. …)
9.4.7 Replacing the return filter (from serial no. … up to serial no. …)
9.4.8 Replacing the return filter (from serial no. …)
9.4.9 Filling instructions when replacing the hydraulic oil (Sauer 90 R 130 / 90 M 100)
9.4.10 Bleeding the cutterbar cross-levelling hydraulic cylinder (machines with Auto Contour) (up to serial no. …)
9.4.11 Bleeding the cutterbar cross-levelling hydraulic cylinder (machines with Auto Contour) (from serial no. …)
9.5 Transmission
9.5.1 2-speed gearbox
9.5.2 Differential and axle carrier
9.5.3 Wheel rockers
9.5.4 Final drive gearbox (planetary gear)
9.5.5 Threshing drum reduction gearbox
9.5.6 Engine output transfer gearbox
9.5.7 Grain tank unloading gearbox
9.5.8 Rotor gearbox (up to serial no. …)
9.5.9 Rotor gearbox (from serial no. …)
9.5.10 Lubricating instructions for the wheel rocker ball race slewing rings
9.6 Feed rake conveyor
9.6.1 Tensioning the feeder chains (up to serial no. …)
9.6.2 Tensioning the feeder chains (from serial no. …)
9.6.3 Adjusting the front attachment cutting angle linkage
9.6.4 Adjusting the front attachment lateral levelling linkage (Montana) (from serial no. …)
9.6.5 Cleaning the suction blower (accessory)
9.7 Drive axle
9.7.1 Adjusting the linkage for wheel rockers
9.8 Separation
9.8.1 Cleaning the separating grates flaps linkage
9.9 Elevator chains
9.9.1 Tensioning the grain elevator chain (machine without yield meter)
9.9.2 Tensioning the grain elevator chain (machine with yield meter / without cock)
9.9.3 Tensioning the grain elevator chain (machine with yield meter / with cock)
9.9.4 Relieving the tension of the grain elevator chain (machine with yield meter)
9.9.5 Tensioning the returns elevator chain
9.10 Drive belts / drive chains
9.10.1 General Information
9.10.2 Drive diagram, left (LEXION 570 Montana with standard cleaning system)
9.10.3 Drive diagram, right (LEXION 570 Montana with standard cleaning system)
9.10.4 Drive diagram, left (LEXION 570 Montana with JET STREAM cleaning system)
9.10.5 Drive diagram, right (LEXION 570 Montana with JET STREAM cleaning system)
9.10.6 Removing the belt (1)
9.10.7 Installing the belt (1)
9.10.8 Removing the belt (2)
9.10.9 Installing the belt (2)
9.10.10 Removing the belt (3)
9.10.11 Installing the belt (3)
9.10.12 Removing the belt (4)
9.10.13 Installing the belt (4)
9.10.14 Removing the belt (5)
9.10.15 Installing the belt (5)
9.10.16 Removing belt (6) (without torque support)
9.10.17 Installing belt (6) (without torque support)
9.10.18 Removing belt (6) (with torque support)
9.10.19 Installing belt (6) (with torque support)
9.10.20 Removing the belt (7)
9.10.21 Installing the belt (7)
9.10.22 Removing the belt (8)
9.10.23 Installing the belt (8)
9.10.24 Removing the belt (9)
9.10.25 Installing the belt (9)
9.10.26 Removing the belt (10)
9.10.27 Installing the belt (10)
9.10.28 Removing the chain (11)
9.10.29 Installing the chain (11)
9.10.30 Removing the belt (12)
9.10.31 Installing the belt (12)
9.10.32 Removing the belt (13)
9.10.33 Installing the belt (13)
9.10.34 Removing the belt (14)
9.10.35 Installing the belt (14)
9.10.36 Removing the belt (15)
9.10.37 Installing the belt (15)
9.10.38 Removing the belt (16)
9.10.39 Installing the belt (16)
9.10.40 Removing the belt (17)
9.10.41 Installing the belt (17)
9.10.42 Removing the belt (18)
9.10.43 Installing the belt (18)
9.10.44 Removing the belt (19)
9.10.45 Installing the belt (19)
9.10.46 Removing the belt (20)
9.10.47 Installing the belt (20)
9.10.48 Removing belt (21) (up to serial no. …)
9.10.49 Installing belt (21) (up to serial no. …)
9.10.50 Removing the belt (21) (from serial no. …)
9.10.51 Installing belt (21) (from serial no. …)
9.10.52 Removing the belt (23)
9.10.53 Installing the belt (23)
9.10.54 Removing the belt (24)
9.10.55 Installing the belt (24)
9.10.56 Removing the belt (25)
9.10.57 Installing the belt (25)
9.10.58 Removing the belt (40)
9.10.59 Installing the belt (40)
9.10.60 Removing the belt (41)
9.10.61 Installing the belt (41)
9.10.62 Removing the belt (42)
9.10.63 Installing the belt (42)
9.10.64 Removing the belt (46)
9.10.65 Installing the belt (46)
9.10.66 Removing belt (R47)
9.10.67 Installing belt (R47)
9.10.68 Adjusting belt (R47)
9.10.69 Removing the belt (48)
9.10.70 Installing the belt (48)
9.10.71 Removing the belt (49)
9.10.72 Installing the belt (49)
9.10.73 Removing the belt (50)
9.10.74 Installing the belt (50)
9.10.75 Removing the belt (51)
9.10.76 Installing the belt (51)
9.10.77 Removing the belt (52)
9.10.78 Installing the belt (52)
9.10.79 Removing the belt (53)
9.10.80 Installing the belt (53)
9.10.81 Removing the belt (54)
9.10.82 Installing the belt (54)
9.10.83 Removing the chain (55)
9.10.84 Installing the chain (55)
9.10.85 Removing the chain (56)
9.10.86 Installing the chain (56)
9.10.87 Removing the belt (57)
9.10.88 Installing the belt (57)
9.10.89 Removing and installing belt (58)
9.11 Cab / air conditioner
9.11.1 Cleaning the cab filters
9.11.2 Cleaning the units located in the cab roof
9.11.3 Cleaning the windscreen and the side windows
9.11.4 Cleaning the condenser
9.11.5 Checking the refrigerant level
9.11.6 Replacing the filter receiver drier
9.11.7 Required refrigerant quantity – refrigerant R 134 a
9.11.8 Oil for the compressor
9.11.9 Maintenance work before the harvest
9.12 Fire extinguisher
9.12.1 Checking the fire extinguisher
9.13 Compressed-air system (accessory)
9.13.1 Compressed-air system
9.13.2 Compressed-air connections
9.13.3 Compressed-air gun and woven hose
9.13.4 Draining the accumulator
9.13.5 Pressure controller
9.13.6 Checking the safety valve
9.14 Straw chopper (LEXION 570 Montana)
9.14.1 Replacing the free-swinging knives for grain
9.14.2 Removing the straw guide plate (straw chopper with radial spreader)
9.14.3 Installing the straw guide plate (straw chopper with radial spreader)
9.14.4 Removing the straw guide plate (straw chopper with standard spreader)
9.14.5 Installing the straw guide plate (straw chopper with standard spreader)
9.14.6 Removing the free-swinging knives for grain
9.14.7 Bolting down the free-swinging knives for grain
9.14.8 Replacing the stationary knives
9.15 Winter storage
9.15.1 Winter storage instructions for combines
10 Maintenance – Engine
10.1 Important maintenance instructions
10.1.1 Important maintenance instructions and safety rules
10.1.2 Cooling water and air intake hoses
10.1.3 Coolant
10.1.4 Belts
10.1.5 Cleaning the engine compartment and hazard areas
10.1.6 Alternator
10.1.7 Warranty on non genuine CATERPILLAR products
10.1.8 Approved engine oils
10.1.9 Engine oils with dry lubricant additives
10.2 Maintenance schedules
10.2.1 CATERPILLAR C-12 maintenance schedule
10.2.2 Maintenance schedule CATERPILLAR C-13
10.3 Lubricants charts
10.3.1 Engine lubricants chart CATERPILLAR C13, C12
10.3.2 Cooling system lubricants chart CATERPILLAR C13, C12
10.4 Engine overview
10.4.1 Engine overview CATERPILLAR C-13
10.4.2 Engine overview CATERPILLAR C-12
10.5 Fuel system / engine oil
10.5.1 Fuel system
10.5.2 Fuel tank
10.5.3 Fuel tank breather (from serial no. …)
10.5.4 Fuel shut-off tap
10.5.5 Water separator / fuel prefilter (standard equipment – small version)
10.5.6 Water sepa
John Deere Repair Technical Manual PDF
John Deere Repair Technical Manual PDF
John Deere Diesel Engines PowerTech 4.5L and 6.8L – Motor Base Technical Manual 07MAY08 Portuguese
John Deere Repair Technical Manual PDF
John Deere 18-Speed PST Repair Manual Component Technical Manual CTM168 10DEC07
John Deere Repair Technical Manual PDF
John Deere Parts Catalog PDF
John Deere Tractors 7500 Parts Catalog CPCQ26568 30 Jan 02 Portuguese
John Deere Repair Technical Manual PDF
John Deere Repair Technical Manual PDF
John Deere Transmission Control Unit Component Technical Manual CTM157 15JUL05
John Deere Repair Technical Manual PDF
John Deere POWERTECH E 4.5 and 6.8 L Diesel Engines TECHNICAL MANUAL 25JAN08
John Deere Repair Technical Manual PDF
John Deere PowerTech M 10.5 L and 12.5 L Diesel Engines COMPONENT TECHNICAL MANUAL CTM100 10MAY11

