Claas Swath Up 450 Swath Up 450 Na (444) Combines Operator Manual EN
$50.00
- Model: Swath Up 450 Swath Up 450 Na (444) Combines
- Type Of Manual: Operator Manual
- Language: EN
- Format: PDF(s)
- Size: 20.5 MB
File List:
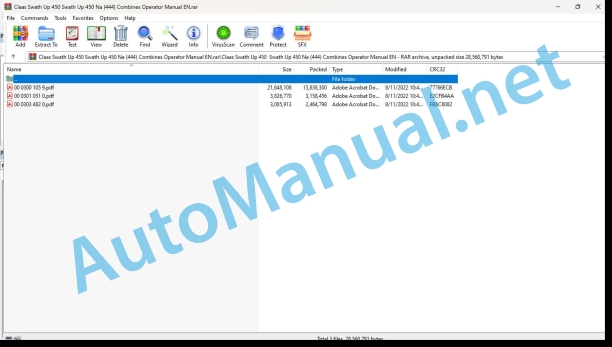
00 0300 105 9.pdf
00 0301 051 0.pdf
00 0303 482 0.pdf
00 0300 105 9.pdf:
SWATH UP 450
Table of contents
1 Introduction
1.1 General Information
1.1.1 Manual validity
1.1.2 Information about this Operator’s Manual
1.1.3 Symbols and notes
1.1.4 Optional equipment
1.1.5 CLAAS dealer
1.1.6 Maintenance information
1.1.7 Information about the warranty
1.1.8 Spare parts and technical questions
1.2 Intended use
1.2.1 Intended use
1.2.2 Reasonably foreseeable improper use
2 Safety
2.1 Recognizing safety messages
2.1.1 Safety alert symbol
2.1.2 Signal word
2.2 Safety instructions for use
2.2.1 Meaning of the operator’s manual
2.2.2 Observing safety signs and safety messages
2.2.3 Requirements of all people that work with the machine
2.2.4 Hazard areas
2.2.5 Stopping or standing between machine and header
2.2.6 Passengers
2.2.7 Hitching machine with header or trailer
2.2.8 Injury hazard from rotating shafts
2.2.9 Design changes
2.2.10 Optional equipment and replacement parts
2.2.11 Operation only after proper placement of the machine into service
2.2.12 Technical condition
2.2.13 Hazard from damage to the machine
2.2.14 Keeping safety equipment operational
2.2.15 Personal protective gear
2.2.16 Wearing suitable clothing
2.2.17 Removing dirt and loose items
2.2.18 Preparing machine for road travel
2.2.19 Unsuitable operating fluids
2.2.20 Safe handling of operating fluids and auxiliary materials
2.2.21 Environmental protection and disposal
2.2.22 Electric shock from the electrical system
2.2.23 Pressurized fluids
2.2.24 Only work on the machine while it is stopped
2.2.25 Maintenance and repair work
2.2.26 Raised machine parts and loads
2.2.27 Danger from welding work
2.3 Safety decals
2.3.1 Installing safety signs
2.3.2 Safety sign locations
2.3.3 Interpreting safety signs
3 Machine description
3.1 Overview and functionality
3.1.1 SWATH UP 450 overview
3.1.2 Storing the operators manual
3.2 Options
3.2.1 Hold-down performance kit
3.2.2 Seed saver performance kit
3.2.3 Auger dent repair kit
3.2.4 Pivoting caster wheels kit
3.3 Identification plates and identification number
3.3.1 Position of identification plate and serial number
4 Technical data
4.1 SWATH UP 450
4.1.1 Header specifications
4.1.2 Header dimensions
4.2 Fuels
4.2.1 Recommended fluids and lubricants
5 Preparing the machine
5.1 Assembling the machine
5.1.1 Unloading and assembly
5.2 Attaching the header
5.2.1 Changing header opening
5.2.2 Preparing locking mechanism
5.2.3 Attaching the header
5.3 Removing the header
5.3.1 Removing the header
6 Operation
6.1 General Information
6.1.1 Daily start-up check
6.1.2 Shutdown procedure
6.1.3 Break-in period
6.1.4 Storing the header
6.2 Settings for fieldwork use
6.2.1 Header operati.2 Operating speed
Adjusting draper speed
6.2.3 Unplugging the header
6.2.4 Adjusting pan seal assembly
6.3 Safety devices
6.3.1 Endshields
6.3.2 Opening left endshield
6.3.3 Closing left endshield
6.3.4 Hold-down lift cylinder safety support
Engaging hold-down lift cylinder safety support
Disengaging hold-down lift cylinder safety support
6.4 Intake auger
6.4.1 Auger operation
6.4.2 Auger speed
6.4.3 Auger position
Checking auger position
Adjusting auger position
6.4.4 Auger float
Locking auger float
Unlocking auger float
6.4.5 Stripper plate clearance
6.4.6 Checking stripper plate clearance
6.4.7 Adjusting stripper plate clearance
6.5 Operating height
6.5.1 Header height
6.5.2 Pick-up height
Adjusting pick-up height
6.5.3 Adjusting header float
6.6 Hold-down
6.6.1 Hold-downs
6.6.2 Hold-down position
6.6.3 Adjusting hold-down rod angle
6.7 Crop deflectors
6.7.1 Crop deflectors
Removing crop deflectors
Installing crop deflectors
6.8 Drives
6.8.1 Driveline
6.8.2 Driveline clutch
6.8.3 Driveline guard
6.9 Sensors / Modules
6.9.1 CLAAS AUTO CONTOUR (CAC)
6.9.2 Header height sensors
6.9.3 Height sensor output voltage range – combine requirements
6.9.4 Adjusting header height sensor voltage range (left side)
6.9.5 Adjusting header height sensors voltage range (right side)
6.9.6 Calibrating the CLAAS AUTO CONTOUR system
7 Fault and remedy
7.1 General Information
7.1.1 Problems and remedies
8 Maintenance
8.1 General Information
8.1.1 Maintenance and servicing
8.1.2 Preparing header for servicing
8.2 Maintenance tables
8.2.1 Maintenance intervals
8.2.2 Pre-season/annual service
8.2.3 After 10 operating hours
8.2.4 After 25 operating hours
8.2.5 After 50 operating hours
8.2.6 After 100 operating hours
8.2.7 End of season
8.3 Lubrication chart
8.3.1 Lubrication
8.3.2 Greasing procedure
8.3.3 Greasing points – 25 h
8.3.4 Greasing points – 100 h
8.3.5 Lubricating auger drive chain
8.3.6 Installing sealed bearing
8.4 Safety devices
8.4.1 Removing left endshield
8.4.2 Installing left endshield
8.4.3 Removing right endshield
8.4.4 Installing right endshield
8.5 Drives
8.5.1 Header drive shaft
8.5.2 Header driveline
8.5.3 Removing header driveline
8.5.4 Installing header driveline
8.5.5 Replacing driveline clutch
8.5.6 Removing driveline guard
8.5.7 Installing driveline guard
8.5.8 Driveline splined shaft
8.5.9 Draper drives
8.5.10 Removing front hydraulic motor
8.5.11 Installing front hydraulic motor
8.5.12 Removing rear hydraulic motor
8.5.13 Installing rear hydraulic motor
8.5.14 Removing hydraulic motor hoses
8.5.15 Installing hydraulic motor hoses
8.5.16 Auger drive
8.5.17 Removing auger drive chain
8.5.18 Installing auger drive chain
8.5.19 Adjusting auger drive chain tension
8.5.20 Removing driven sprocket
8.5.21 Installing driven sprocket
8.5.22 Removing drive sprocket
8.5.23 Installing drive sprocket
8.6 Intake auger
8.6.1 Replacing auger fingers
8.6.2 Replacing auger finger guides
8.6.3 Replacing auger finger holder
8.6.4 Replacing stripper plates
8.6.5 Replacing flighting extensions
8.7 Decks
8.7.1 Draper belts
8.7.2 Removing front draper belt
8.7.3 Installing front draper belt
8.7.4 Removing rear draper belt
8.7.5 Installing rear draper belt
8.7.6 Draper fingers and guides
8.7.7 Replacing draper fingers
8.7.8 Replacing draper guide
8.7.9 Draper deck roller bearings
8.7.10 Replacing rear deck drive roller bearings
Replacing drive roller bearing on left side of rear deck
Replacing drive roller bearing on right side of rear deck
8.7.11 Replacing rear deck idler roller bearings
Replacing idler roller bearing on left side of rear deck
Replacing idler roller bearing on right side of rear deck
8.7.12 Aligning rear draper deck rollers
8.7.13 Replacing front deck drive roller bearings
Replacing drive roller bearing on left side of front deck
Replacing drive roller bearing on right side of front deck
8.7.14 Replacing front deck idler roller bearings
8.7.15 Aligning front draper deck rollers
8.8 Header spring float assembly
8.8.1 Header spring float assembly
8.8.2 Removing header spring float assembly
8.8.3 Installing header spring float assembly
8.9 Hold-down
8.9.1 Replacing fiberglass rods
8.9.2 Replacing master hold-down cylinder
Removing master cylinder
Installing master cylinder
8.9.3 Replacing slave hold-down cylinder
Removing slave cylinder
Installing slave cylinder
8.9.4 Bleeding cylinders and lines
8.9.5 Hydraulic hoses and lines
8.9.6 Removing master cylinder hose
8.9.7 Installing master cylinder hose
8.10 Sensors / Modules
8.10.1 Draper speed sensor
8.10.2 Checking draper speed sensor position
8.10.3 Adjusting draper speed sensor
8.10.4 Replacing draper speed sensor
8.11 Axle and wheels
8.11.1 Wheels and tires
Checking tire pressure
Removing wheel
Installing wheel
8.12 Lighting
8.12.1 Lights
8.12.2 Adjusting transport lights
8.12.3 Replacing transport light bulb
8.12.4 Replacing lens
8.12.5 Replacing lamp housing
9 Decommissioning and disposal
9.1 General Information
9.1.1 Removal from service and disposal
10 Conformity declaration
10.1 EC declaration of conformity
10.2 UK Declaration of Conformity
11 Technical terms and abbreviations
11.1 Terms and explanations
11.1.1 Conversion chart
00 0301 051 0.pdf:
PROFI CAM 3
Table of contents
1 Introduction
1.1 Notes on the manual
1.1.1 Validity of manual
1.1.2 Information about this Operator’s Manual
1.1.3 Symbols and notes
1.1.4 Optional equipment
1.1.5 Qualified specialist workshop
1.1.6 Maintenance information
1.1.7 Warranty notes
1.1.8 Spare parts and technical questions
1.2 Intended use
1.2.1 Intended use
1.2.2 Reasonably foreseeable misuse
2 Safety
2.1 Identifying warnings
2.1.1 Hazard signs
2.1.2 Signal word
2.2 Safety rules
2.2.1 Meaning of Operator’s Manual
2.2.2 Observing safety decals and warnings
2.2.3 Optional equipment and spare parts
3 Product description
3.1 Overview and method of operation
3.1.1 How the PROFI CAM works
3.2 Identification plates and identification number
3.2.1 Position of identification plates
3.2.2 Explanation of PROFI CAM identification plate
3.3 Information on the product
3.3.1 CE marking
4 Operating and control elements
4.1 Camera system
4.1.1 Camera system monitor
4.2 Menu structure
4.2.1 Main menu
4.2.2
4.2.3
4.2.4
4.2.5
4.2.6
5 Technical specifications
5.1 PROFI CAM
5.1.1 Monitor
5.1.2 Camera
5.1.3 Switch box
5.1.4 Degree of protection against foreign bodies and water
6 Preparing the product
6.1 Shutting down and securing the machine
6.1.1 Switching off and securing the machine
6.2 Prior to operation
6.2.1 Carry out prior to operation
6.2.2 Installing the sun protection
6.2.3 Aligning the camera
6.2.4 Connecting the camera electrics
7 Operation
7.1 Monitor
7.1.1 Switching on the monitor
7.1.2 Calling up the menu
7.1.3 Setting a menu item
7.1.4 Setting the image orientation
7.1.5 Setting automatic screen darkening
7.1.6 Image mirroring
7.1.7 Setting the trigger view
7.1.8 Setting the follow-up time for trigger view
7.1.9 Setting the display mode
7.1.10 Activating/deactivating a display mode
8 Faults and remedies
8.1 Electrical and electronic system
8.1.1 Overview of problems on PROFI CAM camera system
8.1.2 Replacing the switch box fuse
9 Maintenance
9.1 Maintenance intervals
9.1.1 Every 10 operating hours or daily
9.2 Camera system
9.2.1 Checking the camera system for dirt
9.2.2 Cleaning the camera
9.2.3 Cleaning the switch box
9.2.4 Cleaning the monitor
10 Placing out of operation and disposal
10.1 General Information
10.1.1 Putting out of operation and disposal
11 Technical terms and abbreviations
11.1 Abbreviations
11.1.1 Units
11.1.2 Abbreviations
11.1.3 Technical terms
00 0303 482 0.pdf:
PROFI CAM 4
Table of contents
1 Introduction
1.1 Notes on the manual
1.1.1 Validity of manual
1.1.2 Information about this Operator’s Manual
1.1.3 Symbols and notes
1.1.4 Optional equipment
1.1.5 Qualified specialist workshop
1.1.6 Maintenance information
1.1.7 Notes on warranty
1.1.8 Spare parts and technical questions
1.2 Intended use
1.2.1 Intended use
1.2.2 Reasonably foreseeable misuse
2 Safety
2.1 Identifying warnings
2.1.1 Hazard signs
2.1.2 Signal word
2.2 Safety rules
2.2.1 Meaning of Operator’s Manual
2.2.2 Structural changes
2.2.3 Optional equipment and spare parts
2.2.4 Operation only following proper putting into operation
2.2.5 Technical status
2.2.6 Respecting technical limit values
Respecting technical limit values
2.2.7 Hazards when driving on roads and fields
3 Product description
3.1 Overview and method of operation
3.1.1 How the PROFI CAM works
3.2 Identification plates and identification number
3.2.1 Identification plates
3.3 Information on the product
3.3.1 CE marking
4 Operating and display elements
4.1 Camera system
4.1.1 Camera system monitor
4.1.2 CEBIS
4.2 Menu structure
4.2.1 Main menu
4.2.2
4.2.3
4.2.4
4.2.5
4.2.6
5 Technical specifications
5.1 PROFI CAM
5.1.1 Monitor
5.1.2 Camera
5.1.3 Switch box
6 Preparing the product
6.1 Switching off and securing the machine
6.1.1 Switching off and securing the machine
6.2 Prior to putting into operation
6.2.1 Carry out prior to operation
6.2.2 Installing the sun protection
6.2.3 Aligning the camera
7 Operation
7.1 Monitor
7.1.1 Switching on the monitor
7.1.2 Calling up the menu
7.1.3 Setting a menu item
7.1.4 Setting the image orientation
7.1.5 Setting automatic screen darkening
7.1.6 Image mirroring
7.1.7 Setting the trigger view
7.1.8 Setting the follow-up time for trigger view
7.1.9 Setting the display mode
7.1.10 Activating/deactivating a display mode
8 Faults and remedies
8.1 Electric and electronic system
8.1.1 Overview of problems on PROFI CAM camera system
9 Maintenance
9.1 Maintenance intervals
9.1.1 Every 10 operating hours or daily
9.2 Camera system
9.2.1 Checking the camera system for dirt
9.2.2 Cleaning the camera
9.2.3 Cleaning the switch box
9.2.4 Cleaning the monitor
10 Putting out of operation and disposal
10.1 General information
10.1.1 Putting out of operation and disposal
11 Technical terms and abbreviations
11.1 Abbreviations
11.1.1 Units
11.1.2 Abbreviations
11.1.3 Technical terms
John Deere Repair Technical Manual PDF
John Deere 16, 18, 20 and 24HP Onan Engines Component Technical Manual CTM2 (19APR90)
John Deere Repair Technical Manual PDF
John Deere 18-Speed PST Repair Manual Component Technical Manual CTM168 10DEC07
John Deere Repair Technical Manual PDF
John Deere POWERTECH E 4.5 and 6.8 L Diesel Engines TECHNICAL MANUAL 25JAN08
John Deere Repair Technical Manual PDF
John Deere Repair Technical Manual PDF
John Deere Diesel Engines PowerTech 4.5L and 6.8L – Motor Base Technical Manual 07MAY08 Portuguese
John Deere Repair Technical Manual PDF
John Deere Application List Component Technical Manual CTM106819 24AUG20
John Deere Repair Technical Manual PDF
John Deere Repair Technical Manual PDF
John Deere Diesel Engines POWERTECH 2.9 L Component Technical Manual CTM126 Spanish
John Deere Repair Technical Manual PDF


