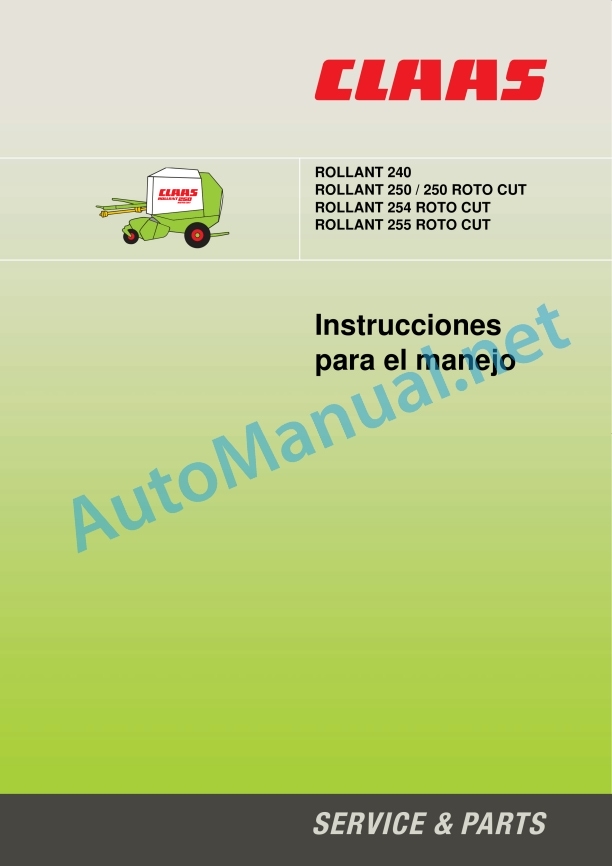
Claas Rollant 240 (749) Baler Operator Manual ES
$50.00
- Model: Rollant 240 (749) Baler
- Type Of Manual: Operator Manual
- Language: ES
- Format: PDF(s)
- Size: 5.8 MB
File List:
00 0299 111 5.pdf
00 0299 111 5.pdf:
Introduction
Introduction
General indications
Road Traffic
Observe especially
Type indicator plate (press)
Machine number
For security
For security
Warning and indication signs
Proper use
General safety and accident prevention requirements
Trailed machines
Service with PTO shaft
Hydraulic system
Maintenance
Machine working noises, “D” information
Fire extinguisher (option with Rollant 254/255)
Safety stickers with warning symbols
Technical characteristics
CLAAS Rollant 240/250/Rollant 250/254/255 RC
Admission bodies
Tying device
Hydraulic system
Hydraulic system required for the tractor
Hydraulic oil flow
Electric system
CLAAS Rollant 240/250/Rollant 250/254/255 RC
Round baler dimensions
CLAAS Rollant 240/250/Rollant 250/254/255 RC
Safety devices
Operationier transmission
Pickup drum
rebound plate
Roller retainer
Cutting device (ROLLANT 250/254/255 RC)
Rotor back-turning device (ROLLANT 240/250/254/255)
Hydraulic rotor back-turning device (ROLLANT 254/255 with control terminal/Claas Comm…
Tractor rotor hydraulic back-turn device (ROLLANT 250/254/255)
packaging chamber
Bale ejector
Transport of round bales
Storage of round bales
Before start-up
To be checked and taken into account before commissioning
baler hitch
Mounting the cardan shaft on the machine side
Cardan shaft with tightening cone lock
Install the cardan shaft with CC lock
Rest support
Before hooking up the baler:
Attachment to the drawbar with lock nut
Attachment to the drawbar with locknut
Adjusting the drive fork arms
Traction eye adjustment
Grease the ring
Mounting the cardan shaft on the side of the tractor (with hooking of the pendulum drawbar)
Check the meshing of the drive shaft halves:
Shorten the drive shaft
Attachment with safety nut to the hitch (in Germany authorized only with homogeneous type drawbar…
Attachment with locknut to the hitch (in Germany authorized only with approved type drawbar)
Adjusting the drive fork arms
Traction eye adjustment
Labeled Pivot Coupling Adjustment
Mounting the cardan shaft on the side of the tractor (with attachment to the hitch mouth)
Electric system
Control cassette
Standard handling
CLAAS COMMUNICATOR
Power supply
Machines with high beams
Hydraulic system
Hydraulic system on standard machines
Hydraulic system in comfortable balers
Before transportation
bale ejector
Installing the bale ejector
Adjustment of the ramp to signal bale ejection
Adjust the baler
Picker, transport and tillage position
Pickup tillage height adjustment (Pickup without support wheels)
Pickup tillage height adjustment (Pickup with support wheels)
Support wheels
rebound plate
Roller retainer
Roller retainer adjustment
Adjustment of the roller retainer due to feeding problems of the material to be pressed
Moving the baler with roller retainer
Roller retainer jamming
Cutting device (ROLLANT 250/254/255 RC)
blind blade
Assembly and disassembly of the blades
Lock the blades
Blade holder and blind blades (optional)
Hydraulic pre-adjustment of pressing pressure
Pre-adjustment of the pressing pressure using the pivoting segment
Spring tension adjustment
Safety lock for rear hood
Ladder (on balers with net tying)
tied with mesh
Place the mesh
Blade lift (M):
Mesh guide with a diverter plate:
Mesh guide with two diverter plates:
ROLLANT 240/250 with twine and mesh tying (standard)
ROLLANT 254/255 with twine and net binding (standard)
ROLLANT 254/255 tied with twine and mesh (comfort)
Connecting the drive for net tying ROLLANT_x0011_240/250/254/255 with standard operation:
Switching off the drive for twine tying ROLLANT_x0011_240/250/254/255 with standard operation:
Drive of the V-belt in mesh tying ROLLANT_x0011_240/250/254/255 with electronic handling…
Adjustment of the number of turns of the mesh
ROLLANT_x0011_240/250/254/255 with standard handling:
ROLLANT_x0011_254/255 with comfortable handling:
Double tied with twine
Twine box
Threading the tying twine
Thread the thread in ROLLANT_x0011_240/250/254/255 equipped with the standard model control
Thread the thread in ROLLANT_x0011_254/255 equipped with the comfort model control
Adjust the twists of twine on the outer edges of the bale
Rotate the cord diverter
Connecting the drive for twine tying ROLLANT_x0011_240/250/254/255 with standard operation:
Shutdown of the drive for net tying ROLLANT_x0011_240/250/254/255 with standard operation:
Adjustment of the number of turns of the ROLLANT 240/250/254/255 twine with standard handling:
Bale ejection without bale ejector Only on ROLLANT_x0011_240/250/254/255 models with handle…
Balers with standard handling (ROLLANT 240/250)
Automatic tying with twine and mesh
Manual mesh tying
Tying process completed
Deposit the bales
bale counter
Switch position during net tying
Switch position during double twine tying
Manual excessive speed of automatic tying
Delay time until automatic mesh tying starts
Control the delay time
Delay time setting
Activate manual net tying
Baler jam
Camshaft drive cardan shaft (Optional equipment)
Rotor back-turning device, manual
Hydraulic rotor back-turning device (of the tractor) (Optional equipment for the ROLLAN…
cutting device
Turn the blade inward
Rotate the blades out
Switch position
Balers with standard handling (ROLLANT 254/255)
Commissioning the round bale baler
Automatic binding
Bale tying and ejection
put down the bale
bale counter
Round bale press with net tying
Round bale press with twine and net tying
Round bale press with twine tying
Manual override of automatic tethering
Start the tying process early
Slow down the binding process
Setting the delay time until the start of automatic net tying
Cutting device (ROTO CUT)
Turn the blade inward
Rotate the blade outward
Adjust the volume of the warning tone
Comfortable handling
Balers with comfort handling (Optional on the ROLLANT 254/255)
Control terminal – synopsis
Status indication
Tying type adjustment
Manually activate tying
Delay tying
Raise/lower the collector (they are floating position)
Pickup in floating/lift position
In/out rotation of blades
Rotor back-turning device
Open/close the rear hood
Work data
Settings
Adjustment of the number of turns
Call up the user settings submenu.
Make user settings
Adjustment of the delay time until automatic or manual tying with mesh
Connecting/Disconnecting the rear hood automatic device
Excessive speed of the rear hood automatic device
Recharge pressure
Clean the blades
Choose the language
Bale rewinding frame
Daily and total counter
Resetting the maintenance indication
Daily counter reset
special counter
Start special counter
Correct the number of bales
Replenishment of the order
Error indication
Error indication in text mode
Warning sound disconnection
Clear the error
Application example
CLAAS COMMUNICATOR
Overview – Claas Communicator (ROLLANT 254/255 optional)
Connect the Claas Communicator
Overview – CLAAS COMMUNICATOR
Incremental transmitter and keys
Incremental transmitter
How to use the incremental transmitter:
Soft keys
Menu navigation keys
Main menu
Work menu
Job functions
Information window in the work menu
Setting menu
Setting Menu Functions
Parameterized functions
Counters Menu
Main menu
Current order display window
Fault menu
System Information Menu
User settings
Select the type of tie
The press can be equipped with two tying systems: net tying and thread tying.
Adjust the number of network turns
Adjust the thread length
Adjust the delay time between the end of the bale and the start of the net tying
Adjust the automatic opening of the back cover
Adjust the recharging of the pressing pressure of the hydraulic cylinders
Sequence for cleaning the blades
Settings in the counter menu
Select the order
Reset the order counter
Daily counter reset
Maintenance indication reset
Fault indicator
Main menu »Service«
Call service menu
System Information Menu
Screen adjustment menu
Adjust contrast
Adjust brightness
Time and date menu
Set the date or time
Memory management menu
Managing sed projects
Reduce conflicts between press and tractor
Langge selection menu
Adjust the tongue
Aux menu
hosting function
collector
Activate the cutting device
Cutting device position control
Standard machines
Active cutting device
Cutting device disabled
Recharging the pressing pressure from the first bale
How to activate the function from the first bale
Turn the rotor backwards
Way to turn the rotor backwards:
Pressing and binding
Automatic thread tying
Automatic net tying
Manual tying – thread tying and net tying
With the CLAAS COMMUNICATOR, bale formation can be adapted depending on the baling product…
Activate the binding process early
Slow down the binding process
Unloading the bales
Automatically open the back cover
Manually open the back cover
Procedure:
Bale chute failure
Manually deposit the bales:
States of the press
Tying with thread without reloading the pressure
Net tying without pressure refill
Malfunction and _x0004_remedy
Malfunction, Cause or remedy
tied with twine
tied with mesh
After the work
Unhook the press
Stop support
control box
Standard handling
Control terminal (optional on ROLLANT 254/ 255)
Claas Communicator (optional on ROLLANT 254/255)
Placement of hydraulic hoses and cables
Jointed shaft
Support wheels (ROLLANT 250/254/255)
Maintenance
Important maintenance instructions
General maintenance instructions
Maintenance and lubrication tables
Maintenance scheme
Lubricant table
Main drive shear screw (optional on ROLLANT 240/250/254)
Main drive shear screw
bevel gear
Retensioning of transmission chains
Pickup drive chain tensioning
Chain tensioner adjustment
Flexible cylinder to drive the compression rollers – rear hood
Flexible cylinder for the lower drive of the compression rollers
Adjust the flexible cylinder for the front drive of the compression rollers
Adjustment of the tension springs
Tensing the tension spring for the brake caliper of the mesh coil (Adjustment without the…
Tension spring tension (F) (Adjustment without mesh coil)
Adjustment of the tension spring for the mesh brake
Adjustment of the compression springs for the baling roller
Adjustment of the tensioning device for the mesh cutting blade
String tensioner adjustment
Adjustment of the control for the rope cutting blades
Greasing systems
Automatic chain lubrication
Mechanical central lubrication for chains (Rollant 254/255 – optional)
General view of mechanical grease pump
Mechanical grease pump adjustment
Lubricant
Greaseable bearings and central lubrication equipment (with ROLLANT 254/255 – option)
Automatic central lubrication of the bearings (Rollant 254/255 – optional)
Synoptic table
Flow adjustment
Possible flow:
Increased flow
(Fig._x0011_11)
Flow reduction
Grease pump stop adjustment
Filling the grease tank
cutting device
Cutting blade height adjustment (ROLLANT 250/254/255 RC)
ROLLANT 254/255 – from 75400181/ 74802194
Hydraulic oil filter (Machines with filtering equipment)
Bleeding the valve assembly with the pressure relief valve (DBV)
Equipment
Fire extinguisher (ROLLANT 254/255 option)
Cleaning the roller (ROLLANT 254/255)
Check the seat of the wheel nuts
Control distances
Procedure:
Bearing clearance engagement
Proposals for preparing for winter
Greasing scheme
Lubricants and information
Alphabetical index
Alphabetical index
John Deere Repair Technical Manual PDF
John Deere Transmission Control Unit Component Technical Manual CTM157 15JUL05
John Deere Parts Catalog PDF
John Deere Tractors 6300, 6500, and 6600 Parts Catalog CQ26564 (29SET05) Portuguese
John Deere Repair Technical Manual PDF
John Deere Diesel Engines POWERTECH 2.9 L Component Technical Manual CTM126 Spanish
John Deere Parts Catalog PDF
John Deere Tractors 7500 Parts Catalog CPCQ26568 30 Jan 02 Portuguese
John Deere Repair Technical Manual PDF
John Deere Repair Technical Manual PDF
John Deere POWERTECH E 4.5 and 6.8 L Diesel Engines TECHNICAL MANUAL 25JAN08
John Deere Repair Technical Manual PDF
John Deere PowerTech M 10.5 L and 12.5 L Diesel Engines COMPONENT TECHNICAL MANUAL CTM100 10MAY11
John Deere Repair Technical Manual PDF
John Deere 18-Speed PST Repair Manual Component Technical Manual CTM168 10DEC07
John Deere Repair Technical Manual PDF
John Deere Repair Technical Manual PDF


