- Claas
- Grove
- New Holland
- Komatsu
- Kubota
- John Deere
- Linde
- Bomag
- CASE
- Clark
- JCB
- Jungheinrich
- Linde
- Yale
- Yanmar
- Manitou
- Manitowoc
- CNH
- Doosan
- Fiatagri
- Fiatallis
- Fiatallis Other Manual PDF
- Flexi Coil
- Ford New Holland
- Ford New Holland Other Manual PDF
- Huyndai
- Hypac
- Hyster
- Hyster Service Manual PDF
- Isuzu
- Kobelco
- Kohler
- Krupp
- Lombardini
- Mahindra
- Nuvera
- Perkins
- Sperry New Holland
- Utilev
- Versatile
- ZF
 Combines Operator Manual ES 1")
 Combines Operator Manual ES 2")
%20Combines%20Operator%20Manual%20ES&url=https://automanual.net/doc/claas-vario-1380-1080-823-combines-operator-manual-es/&media=https://automanual.net/wp-content/uploads/2024/04/claas-vario-1380-1080-823-combines-operator-manual-es-1.jpg)
Claas Vario 1380-1080 (823) Combines Operator Manual ES
$50.00
- Model: Vario 1380-1080 (823) Combines
- Type Of Manual: Operator Manual
- Language: ES
- Format: PDF(s)
- Size: 30.6 MB
File List:
00 0305 441 4.pdf
00 0305 441 4.pdf:
1. Introduction
1.1 General information
1.1.1 Validity of the manual
1.1.2 Information about this instruction manual
1.1.3 Symbols and indications
1.1.4 Optional equipment
1.1.5 Qualified specialized workshop
1.1.6 Maintenance instructions
1.1.7 Information regarding warranty
1.1.8 Spare parts and technical questions
1.2 Proper application of the machine
1.2.1 Proper machine application
1.2.2 Logically foreseeable misuse
2 Security
2.1 Recognize warning signs
2.1.1 Danger symbols
2.1.2 Keyword
2.2 Safety instructions
2.2.1 Meaning of the instruction manual
2.2.2 Observe graphic danger symbols and alarm indications
2.2.3 Requirements for all people working with the machine
2.2.4 Danger zones
2.2.5 Position yourself between the machine and the head
2.2.6 Accompanying persons
2.2.7 Attach the machine to a header or transport trailer
2.2.8 Risk of injury due to rotating shafts
2.2.9 Construction modifications
2.2.10 Optional equipment and spare parts
2.2.11 Use only after correct commissioning
2.2.12 Technical status
2.2.13 Danger due to machine breakdowns
2.2.14 Maintain functional protection devices
2.2.15 Personal protective equipment
2.2.16 Wear appropriate clothing
2.2.17 Remove dirt and loose objects
2.2.18 Prepare the machine for road traffic
2.2.19 Unsuitable consumables
2.2.20 Safe handling of consumables and auxiliary materials
2.2.21 Environmental protection and waste disposal
2.2.22 Electrical shock from electrical equipment
2.2.23 Liquids under pressure
2.2.24 Work only on the stopped machine
2.2.25 Maintenance work and repair work
2.2.26 Machine parts and lifted loads
2.2.27 Danger from welding work
2.2.28 Fire prevention
2.3 Safety signage
2.3.1 Structure of graphic hazard symbols
2.3.2 Graphic danger symbols on the head
3 Machine Description
3.1 Summary and operation
3.1.1 Head summary
3.1.2 Overview of drives
3.1.3 Summary of the hydraulic installation
3.1.4 Lighting overview
3.1.5 VARIO operating mode
3.1.6 Operating mode of overload protections
3.1.7 Operating mode of the reel tension regulation
3.2 Optional machine equipment
3.2.1 External reel tines
3.2.2 Protection against winding
3.2.3 Stone collection plate
3.2.4 Drainer
3.2.5 Chain bevel sprocket play
3.2.6 Stabilizing wheels
3.2.7 Rapeseed separator knives
3.2.8 Transport box for rapeseed equipment
3.2.9 Lighting
3.3 Identification plates and identification numbers
3.3.1 Head identification plate
3.4 Machine information
3.4.1 Adhesives
4 Control and display instruments
4.1 Head
4.1.1 Control elements
4.1.2 Indicator elements
5 Technical data
5.1 VARIOUS
5.1.1 Eligible machines
5.1.2 Dimensions
5.1.3 Weights
5.1.4 Windlass
5.1.5 Feed auger
5.1.6 Cutting widths
5.1.7 Tire pressure
5.2 Inputs
5.2.1 Lubricants
6 Preparation of the machine
6.1 Turn off the machine and secure it
6.1.1 Turn off the machine and secure it
6.2 Load the head
6.2.1 Load and tie down the head
6.3 Assemble the head
6.3.1 Assemble the head
6.3.2 Prepare the bolting
6.3.3 Attach the head
6.3.4 Locking the head
6.3.5 Assemble the cardan shaft
6.3.6 Attach the cardan shaft protection chain
6.3.7 Installing the multiple coupling
6.3.8 Remove the support legs
6.3.9 Adjust the stabilizer wheels*
6.3.10 Adjusting the header in the combine on-board information system
6.4 Disassemble the head
6.4.1 Disassemble the head
6.4.2 Assemble the support legs
6.4.3 Dismantling the multiple coupling
6.4.4 Disassemble cardan shaft
6.4.5 Unlock the head
6.4.6 Unhook the head
6.5 Harvest harvest
6.5.1 Place the safety supports of the windlass
6.5.2 Release the safety supports of the windlass
6.6 Feed auger
6.6.1 Adapt the scraper strips to the feed channel
6.7 Mowing device
6.7.1 Install the cutter bar protection device
7 Management
7.1 Driving the machine
7.1.1 Prepare for road traffic
7.1.2 Adjust the rest position
Adjusting the rest position with controls in the cab
Adjusting the rest position with controls on the head
7.1.3 Adjust cleaning position
Adjust the cleaning position with controls on the head
7.2 Work application
7.2.1 Prepare the field trip
7.2.2 Adjust the working position
Adjusting the working position with controls in the cab
7.2.3 Control the collection of harvest material
7.3 Cereal harvest
7.3.1 Assemble the cereal equipment
7.4 Rapeseed harvest
7.4.1 Assemble rapeseed equipment*
7.4.2 Assembling the rapeseed separator blade*
Adjust quick release
7.4.3 Removing the rapeseed separator blade*
7.4.4 Adjusting the rape separator blade*
Check power train adjustment
Tune the power train
Notes regarding power train adjustment
7.5 Electrical and electronic system
7.5.1 Turn lighting on and off*
Adjust lighting with controls in the cabin
Adjust lighting with controls on the head*
7.6 Address
7.6.1 Deploy LASER PILOT*
7.6.2 Fold LASER PILOT*
7.7 Harvest harvest
7.7.1 Mounting the crop divider
7.7.2 Dismantle the crop divider
7.7.3 Adjusting long crop dividers
7.7.4 Deploy long crop dividers
7.7.5 Folding long crop dividers
7.7.6 Assemble the outer separator
7.7.7 Remove the outer separator
7.7.8 Assemble the transfer plate
7.7.9 Remove the transfer plate
7.7.10 Adjust short crop dividers
7.7.11 Deploy short crop dividers
7.7.12 Folding short crop dividers
7.7.13 Close the opening for cleaning
7.7.14 Adjust the position of the cutting mechanism table
Adjust position in CEBIS
Adjust the position with controls in the cabin
Adjust the position with controls in the cabin
7.7.15 Adjust the position of the reel
Adjust position in CEBIS
Adjust the position with controls in the cabin
7.7.16 Manage the reel tension regulation system
Adjust draft force regulation with CEBIS
7.7.17 Adjust the reel tines
7.8 Feed auger
7.8.1 Adjusting the feed auger scraper strips
7.8.2 Adjust the height of the feeding auger on the side
7.8.3 Adjust the height of the feed auger in the center
Change the basic setting
Adjust height with CEBIS
Adjusting the height with controls on the head
7.8.4 Adjust the feed auger fingers
7.8.5 Remove the extensions from the auger plate
7.8.6 Assemble the auger plate extensions
7.8.7 Modify the speed of the feeding auger
7.9 Mowing device
7.9.1 Connecting the rapeseed separator blade*
7.9.2 Assemble the crop lifters
7.9.3 Dismantle the crop lifters
7.9.4 Assembling and disassembling the crop lifters with quick release
Assemble the harvest lifters
Dismantle the crop lifters
7.10 Guided by the ground
7.10.1 Adjust the skates
8 Incident and solution
8.1 Head
8.1.1 Improve flow
8.1.2 Harvest harvest
8.1.3 Feed auger
8.1.4 Mowing device
8.1.5 Ground guidance
8.2 Hydraulic installation
8.2.1 Compensate the reel hydraulic cylinders
Automatic compensation
Manual compensation
8.2.2 Bleed the hydraulic cylinders of the cutting mechanism table adjustment
Automatically purge
Manually purge
8.3 Electrical and electronic system
8.3.1 Prepare welding work
8.4 Harvest harvest
8.4.1 Check the basic adjustment of the reel
Adjust reel height
8.4.2 Change the reel tines
8.5 Feed auger
8.5.1 Change the fingers of the feed auger with quick closure
8.5.2 Remove the dust protection plate
8.6 Mowing device
8.6.1 Remove the coupling rod from the rapeseed separator blade drive*
Remove the tie rod
Fix the pivot lever
Install the tie rod
9 Maintenance
9.1 Maintenance intervals
9.1.1 Before starting the harvest
9.1.2 Every 10 hours of service or daily
9.1.3 Every 50 hours of service
9.1.4 Every 100 hours of service
9.1.5 Every 250 hours of service
9.1.6 Every 500 hours of service or annually
9.1.7 After harvest
9.1.8 Maintain the head
9.2 Greasing scheme
9.2.1 Grease the lubrication points every 10 hours of service
9.2.2 Grease the lubrication points every 50 hours of service
9.2.3 Grease the lubrication points every 100 hours of service
9.2.4 Grease the lubrication points every 250 hours of service
9.3 Transmission, clutch and cardan shaft
9.3.1 Check the oil level of the bevel spur gear
9.3.2 Change the bevel spur gear oil
Drain oil
Fill oil
9.3.3 Check the reel gear oil level
9.3.4 Change the reel gear oil
Drain oil
Fill oil
9.4 Chassis
9.4.1 Check the wheel hub bearing play
9.4.2 Adjust wheel hub bearing play
9.4.3 Check the tightening torque of the wheel nuts
9.5 Drives
9.5.1 Adjust the drives
9.5.2 Remove the chain (K01)
9.5.3 Assemble the chain (K01)
9.5.4 Adjust the chain (K01)
9.5.5 Remove the chain (K03)
9.5.6 Assemble the chain (K03)
9.5.7 Adjust the chain (K03)
9.6 Hydraulic installation
9.6.1 Check the tightness of the hydraulic system
9.6.2 Check the hydraulic hoses
Marking of hydraulic hoses
9.6.3 Check the pressure accumulator
9.7 Harvest harvest
9.7.1 Clean the cutting mechanism table
9.7.2 Clean the cover plates
9.8 Mowing device
9.8.1 Change blades
9.8.2 Change segmented blades
Assemble the blade connection
Assemble the blade segments (A) with reinforcement plate
Assemble the blade segments (B) without reinforcement plate
Assemble the overlapping segment
9.8.3 Control the pusher
Control the low pusher
Check the wear plate
Check the wear of the high pusher
Control the high pusher
9.8.4 Change the blade section
9.8.5 Replacing double fingers
9.8.6 Align double fingers
9.8.7 Change the rapeseed separator blade*
Remove the blade
Assemble the blade
9.8.8 Clean the guide strips of the rapeseed separator knives*
9.9 Guided by the ground
9.9.1 Clean the skates
9.9.2 Check the draft spring
9.9.3 Check the sliding beams
9.9.4 Adjusting the sliding beams
9.9.5 Clean the sliding beams
10 Decommissioning and waste disposal
10.1 General information
10.1.1 Decommissioning and waste disposal
11 Declaration of conformity
11.1 VARIOUS
11.1.1 EC declaration of conformity
%20Component%20Technical%20Manual%20CTM147%2005JUN98&url=https://automanual.net/doc/john-deere-df-series-150-and-250-transmissions-analog-component-technical-manual-ctm147-05jun98/&media=https://automanual.net/wp-content/uploads/2023/08/john-deere-df-series-150-and-250-transmissions-analog-component-technical-manual-ctm147-05jun98-1.jpg)

John Deere Repair Technical Manual PDF
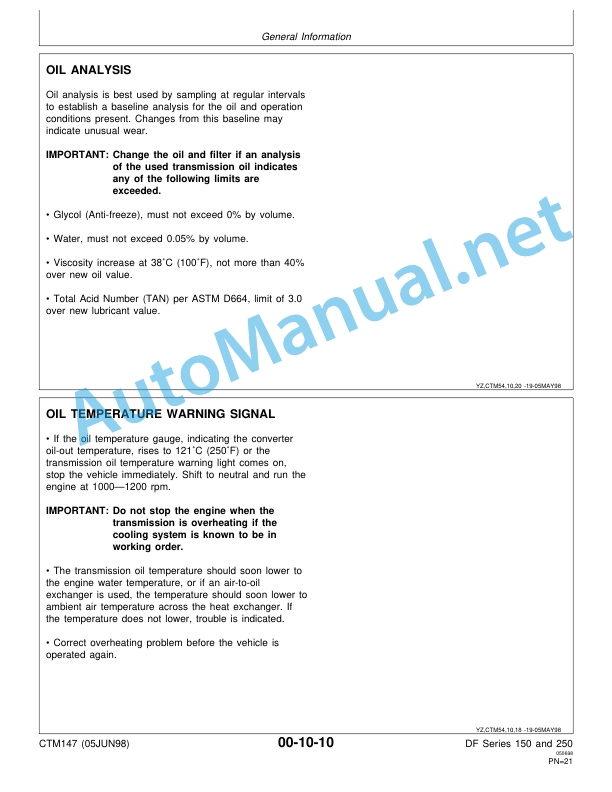
John Deere DF Series 150 and 250 Transmissions (ANALOG) Component Technical Manual CTM147 05JUN98


John Deere Repair Technical Manual PDF
John Deere Repair Technical Manual PDF


John Deere Repair Technical Manual PDF

John Deere Repair Technical Manual PDF

New Holland Service Manual PDF
&url=https://automanual.net/doc/john-deere-16-18-20-and-24hp-onan-engines-component-technical-manual-ctm2-19apr90/&media=https://automanual.net/wp-content/uploads/2023/08/john-deere-16-18-20-and-24hp-onan-engines-component-technical-manual-ctm2-19apr90-1.jpg)


John Deere Repair Technical Manual PDF
John Deere 16, 18, 20 and 24HP Onan Engines Component Technical Manual CTM2 (19APR90)


John Deere Repair Technical Manual PDF


John Deere Repair Technical Manual PDF
John Deere Application List Component Technical Manual CTM106819 24AUG20
- Claas
- Grove
- New Holland
- Komatsu
- Kubota
- John Deere
- Linde
- Bomag
- CASE
- Clark
- JCB
- Jungheinrich
- Linde
- Yale
- Yanmar
- Manitou
- Manitowoc
- CNH
- Doosan
- Fiatagri
- Fiatallis
- Fiatallis Other Manual PDF
- Flexi Coil
- Ford New Holland
- Ford New Holland Other Manual PDF
- Huyndai
- Hypac
- Hyster
- Hyster Service Manual PDF
- Isuzu
- Kobelco
- Kohler
- Krupp
- Lombardini
- Mahindra
- Nuvera
- Perkins
- Sperry New Holland
- Utilev
- Versatile
- ZF