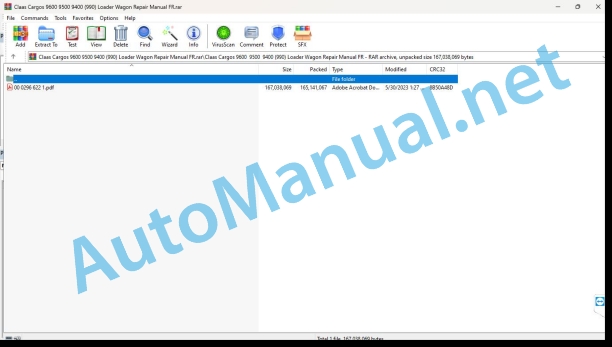
Claas Cargos 9600 9500 9400 (990) Loader Wagon Repair Manual FR
$300.00
- Model: Cargos 9600 9500 9400 (990) Loader Wagon
- Type Of Manual: Repair Manual
- Language: FR
- Format: PDF(s)
- Size: 157 MB
File List:
00 0296 622 1.pdf
00 0296 622 1.pdf:
CARGOS 9600CARGOS 9500CARGOS 9400
Contents
Introduction
General informations
Use of the Notice
Texts and illustrations
Classification by module structure
Seek and find
Directions
Abbreviations
Specialized terms
Validity of the notice
General repair tips
Technical specifications
Cause of damage
Spare parts
Diesel motor
Generator
Welding work
Drive Belt / Drive Chains
Steel roller chains
Chain closing link
Conical ring connections
Disassembly
Assembly
Heel pin connections
Disassembly
Assembly
Self-locking screws
Liquid screw brake
Clamp ring bearing
Disassembly
Assembly
Clamp sleeve bearing
Disassembly
Assembly
Threaded fittings with cutting ring
To screw
Sealing failure of the cutting ring connection
Progressive ring screw connections on hydraulic lines
Bicone ring screw connections
Hydraulic flexible lines
Hose routing
Tips for correct repair
Tightening torques
Tightening torques for metric coarse threads
Tightening torques for metric fine pitch threads
Tightening torques for hydraulic connections with cutting ring DIN 3861
Tightening torques for hydraulic screw connections and air conditioning system screw connections with bicone ring and O-ring DIN 3865
Tightening torques for SDS hydraulic screwed sleeve
Tightening torques for SDE adjustable screwed hydraulic coupling
Tightening torques for hydraulic swivel threaded connections
Tightening torques for hollow screws DIN 7643
Tightening torques for brake line screw connections
Tightening torques for tangent screw clamps
Tightening torques for spring-controlled tangent screw clamps
Tightening torques for tires
Technical characteristics
Lubricants
CCN explanation
CCN (CLAAS Component Number)
Electrical standard
Summary table
Hydraulic standard
Overview
CCN (CLAAS Component Number)
Security
General informations
Important
Marking of warnings and dangers
General safety instructions and accident prevention regulations
Exit the machine
Adjustment and maintenance work
Risk of injury from hydraulic fluid
Air conditioner
Pressure accumulator
First aid measures
Battery cut-off switch
Place the machine on jack stands
Shutting down the machine
02 Transmission – Clutch – Cardan shaft
0230 Mechanical gearbox
Main gearbox
Preparing for work
Disassemble
To assemble
To set down
0260 Cardan shaft
Cardan shaft
Preparing for work
To set down
07 Hitch device
0725 Drawbar
Hydraulic drawbar cylinder
Preparing for work
Screw the special tool
Disassemble
To assemble
To set down
09 Hydraulic system
0920 Valves
Valve block
Disassemble
To assemble
To set down
10 Electrical/electronic system
1015 Electrical wiring
Main cable set
Screw the special tool
Main cable set, electronic module
To set down
20 Harvest feeding
2020 Pickup
Pickup chassis
To set down
Assembly advice
Adjust the ground support pressure of the pickup
Scraper sheets
To set down
Guide elements and connecting plates
Remove the guide element
Install the guide element
Remove the connection plates
Install the connection plates
Pickup, support plates
Preparing for work
Remove, left side support plate
Disassemble the left side support plate
Assemble, left side support plate
Install, left side support plate
Remove, right side support plate – CARGOS without dosing drum unit
Disassemble, right side support plate – CARGOS without metering drum unit
Assemble, right side backing plate
Install, right side support plate
Pickup, cam
Preparing for work
Place left side
Disassemble left side
Assemble, left side
Place, left side
Place right side
Disassemble and assemble, right side
Place, right side
Pickup, crankshaft
Preparing for work
Place left side
Disassemble
To assemble
Place, left side
Pickup, tine bearing roller
Preparing for work
Place right side
Place, right side
Place left side
Place, left side
Pickup, tine holder
Disassemble
To assemble
To set down
Pickup shaft, elastic teeth
To set down
To set down
Fixing the support wheel
Preparing for work
To set down
Support wheel attachment, axle support
Preparing for work
To set down
Pickup, torque limiter
Preparing for work
Disassemble
To assemble
To set down
Pickup, drive, chain tensioner
Preparing for work
Disassemble
To assemble
To set down
Pickup drive, torque limiter
Preparing for work
To set down
Pickup clutch, hydraulic cylinder – only CARGOS with dosing drum unit
Remove, hydraulic cylinder clutch from pickup
To set down
Pickup clutch, adjustment rod – only CARGOS with dosing drum unit
Disassemble
To assemble
To set down
Hydraulic cylinder, pickup
To set down
Adjust the ground support pressure of the pickup
21 Power group
2125 Rotor
Knife frame, cutting rotor
To set down
Adjust the knife frame
Eliminate tension in the setting of knives
Shift the knife frame to the right
Shift the knife frame to the left
Adjust the left and right side guide screws.
Adjust the knives
Adjust the gap from the tip of the knives to the rotor wall
Adjust the clearance between the knives and the eccentric shaft
Cutting rotor scraper
To set down
To set down
Cutting rotor
Preparing for work
Screw the special tool
Left side
Right side
Left side
Right side
Left side
Right side
Right side
Left side
Disassemble
Left side
On model up to machine number: 99001194
On model from machine number: 99001195
Right side, model up to machine number: 99001194
Right side, model from machine number: 99001195
Align the teeth on the cutting rotor
To assemble
Right side, up to machine No.: 99001194
Right side, from machine number: 99001195
Left side, up to the machine No.: 99001194
Left side, from machine No.: 99001195
All models
To set down
Right side
Left side
Right side
Left side
Right side
Left side
Right side
Left side
Fixing knives, spring holder
Preparing for work
To set down
Adjust the spring holder stop
Knife attachment, pressure spring
Preparing for work
To set down
Fixing the knives, eccentric shaft
To set down
Fixing the knives, locking bracket
To set down
Rotor gearbox
Preparing for work
Auxiliary tool
Disassemble
To assemble
Preassemble the intermediate gear
Preassemble the pinion shaft
Preassemble the right gear
To set down
Rotor gearbox cardan shaft
Preparing for work
To set down
Hydraulic knife frame cylinder
To set down
Spring carrier hydraulic cylinder
Preparing for work
To set down
Hydraulic cylinder, eccentric shaft
Preparing for work
Place, right side
Place, right side
Remove, left side
Place, left side
60 Removal of harvested product / removal of straw
6030 Removing the crop / Removing the windrows / Windrow consolidator
Overview of the dosing drum drive
Compensating coupling
Preparing for work
To set down
Dosing drum flange
Place, right side
Right side flange, bottom
Flange flange right, center and top
Place, right side
Right side flange, bottom
Flange flange right, center and top
Remove, left side
Flange flange left side, bottom and center
Flange flange left side, top
Place, left side
Flange flange left side, bottom and center
Flange flange left side, top
Dosing drum
Remove the right side side wall
Removing the dosing drum in the center, left side wall
Removing the dosing drum at the bottom, left side wall
Removing the dosing drum at the top, left side wall
To set down
Installation of the dosing drum in the center, left side wall
Installation of the dosing drum at the bottom, left side wall
Installation of the dosing drum at the top, left side wall
Installation of the right side side wall
Rear metering drum gearbox
Preparing for work
Disassemble
To assemble
To set down
Dosing drum gearbox, front top
Preparing for work
Disassemble
To assemble
To set down
Dosing drum gearbox, front bottom
Preparing for work
Auxiliary tool
Disassemble
To assemble
Install the shafts in the housing
To set down
Cardan shaft, front metering drums
To set down
Dosing drum cardan shaft, rear
To set down
Metering drums, short drive shaft
Preparing for work
To set down
Dosing drums, long drive shaft
Screw the special tool
Disassemble
To assemble
To set down
Check concentricity
Adjust the gap
Dosing drum drive chain
To set down
80 Assembly/body parts
8040 Raised
Trailer bottom, guide bars
Preparing for work
Remove the wide plastic bar
Remove the guide bar at the front
Remove the guide bars in the center to the rear
To set down
Install the guide bars in the center to the rear
Install the front guide bar
Install the wide plastic bar
Front conveyor bottom
Preparing for work
To set down
Conveyor bottom, conveyor bars
To set down
Conveyor bottom, chain
Shorten the chain
Conveyor bottom bearing
Preparing for work
Disassemble
Gearbox side
Central bearing side
To assemble
Central bearing side
Gearbox side
Central bearing side
Gearbox side
To set down
Conveyor bottom, chain tensioner
Preparing for work
Disassemble
To assemble
To set down
Front mounting, projection plate
To set down
Conveyor bottom gearbox
Preparing for work
To set down
Rear hatch hydraulic cylinder
To set down
Rear hatch
To set down
Adjust the rear hatch
Hydraulic cylinder, front mounting
To set down
Hydraulic cylinder front mounting, adjustment
To set down
John Deere Repair Technical Manual PDF
John Deere 16, 18, 20 and 24HP Onan Engines Component Technical Manual CTM2 (19APR90)
John Deere Repair Technical Manual PDF
John Deere Repair Technical Manual PDF
John Deere Diesel Engines POWERTECH 2.9 L Component Technical Manual CTM126 Spanish
John Deere Repair Technical Manual PDF
John Deere POWERTECH E 4.5 and 6.8 L Diesel Engines TECHNICAL MANUAL 25JAN08
John Deere Repair Technical Manual PDF
John Deere Repair Technical Manual PDF
John Deere Diesel Engines PowerTech 4.5L and 6.8L – Motor Base Technical Manual 07MAY08 Portuguese
John Deere Repair Technical Manual PDF
John Deere Repair Technical Manual PDF
John Deere Repair Technical Manual PDF
John Deere 18-Speed PST Repair Manual Component Technical Manual CTM168 10DEC07
John Deere Repair Technical Manual PDF
John Deere Application List Component Technical Manual CTM106819 24AUG20


