Claas Corio 880-670 Fc Conspeed (H10) Combines Operator Manual FR
$50.00
- Model: Corio 880-670 Fc Conspeed (H10) Combines
- Type Of Manual: Operator Manual
- Language: FR
- Format: PDF(s)
- Size: 24.9 MB
File List:
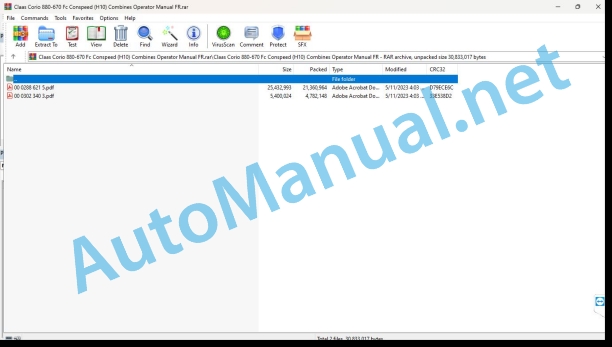
00 0288 621 5.pdf
00 0302 340 3.pdf
00 0288 621 5.pdf:
Instructions for use
Contents
1 Introduction
1.1 General instructions
1.1.1 Validity of the notice
1.1.2 Information regarding this user manual
1.1.3 Icons and notes
1.1.4 Optional equipment
1.1.5 Qualified specialist workshop
1.1.6 Notes on maintenance
1.1.7 Notes regarding warranty
1.1.8 Spare parts and technical questions
1.2 Use in accordance with instructions
1.2.1 Use in accordance with instructions
1.2.2 Reasonably foreseeable misuse
2 Security
2.1 Recognize the warnings
2.1.1 Warning pictogram
2.1.2 Signal word
2.2 Safety tips
2.2.1 Meaning of the instructions for use
2.2.2 Observe warning pictograms and warnings
2.2.3 Requirements for all people who work with the machine
2.2.4 Dangerous areas
2.2.5 Do not stand between the machine and the front tool
2.2.6 Passengers
2.2.7 Couple the machine with the front tool or cutting carriage
2.2.8 Risk of injury due to rotating shafts
2.2.9 Constructive modifications
2.2.10 Optional equipment and spare parts
2.2.11 Operation only after proper commissioning
2.2.12 Technical condition
2.2.13 Risks in the event of damage to the machine
2.2.14 Maintain safety devices in operational capacity
2.2.15 Personal safety equipment
2.2.16 Wear suitable clothing
2.2.17 Remove dirt and loose objects
2.2.18 Prepare the machine for road travel
2.2.19 Inappropriate operating consumables
2.2.20 Safety in handling operating consumables and secondary consumable materials
2.2.21 Environmental protection and disposal
2.2.22 Electric shock from the electrical system
2.2.23 Liquids under pressure
2.2.24 Work only on the stopped machine
2.2.25 Maintenance and repair work
2.2.26 Machine elements recorded and loads
2.2.27 Risks due to welding work
2.3 Safety marking on the machine
2.3.1 Structure of warning pictograms
2.3.2 Position of warning pictograms
3 Description of the machine
3.1 Overview and mode of operation
3.1.1 Overview of CORIO CONSPEED
3.1.2 Overview of the harvesting device
3.1.3 CORIO CONSPEED operating mode
3.1.4 Header gearbox torque limiter
3.2 Nameplates and identification numbers
3.2.1 Corn header nameplate
3.3 Optional machine equipment
3.3.1 Main gearbox gear pairs
3.3.2 Pinion to increase the speed of the feed auger
3.3.3 Counterblade and deflector rubber
3.3.4 Auger for poured corn
3.3.5 Raising the hood
3.3.6 Stubble breakers
3.3.7 High cob recovery rubber
3.3.8 Protection bar
3.3.9 AUTO CONTOUR
3.3.10 AUTOPILOT
3.3.11 MONTANA kit
3.3.12 Anti-winding device
3.3.13 Anti-projection protection
3.3.14 Sunflower kit
4 Control and display elements
4.1 Front tool
4.1.1 Control elements
5 Technical characteristics
5.1 CORIO CONSPEED
5.1.1 Dimensions
5.1.2 Weight
5.1.3 Lubricants
6 Preparing the machine
6.1 Stop and immobilize the machine
6.1.1 Stop and immobilize the machine
6.2 Before commissioning
6.2.1 To be carried out before first commissioning
6.2.2 Install the switch
6.3 Assembling the front tool
6.3.1 Install and adjust the thatch breaker*
Install the thatch breaker
Adjust the stubble breaker
Adjust the working position
Adjust transport position
Adjust the stubble breaker
Adjust the working position
Adjust transport position
6.3.2 Install the skates
6.3.3 Install the power socket* for protection bar
6.3.4 Install the counterblade and deflector rubber*
Install the counterblade
Install the deflector rubber
6.3.5 Prepare the installation of the hood elevation*
6.4 Load the front tool
6.4.1 Load the front implement and secure it
6.5 Install the front tool
6.5.1 Install the front tool
6.5.2 Adapt the machine
6.5.3 Select the cardan shaft
6.5.4 Modify the position of the cardan shafts
Check the cardan shaft
Remove the cardan shaft
Remove the cardan shaft
Install the cardan shaft
Install the cardan shaft
6.5.5 Hanging the front tool
6.5.6 Prepare for locking
6.5.7 Lock the front tool
6.5.8 Install the multicoupler
6.5.9 Install the cardan shaft
6.5.10 Bring the crutches backwards
6.5.11 Learn the end stops of the hydraulic adjustment of picking plates
6.6 Remove the front tool
6.6.1 Remove the front tool
6.6.2 Remove the multicoupler
6.6.3 Remove the cardan shaft
6.6.4 Unlock the front tool
6.6.5 Take out the crutches
6.6.6 Unhook the front tool
7.1 Traveling on the road
7.1.1 Prepare for road travel
7.1.2 Fold the front tool into transport position
7.1.3 Install the protection bar
Install the protection bar on the closed fairings
Install the protection bar on the open fairings
7.1.4 Install protective cloths
7.2 Work
7.2.1 Prepare to move into the field
7.2.2 Remove the protective cloths
7.2.3 Remove the safety bar
7.2.4 Unfold the front tool into the working position
7.3 Power group
7.3.1 Adjust the feed speed
7.3.2 Modify the feed auger speed
7.4 Harvesting device
7.4.1 Adjusting the transport height of the hood tip
7.4.2 Fold the fairing tip
Fold the inner fairing tips
Fold the outer fairing tips
7.4.3 Unfold the fairing tip
Unfold the outer fairing tips
Unfold the inner fairing tips
7.4.4 Lift the fairing into the maintenance position
7.4.5 Fold the cover down
7.4.6 Remove and install the cob recovery rubber*
Remove the cob recovery rubber
Install the cob recovery rubber
7.4.7 Hydraulically adjust the picking plates
7.4.8 Mechanically adjust the picking plates
7.4.9 Remove and install the fairing elevation*
Install the fairing elevation
Remove the fairing elevation
7.5 Hashing
7.5.1 Couple the chopper knives
7.5.2 Uncouple the chopper knives
8 Faults and solutions
8.1 Front tool
8.1.1 Overview of faults on the front tool
9 Maintenance
9.1 Overview of maintenance frequencies
9.1.1 Before the start of the harvest
9.1.2 After the first 10 hours of operation
9.1.3 After the first 50 hours of operation
9.1.4 Every 10 operating hours
9.1.5 Every 50 operating hours
9.1.6 Every 100 operating hours
9.1.7 Every 250 operating hours
9.1.8 Every 500 operating hours or every year
9.1.9 After harvest
9.2 Lubrication plan
9.2.1 Lubricate the lubrication points every 50 operating hours
9.2.2 Lubricate the lubrication points every 100 operating hours
9.2.3 Lubricate the lubrication points every 250 operating hours
9.3 Gearboxes, clutch and cardan shaft
9.3.1 Check the main gearbox oil level
9.3.2 Change the main gearbox oil
Change the oil
Fill with oil
9.3.3 Check the oil level of the bevel gearbox
9.3.4 Drain the oil from the angle gearbox
Change the oil
Fill with oil
9.3.5 Check the oil level of the header gearboxes
9.3.6 Replacing the oil in the header gearboxes
Change the oil
Fill with oil
9.3.7 Check header gearbox overload couplings
9.3.8 Check feed auger drive overload coupling
9.4 Workouts
9.4.1 Setting drives
9.4.2 Adjust the chain (K01)
9.5 Harvesting device
9.5.1 Adjust the scraper plates
9.5.2 Remove the picking plates
9.5.3 Install the picking plates
9.5.4 Check the picker roller knives*
9.5.5 Replace the picker roller knives*
9.5.6 Cleaning the picker rollers
Remove the scraper plates
Remove the picker rollers
Attach the picker rollers
9.5.7 Adjusting the feed chains
9.5.8 Replace feed chains
Remove the protections
Remove the fixings
Remove the power chain
Install the power chain
9.5.9 Replace worn edges of covers
9.5.10 Adjust the height of the fairings
9.6 Hashing
9.6.1 Replacing the chopper knives
9.6.2 Check the chopper knives
9.6.3 Check the tightening torques of the chopper knives
9.6.4 Remove and install the knife holder
Remove the knife holder
Place the knife holder
10 Decommissioning and disposal
10.1 General instructions
10.1.1 Deactivation and disposal
11 Declaration of conformity
11.1 CORIO CONSPEED
11.1.1 Declaration of conformity for CE
00 0302 340 3.pdf:
JAGUAR 990 /980 / 970 / 960 / 950 / 940 / 930JAGUAR 880 / 870 / 860 / 850 / 840 / 830JAGUAR 990 / 960 TERRA TRAC
Contents
1 Introduction
1.1 General instructions
1.1.1 Validity of the notice
1.1.2 Information about this user manual
1.1.3 Icons and notes
1.1.4 Notes on maintenance
1.1.5 Notes regarding warranty
1.1.6 Spare parts and technical questions
1.2 Nameplates and identification numbers
1.2.1 Adapter nameplate
2 Security
2.1 Recognize the warnings
2.1.1 Warning pictogram
2.1.2 Signal word
2.2 Safety tips
2.2.1 Meaning of the instructions for use
2.2.2 Observe warning pictograms and warning advice
2.2.3 Requirements for all people who work with the product
2.2.4 Couple the machine with the front tool
2.2.5 Risk of injury to the cardan shaft
2.2.6 Constructive modifications
2.2.7 Technical condition
2.2.8 Inappropriate operating consumables
2.2.9 Environmental protection and disposal
2.2.10 Liquids under pressure
2.3 Safety label
2.3.1 Structure of warning pictograms
2.3.2 Warning pictogram on the adapter
3 Control and display elements
3.1 Cabin and driving position
3.1.1 Control elements on column B
4 Technical characteristics
4.1 Adapter
4.1.1 Authorized machines
4.1.2 Dimensions
4.1.3 Weight
4.1.4 Lubricants
5.1 Adapter
5.1.1 Using the adapter
5.1.2 Remove the scraper bars
5.1.3 Adjust the speed of the feed drum
5.1.4 Adjust the cutting height
5.1.5 Adjust the interconnection
5.1.6 Mounting the adapter
5.1.7 Remove the adapter
6 Maintenance
6.1 Overview of maintenance frequencies
6.1.1 Every 10 operating hours or every day
6.1.2 Every 100 operating hours
6.1.3 Every 500 operating hours or every year
6.2 Lubrication plan
6.2.1 Lubricate the lubrication points every 10 hours of operation
6.2.2 Lubricate the lubrication points every 100 operating hours
6.3 Transmission, clutch and cardan shaft
6.3.1 Checking the oil level of the drive gearbox
6.3.2 Change the oil from the drive gearbox
Change the oil
Fill with oil
6.3.3 Check the output gearbox oil level
6.3.4 Change output gearbox oil
Drain the oil
Pour the oil
6.3.5 Check the chain tension
John Deere Parts Catalog PDF
John Deere Harvesters 8500 and 8700 Parts Catalog CPCQ24910 Spanish
John Deere Repair Technical Manual PDF
John Deere Repair Technical Manual PDF
John Deere Repair Technical Manual PDF
John Deere Diesel Engines PowerTech 4.5L and 6.8L – Motor Base Technical Manual 07MAY08 Portuguese
John Deere Repair Technical Manual PDF
John Deere Repair Technical Manual PDF
John Deere DF Series 150 and 250 Transmissions (ANALOG) Component Technical Manual CTM147 05JUN98
John Deere Parts Catalog PDF
John Deere Tractors 6300, 6500, and 6600 Parts Catalog CQ26564 (29SET05) Portuguese
John Deere Repair Technical Manual PDF
John Deere 16, 18, 20 and 24HP Onan Engines Component Technical Manual CTM2 (19APR90)
John Deere Repair Technical Manual PDF


