Claas Disco 3500 (619) Mower Technical System EN
$300.00
- Model: Disco 3500 (619) Mower
- Type Of Manual: Technical System
- Language: EN
- Format: PDF(s)
- Size: 69.0 MB
File List:
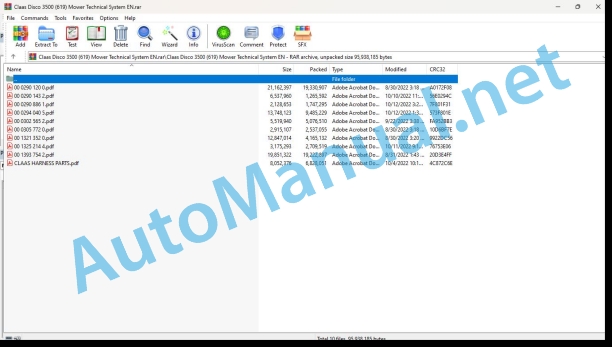
00 0290 120 0.pdf
00 0290 143 2.pdf
00 0290 886 1.pdf
00 0294 040 5.pdf
00 0302 565 2.pdf
00 0305 772 0.pdf
00 1321 352 0.pdf
00 1325 214 4.pdf
00 1393 754 2.pdf
CLAAS HARNESS PARTS.pdf
00 0290 120 0.pdf:
Contents
1 Introduction
Validity of the manual
Overview
2 DISCO 3000 TC, TRC, AS, FG – Hydraulic system
Hydraulic circuit diagram
Circuit diagram DISCO 3000 TC, TRC, AS, FG
Key to diagram
3 DISCO 2700, 3100, 3500 Contour – Hydraulic system
Hydraulic circuit diagram
Circuit diagram
Key to diagram
Description of function
Working / transport position hydraulic cylinder (3169)
Description of function
4 DISCO 3050 TCAS
Hydraulic circuit diagram
Hydraulic circuit diagram
Key to diagram
Position of components
Swathing belt speed adjustment
Control unit
Troubleshooting
5 DISCO 3100 Contour / 2700C Contour
Hydraulic circuit diagram
Circuit diagram
Key to diagram
Description of function
Working / transport position hydraulic cylinder (3169)
Description of function
One-way restrictor valve, one-sided
Key to diagram
Position of components
6 DISCO 3100C
Hydraulic circuit diagram
Circuit diagram
Key to diagram
Description of function
Working / transport position hydraulic cylinder (3169)
Description of function
One-way restrictor valve, one-sided
Key to diagram
7 DISCO 3500C
09 Hydraulic system main group
Circuit diagram
Key to diagram
Description of function
Working / transport position hydraulic cylinder (3169)
Description of function
One-way restrictor valve, one-sided
Key to diagram
Position of components
8 DISCO 3900
Hydraulic circuit diagram
Circuit diagram
Key to diagram
Description of function
Working / transport position hydraulic cylinder (3169)
Description of function
One-way restrictor valve, one-sided
Key to diagram
Position of components
9 DISCO 8550C – Hydraulic system
Hydraulic circuit diagram
Circuit diagram
Key to diagram
10 DISCO 8550C – Electric system
Electric circuit diagram
Circuit diagram
Key to diagram
11 DISCO 8550 C Plus – Hydraulic system
Hydraulic circuit diagram
Circuit diagram
Key to diagram
12 DISCO 8550 C Plus – Electric system
Electric circuit diagram
Circuit diagram
Key to diagram
Connector/Socket
Connectors X1 through X4 in CCT (CLAAS Control Terminal)
Position of components
Speed monitor
Adjustment
Description of function
Malfunction
13 DISCO 8550 AS – Electric system
Swath displacers (belt drive)
Circuit diagram (DIN A3)
Key to diagram
Description of function
Adapting the belt speeds
Description of function
Menu „A“, left belt
Menu „B“, right belt
Menu „C“
Menu „D“
Position of components
14 DISCO 8550 AS – Hydraulic system
Overall circuit diagram
Raise/lower mower units and swath displacers hydnations
Swath displacers hydraulic circuit diagram (belt drive)
Designations
Functions of overall hydraulic system
Raise mower units, raise swathers
Lowering the mower units, lowering the swather
Swath displacer
Position of components
15 DISCO 8500 C-6 = 695SL, 8500 C-8 = 820-880, JAGUAR 8500 C – Hydraulic system
Overall circuit diagram
Circuit diagram (DIN A3)
Key to diagram
Position of components
Description of function
16 DISCO 8500 C-6, 8500 C-8, JAGUAR 8500 C – Electric system
Overall circuit diagram
Circuit diagram (DIN A3)
Key to diagram
Description of function
Central terminal compartment
Graphics
Key to diagram
Central terminal compartment, starting in model year 2000
Graphics
Key to diagram
Central terminal compartment until model year 2000
Graphics
Key to diagram
Switch/pin assignment in CCT (CLAAS Control Terminal)
Graphics
Key to diagram
17 JAGUAR 8700/8500, DISCO 8700 Plus – Hydraulic system
Overall circuit diagram
Circuit diagram (DIN A3)
Key to diagram
18 JAGUAR 8700/8500, DISCO 8700 Plus – Electric system
Overall circuit diagram from serial no. 492 00 503 to 492 00 512
Circuit diagram (DIN A3)
Key to diagram
CCT pin assignment
MFG pin assignment
Block diagram
Position of components
Overall circuit diagram from serial no. 492 00 513
Circuit diagram (DIN A3)
Key to diagram
CCT pin assignment
MFG pin assignment
Block diagram
Position of components
19 DISCO 8700 Plus, DISCO 8550 C-8 for JAGUAR 880-820 (491) – Electric system
Overall circuit diagram
Circuit diagram (DIN A3)
Key to diagram
CCT pin assignment
MFG pin assignment
Block diagram from serial no.: 652 01278 and type 654, starting with model year 2002
Block diagram from serial no.: 652 …, 654…
Position of components
Speed monitor
Graphics
Adjustment
Description of function
Malfunction
Speed monitor connector
20 DISCO 8700 Plus, DISCO 8550 C-8 for JAGUAR 880-820 (491) – Hydraulic system
Overall circuit diagram
Circuit diagram (DIN A3)
Key to diagram
21 DISCO 9100 – 8400
09 Hydraulic system main group
Overall circuit diagram with safety frame
Designations
Overall circuit diagram without safety frame
Designations
10 Electric system main group
Electric circuit diagram DISCO 9100 – 8400 with CST
Designations
Electric circuit diagram DISCO 9100 – 8400 with ISO BUS
Designations
Mower unit control module (A68), mower unit control additional module (A111)
Designations
Mower unit control module (A068) – Connector pin assignment
Module A068 – Connector X1
Module A068 – Connector X2
Mower unit control additional module (A111) – Connector pin assignment
Additional module A111 – Connector X1
Additional module A111 – Connector X2
Position of components
Individual components
22 DISCO 9300C – 8600C with push operation
09 Hydraulic system main group
Overall circuit diagram
Description of function
Valve block
23 DISCO 9300 – 8600 without push operation
09 Hydraulic system main group
Overall circuit diagram
Valve block
24 DISCO 9300 – 8600
10 Electric system main group
Electric circuit diagram DISCO 9300 – 8600 with CST (CLAAS standard terminal)
Designations
Electric circuit diagram DISCO 9300 – 8600 with ISO BUS
Designations
Safety frame fold in/out solenoid coil
Key to diagram
Mower unit control module (A68), mower unit control additional module (A111)
Designations
Mower unit control module (A068) – Connector pin assignment
Module A068 – Connector X1
Module A068 – Connector X2
Position of components
Individual components
00 0290 886 1.pdf:
DISCO 3500 C ContourDISCO 3100 C ContourDISCO 2700 C Contour
Table of contents
Introduction
Validity of manual
Overview
CCN explanation
CCN (CLAAS Component Number)
Electric systems standard
Overview
Hydraulic system standard
Overview
CCN (CLAAS Component Number)
09 Hydraulic system
0920 Valves
Components
Working / transport position hydraulic cylinder (3169)
One-way restrictor valve, one-sided (7060)
0980 Hydraulic circuit diagram
Hydraulic circuit diagram DISCO 3500, 3100, 2700 Contour
Description of function
Working / transport position hydraulic cylinder (3169)
One-way restrictor valve, one-sided (7060)
00 0294 040 5.pdf:
Zusammenbauanleitung
1 Instructions
Instructions
2 Inhalt
3 Allgemeine Hinweise
Besons on the beach
Kennzeichnung von Warn- und Gefahrenhinweisen
Bestimmungsgemäße Verwendung
Sicherheitaveckleber mit Warnbildzeichen
Allgemeine Sicherheitshinweise
4 Assembly
Allgemeine Hinweise zur Montage
Zusammenbau des Scheibenmähwerks
Arbeitsfolge – Lieferung auf Pate
Dreipunktbock
Ausleger – Ran
Schutztuchhalterungen / Schutztücher DISCO 3500 Contour / 3100 Contour / 2700 Contour
Schutztuchhalterungen / Schutztücher DISCO 3900 Contour
Zugseile
Gelenkwellen
Mähklingen
Arbeitsfolge – Lieferung im Verschlag
Dreipunktbock
Ausleger-Drehgelenk
Auffahrsicherung
Ausleger – Rahmen
Now you need to install and install them on the beach!
Assembly instructions
1 Introduction
Introduction
2 Contents
3 General Information
Of special importance
Identification of warnings and dangers
Designated use
Safety decals with warning symbols
General safety instructions
4 Assembly
General instructions for assembly
Assembly of the disc mower
Sequence of operations – shipment on pallets
Headstock
Mower – mounting frame
Protective cover holders/protective covers DISCO 3500 Contour / 3100 Contour / 2700 Contour
Protective cover holders/protective coveDISCO 3900 Contour
Pull ropes
Univer drive shafts
Mowing blades
Sequence of operation – delivery in crates
Headstock
Mower – swivel joint
Break back device
Mower – mounting frame
Check and observe after complete assembly and before commissioning.
Assembly instructions
1 Introduction
Introduction
2 Table of contents
3 General tips
Important
Identification of warning and hazard requirements
Use as intended
Safety label with danger pictogram
General safety instructions
4 Assembly
General assembly instructions
Assembling the rotary disc mower
Assembly order – Delivery on pallet
Three-point hitch support
Arm – Chassis
Supports for DISCO 3500 Contour / 3100 Contour / 2700 Contour protective cloths / protective cloths
Supports for DISCO 3900 Contour protective cloths / protective cloths
Traction cables
Cardan shafts
Cutting blades
Assembly order – Delivery in a crate
Three-point hitch support
Arm – Rotating joint
Anti-collision safety device
Arm – Chassis
To be checked and respected once assembly is complete and before commissioning!
Mountain structure
1 Introduction
Introduction
3 General information
Important warnings
Symbols concern warnings and warnings of pericolo
Norm per il corretto impiego
Decal with pericolo symbol
General safety information
4 Montaggio
General instructions for the mountain
Assembly of the falciatrice a dischi
Lavory sequence – Spedizione su pallet
Attacco a tre punti
Braccio – Telaio
Protection phone support/protection phone DISCO 3500 Contour / 3100 Contour / 2700 Contour
Protective phone support/protective phone DISCO 3900 Contour
Cavetti di commando
Alberi cardanici
Lama section
Sequence of lavori – Spedizione in gabbia
Attacco a tre punti
Braccio – Giunto snodato
Safeguarding your ostacoli
Braccio – Telaio
Dopo ave tuato the mount, control and operate first of the mess in campo!
Assembly instructions
1 Introduction
Introduction
3 General information
To observe in special
Identification of warning and warning signs
Use in accordance with prescribed standards
Safety sticker with warning symbol
General safety information
4 Montaje
General information for mounting
Turning on the rotating disc segment
Sequence of jobs – entrega en paleta
Support at three points
Brazo saliente – marco
Supports for lonas protectoras/ lonas protectoras DISCO 3500 Contour / 3100 Contour / 2700 Contour
Supports for lonas protectoras/ lonas protectoras DISCO 3900 Contour
Tiro Cuerdas
Cardan shafts
Segmented cutters
Succession of work – business in box
Support at three points
Salient arm – rotating joint
Shock protection
Brazo saliente – marco
Check and observe, after you have completed the assembly and before the door starts!
Machine van assembly
1 Inleiding
Inleiding
2 Inhoud
3 Algemene aanwijzingen
Waar u bijzonder op moet letten
Aanduiding van waarschuwingen en gevaren
Gebruik volgens de bestemming
Veiligheidsstickers met gevarensymbolen
Algemene veiligheidsvoorschriften
4 Assembly
Algemene opmerkingen bij assembly
Montage van de schijvenmaaibalk
Werkvolgorde – levering op pallet
Driepuntskoppeling
Uitlegger – chassis
Afschermdoekhouders/afschermdoeken DISCO 3500 Contour / 3100 Contour / 2700 Contour
Afschermdoekhouders/afschermdoeken DISCO 3900 Contour
Trekkabel
Koppelingsassen
Mailemmeten
Werkvolgorde – levering in een krat
Driepuntskoppeling
Uitlegger – draaikoppeling
Oprijbeveiliging
Uitlegger – chassis
If you do not assemble it, you will not have to check it or not!
00 0302 565 2.pdf:
Sensor system
Table of contents
CCN explanation
CCN (CLAAS Component Number)
Electric system standard
Overview
Hydraulic system standard
Overview
CCN (CLAAS Component Number)
Introduction
Safety rules
Safety and hazard information
10 Electrical / Electronic equipment
1097 Testing / Measuring / Adjusting
Test report of the angle sensor (0011780.x)
Application of test report
Required tools
Test report of the angle sensor (0011780.x)
Testing / Measuring / Adjusting of angle sensor (0011780.x)
1. Reason for test
2. Mechanical test of angle sensor
3. Electric test with CDS
4. Electric test with multimeter
5. Mechanical test of connecting cable
Completing the machine
Test report of position and speed sensors
Application of test report
Required tools
Sensor variants
Part numbers of speed sensors
Part number of position sensor
Test report of position and speed sensors
Testing / measuring / adjusting of position and speed sensors
1. Reason for test
2. Mechanical test
3. Electric test with CDS
4a. Installation dimensions
Check of installation dimension
Installation dimensions of gearbox speed sensor (0011 799.x) and cam speed sensor (0011 810.x)
Installation dimension of position sensor (0011 815.x)
4b. Installation position
Centring of sensor
Metal-free zone
5. Electric test with multimeter
Voltage measurement
Direction of rotation and speed sensor (0011 605.x)
Measured values table
6. Mechanical test of connecting cable
Completing the machine
Test report of the urea sensor (00 0773 207 x)
Application of test report
Required tools
Parts number of the urea sensor
Test report of the urea sensor
Testing / measuring / adjusting urea sensor
1. Reason for test
2. Mechanical test
3. Mechanical test of connecting cable
4. Electric test with multimeter
5. Component test with the CDS
00 0305 772 0.pdf:
Table of contents
Introduction
Notes on the manual
Information about this Technical Systems Manual
Using the manual
Document structure based on subassemblies
Search and find
Directions
Identifying warnings
Hazard signs
Signal word
Safety rules
Safety signs and warnings
Requirement made on technical staff
Children in danger
Hazard areas of the machine
Instructors travelling along during fieldwork
Risk of injury from rotating shafts
Structural alterations of the machine
Optional equipment and spare parts
Control of running machine
Technical condition
Respecting technical limit values
Danger from machine parts that continue rotating
Keeping safety devices functional
Personal protective equipment
Wearing suitable clothing
Removing dirt and loose objects
Parking the machine safely
Unsuitable operating utilities
Safe handling of service fluids and auxiliary utilities
Environmental protection and disposal
Keeping the cab free of chemicals
Avoiding fires
Potentially fatal electric shock from overhead lines and lightning strike
Electric shock from electric system
Noise may damage your health
Pre-loaded machine parts
Liquids under pressure
Compressed air
Toxic exhaust gases
Hot surfaces
Safe access and leaving
Working only on the stopped machine
Hazards during repairs
Raised machine parts and loads
Danger from welding work
Checking and charging the battery
Preparations for cases of emergency
10 Electrical / Electronic equipment
1098 Fault / remedy
ISOBUS checklist for fault analysis
Use of the checklist
1. Fault when loading the graphical user interface of the ISOBUS implement
1.1 The graphical user interface for an ISOBUS implement (object pool) is not loaded to the terminal
1.2 Loading the graphical user interface of the ISOBUS implement is not finished or is interrupted
1.3 The graphical user interface for an ISOBUS implement is loaded to the wrong terminal
2. Fault when assigning function keys
2.1 No keys available for assigning, no AUX input available
2.2 Assigned function keys without a function or faulty
2.3 Assignment of function keys after restarting no longer available
3. Task management fault (TC BAS)
3.1 Meter readings from the implement not available or remain at zero
3.2 Import/export of iso.xml not possible/only partially possible
3.3 Missing reference tracks in import/export
3.4 Individual tasks cannot be deleted from the terminal
3.5 Folder structure task data on the USB stick
4. Section Control fault (TC SC)
4.1 TC SC at the wrong terminal
4.2 TC SC without a function/only with a partial function
4.3 Incorrect switching on or off of TC SC
5. Testing and measuring
5.1 Testing and measuring – terminal socket
5.2 Testing and measuring – ISOBUS socket
5.3 Testing and measuring – diagnostic socket
6. Diagnosis with CDS
6.1 ISOBUS check (load object pool)
6.2 ISOBUS CAN logging (assigning of function keys)
6.3 ISOBUS CAN logging (assigned key without a function)
6.4 ISOBUS CAN logging (assignment no longer available, gets lost)
6.5 ISOBUS CAN logging (in the event of a fault with task management)
6.6 ISOBUS CAN logging (general problems)
7. ISOBUS components/AEF compatibility/software statuses
7.1 ISOBUS components and fault description
7.2 ISOBUS functionalities
7.3 Software statuses/AEF compatibility
00 1321 352 0.pdf:
Vorgewende-Aushebung
1 Sicherheit
1.1 Besonders zu beachten
1.2 Bestimmungsgemäße Verwendung
1.3 Allgemeine Sicherheitshinweise
1.4 Warnbildzeichen
1.4.1 Symbol Warnhinweise
1.1 Of special importance
1.2 Intended use
1.3 General safety instructions
1.4 Safety decals
1 Security
1.1 Important
1.2 Conformity of use
1.3 General security notices
1.4 Pictogramme d’avertissement
1 Security
1.1 Important warnings
1.2 Rules for correct use
1.3 General safety instructions
1.4 Decals with danger symbols
1 Security
1.1 A special observation
1.2 Use in accordance with expected regulations
1.3 General safety instructions
1.4 Safety sticker roll with warning symbol
1 Comments
1.1 How the content was written
1.2 Read more
1.3 Review the content of the article
1.4 Наклейки с предупреждающими символами
00 0494 830 0
00 0494 830 0
CLAAS HARNESS PARTS.pdf:
CLAAS HARNESS PARTS
Table of contents
10 Electrical / Electronic equipment
1081 Overview o
John Deere Repair Technical Manual PDF
John Deere Repair Technical Manual PDF
John Deere Parts Catalog PDF
John Deere Tractors 7500 Parts Catalog CPCQ26568 30 Jan 02 Portuguese
John Deere Repair Technical Manual PDF
John Deere Repair Technical Manual PDF
John Deere Repair Technical Manual PDF
John Deere Diesel Engines PowerTech 4.5L and 6.8L – Motor Base Technical Manual 07MAY08 Portuguese
John Deere Repair Technical Manual PDF
John Deere Repair Technical Manual PDF
John Deere Repair Technical Manual PDF
John Deere Repair Technical Manual PDF
John Deere DF Series 150 and 250 Transmissions (ANALOG) Component Technical Manual CTM147 05JUN98

