Claas Elios 240-210 Stage V (A68) Tractors Operator Manual EN
$50.00
- Model: Elios 240-210 Stage V (A68) Tractors
- Type Of Manual: Operator Manual
- Language: EN
- Format: PDF(s)
- Size: 323 MB
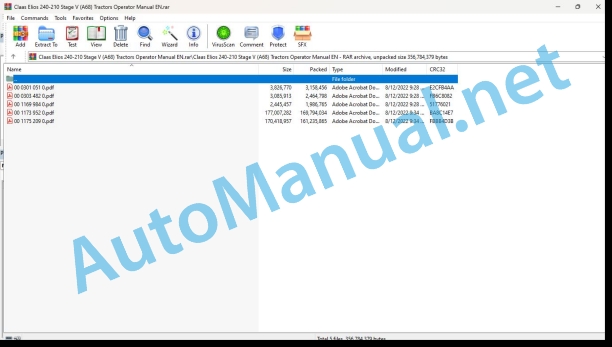
File List:
00 0301 051 0.pdf
00 0303 482 0.pdf
00 1169 984 0.pdf
00 1173 952 0.pdf
00 1175 209 0.pdf
00 0301 051 0.pdf:
PROFI CAM 3
Table of contents
1 Introduction
1.1 Notes on the manual
1.1.1 Validity of manual
1.1.2 Information about this Operator’s Manual
1.1.3 Symbols and notes
1.1.4 Optional equipment
1.1.5 Qualified specialist workshop
1.1.6 Maintenance information
1.1.7 Warranty notes
1.1.8 Spare parts and technical questions
1.2 Intended use
1.2.1 Intended use
1.2.2 Reasonably foreseeable misuse
2 Safety
2.1 Identifying warnings
2.1.1 Hazard signs
2.1.2 Signal word
2.2 Safety rules
2.2.1 Meaning of Operator’s Manual
2.2.2 Observing safety decals and warnings
2.2.3 Optional equipment and spare parts
3 Product description
3.1 Overview and method of operation
3.1.1 How the PROFI CAM works
3.2 Identification plates and identification number
3.2.1 Position of identification plates
3.2.2 Explanation of PROFI CAM identification plate
3.3 Information on the product
3.3.1 CE marking
4 Operating and control elements
4.1 Camera system
4.1.1 Camera system monitor
4.2 Menu structure
4.2.1 Main menu
4.2.2
4.2.3
4.2.4
4.2.5
4.2.6
5 Technical specifications
5.1 PROFI CAM
5.1.1 Monitor
5.1.2 Camera
5.1.3 Switch box
5.1.4 Degree of protection against foreign bodies and water
6 Preparing the product
6.1 Shutting down and securing the machine
6.1.1 Switching off and securing the machine
6.2 Prior to operation
6.2.1 Carry out prior to operation
6.2.2 Installing the sun protection
6.2.3 Aligning the camera
6.2.4 Connecting the camera electrics
7 Operation
7.1 Monitor
7.1.1 Switching on the monitor
7.1.2 Calling up the menu
7.1.3 Setting a menu item
7.1.4 Setting the image orientation
7.1.5 Setting automatic screen darkening
7.1.6 Image mirroring
7.1.7 Setting the trigger view
7.1.8 Setting the follow-up time for trigger view
7.1.9 Setting the display mode
7.1.10 Activating/deactivating a display mode
8 Faults and remedies
8.1 Electrical and electronic system
8.1.1 Overview of problems on PROFI CAM camera system
8.1.2 Replacing the switch box fuse
9 Maintenance
9.1 Maintenance intervals
9.1.1 Every 10 operating hours or daily
9.2 Camera system
9.2.1 Checking the camera system for dirt
9.2.2 Cleaning the camera
9.2.3 Cleaning the switch box
9.2.4 Cleaning the monitor
10 Placing out of operation and disposal
10.1 General Information
10.1.1 Putting out of operation and disposal
11 Technical terms and abbreviations
11.1 Abbreviations
11.1.1 Units
11.1.2 Abbreviations
11.1.3 Technical terms
00 0303 482 0.pdf:
PROFI CAM 4
Table of contents
1 Introduction
1.1 Notes on the manual
1.1.1 Validity of manual
1.1.2 Information about this Operator’s Manual
1.1.3 Symbols and notes
1.1.4 Optional equipment
1.1.5 Qualified specialist workshop
1.1.6 Maintenance information
1.1.7 Notes on warranty
1.1.8 Spare parts and technical questions
1.2 Intended use
1.2.1 Intended use
1.2.2 Reasonably foreseeable misuse
2 Safety
2.1 Identifying warnings
2.1.1 Hazard signs
2.1.2 Signal word
2.2 Safety rules
2.2.1 Meaning of Operator’s Manual
2.2.2 Structural changes
2.2.3 Optional equipment and spare parts
2.2.4 Operation only following proper putting into operation
2.2.5 Technical status
2.2.6 Respecting technical limit values
Respecting technical limit values
2.2.7 Hazards when driving on roads and fields
3 Product description
3.1 Overview and method of operation
3.1.1 How the PROFI CAM works
3.2 Identification plates and identification number
3.2.1 Identification plates
3.3 Information on the product
3.3.1 CE marking
4 Operating and display elements
4.1 Camera system
4.1.1 Camera system monitor
4.1.2 CEBIS
4.2 Menu structure
4.2.1 Main menu
4.2.2
4.2.3
4.2.4
4.2.5
4.2.6
5 Technical specifications
5.1 PROFI CAM
5.1.1 Monitor
5.1.2 Camera
5.1.3 Switch box
6 Preparing the product
6.1 Switching off and securing the machine
6.1.1 Switching off and securing the machine
6.2 Prior to putting into operation
6.2.1 Carry out prior to operation
6.2.2 Installing the sun protection
6.2.3 Aligning the camera
7 Operation
7.1 Monitor
7.1.1 Switching on the monitor
7.1.2 Calling up the menu
7.1.3 Setting a menu item
7.1.4 Setting the image orientation
7.1.5 Setting automatic screen darkening
7.1.6 Image mirroring
7.1.7 Setting the trigger view
7.1.8 Setting the follow-up time for trigger view
7.1.9 Setting the display mode
7.1.10 Activating/deactivating a display mode
8 Faults and remedies
8.1 Electric and electronic system
8.1.1 Overview of problems on PROFI CAM camera system
9 Maintenance
9.1 Maintenance intervals
9.1.1 Every 10 operating hours or daily
9.2 Camera system
9.2.1 Checking the camera system for dirt
9.2.2 Cleaning the camera
9.2.3 Cleaning the switch box
9.2.4 Cleaning the monitor
10 Putting out of operation and disposal
10.1 General information
10.1.1 Putting out of operation and disposal
11 Technical terms and abbreviations
11.1 Abbreviations
11.1.1 Units
11.1.2 Abbreviations
11.1.3 Technical terms
00 1169 984 0.pdf:
Sensor case for tractors Stage IIIB, IV and VSensor case for tractors Stage IIIB, IV and VSensor case for Stage IIIB, IV and V tractors
Contents
1 Sensorkoffer – Sensor case – Sensor suitcase – Stage IIIB, IV & V
1.1 Auflistung Kofferinhalt
1.1 Listing case content
1.1 Presentation of the contents of the suitcase
00 1173 952 0.pdf:
ELIOS 210Stage V
Table of contents
1 Introduction
1.1 Notes on the manual
1.1.1 Validity of the operator’s manual
1.1.2 Information about this Operator’s Manual
1.1.3 Symbols and notes
1.1.4 Optional equipment
1.1.5 Qualified specialist workshop
1.1.6 Notes on maintenance
1.1.7 Notes on warranty
1.1.8 Spare parts and technical questions
1.1.9 Transferring the tractor to a third party
1.2 Intended use
1.2.1 Intended use
1.2.2 Reasonably foreseeable misuse
2 Safety
2.1 Identifying warnings
2.1.1 Hazard signs
2.1.2 Signal word
2.2 Safety rules
2.2.1 European regulations
2.2.2 Importance of the Operator’s Manual
2.2.3 Observing safety decals and warnings
2.2.4 Requirements made on all persons working with the tractor
2.2.5 Children in danger
2.2.6 High risk areas
2.2.7 Presence between tractor and machine
2.2.8 Persons riding on the machine
2.2.9 Hitching an implement or trailer to the tractor
2.2.10 Risk of injury on the PTO shaft
2.2.11 Danger of injury on the universal drive shaft
2.2.12 Applications with front loaders
2.2.13 Avoid hazards posed by frontloaders
2.2.14 Structural changes
2.2.15 Optional equipment and spare parts
2.2.16 Forestry work
2.2.17 Controlling the tractor when it is running
2.2.18 Operation only after commissioning has been properly performed
2.2.19 Technical condition
2.2.20 Danger from damage on the tractor
2.2.21 Respecting technical limit values
2.2.22 Danger from machine parts running on
2.2.23 Keeping safety devices functional
2.2.24 Personal protective equipment
2.2.25 Wearing suitable clothing
2.2.26 Removing dirt and loose objects
2.2.27 Preparing the tractor for road travel
2.2.28 Hazards when driving on the road and on the field
2.2.29 Parking the tractor securely
2.2.30 Unsuitable operating utilities
2.2.31 Safe handling of operating and auxiliary utilities
2.2.32 Fuel is harmful to your health
2.2.33 Refrigerant is harmful to your health
2.2.34 Environmental protection and disposal
2.2.35 Keeping the cab free of chemicals
2.2.36 Handling of crop protection agents and fertilisers
2.2.37 Fire hazard
2.2.38 Lethal electrocution from overhead lines
2.2.39 Behaviour in case of voltage flash-over from overhead lines and when lightning strikes
2.2.40 Electrocution by electrical system
2.2.41 Noise may cause health problems
2.2.42 Vibrations may cause health problems
2.2.43 Pressurised fluids
2.2.44 Compressed air
2.2.45 Toxic exhaust gas
2.2.46 Hot surfaces
2.2.47 Accessing and leaving the machine safely
2.2.48 Working on the tractor only when shut down
2.2.49 Maintenance operations and repair work
2.2.50 Raised tractor parts and loads
2.2.51 Hazard posed by welding work
2.2.52 Checking and charging the battery
2.3 Safety decals on the tractor
2.3.1 Layout of safety decals
2.3.2 Warning symbols
2.4 Safety devices
2.4.1 Wheel chock
3 Tractor description
3.1 Overview
3.1.1 Front left-hand view
3.1.2 Rear left-hand view
3.2 Identification plates and vehicle identification number
3.2.1 Tractor identification plate
Tractor identification number (VIN code)
Decoding the Types/Variants/Versions
Tractor serial number
3.2.2 Tractor power label
3.2.3 Engine identification plate
3.2.4 Transmission identification plate
3.2.5 Front axle identification plate
3.2.6 Cab or platform identification plate
3.3 Information on the tractor
3.3.1 Lifting points
3.3.2 Transmission dipstick
3.3.3 Brake fluid
3.3.4 Engine bonnet
3.3.5 Removing the side covers
3.3.6 Tractor lubrication
3.3.7 Rear linkage
3.3.8 Rear hydraulic control valve pressure taps
3.3.9 Emergency exit
3.3.10 Cab category
4 Operating and display elements
4.1.1 Driving position
Right-hand controls (tractor with electronic linkage)
Right-hand controls (tractor with mechanical linkage)
Left-hand controls
4.1.2 Dashboard
Tractor with mechanical reverser
Tractor with clutchless reverser
4.1.3 Controls on the right-hand post
4.1.4 Cab top controls
Heating, ventilation and air conditioning controls
Rear screen wiper
Overhead light
Radio (pre-equipment)
4.1.5 Hinged panels and windows
Hinged panels
Left and right doors
Opening tailgate
Windscreen open
Sun blind
Sunroof sun blind
4.2 Operator’s platform
4.2.1 Driving position
Right-hand controls
Left-hand controls
4.2.2 Work light controls
4.3 Operating and display elements
4.3.1 Instrument panel
4.3.2 Instrument panel digital display
4.3.3 Electronic linkage controls
4.3.4 Rear mechanical linkage controls
4.3.5 External controls
Mechanical rear linkage
4.4 Hydraulic system
4.4.1 Hydraulic controls
Front linkage
Converting single/double action auxiliary hydraulic control valves
4.5 Electric and electronic system
4.5.1 Key-operated ignition
4.5.2 Control lever for indicator lights and horn
4.5.3 External controls
Electronic rear linkage
4.5.4 Switch box electrical socket
4.6 Assembled parts/Machine housing
4.6.1 Sight
4.6.2 Tool box
5 Technical specifications
5.1 ELIOS
5.1.1 Dimensions
Cab version
Platform version
5.1.2 Tractor weight
Cab version
Platform version
5.1.3 Engine
5.1.4 Gearbox
Mechanical transmission
Electrohydraulic transmission
5.1.5 Tractor travel speeds
5.1.6 Without doubler and 12/12 transmission – 30 km/h version
5.1.7 Mechanical or electrohydraulic doubler and 24/24 transmission – 40 km/h version
5.1.8 Electrohydraulic reverser
5.1.9ven front axle
Front/Rear inter-axle ratio
30 km/h version
40 km/h version
5.1.10 Rear axle
5.1.11 Table of front track widths
Standard fronle
Narrow front axle
5.1.12 Table of rear tracks
5.1.13 Tyre combinations
ELIOS 210 (total laden weight 5100 kg)
ELIOS 210 (total laden weight 3500 kg)
5.1.14 Tyre specifications
5.1.15 Brakes
5.1.16 Direction
5.1.17 Rear linkage
5.1.18 Front linkage
5.1.19 Rear hitches
Ladder hitch
Spindle ladder hitch
Ladder hitch with runners
Pick-up hitch
5.1.20 Rear power take-off
5.1.21 Front power take-off
5.1.22 Hydraulic circuits
Open centre circuit 60 l/min
Open centre circuit 85 l/min
5.1.23 Hydraulic control valve combinations
Hydraulic control valves
Electrohydraulic control valves
5.1.24 Electrical circuit
5.1.25 Sound level
Driver’s exposure to noise level (according to annex XIII of the delegated regulation 1322/2014)
Passers-by exposure to noise level (according to annex III of delegated regulation 2015/96)
5.1.26 Seat vibration level
5.1.27 Level of protection provided by the cab
5.1.28 Level of protection provided by the platform
5.1.29 Ballast
5.1.30 Maximum authorised tow weights
5.1.31 Load capacities
5.2 Operating utilities
5.2.1 Lubricants and hydraulic oils
5.2.2 Engine coolant
5.2.3 Brake fluid
5.2.4 Air conditioning circuit
6 Tractor preparation
6.1 Securing the tractor
6.1.1 Stop the tractor and secure it
6.1.2 Securing the tractor
6.2 Prior to putting into operation
6.2.1 Preparing for initial commissioning
6.2.2 Preparing for commissioning
6.2.3 Hitching and connecting the implement
6.3 Engine
6.3.1 Fuel
Quality requirement
Special notes on biofuels
Handling fuel
6.3.2 Topping up the fuel
6.4 Frame
6.4.1 Track adjustment
Tracking method
6.4.2 Adjusting the front axle steering stops
Adjustment
6.4.3 General information about the tyres
6.4.4 Inflation pressure
Effect on soil compaction
Effect on consumption
6.4.5 Specifications
Load index
Speed symbol
6.5 Brake
6.5.1 Coupling the brake pedals
6.5.2 Trailer hydraulic brake
6.6 Steering
6.6.1 Steering column
6.7 Rear power lift
6.7.1 Axle stands
6.7.2 Top link
6.7.3 Stabilisers
6.7.4 Vertical hydraulic tie-rod
6.7.5 Automatic hitches
6.7.6 Rear linkage external controls
Mechanical rear linkage
Electrohydraulic rear linkage
6.7.7 Hitch and unhitch an implement
Recommendations for hitching an implement
Hitching an implement
Unhitching an implement
6.8 Front power lift
6.8.1 Fitting caps on the pressure taps
6.8.2 Converting the single action/double action front linkage
6.8.3 Locking the front linkage
6.8.4 Top link
6.8.5 Lower links for the front linkage
6.8.6 Automatic hitches
6.8.7 Hitch and unhitch an implement
Implement hitching recommendations
Hitching an implement
Unhitching an implement
6.9 Front loader
6.9.1 Fitting an adapter frame for the front loader
6.10 Rear power take-off
6.10.1 Hitch and unhitch an implement
Connecting and disconnecting the rear power take-off universal drive shaft
Hitching an implement to the rear power take-off
Unhitching an implement from the rear power take-off
6.11 Hitch
6.11.1 Recommendations
6.11.2 Calculating the maximum tow load (not including CUNA clevis)
6.11.3 Clevis drawbars
6.11.4 Swinging drawbar
Tightening the clevis
Safety device
6.11.5 Pick-up hitch
6.12 Rear hydraulic system
6.12.1 Rear pressure taps
Connecting or disconnecting the pressure taps
Free return to the tank
6.12.2 Single/double action setting
6.13 Front hydraulic system
6.13.1 Lateral pressure connectors
Connecting/Disconnecting the pressure connectors
6.14 Electric and electronic system
6.14.1 Electrical sockets
Trailer or implement lighting socket
Switch box electrical socket
6.14.2 Adjusting the engine bonnet dipped beam headlights
6.15 Cab and operator’s platform
6.15.1 Adjusting the rear-view mirrors
Cab version
Telescopic rear-view mirrors (depending on option)
Interior rear-view mirror
Platform version
6.15.2 Folding roll hoop
6.15.3 Adjusting the driver’s seat
6.15.4 Cable channel
6.15.5 Storage
6.15.6 Category 2 filter
6.16 Assembly parts and machine body
6.16.1 Ballast
6.16.2 Balancing the tractor with mounted implements
Summary table
6.16.3 Fitting and removing the front weights
6.16.4 Opening and closing engine bonnets
One-piece bonnet
Opening the engine bonnet
Closing the engine bonnet
Side covers
Removing the side covers
Refitting the side covers
6.17 Transport of the tractor
6.17.1 Transport
7 Operation
7.1 Driving and transportation
7.1.1 Preparing for road travel
7.1.2 Prepare for driving in the field
7.1.3 Driving with the implements
Heavy-duty pulling operations
7.2 Engine
7.2.1 Running in
7.2.2 Start the engine
Preliminary operations
Start up
Recommendations
7.2.3 Accelerator pedal
7.2.4 Hand accelerator
7.2.5 Engine speed memories
Activating an engine speed memory
Manually adjusting the engine speed memories (first method)
Manually adjusting the engine speed memories (second method)
7.2.6 Particulate filter
Particulate filter filling percentage
Instrument panel
Operating logic
Particulate filter automatic regeneration
Particulate filter stationary regeneration
Maintenance regeneration
Replace the particulate filter
7.2.7 Switching off the engine
7.3 Transmission, clutch and driveshaft
7.3.1 Putting the direction reverser in neutral
Tractors with mechanical reverser
Tractors with clutchless reverser (electrohydraulic)
7.3.2 Selecting the tractor’s travel direction
Recommendations
Tractors with mechanical reverser
Tractors with clutchless reverser (electrohydraulic)
7.3.3 Clutch
Clutch pedal
7.3.4 Speed selection
7.3.5 Range selection
7.3.6 Range doubler
Mechanical range doubler
Electrohydraulic range doubler
7.3.7 Differential lock
7.4 Chassis
7.4.1 Place the tractor on axle stands
7.4.2 Front axle engagement
General points
Automatic mode
Operation
Permanent mode
Operation
7.5 Brake
7.5.1 Service brakes
7.5.2 Parking brake
7.6 Electronic rear linkage
7.6.1 Warning light
7.6.2 Road transport safety
7.6.3 Operating the linkage
7.6.4 Selecting modes
7.6.5 Position control
7.6.6 Draft control
7.6.7 Upper stop
7.6.8 Rear linkage lower link lowering speed
7.6.9 Rapid soil entry function
7.6.10 Electrohydraulic rear linkage external controls
7.7 Mechanical rear linkage
7.7.1 Position control
7.7.2 Draft control
7.7.3 Mixed control
7.7.4 Floating linkage
7.7.5 Sensitivity adjustment
7.7.6 Mechanical rear linkage external controls
7.8 Front power lift
7.8.1 Usage
Mechanically-controlled control valve
Electrohydraulic control valve
7.9 Rear power take-off
7.9.1 Power take-off speed selection
Selecting the drive-proportional power take-off speed
7.9.2 Usage
Power take-off with assisted mechanical engagement
Power take-off with electrohydraulic engagement
7.9.3 Stationary working
7.10 Front power take-off
7.10.1 Using the front power take-off
Engaging the front power take-off
Disengage the front power take-off
7.10.2 Stationary working
7.11 Rear hydraulic system
7.11.1 Rear pressure connectors and controls
Mechanically-controlled hydraulic control valves
Electrohydraulic hydraulic control valves
7.11.2 Mechanically-controlled auxiliary hydraulic control valves
7.11.3 Auxiliary electrohydraulic control valves
Controls
Start up
Linear controls
Pressure position
Floating position
Hydraulic timer
Joystick
Floating position
Other functions
7.11.4 Hydraulic timer
7.11.5 Setting hydraulic flow rates
Flow divider
Motorized flow controller
Hydraulic circuits with two hydraulic pumps
Hydraulic circuits with three hydraulic pumps
Electrohydraulic control valves
7.11.6 Stationary working
7.12 Front hydraulic system
7.12.1 Lateral pressure connectors and controls
Mechanically-controlled auxiliary hydraulic control valves
Auxiliary electrohydraulic control valves
7.13 Electric and electronic system
7.13.1 Manual circuit breaker
7.14 Cab and operator’s platform
7.14.1 Instrument panel display
Display information menu
Information available:
User menu
Particulate filter (DPF)
Inhibiting the strategy to reduce the volume of unburnt fuel
Language
Units of measurement
Transmission errors
Engine errors
Recalibrating the tractor speed
Exiting the user menu
7.14.2 Manual air conditioning
Windscreen de-icing
7.14.3 Category 2 filtration system
8 Faults and remedies
8.1 Alarms
8.1.1 Operating faults
Viewing error codes
8.1.2 Primary alarms
8.1.3 Secondary alarms
8.1.4 Other alarms
8.1.5 Resolution procedures for specific faults
Tractor error codes
Engine error codes
8.2 Engine
8.2.1 Faults caused by a low fuel level
8.3 Frame
8.3.1 Fitting a jack
8.3.2 Replacing a wheel
8.3.3 Towing the tractor
Towing with the engine running
Towing with the engine stopped
Towing clevises
8.3.4 Digging out the tractor
Digging out a tractor
Digging out a tractor by towing
8.4 Electric and electronic system
8.4.1 Fuses and relays
Main fuse box
Tractor with mechanical reverser
Tractor with hydraulic reverser
Dashboard fuses
Right-hand post fuse box
Engine front part fuses and relays
Electrohydraulic control valve fuse box
8.4.2 Overview of the lights
9 Maintenance
9.1 Maintenance Information
9.1.1 Personal protective equipment
9.1.2 Appropriate use
9.1.3 Switching off the engine and securing the tractor
9.1.4 Cleaning and tidying risk areas
9.1.5 Welding advice
9.1.6 Protective devices on the tractor
9.1.7 Engine
Alternator
Engine lubrication
Engine cooling
Engine belts
9.1.8 Wheels and tyres
9.1.9 Braking system
9.1.10 Direction
9.1.11 Implements driven by a power take-off
9.1.12 Air conditioning
9.1.13 Hydraulic circuit
9.1.14 Electrical system
9.1.15 Energy accumulators
9.1.16 Spare parts
9.1.17 Cleaning and protection
9.1.18 Working at height
9.1.19 Handling heavy components
9.1.20 Maintenance operations under the cab or the platform
9.1.21 Lifting the front of the tractor
9.2 Maintenance interval overview
9.2.1 After the first 100 hours of operation
9.2.2 After the first 600 hours of operation
9.2.3 Every 10 hours of operation
9.2.4 Every 100 hours of operation
9.2.5 Every 600 hours of operation
9.2.6 Every 1200 hours of operation
9.2.7 Every 2400 hours of operation
9.2.8 Every two years
9.3 Lubrication plan
9.3.1 Greasing points – 20 hrs
9.3.2 Lubrication points – 50 hrs
9.3.3 Greasing points – 100 hrs
9.3.4 Lubrication points – 600 hrs
9.4 Maintenance engine
9.4.1 Eliminate the water present in the fuel pre-filter
9.4.2 Replace the fuel filters
9.4.3 Bleeding the air from the fuel circuit
9.4.4 Check the engine oil level
9.4.5 Changing the engine oil
Reset the instrument panel
9.4.6 Replace the engine oil filter
9.4.7 Replace the oil vapour recycling filter
9.4.8 Check the coolant level
9.4.9 Check the cooling system seal
9.4.10 Cleaning the coolers
9.4.11 Check the engine alternator and water pump belts
9.4.12 Replace the engine alternator and water pump belts
Removing/fitting the alternator belt
Assembly diagram
9.4.13 Clean the engine air filter
9.4.14 Replace the engine air filter
9.4.15 Replace the engine air filter safety cartridge
9.4.16 Check the air intake seal
9.5 Maintenance operations gearbox
9.5.1 Check the clutch pedal clearance
9.5.2 Adjust the clutch clearance (depending on equipment)
9.6 Maintanance operations chassis
9.6.1 Check the oil level of the front axle differential casing
9.6.2 Replace the front axle differential unit oil
9.6.3 Check the front axle final drive oil level
9.6.4 Replace the front axle final drive oil
9.6.5 Replacing the front axle breather
9.6.6 Check the tightness of the wheel discs on the hubs
9.6.7 Check the tightness of the wheel discs on the rims
9.6.8 Checking the condition of the wheels and tyres and checking the tyre inflation pressure
9.7 Maintenance operations brake
9.7.1 Check the service brake fluid level
9.8 Maintenance operations hitch
9.8.1 Check the clearance of the clevises
9.9 Rear power take-off maintenance operations
9.9.1 Checking the rear power take-off clutch clearance
9.10 Maintenance front power take-off
9.10.1 Check the front power take-off unit oil level
9.10.2 Replace the front power take-off unit filter
9.10.3 Replacing the front power take-off unit oil
9.11 Maintenance operations hydraulic
9.11.1 Checking the level of transmission oil and hydraulic circuit oil
9.11.2 Changing the oil in the transmission/hydraulic circuit
9.11.3 Replacing the filter cartridges on the transmission/hydraulic circuit
9.11.4 Replacing the hydraulic strainer
9.11.5 Check the hydraulic circuit
9.12 Maintenance electrical / electronics
9.12.1 Clean and grease the battery terminals
9.12.2 Checking the operation and condition of the lighting and signalling devices
9.13 Maintenance Cab / Operator’s platform
9.13.1 Check the screen washer fluid level
9.13.2 Cleaning the cab air filter
9.13.3 Replace the cab air filter
9.13.4 Activating the air conditioning
9.13.5 Check the air conditioning dehumidifier
9.14 Maintenance operations machine body
9.14.1 Check the tightness of the front weight mounting bolts
9.14.2 Cleaning the radiator grilles
9.15 Storage
9.15.1 Storage instructions
Long-term storage
Restarting the tractor
10 Putting out of operation and disposal
10.1 Information on the machine
10.1.1 Scrapping and waste disposal
11 Technical terms and abbreviations
11.1 Technical terms and abbreviations
11.1.1 Technical terms
11.1.2 Abbreviations
00 1175 209 0.pdf:
ELIOS 240-230-220Stage V
Table of contents
1 Introduction
1.1 Notes on the manual
1.1.1 Validity of the operator’s manual
1.1.2 Information about this Operator’s Manual
1.1.3 Symbols and notes
1.1.4 Optional equipment
1.1.5 Qualified specialist workshop
1.1.6 Notes on maintenance
1.1.7 Notes on warranty
1.1.8 Spare parts and technical questions
1.1.9 Transferring the tractor to a third party
1.2 Intended use
1.2.1 Intended use
1.2.2 Reasonably foreseeable misuse
2 Safety
2.1 Identifying warnings
2.1.1 Hazard signs
2.1.2 Signal word
2.2 Safety rules
2.2.1 European regulations
2.2.2 Importance of the Operator’s Manual
2.2.3 Observing safety decals and warnings
2.2.4 Requirements made on all persons working with the tractor
2.2.5 Children in danger
2.2.6 High risk areas
2.2.7 Presence between tractor and machine
2.2.8 Persons riding on the machine
2.2.9 Hitching an implement or trailer to the tractor
2.2.10 Danger of injury on the PTO shaft
2.2.11 Danger of injury on the universal drive shaft
2.2.12 Applications with front loaders
2.2.13 Avoid hazards posed by frontloaders
2.2.14 Structural changes
2.2.15 Optional equipment and spare parts
2.2.16 Forestry work
2.2.17 Controlling the tractor when it is running
2.2.18 Operation only after commissioning has been properly performed
2.2.19 Technical condition
2.2.20 Danger from damage on the tractor
2.2.21 Respecting technical limit values
2.2.22 Danger from machine parts running on
2.2.23 Keeping safety devices functional
2.2.24 Personal protective equipment
2.2.25 Wearing suitable clothing
2.2.26 Removing dirt and loose objects
2.2.27 Preparing the tractor for road travel
2.2.28 Hazards when driving on the road and on the field
2.2.29 Parking the tractor securely
2.2.30 Unsuitable operating utilities
2.2.31 Safe handling of operating and auxiliary utilities
2.2.32 Fuel is harmful to your health
2.2.33 Refrigerant is harmful to your health
2.2.34 Environmental protection and disposal
2.2.35 Keeping the cab free of chemicals
2.2.36 Handling of crop protection agents and fertilisers
2.2.37 Avoiding fires
2.2.38 Lethal electrocution from overhead lines
2.2.39 Behaviour in case of voltage flash-over from overhead lines and when lightning strikes
2.2.40 Electrocution by electrical system
2.2.41 Noise may cause health problems
2.2.42 Vibrations may cause health problems
2.2.43 Pressurised fluids
2.2.44 Compressed air
2.2.45 Toxic exhaust gas
2.2.46 Hot surfaces
2.2.47 Accessing and leaving the machine safely
2.2.48 Working on the tractor only when shut down
2.2.49 Maintenance operations and repair work
2.2.50 Raised tractor parts and loads
2.2.51 Hazard posed by welding work
2.2.52 Checking and charging the battery
2.3 Safety decals on the tractor
2.3.1 Structure of safety decals
2.3.2 Warning symbols
2.4 Safety devices
2.4.1 Wheel chock
3 Tractor description
3.1 Overview
3.1.1 Front left-hand view of the tractor
3.1.2 Rear left-hand view of the tractor
3.2 Identification plates and vehicle identification number
3.2.1 Tractor identification plate
Tractor identification number (VIN code)
Decoding the Types/Variants/Versions
Tractor serial number
3.2.2 Tractor power label
3.2.3 Engine identification plate
3.2.4 Transmission identification plate
3.2.5 Front axle identification plate
3.2.6 Cab identification plate
3.3 Information on the tractor
3.3.1 Lifting points
3.3.2 Transmission dipstick
3.3.3 Brake fluid
3.3.4 Engine bonnet
3.3.5 Removing the side covers
3.3.6 Tractor lubrication
3.3.7 Rear linkage
3.3.8 Rear hydraulic control valve pressure taps
3.3.9 Emergency exit
3.3.10 Cab category
4 Operating and display elements
4.1.1 Driving position
Right-hand controls
Left-hand controls
4.1.2 Dashboard
Tractor with mechanical reverser
Tractor with clutchless reverser
4.1.3 Controls on the right-hand post
4.1.4 Cab top controls
Heating, ventilation and air conditioning controls
Rear screen wiper
Overhead light
Radio (pre-equipment)
4.1.5 Hinged panels and windows
Hinged panels
Left and right doors
Opening tailgate
Windscreen open
Sun blind
Sunroof sun blind
4.2 Operating and display elements
4.2.1 Instrument panel module
4.2.2 Instrument panel digital display
Engine oil warning light
Transmission oil warning light
Tractor calculated speed indication
Tank urea solution level indication
Water in fuel warning light
Speed range doubler status indicator light
Tractor’s direction of travel r
John Deere Repair Technical Manual PDF
John Deere POWERTECH E 4.5 and 6.8 L Diesel Engines TECHNICAL MANUAL 25JAN08
John Deere Repair Technical Manual PDF
John Deere PowerTech M 10.5 L and 12.5 L Diesel Engines COMPONENT TECHNICAL MANUAL CTM100 10MAY11
John Deere Repair Technical Manual PDF
John Deere Repair Technical Manual PDF
John Deere Diesel Engines POWERTECH 2.9 L Component Technical Manual CTM126 Spanish
John Deere Repair Technical Manual PDF
John Deere Transmission Control Unit Component Technical Manual CTM157 15JUL05
John Deere Parts Catalog PDF
John Deere Tractors 6300, 6500, and 6600 Parts Catalog CQ26564 (29SET05) Portuguese
John Deere Repair Technical Manual PDF
John Deere Application List Component Technical Manual CTM106819 24AUG20
John Deere Parts Catalog PDF
John Deere Harvesters 8500 and 8700 Parts Catalog CPCQ24910 Spanish
John Deere Repair Technical Manual PDF

