Claas Frontloader 100E-40E (B59) Tractors Operator Manual EN
$50.00
- Model: Frontloader 100E-40E (B59) Tractors
- Type Of Manual: Operator Manual
- Language: EN
- Format: PDF(s)
- Size: 41.4 MB
File List:
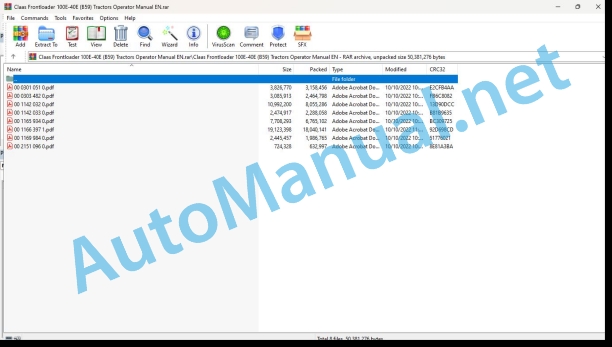
00 0301 051 0.pdf
00 0303 482 0.pdf
00 1142 032 0.pdf
00 1142 033 0.pdf
00 1165 934 0.pdf
00 1166 397 1.pdf
00 1169 984 0.pdf
00 2151 096 0.pdf
00 0301 051 0.pdf:
PROFI CAM 3
Table of contents
1 Introduction
1.1 Notes on the manual
1.1.1 Validity of manual
1.1.2 Information about this Operator’s Manual
1.1.3 Symbols and notes
1.1.4 Optional equipment
1.1.5 Qualified specialist workshop
1.1.6 Maintenance information
1.1.7 Warranty notes
1.1.8 Spare parts and technical questions
1.2 Intended use
1.2.1 Intended use
1.2.2 Reasonably foreseeable misuse
2 Safety
2.1 Identifying warnings
2.1.1 Hazard signs
2.1.2 Signal word
2.2 Safety rules
2.2.1 Meaning of Operator’s Manual
2.2.2 Observing safety decals and warnings
2.2.3 Optional equipment and spare parts
3 Product description
3.1 Overview and method of operation
3.1.1 How the PROFI CAM works
3.2 Identification plates and identification number
3.2.1 Position of identification plates
3.2.2 Explanation of PROFI CAM identification plate
3.3 Information on the product
3.3.1 CE marking
4 Operating and control elements
4.1 Camera system
4.1.1 Camera system monitor
4.2 Menu structure
4.2.1 Main menu
4.2.2
4.2.3
4.2.4
4.2.5
4.2.6
5 Technical specifications
5.1 PROFI CAM
5.1.1 Monitor
5.1.2 Camera
5.1.3 Switch box
5.1.4 Degree of protection against foreign bodies and water
6 Preparing the product
6.1 Shutting down and securing the machine
6.1.1 Switching off and securing the machine
6.2 Prior to operation
6.2.1 Carry out prior to operation
6.2.2 Installing the sun protection
6.2.3 Aligning the camera
6.2.4 Connecting the camera electrics
7 Operation
7.1 Monitor
7.1.1 Switching on the monitor
7.1.2 Calling up the menu
7.1.3 Setting a menu item
7.1.4 Setting the image orientation
7.1.5 Setting automatic screen darkening
7.1.6 Image mirroring
7.1.7 Setting the trigger view
7.1.8 Setting the follow-up time for trigger view
7.1.9 Setting the display mode
7.1.10 Activating/deactivating a display mode
8 Faults and remedies
8.1 Electrical and electronic system
8.1.1 Overview of problems on PROFI CAM camera system
8.1.2 Replacing the switch box fuse
9 Maintenance
9.1 Maintenance intervals
9.1.1 Every 10 operating hours or daily
9.2 Camera system
9.2.1 Checking the camera system for dirt
9.2.2 Cleaning the camera
9.2.3 Cleaning the switch box
9.2.4 Cleaning the monitor
10 Placing out of operation and disposal
10.1 General Information
10.1.1 Putting out of operation and disposal
11 Technical terms and abbreviations
11.1 Abbreviations
11.1.1 Units
11.1.2 Abbreviations
11.1.3 Technical terms
00 0303 482 0.pdf:
PROFI CAM 4
Table of contents
1 Introduction
1.1 Notes on the manual
1.1.1 Validity of manual
1.1.2 Information about this Operator’s Manual
1.1.3 Symbols and notes
1.1.4 Optional equipment
1.1.5 Qualified specialist workshop
1.1.6 Maintenance information
1.1.7 Notes on warranty
1.1.8 Spare parts and technical questions
1.2 Intended use
1.2.1 Intended use
1.2.2 Reasonably foreseeable misuse
2 Safety
2.1 Identifying warnings
2.1.1 Hazard signs
2.1.2 Signal word
2.2 Safety rules
2.2.1 Meaning of Operator’s Manual
2.2.2 Structural changes
2.2.3 Optional equipment and spare parts
2.2.4 Operation only following proper putting into operation
2.2.5 Technical status
2.2.6 Respecting technical limit values
Respecting technical limit values
2.2.7 Hazards when driving on roads and fields
3 Product description
3.1 Overview and method of operation
3.1.1 How the PROFI CAM works
3.2 Identification plates and identification number
3.2.1 Identification plates
3.3 Information on the product
3.3.1 CE marking
4 Operating and display elements
4.1 Camera system
4.1.1 Camera system monitor
4.1.2 CEBIS
4.2 Menu structure
4.2.1 Main menu
4.2.2
4.2.3
4.2.4
4.2.5
4.2.6
5 Technical specifications
5.1 PROFI CAM
5.1.1 Monitor
5.1.2 Camera
5.1.3 Switch box
6 Preparing the product
6.1 Switching off and securing the machine
6.1.1 Switching off and securing the machine
6.2 Prior to putting into operation
6.2.1 Carry out prior to operation
6.2.2 Installing the sun protection
6.2.3 Aligning the camera
7 Operation
7.1 Monitor
7.1.1 Switching on the monitor
7.1.2 Calling up the menu
7.1.3 Setting a menu item
7.1.4 Setting the image orientation
7.1.5 Setting automatic screen darkening
7.1.6 Image mirroring
7.1.7 Setting the trigger view
7.1.8 Setting the follow-up time for trigger view
7.1.9 Setting the display mode
7.1.10 Activating/deactivating a display mode
8 Faults and remedies
8.1 Electric and electronic system
8.1.1 Overview of problems on PROFI CAM camera system
9 Maintenance
9.1 Maintenance intervals
9.1.1 Every 10 operating hours or daily
9.2 Camera system
9.2.1 Checking the camera system for dirt
9.2.2 Cleaning the camera
9.2.3 Cleaning the switch box
9.2.4 Cleaning the monitor
10 Putting out of operation and disposal
10.1 General information
10.1.1 Putting out of operation and disposal
11 Technical terms and abbreviations
11.1 Abbreviations
11.1.1 Units
11.1.2 Abbreviations
11.1.3 Technical terms
00 1165 934 0.pdf:
MANUBALC40-C30-U40L6000-L500-L40V7000-V500-V60-V50-V40W500
Table of contents
1 To this Operator’s Manual
1.1 Notes on the manual
1.1.1 Using the user manual
Important information concerning this user manual
Structure by MANUBAL sub-assemblies
Search and find
Direction indications
Specific terminology
Optional and additional equipment
1.1.2 Symbols and instructions
Text and illustrations
Highlighting dangers and warnings
1.1.3 Technical information
2 Safety
2.1 Safety instructions
2.1.1 Recommendations
2.1.2 Appropriate use
2.1.3 Inappropriate use
2.1.4 Safety and accident prevention instructions
2.1.5 MANUBAL
2.1.6 Checking the condition of the MANUBAL
2.1.7 Adjustment, servicing or repair work
2.1.8 Driving and transport
2.1.9 Safety regulations
2.1.10 Safety labels
3 Machine description
3.1 Identification plate and serial number
3.1.1 Identification plate
3.2 Overview
3.2.1 Description
Bale grabber
Wrapped bale grabber
Connections
Bale fork
3.3 Optional equipment
3.3.1 Wrapped bale grabber kit
3.3.2 Lower finger kit
3.3.3 Finger length
3.3.4 Additional fingers
3.3.5 Extension
4 Technical specifications
4.1 MANUBAL
4.1.1 Specifications of the MANUBAL bale grabber
4.1.2 Specifications of the MANUBAL bale fork
5 Machine preparation
5.1 Hitch
5.1.1 Hitching the MANUBAL
For an implement carrying frame with manual unlocking
5.1.2 Unhitching the MANUBAL
For an implement carrying frame with manual unlocking
5.2 Fieldwork settings
5.2.1 Adjusting the grabber opening/closing
Round bale
Rectangular bale
5.2.2 MANUBAL W500 2nd bale sensor
Operating principle
Adjusting the sensor
Forced activation of the sensor
5.2.3 MANUBAL C40 — Adjusting the Power control system
5.2.4 Position of bale fork fingers
Fixed fingers position
Floating fingers position
Inclined position
On-road position of foldable fingers
5.2.5 MANUBAL V7000 lower fingers
Configuration of lower fingers Parking position
5.2.6 Finger spacing
5.3 Optional equipment
5.3.1 Wrapped bale grabber kit
Adjusting the opening/closing of the wrapped bale abber
Assembling the wrapped bale grabbers
5.3.2 Lower finger kit
Configuration of lower fingers
Parking position
Adjusting the finger spacing
5.3.3 Extension
6 Operation
6.1 MANUBAL
6.1.1 Picking up bales on cylindrical face
6.1.2 Picking up bales on flat face
6.2 MANUBAL V50
6.2.1 Changing the grabber position
7 Maintenance
7.1 Maintenance Information
7.1.1 Cleaning the MANUBAL
7.2 General maintenance information
7.2.1 Servicing and storage
Maintenance
7.3 Lubrication plan
7.3.1 Greasing
8 EC declaration of conformity
8.1 MANUBAL
8.1.1 MANUBAL C40, C30, L6000, L500, L40, U40, V7000, V500, V60, V50, V40, W500
00 1166 397 1.pdf:
Front loaderFL 100–60–40 E
Table of contents
1 Inuction
1.1 General information
1.1.1 Validity of the operator’s manual
1.1.2 Information about this Operator’s Manual
1.1.3 Symbols and notes
1.1.4 Optional equipment
1.1.5 Qualified specit workshop
1.1.6 Maintenance notes
1.1.7 Notes on warranty
1.1.8 Spare parts and technical questions
1.1.9 Technical information
1.2 Intended use
1.2.1 Use compliant with the instructions
1.2.2 Reasonably foreseeable misuse
2 Safety
2.1 Identifying warnings
2.1.1 Hazard signs
2.1.2 Signal word
2.2 Safety rules
2.2.1 Importance of Operator’s Manual
2.2.2 Observing safety decals and warnings
2.2.3 Requirements made on all persons working with the product
2.2.4 Children in danger
2.2.5 High risk areas
2.2.6 Persons riding on the machine
2.2.7 Driving and transport
2.2.8 Hitching the tractor to the machine
2.2.9 Avoiding risks linked to using the front loader
2.2.10 Limits for using the loader on a tractor fitted with a roll hoop with two uprights
2.2.11 Structural changes
2.2.12 Optional equipment and spare parts
2.2.13 Technical condition
2.2.14 Keeping safety devices functional
2.2.15 Personal protective equipment
2.2.16 Wearing suitable clothing
2.2.17 Removing dirt and loose objects
2.2.18 Preparing the machine for road travel
2.2.19 Hazards when driving on the road and on the field
2.2.20 Unsuitable operating utilities
2.2.21 Safe handling of operating and auxiliary utilities
2.2.22 Environmental protection and disposal
2.2.23 Lethal electrocution from overhead lines
2.2.24 Behaviour in case of voltage flash-over from overhead lines and when lightning strikes
2.2.25 Vibrations may cause health problems
2.2.26 Pressurised fluids
2.2.27 Working on machine only after shutting it down
2.2.28 Maintenance work and repairs
2.2.29 Raised tractor parts and loads
2.2.30 Using the front loader
2.2.31 Safety when lifting a load
Extract from section 4.4.4 of the standard EN 12525 and its amendment A2 2010
Extract from Annex E of the standard EN 12525 and its amendment A2 2010
2.2.32 Using the front loader implements
2.2.33 Operation requiring someone underneath the front loader
2.2.34 Welding work prohibited
2.3 Safety marking
2.3.1 Structure of safety decals
2.3.2 Safety labels
2.3.3 Safety labels
3 Machine description
3.1 Overview and method of operation
3.1.1 Overview of the front loader
3.1.2 Overview of the front loader mounting frame
3.2 Identification plates and identification numbers
3.2.1 Front loader identification plate
Identification plate 1
Identification plate 2
Identification plate 3
3.2.2 Front loader identification plate (Australia)
3.2.3 Front loader adaptation structure identification plate
Identification plate 1
Identification plate 2
3.3 Safety devices
3.3.1 Safety device for lifting and dumping the front loader
3.4 Front loader equipments
3.4.1 Level indicator
3.4.2 Implement carrier frame
MX implement carrier frame
Euro implement carrier frame
3.4.3 Overview of front implements
Bins, forks, grab and blade
Bale clamp
3.5 Front loader optional equipments
3.5.1 SHOCK ELIMINATOR system
3.5.2 MACH system
3.5.3 Additional functions
3.6 Information on the machine
3.6.1 Handling points
4 Operating and display elements
4.1 Front loader controls
4.1.1 Hydraulic supply to the front loader or the rear hydraulic pressure taps
4.1.2 PROPILOT system handle
4.1.3 FLEXPILOT system handle
5 Technical specifications
5.1 FL 100-40 E
5.1.1 Technical specifications for FL E front loaders
5.1.2 Compatibility of FL E front loaders with tractors in the CLAAS range
5.2 Operating utilities
5.2.1 Lubricants
6 Machine preparation
6.1 Front loader
6.1.1 Adjusting the position of the control
6.1.2 Hitching the front loader
Connecting the hydraulics and electrics
6.1.3 Unhitching the front loader
6.2 Front loader equipments
6.2.1 Preparing the level indicator
6.3 Front attachment
6.3.1 Hitching an implement to an implement carrier frame with manual unlocking
6.3.2 Unhitching an implement with an implement carrier frame with manual unlocking
6.4 Ballast
6.4.1 Tractor balancing
6.5 Transport of the front loader
6.5.1 Transporting and handling the front loader
7 Operation
7.1 Front loader
7.1.1 Safety device for lifting and dumping
7.1.2 Controlling the front loader or the tractor’s rear pressure taps
7.1.3 Using the PROPILOT system control
Locking and unlocking the PROPILOT system control
Using the front loader with PROPILOT system
Using the hitched implement’s third function
7.1.4 Using the FLEXPILOT system control
Locking and unlocking the FLEXPILOT system control
Using the front loader with FLEXPILOT system
Using the front loader’s third functions with the FLEXPILOT System
7.2 Front loader optional equipments
7.2.1 Using the SHOCK ELIMINATOR system function
Manual valve
Electrohydraulic valve
8 Faults and remedies
8.1 Problems hitching the front loader
9 Maintenance
9.1 Maintenance Information
9.1.1 General information on front loader maintenance
9.1.2 Personal protective equipment
9.1.3 Cleaning the front loader
9.1.4 Working on the tractor or the front loader
9.1.5 Installing a lifting ram locking system
9.1.6 Removing the system for locking the front loader lifting rams
9.2 Maintenance interval overview
9.2.1 After the first ten hours of operation
9.2.2 After the first 50 hours of operation
9.2.3 Every ten hours of operation
9.2.4 Every month
9.2.5 Every 100 hours of operation
9.3 Lubrication plan
9.3.1 Lubricate the lubrication points every ten hours of operation
9.3.2 Lubricating the lubrication points every three months
9.4 Lifting device maintenance operations
9.4.1 Checking the front loader articulations
9.4.2 Check the hydraulic circuit
9.4.3 Checking the front loader hoses
9.4.4 Checking the front loader controls
9.4.5 Checking the front loader wiring harnesses
9.4.6 Checking the mechanical condition of the front loader
9.5 Maintanance operations chassis
9.5.1 Checking the front loader mounting frame is correctly tightened on the tractor
10 Putting out of operation and disposal
10.1 Disposing of the front loader and getting rid of waste
11 Declaration of Conformity
11.1 Front loader
11.1.1 UKCA and EC declaration of conformity
12 Technical terms and abbreviations
12.1 Units of measurement
12.2 Technical terms
00 1169 984 0.pdf:
Sensor case for tractors Stage IIIB, IV and VSensor case for tractors Stage IIIB, IV and VSensor case for Stage IIIB, IV and V tractors
Contents
1 Sensorkoffer – Sensor case – Sensor suitcase – Stage IIIB, IV & V
1.1 Auflistung Kofferinhalt
1.1 Listing case content
1.1 Presentation of the contents of the suitcase
00 2151 096 0.pdf:
CONTENTS
1. USER INSTRUCTIONS
2. SAFETY INSTRUCTIONS
3. SAFETY STICKERS
4. IDENTIFICATION PLATE
5. DOMAIN OF USE
6. OPERATING PRINCIPLES
7. TECHNICAL SPECIFICATIONS
DECLARATION OF CONFORMITY
John Deere Repair Technical Manual PDF
John Deere Repair Technical Manual PDF
John Deere Repair Technical Manual PDF
John Deere DF Series 150 and 250 Transmissions (ANALOG) Component Technical Manual CTM147 05JUN98
John Deere Repair Technical Manual PDF
John Deere Repair Technical Manual PDF
John Deere Repair Technical Manual PDF
John Deere Repair Technical Manual PDF
John Deere 16, 18, 20 and 24HP Onan Engines Component Technical Manual CTM2 (19APR90)
John Deere Repair Technical Manual PDF
John Deere Parts Catalog PDF
John Deere Tractors 6300, 6500, and 6600 Parts Catalog CQ26564 (29SET05) Portuguese
John Deere Repair Technical Manual PDF

