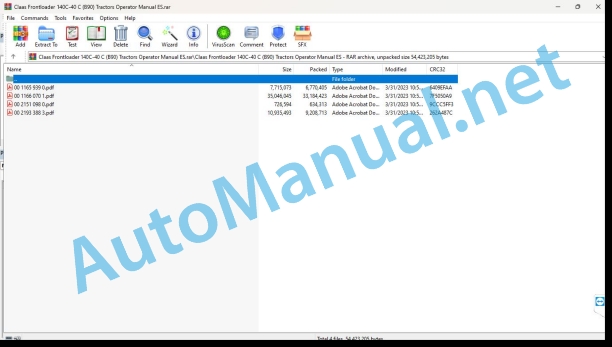
Claas Frontloader 140C-40 C (B90) Tractors Operator Manual ES
$50.00
- Model: Frontloader 140C-40 C (B90) Tractors
- Type Of Manual: Operator Manual
- Language: ES
- Format: PDF(s)
- Size: 47.5 MB
File List:
00 1165 939 0.pdf
00 1166 070 1.pdf
00 2151 098 0.pdf
00 2193 388 3.pdf
00 1165 939 0.pdf:
MANUBALC40-C30-U40L6000-L500-L40V7000-V500-V60-V50-V40W500
1 Regarding this instruction manual
1.1 Information regarding the instruction manual
1.1.1 Use the user manual
Important information about this user manual
Structuring according to the MANUBAL subsets
Search and find
Direction signs
Specific terminology
Optional equipment and supplementary equipment
1.1.2 Symbols and instructions
Texts and illustrations
Indication of dangers and warnings
1.1.3 Technical instructions
2 Security
2.1 Safety regulations
2.1.1 Recommendations
2.1.2 Use according to assignment
2.1.3 Use not in accordance with the assignment
2.1.4 Safety and accident prevention instructions
2.1.5 MANUBAL
2.1.6 Checking the status of the MANUBAL
2.1.7 Adjustment, maintenance or repair work
2.1.8 Circulation and transportation
2.1.9 Safety regulations
2.1.10 Safety stickers
3 Machine Description
3.1 Identification plate and serial number
3.1.1 Identification plate
3.2 Overview
3.2.1 Description
bale clamps
Clamps for bales
Fittings
Bale spikes
3.3 Optional equipment
3.3.1 Wrapped Bale Clamp Kit
3.3.2 Lower spike kit
3.3.3 Spike length
3.3.4 Additional spikes
3.3.5 Enhancement
4 Technical data
4.1 MANUBAL
4.1.1 Characteristics of the MANUBAL with bale clamps
4.1.2 Characteristics of the MANUBAL with bale spikes
5 Preparation of the machine
5.1 Towing device
5.1.1 HANDLE Hitch
Case of a tool holder frame with manual release
5.1.2 Unhooking the MANUBAL
Case of a tool holder frame with manual release
5.2 Settings for use at work
5.2.1 Gripper opening/closing adjustment
Cylindrical bale
rectangular bale
5.2.2 MANUBAL W500 2nd bale detector
Operating principle
Detector adjustment
Forced activation of the detector
5.2.3 MANUBAL C40 — Setting the Power control system
5.2.4 Position of the tips of the bale spikes
Fixed spike position
Floating Spikes Position
inclined position
Position of retractable spikes on the road
5.2.5 MANUBAL V7000 with lower spikes
Lower spike configuration
Parking position
5.2.6 Spike separation
5.3 Optional equipment
5.3.1 Wrapped Bale Clamp Kit
Wrapped bale clamp open/close adjustment
Mounting the wrapped bale clamps
5.3.2 Lower spike kit
Lower spike configuration
Parking position
Spike spacing adjustment
5.3.3 Enhancement
6 Management
6.1 MANUBAL
6.1.1 Gripping bales due to their cylindrical surface
6.1.2 Gripping of bales due to their flat surface
6.2 MANUBAL V50
6.2.1 Change of position of the clamp
7 Maintenance
7.1 Maintenance instructions
7.1.1 Cleaning the MANUBAL
7.2 General maintenance insuions
7.2.1 Maintenance and storage
Maintenance
Parking lot
7.3 Greasing scheme
7.3.1 Greasing
8 EC declaration of conformity
8.1 MANUBAL
8.1.1 MANUBAL C40, C30, L6000, L500, L40, U40, V7000, V500, V60, V50, V40, W500
00 1166 070 1.pdf:
Front loaderFL 140-120-100-80-60-40 C
1. Introduction
1.1 General information
1.1.1 Validity of the user manual
1.1.2 Information about this instruction manual
1.1.3 Symbols and indications
1.1.4 Optional equipment
1.1.5 Qualified specialized workshop
1.1.6 Maintenance instructions
1.1.7 Information regarding warranty
1.1.8 Spare parts and technical questions
1.1.9 Technical instructions
1.2 Proper application of the machine
1.2.1 Use according to recommendations
1.2.2 Reasonably foreseeable abuse
2 Security
2.1 Recognize warning signs
2.1.1 Danger symbols
2.1.2 Keyword
2.2 Safety instructions
2.2.1 Meaning of the instruction manual
2.2.2 Observe graphic danger symbols and danger indications
2.2.3 Requirements for all people who work with the product
2.2.4 Children in danger
2.2.5 Risk areas
2.2.6 Accompanying persons
2.2.7 Circulation and transportation
2.2.8 Couple the tractor with the machine
2.2.9 Avoid risks due to the use of the front loader
2.2.10 Limits of use of the loader on a tractor with a two-post arch
2.2.11 Construction modifications
2.2.12 Optional equipment and spare parts
2.2.13 Technical status
2.2.14 Maintain functional protection devices
2.2.15 Personal protective equipment
2.2.16 Wear appropriate clothing
2.2.17 Remove dirt and loose objects
2.2.18 Prepare the machine for road traffic
2.2.19 Risks during road and countryside travel
2.2.20 Unsuitable consumables
2.2.21 Safe handling of consumables and auxiliary materials
2.2.22 Environmental protection and waste disposal
2.2.23 Deadly electrical discharge through overhead lines
2.2.24 Behavior in the case of an overhead line voltage transfer and lightning strike
2.2.25 Vibrations can harm health
2.2.26 Liquids under pressure
2.2.27 Work only on the stopped machine
2.2.28 Maintenance work and repair work
2.2.29 Raised tractor elements and loads
2.2.30 Use the front loader
2.2.31 Safety when lifting a load
Extract from chapter 4.4.4 of the EN 12525 standard and its amendment A2 2010
Extract from Annex E of the EN 12525 standard and its amendment A2 2010
2.2.32 Using front loader tools
2.2.33 Operation that requires the presence of a person under the front loader
2.2.34 Welding work is prohibited
2.3 Safety signage
2.3.1 Structure of graphic hazard symbols
2.3.2 Safety stickers
3 Machine Description
3.1 Summary and operation
3.1.1 Front loader overview
3.1.2 Overview of the adaptation structure
3.2 Identification plates and identification numbers
3.2.1 Front loader nameplate
Nameplate 1
Nameplate 2
Name plate 3
3.2.2 Front loader adaptation structure nameplate
Nameplate 1
Nameplate 2
3.3 Safety devices
3.3.1 Safety device for lifting and tipping the front loader
3.4 Front loader equipment
3.4.1 FITLOCK coupling system
3.4.2 Level indicator
3.4.3 Tool racks
MX tool frame
Euro tool frame
MX or Euro tool frame
Euro or SMS tool holder frame
MX or Faucheux-Blanc tool holder frame
Euro or Sigma4 tool holder frame
MX, Euro or Tenias tool holder frame
3.4.4 View of the front tools set
Spoons, forks, gripper and blade
bale clamps
3.5 Optional front loader equipment
3.5.1 SHOCK ELIMINATOR System
3.5.2 MACH System
3.5.3 FASTLOCK System tool holder frame
3.5.4 Additional functions
Function 3
Function 4
MACH 2 system
3.6 Machine information
3.6.1 Handling points
4 Control and display instruments
4.1 Front loader controls
4.1.1 Safety device for lifting and tipping the front loader
4.1.2 Hydraulically supply the front loader or rear hydraulic pressure points
4.1.3 PROPILOT System lever
4.1.4 FLEXPILOT System lever
4.1.5 ELECTROPILOT lever
5 Technical data
5.1FL 140-40C
5.1.1 Technical characteristics of FL C front loaders
5.1.2 Compatibility of FL C front loaders with CLAAS range tractors
5.2 Inputs
5.2.1 Lubricants
6 Preparation of the machine
6.1 Front loader
6.1.1 Control of the front loader or the pressure points at the rear of the tractor
6.1.2 Adjust the knob position
6.1.3 Attach the front loader
6.1.4 Uncouple the front loader
6.2 Front loader equipment
6.2.1 Prepare the tool racks
MX or Euro tool frame
Euro or SMS tool holder frame
MX or Faucheux-Blanc tool holder frame
Euro or Sigma4 tool holder frame
MX, Euro or Tenias tool holder frame
6.2.2 Prepare the implement level indicator
6.3 Head
6.3.1 Hitching an implement with a manual release tool frame
6.3.2 Unhitching the implement with a manual release tool holder frame
6.3.3 Attaching a tool to a FASTLOCK System release tool holder
6.3.4 Detaching a tool from the FASTLOCK System unlocking tool frame
6.4 Ballast
6.4.1 Tractor balancing
6.5 Transport of the front loader
6.5.1 Transport and handling of the front loader
7 Management
7.1 Front loader
7.1.1 Safety device for lifting and tipping
7.1.2 Control of the front loader or the pressure points at the rear of the tractor
7.1.3 Using the PROPILOT System command
Lock and unlock the PROPILOT System control
Using the front loader with PROPILOT System
Use functions 3 and 4 of the attached tool
7.1.4 Using the FLEXPILOT System control
Locking and unlocking the FLEXPILOT System control
Using the front loader with FLEXPILOT System
Use functions 3 and 4 of the attached tool
7.1.5 Use the multifunction lever
Lock and unlock the multifunction lever
Use front loader functions
Use the functions of the docked tool
7.1.6 Use the multifunction lever
Lock and unlock the multifunction lever
Use front loader functions
Activate the floating position in one or both front loader functions
Use the functions of the docked tool
7.1.7 Using the ELECTROPILOT control (ELIOS/ARION 600-500/AXION 800)
Lock and unlock the ELECTROPILOT control
Use front loader functions
Activate the floating position in one or both front loader functions
Use functions 3 and 4 of the attached tool
7.2 Optional front loader equipment
7.2.1 Use the SHOCK ELIMINATOR System function
Manual valve
Electrohydraulic valve
8 Incident and solution
8.1 Hitching difficulties
9 Maintenance
9.1 Maintenance instructions
9.1.1 General information regarding front loader maintenance
9.1.2 Personal protective equipment
9.1.3 Clean the front loader
9.1.4 Perform operations on the tractor or front loader
9.1.5 Install a lifting cylinder locking system
9.1.6 Remove the front loader lift cylinder locking system
9.2 Summary of maintenance intervals
9.2.1 In the first ten hours of service
9.2.2 In the first 50 hours of service
9.2.3 Every ten hours of service
9.2.4 Monthly
9.2.5 Every 100 hours of service
9.3 Greasing scheme
9.3.1 Grease the lubrication points every ten hours of service
9.3.2 Grease the grease points every three months
9.4 Lifting device maintenance operations
9.4.1 Check the front loader joints
9.4.2 Check the hydraulic circuit.
9.4.3 Check the front loader hoses
9.4.4 Check the front loader controls
9.4.5 Check the front loader wiring
9.4.6 Check the mechanical condition of the front loader
9.5 Chassis maintenance work
9.5.1 Check the tightness of the front loader adaptation structure
10 Decommissioning and waste disposal
10.1 Dispose of the front loader and remove waste
11 Declaration of conformity
11.1 Front loader
11.1.1 EC declaration of conformity
11.1.2 EAC Conformity Certificate
12 Technical dictionary and abbreviations
12.1 Units of measurement
12.2 Technical terms
00 2151 098 0.pdf:
1. INSTRUCCIONES PARA EL USUARIO
2. NORMAS DE SEGURIDAD
3. ADHESIVOS DE SEGURIDAD
4. PLACA DE IDENTIFICACIÓN
5. ÁMBITO DE USO
6. PROCEDIMIENTO DE USO
7. CARACTERÍSTICAS TÉCNICAS
CERTIFICADO DE CONFORMIDAD
00 2193 388 3.pdf:
Front loaderFL 120C-100C-80C-60C-40C
1 Regarding this instruction manual
1.1 Information regarding the instruction manual
1.1.1 Use the user manual
Important information about this user manual
Structuring according to front loader subassemblies
Search and find
Direction signs
Specific terminology
Optional equipment and supplementary equipment
1.1.2 Symbols and instructions
Texts and illustrations
Indication of dangers and warnings
1.1.3 Validity of the user manual
1.1.4 Technical instructions
2.1 Safety instructions
2.1.1 Recommendations
2.1.2 Use according to assignment
2.1.3 Use not in accordance with the assignment
2.1.4 Safety and accident prevention instructions
2.1.5 Limits of use of the loader on a tractor with a two-post arch
2.1.6 Precautions before start-up
2.1.7 Checking the status of the front loader
2.1.8 Adjustment, maintenance or repair work
2.1.9 Circulation and transportation
2.1.10 Lifting safety
2.1.11 Using the front loader
2.1.12 Using the front loader tools
2.1.13 Operation requiring the presence of a person under the front loader
2.2 Safety instructions on the machine
2.2.1 General advice regarding safety markings
2.2.2 Safety stickers
3 Machine Description
3.1 Summary and operation
3.1.1 Front loader overview
3.1.2 Overview of the adaptation structure
3.2 Identification plates and identification numbers
3.2.1 Description
3.2.2 Supplementary nameplate
3.2.3 Adaptation structure nameplate
3.3 Front loader equipment
3.3.1 “FITLOCK” hitch system
3.3.2 Level indicator
3.3.3 Tool racks
MASTER-ATTACH tool holder frame
“EURO” tool holder frame
“MASTER-ATTACH/EURO” tool holder frame
“EURO/SMS-ALÖ3” tool holder frame
“MASTER-ATTACH/FAUCHEUX-BLANC” tool holder frame
3.3.4 View of the front tools set
Spoons, forks, gripper and blade
bale clamps
3.4 Optional front loader equipment
3.4.1 “SHOCK ELIMINATOR SYSTEM”
3.4.2 “MACH SYSTEM”
3.4.3 “FASTLOCK” tool lock
3.4.4 Additional functions
Third function
Fourth function
“MACH 2” system
4 Control and display instruments
4.1 Front loader controls
4.1.1 Control of the front loader or the pressure points at the rear of the tractor
4.1.2 “FLEXPILOT” lever
4.1.3 “PROPILOT” lever
4.1.4 .5 Multifunction lever (ARION 460-410 type A32 and A43)
4.1.6 “ELECTROPILOT” lever (ARION 600-500)
5 Technicaof FLC front loaders and CLAAS tractors
5.1.2 Characteristics of front loaders
6 Preparation of the machine
6.1 Front loader
6.1.1 FLC front loader hitch
6.1.2 Front loader release
6.2 Front loader equipment
6.2.1 Preparation of tool holders
“MASTER-ATTACH/EURO” tool holder frame
“EURO/SMS-ALÖ3” tool holder frame
“MASTER-ATTACH/FAUCHEUX-BLANC” tool holder frame
6.2.2 Preparation of the level indicator
6.3 Head
6.3.1 Attaching the tool with a manual release tool holder frame
6.3.2 Attaching the tool to a tool holder frame with «FASTLOCK» «SPEEDLINK» release
6.3.3 Unlocking the tool with a manual release frame
6.3.4 Uncoupling the implement with a tool frame with “FASTLOCK” release
6.4 Ballast
6.4.1 Tractor balancing
6.5 Transport of the front loader
6.5.1 gement
7.1 Front loader
7.1.1 Control of the front loader or the pressure points at the rear of the tractor
7.1.2 Using the “FLEXPILOT” command
Loer Features
Tool Features
7.1.3 Using the “PROPILOT” command
Lock and unlock
Charger Features
Tool function
7.1.4 Using the multifunction lever (ARION 430-410 type A21)
Lock and unlock
Charger Features
Tool function
7.1.5 Using the multifunction lever (ARION 460-410 type A32 and A43)
Lock and unlock
Charger Features
Tool function
7.1.6 Using the «ELECTROPILOT» control (ELIOS/ARION 600-500/AXION 800)
Lock and unlock
Charger Features
Tool function
7.2 Optional front loader equipment
7.2.1 Use of “SHOCK ELIMINATOR SYSTEM”
Manual valve
8 Incident and solution
8.1 Hitching difficulties
9 Maintenance
9.1 Maintenance instructions
9.1.1 Cleaning the front loader
9.1.2 Intervention on the tractor with loaPlacement of the lifting cylinder locking system
9.1.4 Disassembly of the lifting cylinder locking system
9.2 Summary of maintenance intervals
9.2.1 First 10 hours
9.2.2 First 5 9.2.3 Monthly
9.2.4 Every 100 hours
9.3 Greasing scheme
9.3.1 Greasing
Front loader
9.4 Lifting device maintenance operations
9.4.1 Checking the front loader joints
9.4.2 Checking the hydraulic circuit
9.4.3 Checking the front loader hoses
9.4.4 Checking the front loader controls
9.4.5 Checking the front loader cable harnesses
9.4.6 Checking the mechanical condition of the front loader
9.5 Chassis maintenance work
9.5.1 Checking the tightness of the adaptation structure
10 Service
10.1 FL 120C-40C
10.1.1 Spare parts and technical issues
11 Decommissioning and waste disposal
11.1 Information about the machine
11.1.1 Disposal and waste disposal
12 EC declaration of conformity
12.1 Front loader
12.1.1 FL 120C-100C-80C-40C
13 Technical dictionary and abbreviations
13.1 Units
13.2 Technical terms
John Deere Repair Technical Manual PDF
John Deere Application List Component Technical Manual CTM106819 24AUG20
John Deere Repair Technical Manual PDF
John Deere Repair Technical Manual PDF
John Deere Diesel Engines POWERTECH 2.9 L Component Technical Manual CTM126 Spanish
John Deere Repair Technical Manual PDF
John Deere Repair Technical Manual PDF
John Deere Repair Technical Manual PDF
John Deere Diesel Engines PowerTech 4.5L and 6.8L – Motor Base Technical Manual 07MAY08 Portuguese
John Deere Repair Technical Manual PDF
John Deere Repair Technical Manual PDF
John Deere Repair Technical Manual PDF

