Claas Lexion 600 (589) Combines Operator Manual FR
$50.00
- Model: Lexion 600 (589) Combines
- Type Of Manual: Operator Manual
- Language: FR
- Format: PDF(s)
- Size: 81.6 MB
File List:
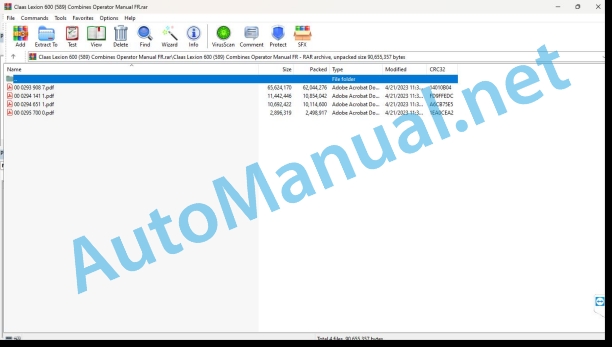
00 0293 908 7.pdf
00 0294 141 1.pdf
00 0294 651 1.pdf
00 0295 700 0.pdf
00 0294 141 1.pdf:
Contents
1 Introduction
1.1 General advice
1.1.1 Use of the instructions
1.1.2 Validity of the notice
1.1.3 Half-track nameplate
2 Technical characteristics
2.1 CLAAS LEXION 600 Terra-Trac
2.1.1 Chassis
2.1.2 Tires and inflation pressures
2.1.3 Wheel bolt tightening torque
2.1.4 Path
2.1.5 Road position/working position
2.2 CLAAS LEXION 580 Terra-Trac
2.2.1 Chassis
2.2.2 Tires and inflation pressures
2.2.3 Wheel bolt tightening torque
2.2.4 Path
2.2.5 Road position/working position
2.3 CLAAS LEXION 570 Terra-Trac
2.3.1 Chassis
2.3.2 Tires and inflation pressures
2.3.3 Wheel bolt tightening torque
2.3.4 Path
2.3.5 Road position/working position
2.4 CLAAS LEXION 560 Terra-Trac
2.4.1 Chassis
2.4.2 Tires and inflation pressures
2.4.3 Wheel bolt tightening torque
2.4.4 Path
2.4.5 Road position/working position
3 Safety Tips
3.1 Observe!
3.1.1 Important
3.1.2 Conformity of use
3.1.3 Marking of warnings and dangers
3.2 Warning pictogram
3.2.1 General information on warning pictograms
3.2.2 Warning pictogram
4 pieces supplied
4.1 Half-track
4.1.1 Kit supplied 000 764 258 1 (type 589), 000 764 202 1 (type 586/584), 000 764 346 0 (type 585)
5 Assembly
5.1 Half-track
5.1.1 Installation of rubber half-tracks
5.1.2 Installation of the front access ladder
5.1.3 Align the tracks
6 Intervention
6.1.1 Check the track tension
6.1.2 Access ladder when traveling on slopes
6.1.3 Folding the ladder steps
6.1.4 Towing the machine with the hydraulic parking brake and defective engine
7 Maintenance
7.1 Important maintenance tips
7.1.1 Important safety tips and regulations
7.2 Maintenance tables
7.2.1 Half-track maintenance tables
7.2.2 Fats
7.2.3 Adjust the tracks
7.2.4 Tension the tracks
7.2.5 Oil change / oil level check
7.2.6 Tightening torque of wheel bolts and fixing screws
7.2.7 Track/undercarriage inspection
8 Lubrication plan
8.1 Lubrication points
8.1.1 Lubrication interval
8.1.2 Lubrication points – 50 h left side
8.1.3 Lubrication points – 50 h right side
8.1.4 Lubrication points – 100 h left side
8.1.5 Lubrication points – 100 h right side
8.1.6 Lubrication points – 500 h left side
8.1.7 Lubrication points – 500 h right side
Alphabetical index
00 0294 651 1.pdf:
Contents
1 Introduction
1.1 General advice
1.1.1 Use of the instructions
Texts and illustrations
Classification by module structure
Seek and find
Directions
1.1.2 Validity of the notice
1.1.3 Half-track nameplate
2 Technical characteristics
2.1 CLAAS LEXION 600 Terra-Trac
2.1.1 Chassis
2.1.2 Tires and inflation pressures
2.1.3 Wheel bolt tightening torque
2.1.4 Path
2.1.5 Road position/working position
2.2 CLAAS LEXION 580 Terra-Trac
2.2.1 Chassis
2.2.2 Tires and inflation pressures
2.2.3 Wheel bolt tightening torque
2.2.4 Path
2.2.5 Road position/working position
2.3 CLAAS LEXION 570 Terra-Trac
2.3.1 Chassis
2.3.2 Tires and inflation pressures
2.3.3 Wheel bolt tightening torque
2.3.4 Path
2.3.5 Road position/working position
2.4 CLAAS LEXION 560 Terra-Trac
2.4.1 Chassis
2.4.2 Tires and inflation pressures
2.4.3 Wheel bolt tightening torque
2.4.4 Path
2.4.5 Road position/working position
3 Safety Tips
3.1 Observe
3.1.1 Important
3.1.2 Conformity of use
3.1.3 Marking of warnings and dangers
3.2 Warning pictogram
3.2.1 General information on warning pictograms
3.2.2 Warning pictogram
000 516 039 0 (22)
000 516 064 0 (22)
000 515 139 1 (50)
4 pieces supplied
4.1 Half-track
4.1.1 Kit supplied 000 764 258 1 (type 589), 000 764 202 1 (type 586/584), 000 764 346 0 (type 585)
5 Assembly
5.1 Half-track
5.1.1 Installation of rubber half-tracks
5.1.2 Installation of the front access ladder
5.1.3 Align the tracks
Carry out a test drive.
Measuring guide block temperatures
Adjust the track
Example: adjust the track
6.1.1 Check the track tension
6.1.2 Access ladder when traveling on slopes
6.1.3 Folding the ladder steps
6.1.4 Pivot the front ladder
6.1.5 Towing the machine with the hydraulic parking brake and defective engine
7 Maintenance
7.1 Important maintenance tips
7.1.1 Important safety tips and regulations
7.2 Maintenance tables
7.2.1 Half-track maintenance tables
7.2.2 Lubricants
7.2.3 Align the tracks
Carry out a test drive.
Measuring guide block temperatures
Adjust the track
Example: adjust the track
7.2.4 Tension the tracks
Preparations
Purge and strain the system
7.2.5 Oil change / oil level check
Oil level checks
Oil drain
7.2.6 Track/undercarriage inspection
8 Lubrication plan
8.1 Lubrication points
8.1.1 Lubrication intervals
8.1.2 Lubrication points – 100 h left side
8.1.3 Lubrication points – 100 h right side
8.1.4 Lubrication points – 500 h left side
8.1.5 Lubrication points – 500 h right side
Alphabetical index
00 0295 700 0.pdf:
Contents
1 Introduction
1.1 General advice
1.1.1 Validity of the notice
2 CEBIS use
2.1 CLAAS CEBIS on-board information system
2.1.1 CEBIS general advice
2.2 Control elements and displays
2.2.1 Keypad
2.2.2 Selector and direct menu
2.2.3 Color screen
2.2.4 Harvest indicator
2.2.5 Main menu
2.2.6 Before first commissioning
2.2.7 Settings menu / Front tool
2.2.8 Settings menu / Diesel engine
2.2.9 Settings / Modes menu
2.2.10 Settings menu / Separation of remainder
2.2.11 Settings / Autopilot menu
2.2.12 Settings menu / CEBIS
2.2.13 Front tool menu
2.2.14 Reel Menu
2.2.15 Menu Number of partial widths
2.2.16 Drive Menu
2.2.17 Cereal setting menu
2.2.18 Performance measurement menu
2.2.19 Counter Menu
2.2.20 Maintenance menu
2.2.21 Indicative values for 100m pulses
3 Before commissioning
3.1 CRUISE PILOT
3.1.1 Learn the flow zero point
3.1.2 Preselect the CRUISE PILOT strategy
3.1.3 Connect the CRUISE PILOT
3.1.4 Disconnect the CRUISE PILOT
3.1.5 Cruise control – store speed (km/h)
3.1.6 Change (km/h) the speed of the automatic cruise control
3.1.7 Memorize the flow rate (t/h) of the harvest
3.1.8 Modify the flow rate (t/h) of the harvest
3.1.9 CRUISE PILOT – driving behavior when emptying the hopper
4 Use – basic machine
4.1 Cabin / driving position
4.1.1 Cutting height control
4.1.2 Memorize the ground support pressure
4.1.3 Memorizing the cutting height
Alphabetical index
John Deere Repair Technical Manual PDF
John Deere Parts Catalog PDF
John Deere Tractors 6300, 6500, and 6600 Parts Catalog CQ26564 (29SET05) Portuguese
John Deere Repair Technical Manual PDF
John Deere Repair Technical Manual PDF
John Deere Repair Technical Manual PDF
John Deere Repair Technical Manual PDF
John Deere Repair Technical Manual PDF
John Deere Transmission Control Unit Component Technical Manual CTM157 15JUL05
John Deere Repair Technical Manual PDF
John Deere Repair Technical Manual PDF
John Deere Diesel Engines POWERTECH 2.9 L Component Technical Manual CTM126 Spanish

