- Claas
- Grove
- New Holland
- Komatsu
- Kubota
- John Deere
- Linde
- Bomag
- CASE
- Clark
- JCB
- Jungheinrich
- Linde
- Yale
- Yanmar
- Manitou
- Manitowoc
- CNH
- Doosan
- Fiatagri
- Fiatallis
- Fiatallis Other Manual PDF
- Flexi Coil
- Ford New Holland
- Ford New Holland Other Manual PDF
- Huyndai
- Hypac
- Hyster
- Hyster Service Manual PDF
- Isuzu
- Kobelco
- Kohler
- Krupp
- Lombardini
- Mahindra
- Nuvera
- Perkins
- Sperry New Holland
- Utilev
- Versatile
- ZF
 Swathers Operator Manual ES 1")
 Swathers Operator Manual ES 2")
%20Swathers%20Operator%20Manual%20ES&url=https://automanual.net/doc/claas-liner-3500-g04-swathers-operator-manual-es/&media=https://automanual.net/wp-content/uploads/2024/04/claas-liner-3500-g04-swathers-operator-manual-es-1.jpg)
Claas Liner 3500 (G04) Swathers Operator Manual ES
$50.00
- Model: Liner 3500 (G04) Swathers
- Type Of Manual: Operator Manual
- Language: ES
- Format: PDF(s)
- Size: 14.0 MB
File List:
00 0296 249 0.pdf
00 0296 249 0.pdf:
LINER 3500
1 Regarding this instruction manual
1.1 Information regarding the instruction manual
1.1.1 General instructions
1.1.2 Validity of the manual
1.1.3 Technical instructions
1.1.4 Symbols and indications
1.1.5 Handling of the manual
Direction signs
2 Security
2.1 Safety instructions
2.1.1 To take special account
2.1.2 Qualification of piloting and maintenance personnel
2.1.3 Proper machine application
2.1.4 Logically foreseeable inappropriate application
2.1.5 Protection and safety standards at work
2.1.6 First aid measures
2.1.7 Risk of injury from hydraulic fluids
2.2 Safety instructions on the machine
2.2.1 Graphic danger symbols
2.2.2 Position on the machine
3 Machine Description
3.1 Summary and operation
3.1.1 Summary LINER 3500
3.1.2 Machine operation
3.2 Optional machine equipment
3.2.1 CLAAS STANDARD TERMINAL
3.2.2 COMMUNICATOR II
3.2.3 ISOBUS extension cable for COMMUNICATOR II*
3.2.4 Speed signal cable for COMMUNICATOR II*
3.2.5 ISOBUS connection cable
3.2.6 Order printer for ISOBUS
3.2.7 Load-Sensing control line
3.2.8 Hydraulic connection parts 2 components
3.2.9 Hydraulic adjustment of rotor height
3.2.10 Insertable fork 8 components
3.2.11 Spare wheel 16×6.50-8
3.2.12 Contour lighting
3.2.13 Work lighting
3.2.14 Lighting adapter for USA
3.3 Identification plates and identification numbers
3.3.1 Spare parts and technical queries
3.3.2 Identification plate position
3.3.3 Identification number position
3.3.4 Machine identification plate explanation
4 Control and display instruments
4.1 Parking brake
4.1.1 Crank
4.2 Hydraulic system flexible tubing
4.2.1 Stopcock
4.3 Windrower rotor
4.3.1 Raking height crank
4.4 CLAAS STANDARD TERMINAL*
4.4.1 Key summary
4.4.2 Summary of light-emitting diodes (LEDs)
Sensor error, chassis, PTO shaft drive
Left front rotor
left rear rotor
Right front rotor
Right rear rotor
4.5 ISOBUS terminal
4.5.1 Screen
4.5.2 Menu bar
4.5.3 Data cell
4.5.4 Status bar
4.5.5 Softkey
4.5.6 Softkey – summary
Message check the position of the swath rotor
Transport menu
Submenu place the machine in position for the ends of the plot
Submenu place the machine in transport position
Work menu
Submenu work – automatic operation 1
Submenu work – automatic operation 2
Submenu work – working width
Submenu work – raking height*
Submenu order management
Submenu adjust height for plot ends/overlap
Submenu adjust delay times
Submenu raking height adjustment*
Service menu
Submenu information – settings
Submenu information – sensor values
Submenu information – sensor error
Submenu „start. – lifting of the rotors
Submenu start – chsis
Submenu start – raking height
Maintenance submenu
Submenus – manual operation
Submenu work – manual operation – chassis
Submenu work – manual operation – rotor lifting
Submenu work – manual operation – working width
Submenu work – manual operation – raking height*
4.5.7 Program version
5 Technical data
5.1 LINER 3500
5.1.1 Measurements
5.1.2 Weights
5.1.3 Requirements for the tractor
5.1.4 Model
5.1.5 Tire air pressure
5.1.6 Acoustic intensity level
5.1.7 Lubricants
6 Preparation of the machine
6.1 Adapt the tractor
6.1.1 Adapt the power supply
6.1.2 Front axle counterbalancing
6.1.3 Assemble CLAAS STANDARD TERMINAL*
6.1.4 Assemble COMMUNICATOR II*
6.2 Adapt the machine
6.2.1 Checklist for first start-up
6.2.2 Cardan shaft – check the length
6.2.3 Cardan shaft – adapt the length
6.2.4 Mount the cardan shaft to the machine
6.2.5 Adapt the hydraulic installation
6.3 Hooking up the machine
6.3.1 Attach the hitch bracket
6.3.2 Assemble the cardan shaft
6.3.3 Connect the hydraulic pipe
6.3.4 Connect the pneumatic brake
6.3.5 Insert the driving lighting cable
6.3.6 Connect the CLAAS STANDARD TERMINAL*
6.3.7 Connect COMMUNICATOR II*
On tractors without ISOBUS female plug
On tractors with ISOBUS female plug
6.3.8 Raise the support leg
6.3.9 Release the parking brake
6.3.10 Remove the shims
6.3.11 Folding the lighting support
6.4 Unhook the machine
6.4.1 Put the shims underneath
6.4.2 Apply the parking brake
6.4.3 Lower the support leg
6.4.4 Unplug the driving lighting cable
6.4.5 Unplug the CLAAS STANDARD TERMINAL*
6.4.6 Unplug COMMUNICATOR II*
On tractors without ISOBUS female plug
On tractors with ISOBUS female plug
6.4.7 Disengage the air brake
6.4.8 Uncouple the hydraulic pipes
6.4.9 Dismantle the cardan shaft
6.4.10 Unhook the coupling bracket
6.5 Prepare for road traffic
6.5.1 General security measures
6.5.2 Transport height
6.5.3 Folding the protective stirrup
6.5.4 Remove the tine arms
6.5.5 Fold in transport position
6.5.6 Fix the wheels
6.5.7 Insert the protective bars
6.5.8 Deploy the lighting support
6.5.9 Close the stopcock
6.6 Load the machine
6.6.1 Maneuver the machine
Maneuvering pulling vehicles without pneumatic braking equipment
6.6.2 Lift the machine
7 Management
7.1 General security measures
7.1.1 Take into account before handling
7.2 Driving on the road
7.2.1 Road traffic
7.3 Settings for use at work
7.3.1 Remove the protective bars
7.3.2 Unlock the wheels
7.3.3 Deploy from transport position
7.3.4 Assemble the tine arms
7.3.5 Deploy the protective stirrups
7.3.6 Adjusting the swath rotor
7.4 Use at work
7.4.1 Take into account during field trips
7.4.2 Journey through the field
7.4.3 Driving characteristics
7.4.4 General instructions
7.4.5 Adjust working height
On machines without hydraulic rotor height adjustment*
In machines with hydraulic adjustment of the height of the rotors*
7.4.6 Adjust swath width
7.4.7 Adjust the working width
7.4.8 Make rows
7.4.9 Position at plot ends
7.4.10 Individual lifting of the rotors
7.5 CLAAS STANDARD TERMINAL*
7.5.1 Information about this chapter
7.6 Switching the CLAAS STANDARD TERMINAL* on/off
7.6.1 General warning instructions
7.6.2 Turn on the terminal
7.6.3 Turn off the terminal
7.6.4 Terminal – automatic shutdown
7.7 CLAAS STANDARD TERMINAL* transport position
7.7.1 Fold in transport position
7.7.2 Deploy from transport position
7.8 CLAAS STANDARD TERMINAL working position*
7.8.1 Lower all rotors (automation for plot ends)
7.8.2 Raise all rotors (automation for the ends of the plot)
7.8.3 Raise/lower individual rotors (individual lifting of each rotor)
7.8.4 Remove the rotor from the automation for plot ends/individual elevation of the rotors or reintegrate it
7.8.5 Change the preselection pairs/individual
7.9 CLAAS STANDARD TERMINAL* working width
7.9.1 Increase/reduce working width
7.10 CLAAS STANDARD TERMINAL* raking height
7.10.1 Increase/decrease raking height*
7.11 CLAAS STANDARD TERMINAL* chassis
7.11.1 Raise/lower the chassis
7.12 CLAAS STANDARD TERMINAL* settings
7.12.1 Adjust the height for the plot ends (program)
7.12.2 Adjust delay times
7.13 CLAAS STANDARD TERMINAL* basic settings (initiation)
7.13.1 General instructions
7.13.2 Windrower rotor stops
7.13.3 Chassis stops
7.13.4 Raking height stops*
7.14 ISOBUS control
7.14.1 Description
General indications
7.14.2 Explanation of ISOBUS terms
7.15 ISOBUS menu structure
7.15.1 Information on menu structure
7.15.2 Main menu
7.15.3 Transport menu
7.15.4 Work menu
7.15.5 Service menu
7.16 Turn on/off the ISOBUS terminal
7.16.1 Before turning on the terminal
7.16.2 Turn on the Terminal
7.16.3 Start the control program
7.16.4 Turn off the terminal
7.17 Open ISOBUS menus
7.17.1 Change main menu
7.17.2 Change submenu
7.17.3 Leave the submenu
7.18 ISOBUS transport position
7.18.1 Fold in transport position
Possible errors when folding
7.18.2 Adjusting ground clearance / transport height
7.18.3 Deploy from transport position
Possible errors when deploying
7.18.4 Turning work lighting on/off*
7.19 ISOBUS operation – transport position
7.19.1 Notices regarding manual handling
Work steps to manually place the machine in transport position
Work steps to manually place the machine in position for the plot ends
7.19.2 Submenu transport – manual handling
7.19.3 Lower/raise the swath rotors
Jamming of the rear swath rotors
7.19.4 Open the closure
7.19.5 Raise / lower the chassis
7.19.6 Increase/reduce working width
7.19.7 Increase/decrease raking height*
7.20 ISOBUS working position
7.20.1 Indications – automatic operation
Submenu work – automatic operation 1
Submenu work – automatic operation 2
7.20.2 Select submenu work – automatic operation
Select automatic operation
7.20.3 Lowering to working position
7.20.4 Lift to position for end of plot
7.20.5 Individual lifting of the rotors
7.20.6 Removing the rotor from automatic control or reinserting it
7.21 ISOBUS working width
7.21.1 Increase/reduce working width
7.22 Raking height* ISOBUS
7.22.1 Increase/decrease raking height*
7.22.2 Select raking height*
7.23 ISOBUS manual operation – working position
7.23.1 Notices regarding manual handling
7.23.2 Submenu work – manual operation
7.23.3 Lower/raise the swath rotors
7.23.4 Raise/lower the chassis
7.23.5 Increase/reduce working width
7.23.6 Increase/decrease raking height*
7.24 ISOBUS settings
7.24.1 Adjust the height for plot ends (program)
7.24.2 Adjust overlap in connection paths
7.24.3 Adjust delay times
Adjust delay times with data selection and data entry
Adjust delay times via function keys
7.24.4 Adjust the raking height*
Raking height adjustment submenu
Record the raking height as nominal value
Adjust the raking height to the nominal values
7.24.5 Recreate factory settings
Factory settings
7.25 ISOBUS maintenance counter
7.25.1 Maintenance submenu
7.25.2 Clear maintenance alarm
Show pending maintenance interval and clear maintenance alarm
7.26 ISOBUS order processing
7.26.1 Display order data
Order counters
Independent order counters
Select order
Print the order
7.26.2 Turn data input on/off
7.26.3 Create order
Enter the designation for the order
7.27 ISOBUS information
7.27.1 Information submenu
7.27.2 Settings summary
7.27.3 Summary of sensor values
7.27.4 Sensor error summary
7.28 ISOBUS service
7.28.1 Notices regarding manual handling
7.28.2 Submenu service – manual operation
7.28.3 Raise/lower the chassis
7.28.4 Lower/raise the swath rotors
7.28.5 Open the closure
7.28.6 Increase/reduce working width
7.28.7 Increase/decrease raking height*
7.29 ISOBUS auxiliary function (AUX)
7.29.1 Available functions
7.29.2 Application example – Joystick occupation
CLAAS AXION 800 series
FENDT Vario
7.30 ISOBUS Drive options – Fendt
7.30.1 Use the tractor terminal
7.30.2 Use the tractor terminal and Joystick
7.30.3 Use COMMUNICATOR II* and Joystick
7.31 ISOBUS basic settings (initiation)
7.31.1 General instructions
7.31.2 Voltage range for plausibility check
7.31.3 Initiation submenu
7.31.4 Windrower rotor stops
7.31.5 Chassis stops
7.31.6 Raking height stops*
8 Incident and solution
8.1 Incident summary
8.1.1 Incidents on the machine
8.2 Emergency management
8.2.1 Indications regarding emergency management
8.2.2 Summary of hydraulic valves
Right side
Left side
8.2.3 Work steps to be carried out before emergency handling
8.2.4 Manually operate the hydraulic valves
8.3 ISOBUS error indications
8.3.1 Alarm messages
8.3.2 System messages
8.3.3 Sensor error
8.3.4 Error code table
9 Maintenance
9.1 Maintenance instructions
9.1.1 General warning instructions for maintenance
9.1.2 Screws
9.1.3 Greasing
9.1.4 Brakes
9.1.5 Wheels
9.1.6 Hydraulic installation
9.1.7 Electrical equipment
9.1.8 Protection devices
9.1.9 Spare parts
9.1.10 Imbalance
9.1.11 Pressurized air and water
9.1.12 Prevention against burns
9.1.13 Oil
9.1.14 Prevention against fires and explosions
9.1.15 Pipes, tubes and hoses
9.2 Summary of maintenance intervals
9.2.1 Behavior with maintenance intervals
9.2.2 Before starting the harvest
9.2.3 After the first 10 hours of service
9.2.4 After the first 50 hours of service
9.2.5 Every 8 hours of service or daily
9.2.6 Every 50 hours of service
9.2.7 Every 100 hours of service
9.2.8 Every 250 hours of service or annually
9.2.9 Every 500 hours of service or annually
9.2.10 If necessary
9.2.11 After harvest
9.3 General maintenance work
9.3.1 Clean the machine
9.3.2 Maintain the machine
9.3.3 Prevent freeze damage
9.3.4 Check the fixing material
9.4 Gearbox
9.4.1 Check the tightness of the gear
9.4.2 Front bevel gear: Check the oil level
9.4.3 Front bevel gear: Change oil
9.4.4 Rear bevel gear: Check the oil level
9.4.5 Rear bevel gear: Change oil
9.4.6 Windrower gear: Check the oil level
9.4.7 Windrower gear: Change oil
9.4.8 Windrower gear: Retighten the screws
9.5 Cardan shaft
9.5.1 Maintain the cardan shafts
9.5.2 Remove the cardan shaft protection
9.5.3 Install the cardan shaft protection tube
9.6 Chassis
9.6.1 Check tire air pressure
9.6.2 Change wheel
9.6.3 Retighten the fixing of the wheel axles
9.6.4 Check convergence
9.6.5 Adjust convergence
9.7 Brake
9.7.1 Check the brake system
9.7.2 Empty the compressed air tank* of water
9.7.3 Clean the air filter in the pipes*
9.7.4 Brake cylinder*: Check the piston stroke
9.7.5 Brake cylinder*: Check the holes
9.8 Hydraulic installation
9.8.1 Carry out maintenance on the hydraulic installation
9.8.2 Change the hydraulic oil filter
9.8.3 Check the hydraulic hoses
9.9 Electrical/electronic installation
9.9.1 Sensor summary
9.9.2 Sensor voltage range
9.9.3 PTO revolution speed sensor (B009)
9.9.4 Chassis sensor (B284)
9.9.5 Left front swath rotor lift sensor (B285)
9.9.6 Right front swath rotor lift sensor (B286)
9.9.7 Left rear swath rotor lift sensor (B287)
9.9.8 Right rear swath rotor elevation sensor (B288)
9.9.9 Raking height sensor left front (B311) / right front (B312) / left rear (B314) / right rear (B313) swath rotor raking height sensor
9.10 Pick holder
9.10.1 Check the tines
9.11 Attached parts, machine housing
9.11.1 Check the discharge springs
Outgoing arm discharge springs at the front
Windrower discharge springs
9.11.2 Chassis: Check the bolted joints
9.11.3 Windrowing rotors: Check the bolted joints
9.12 Greasing scheme
9.12.1 Grease the lubrication points every 50 hours of service
9.12.2 Grease the lubrication points every 100 hours of service
9.12.3 Grease the lubrication points every 250 hours of service
10 Decommissioning and waste disposal
10.1 General information
10.1.1 Decommissioning and waste disposal
11 EC declaration of conformity
11.1 EC declaration of conformity
12 Technical dictionary and abbreviations
12.1 Terms and explanations
12.1.1 Technical vocabulary
12.1.2 Abbreviations


John Deere Repair Technical Manual PDF
%20Interim%20Tier%204%20Stage%20III%20B%20Component%20Technical%20Manual%20CTM104754%2025%20July%202012%20Portuguese&url=https://automanual.net/doc/john-deere-powertech-m-6068-oem-diesel-engines-above-130-kw-174-hp-compo-technical-manual-ctm104754-25jul12-portuguese/&media=https://automanual.net/wp-content/uploads/2023/08/john-deere-powertech-6068-engines-above-130-kw-174-hp-interim-tier-4-stage-iii-b-component-technical-manual-ctm104754-25-july-2012-portuguese-1.jpg)

John Deere Repair Technical Manual PDF
%20Component%20Technical%20Manual%20CTM147%2005JUN98&url=https://automanual.net/doc/john-deere-df-series-150-and-250-transmissions-analog-component-technical-manual-ctm147-05jun98/&media=https://automanual.net/wp-content/uploads/2023/08/john-deere-df-series-150-and-250-transmissions-analog-component-technical-manual-ctm147-05jun98-1.jpg)

John Deere Repair Technical Manual PDF
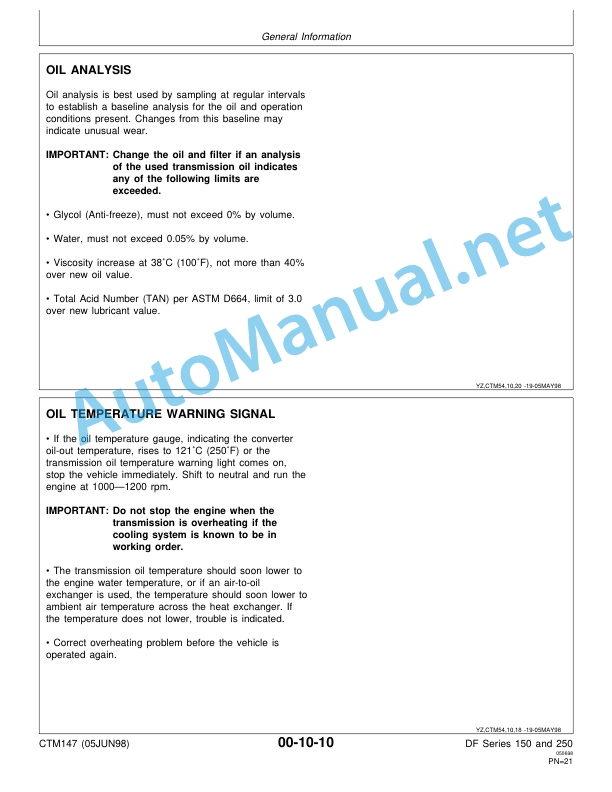
John Deere DF Series 150 and 250 Transmissions (ANALOG) Component Technical Manual CTM147 05JUN98

New Holland Service Manual PDF


John Deere Repair Technical Manual PDF


John Deere Repair Technical Manual PDF
John Deere 18-Speed PST Repair Manual Component Technical Manual CTM168 10DEC07


John Deere Repair Technical Manual PDF
John Deere Diesel Engines POWERTECH 2.9 L Component Technical Manual CTM126 Spanish

John Deere Repair Technical Manual PDF
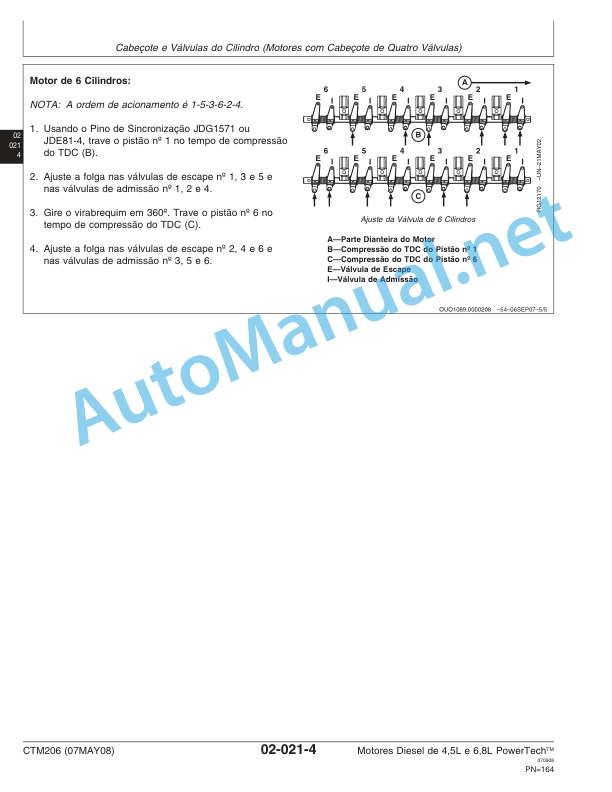
John Deere Diesel Engines PowerTech 4.5L and 6.8L – Motor Base Technical Manual 07MAY08 Portuguese


John Deere Repair Technical Manual PDF


John Deere Repair Technical Manual PDF
John Deere POWERTECH E 4.5 and 6.8 L Diesel Engines TECHNICAL MANUAL 25JAN08
- Claas
- Grove
- New Holland
- Komatsu
- Kubota
- John Deere
- Linde
- Bomag
- CASE
- Clark
- JCB
- Jungheinrich
- Linde
- Yale
- Yanmar
- Manitou
- Manitowoc
- CNH
- Doosan
- Fiatagri
- Fiatallis
- Fiatallis Other Manual PDF
- Flexi Coil
- Ford New Holland
- Ford New Holland Other Manual PDF
- Huyndai
- Hypac
- Hyster
- Hyster Service Manual PDF
- Isuzu
- Kobelco
- Kohler
- Krupp
- Lombardini
- Mahindra
- Nuvera
- Perkins
- Sperry New Holland
- Utilev
- Versatile
- ZF