Claas Markant 650 (776) Baler Operator Manual ES
$50.00
- Model: Markant 650 (776) Baler
- Type Of Manual: Operator Manual
- Language: ES
- Format: PDF(s)
- Size: 37.4 MB
File List:
00 0288 433 5.pdf
00 0288 433 5.pdf:
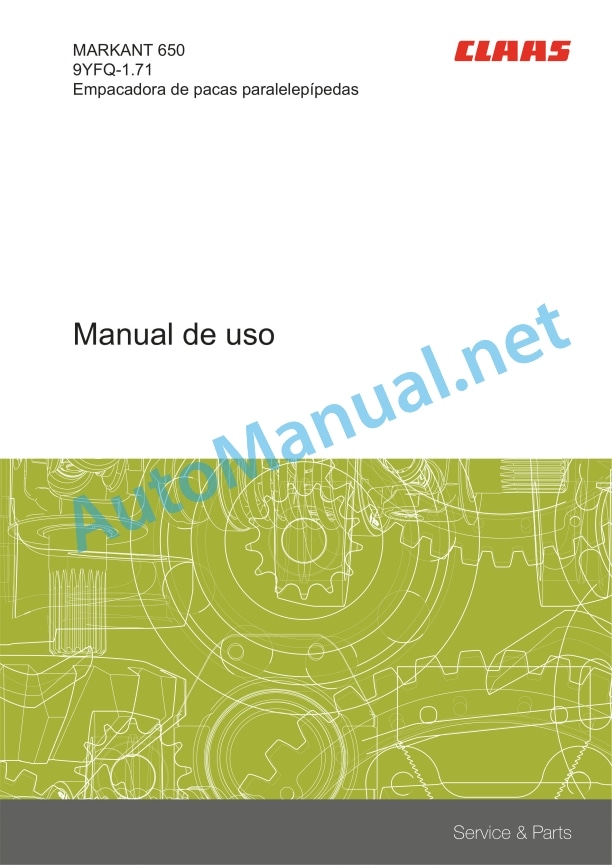
MARKANT 6509YFQ-1.71Parallelepiped baler
1. Introduction
1.1 General information
1.1.1 Application of this user manual
1.1.2 Product identification sheet – MARKANT 650
1.1.3 Information relating to this instruction manual
1.1.4 Symbols and indications
1.1.5 Optional equipment
1.1.6 Qualified specialized workshop
1.1.7 Maintenance instructions
1.1.8 Information regarding warranty
1.1.9 Spare parts and technical questions
1.2 Proper application of the machine
1.2.1 Authorized use
1.2.2 Reasonably foreseeable misuse
2 Security
2.1 Recognize warning signs
2.1.1 Danger symbols
2.1.2 Keyword
2.2 Safety instructions
2.2.1 Meaning of the instruction manual
2.2.2 Observe graphic danger symbols and alarm indications
2.2.3 Requirements for all people working with the machine
2.2.4 Children in danger
2.2.5 Danger zones
2.2.6 Position yourself between the tractor and the machine
2.2.7 Accompanying persons
2.2.8 Couple the tractor with the machine
2.2.9 Risk of injury due to rotating shafts
2.2.10 Construction modifications
2.2.11 Optional equipment and spare parts
2.2.12 Control of the tractor in operation
2.2.13 Use only after correct start-up
2.2.14 Technical status
2.2.15 Danger due to machine breakdowns
2.2.16 Comply with technical limit values
2.2.17 Danger due to coasting parts
2.2.18 Maintain functional protection devices
2.2.19 Personal protective equipment
2.2.20 Wear appropriate clothing
2.2.21 Remove dirt and loose objects
2.2.22 Prepare the machine for road traffic
2.2.23 Dangers when driving on the road and in the countryside
2.2.24 Park the machine safely
2.2.25 Parking without supervision
2.2.26 Unsuitable consumables
2.2.27 Safe handling of consumables and auxiliary materials
2.2.28 Environmental protection and waste disposal
2.2.29 Fire prevention
2.2.30 Deadly electrical discharge through overhead lines
2.2.31 Electrical shock from electrical equipment
2.2.32 Liquids under pressure
2.2.33 Hot surfaces
2.2.34 Work only on the stopped machine
2.2.35 Maintenance work and repair work
2.2.36 Machine parts and lifted loads
2.2.37 Risks derived from welding work
2.3 Graphic danger symbols
2.3.1 Structure of graphic hazard symbols
2.3.2 Location of safety stickers
3 Machine Description
3.1 Existing models
3.1.1 Machine Description
3.2 Overview and functions
3.2.1 Overall view, front right
3.2.2 Overall view, front left
3.2.3 Overall view, rear right
3.3 Safety equipment
3.3.1 Signal lighting
3.3.2 Surety
3.3.3 Shims
3.3.4 Locking the pick-up
3.3.5 Locking the bale unloading ramp
3.4 Work and service positions
3.4.1 General information
3.5 Identification plate and serial number
3.5.1 Spare parts and technical information
3.5.2 Identification number
3.5.3 Machine identification plate
Nameplate for China
Identification plate for machines without European approval
3.6 General operating principle
3.6.1 Bale pressing cycle
3.7 Transmission and drive
3.7.1 Power transmission
3.7.2 Friction clutch
3.7.3 Main drive
3.7.4 Activation of the tying device
3.7.5 Drive of the carriers
3.7.6 Pick-up drive
3.8 Axis
3.8.1 Axis
3.9 Trailer support
3.9.1 Types of fixing
3.10 Harvest harvest
3.10.1 Pick-up
3.11 Power supply unit
3.11.1 Carriers
3.12 Pressing system
3.12.1 Piston and pressing channel
3.13 Tying system
3.13.1 Tying process
3.13.2 Thread box
3.13.3 Wire box*
3.13.4 Needles
3.13.5 Knotters
3.13.6 Braider*
3.14 Unloading bales
3.14.1 Bale unloading ramp
Bale unloading ramp in 2 parts
3.15 Greasing system
3.15.1 Manual centralized lubrication*
3.16 Equipment
3.16.1 Mechanical bale counter
4 Technical data
4.1 Baler
4.1.1 Dimensions
4.1.2 Weight
4.1.3 Hookup
4.1.4 Cardan shaft
4.1.5 Crop feeding
4.1.6 Power group
4.1.7 Pressing system
4.1.8 Unloading bales
4.1.9 Tying device
4.1.10 Wheels
4.1.11 Hydraulic circuit
4.1.12 Screw tightening torques
4.1.13 Greasing and lubrication
4.1.14 Sound levels
4.2 Safety devices
4.2.1 Security screw
4.2.2 Overload safety
4.3 Lubricant tables
4.3.1 Lubricants
4.4 Tractor
4.4.1 Required power
4.4.2 PTO
4.4.3 Hookup
4.4.4 Electrical connections
4.4.5 Hydraulic connections
4.4.6 Hydraulic circuit and oil
5 Preparation of the machine
5.1 General information
5.1.1 First commissioning
5.1.2 Equipment control
5.2 Turn off the machine and secure it
5.2.1 Stop and secure the tractor and machine
5.3 Adapt the tractor
5.3.1 Check the tractor power take-off protection device
5.4 Adapt the machine
5.4.1 Cardan shaft safety regulations
5.4.2 Cardan shaft adjustment
5.4.3 Adaptation of the cardan shaft length
5.4.4 Adaptation of the coupling height
5.5 Hook up the machine
5.5.1 Positioning the cardan shaft
5.5.2 Recommendations
5.5.3 Hitching the baler to the tractor
Long rudder*
Rotating rudder*
5.5.4 Connection of hydraulic hoses
Hose identification
Hydraulic pick-up control*
Hydraulic rudder control*
5.5.5 Lighting connection*
5.5.6 Control ropes
5.6 Prepare for use at work
5.6.1 Important
5.6.2 Pick-up wheel (*)
5.6.3 Pick-up height
5.7 Tying with thread
5.7.1 Yarn quality
5.7.2 Preparation of tying with twine
5.7.3 Thread placement
5.7.4 Placing the thread in the knotters
5.7.5 Checking the settings
5.8 Wired
5.8.1 Wire quality
5.8.2 Preparation of wire tying
5.8.3 Wire placement
5.8.4 Placing the wire in the braider
5.8.5 Checking braider settings
5.9 Unloading bales
5.9.1 Bale unloading ramp
5.10 Load the machine
5.10.1 Lifting the baler
5.10.2 Baler stowage
6 Management
6.1 General information
6.1.1 Baler user
6.1.2 Opening of gates and crankcases
Transmission case cover
Opening the transmission case cover
Transmission case cover closure
Flywheel cover
Opening the flywheel cover
Closing the flywheel cover
Carriers cover
Opening of the carrier cover
Closing the carrier cover
Knotter Cover
Opening the knotter cover
Closing the knotter cover
Thread box cover
Opening the thread box cover
Closing the thread box cover
6.2 Movements with the baler
6.2.1 Equipment control
6.2.2 Preparations for transportation
6.2.3 Road travel
6.2.4 Arrival at the field
6.2.5 Moving around the field
6.2.6 Parking
6.3 Before each use
6.3.1 Reminders
6.3.2 Cardan shaft
6.3.3 Baler maintenance
6.4 Commissioning in the field
6.4.1 Usage tips
End of row or field
6.4.2 Bale unloading ramp
6.4.3 Commissioning of the machine
6.5 Lance
6.5.1 Rudder maneuver
6.6 Bale parameters
6.6.1 Bale adjustments
6.7 Pressing
6.7.1 Setting the pressing pressure
6.7.2 Bale length adjustment
6.7.3 Manual bale ejection
6.8 Unclogging the baler
6.8.1 How to avoid traffic jams?
6.8.2 Safety regulations
6.8.3 Jam
6.9 After use
6.9.1 Reminders
6.9.2 Immobilization of the baler
6.9.3 Disconnecting the baler
6.9.4 Daily checks
6.9.5 Daily cleaning
7 Incident and solution
7.1 Tying with thread
7.1.1 Origin of tying problems
7.1.2 Resolution of twine tying problems
7.2 Wired
7.2.1 Causes of wiring problems
7.2.2 Solving wire tying problems
7.3 Pressing
7.3.1 Resolution of pressing problems
7.4 Greasing system
7.4.1 Origin of the problems
7.4.2 Troubleshooting
8 Maintenance
8.1 General maintenance instructions
8.1.1 Maintenance and safety tips
8.1.2 Wheels and tires
8.1.3 Hydraulic circuit
8.1.4 Chains
8.1.5 Cardan shaft
8.2 Maintenance tables
8.2.1 Maintenance operations before harvest
8.2.2 Maintenance operations after the first 10 hours of service
8.2.3 Maintenance operations after the first 50 hours of service
8.2.4 Maintenance operations every 10 hours of service or every day
8.2.5 Maintenance operations every 50 hours of service
8.2.6 Maintenance operations every 250 hours of service
8.2.7 Annual maintenance operations or every 500 hours of service
8.3 Basic operations
8.3.1 Pressing piston at front dead center
8.3.2 Manual rotation of the flywheel
Remove the flywheel protection
Flywheel protection assembly
8.3.3 Start tying manually
8.4 Basic settings
8.4.1 Basic baler adjustment
Checking the adjustment of the carriers
Inner Carrier Adjustment
Outside Carrier Adjustment
Needle/piston position
Tied with thread*
Piston lock timing
8.4.2 Piston blade
8.5 Gear maintenance operations
8.5.1 Transmission box
8.5.2 Drive Chains
Pick-up drive chain
8.6 Maintenance operations on the clutch
8.6.1 Flywheel friction clutch
Friction clutch without freewheel*
Freewheel Friction Clutch*
Clutch opening
8.6.2 Pick-up friction clutch
8.6.3 Flywheel security screw
8.6.4 Carrier safety screw
8.7 Axle and wheel maintenance operations
8.7.1 Axis
8.7.2 Wheel tightening check
8.7.3 Replacing the wheels
8.7.4 Wheel hub
8.7.5 Tire check
8.8 Tying maintenance operations
8.8.1 Thread tying needles
Position of the needles on the piston
Needle pressure in the knotter
Needle height
Needle top dead center
Needle/piston position
Replacing a needle
Needle brake
8.8.2 Needles – Wired
Needle height
Needles length
Needle/piston position
Replacing a needle
Needle brake
8.8.3 Replacing the needle brake plates
Remove a needle brake
Disassembling a needle brake
Install a needle brake
Install a needle brake
Adjusting a needle brake
8.8.4 Thread tensioner adjustment
8.8.5 Knotter settings
8.8.6 Braider settings
Side play of the needles
Checking wire fasteners
Adjusting the wire fasteners
Cleaning
wire box
Wire guide rollers
8.8.7 Tying control shaft security screw
8.9 Hitch device maintenance operations
8.9.1 Checking the fixation of the coupling device
8.10 Greasing scheme
8.10.1 Greasing intervals
8.10.2 Cardan shaft
8.10.3 Greasing points – 10 h
8.10.4 Greasing points – 20 h
8.10.5 Greasing points – 50 h
8.10.6 Grease points – 250 h
8.11 Hibernation
8.11.1 General information
8.11.2 Cleaning
8.11.3 Greasing
8.11.4 Maintenance
8.11.5 Storage
9 Decommissioning and waste disposal
9.1 General information
9.1.1 Decommissioning and waste disposal
John Deere Repair Technical Manual PDF
John Deere Parts Catalog PDF
John Deere Tractors 6300, 6500, and 6600 Parts Catalog CQ26564 (29SET05) Portuguese
John Deere Repair Technical Manual PDF
John Deere DF Series 150 and 250 Transmissions (ANALOG) Component Technical Manual CTM147 05JUN98
John Deere Repair Technical Manual PDF
John Deere Repair Technical Manual PDF
John Deere 16, 18, 20 and 24HP Onan Engines Component Technical Manual CTM2 (19APR90)
John Deere Repair Technical Manual PDF
John Deere Application List Component Technical Manual CTM106819 24AUG20
John Deere Parts Catalog PDF
John Deere Harvesters 8500 and 8700 Parts Catalog CPCQ24910 Spanish
John Deere Repair Technical Manual PDF
John Deere Repair Technical Manual PDF


