Claas Maxflex 1350-1050 (531) Combines Operator Manual ES
$50.00
- Model: Maxflex 1350-1050 (531) Combines
- Type Of Manual: Operator Manual
- Language: ES
- Format: PDF(s)
- Size: 16.1 MB
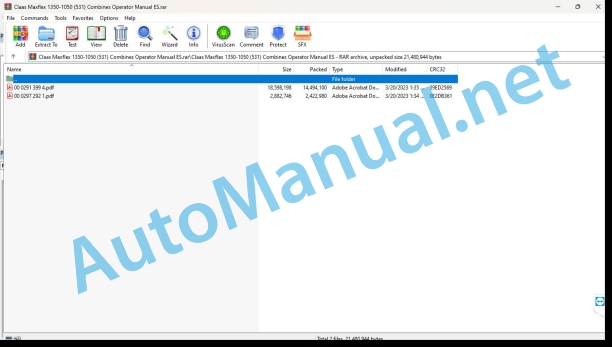
File List:
00 0291 399 4.pdf
00 0297 292 1.pdf
00 0291 399 4.pdf:
MAXFLEX 1350MAXFLEX 1200MAXFLEX 1050
1. Introduction
1.1 General information
1.1.1 Validity of the manual
1.1.2 Information relating to this instruction manual
1.1.3 Symbols and indications
1.1.4 Optional equipment
1.1.5 Qualified specialized workshop
1.1.6 Maintenance information
1.1.7 Information regarding warranty
1.1.8 Spare parts and technical questions
1.2 Proper application of the machine
1.2.1 Proper machine application
1.2.2 Logically foreseeable misuse
2 Security
2.1 Recognize warning signs
2.1.1 Danger symbols
2.1.2 Keyword
2.2 Safety instructions
2.2.1 Meaning of the instruction manual
2.2.2 Observe graphic danger symbols and alarm indications
2.2.3 Requirements for all people working with the machine
2.2.4 Danger zones
2.2.5 Stay between the machine and the head
2.2.6 Attach the header or transport trailer to the machine
2.2.7 Risk of injury due to rotating shafts
2.2.8 Construction changes
2.2.9 Optional equipment and spare parts
2.2.10 Use only after correct start-up
2.2.11 Technical status
2.2.12 Danger due to damage to the machine
2.2.13 Keep protective devices operational
2.2.14 Personal protective equipment
2.2.15 Wear appropriate clothing
2.2.16 Remove dirt and loose objects
2.2.17 Prepare the machine for road traffic
2.2.18 Unsuitable consumables
2.2.19 Safe handling of consumables and auxiliary materials
2.2.20 Environmental protection and waste disposal
2.2.21 Electrical shock from electrical equipment
2.2.22 Liquids under pressure
2.2.23 Work only on the stopped machine
2.2.24 Maintenance work and repair work
2.2.25 Lifted machine parts and loads
2.2.26 Danger from welding work
2.3 Safety signage
2.3.1 Structure of graphic hazard symbols
2.3.2 Graphic danger symbols on the head
2.4 Safety devices
2.4.1 Place the safety supports of the windlass
2.4.2 Remove the safety supports from the reel
2.4.3 Mount the protection device to the cutter bar
3 Machine Description
3.1 Summary and operation
3.1.1 Summary
3.1.2 MAXFLEX operating mode
3.2 Optional machine equipment
3.2.1 Cereal probe
3.2.2 Stone collection plate
3.2.3 Drainer
3.2.4 Protection against winding
3.3 Identification plates and identification numbers
3.3.1 Identification plate
3.4 Machine information
3.4.1 Adhesives
4 Control and display instruments
4.1 Harvest harvest
4.1.1 Control field
5 Technical data
5.1 MAXFLEX
5.1.1 Eligible machines
5.1.2 Dimensions
5.1.3 Weights
5.1.4 Windlass
5.1.5 Power supply unit
5.1.6 Mowing device
5.1.7 Safety devices
5.2 Inputs
5.2.1 Lubricants
6 Preparation of the machine
6.1 Turn off the machine and secure it
6.1.1 Turn off the machine and secure it
6.2 Perform before commissioning
6.2.1 Perform before first start-up
6.2.2 Dismantle transport safety equipment
6.3 Load the head
6.3.1 Load and tie down the head
6.4 Assemble the head
6.4.1 Assemble the head
6.4.2 Prepare the bolting
6.4.3 Hanging the head
6.4.4 Locking the head
6.4.5 Assemble the cardan shaft
Check chain length
6.4.6 Assemble multiple coupling
6.4.7 Adjust the machine to the head
6.5 Disassemble the head
6.5.1 Disassemble the head
6.5.2 Remove multiple coupling
6.5.3 Disassemble cardan shaft
6.5.4 Unlock the head
6.5.5 Unhook the head
6.6 Address
6.6.1 Assemble LASER PILOT*
6.7 Harvest harvest
6.7.1 Mounting the crop divider
Adjust crop divider
6.8 Power supply unit
6.8.1 Adapt the scraper strips to the feed channel
7 Management
7.1 Driving the machine
7.1.1 Prepare for road traffic
7.1.2 Prepare the field trip
7.1.3 Adjust the rest position
7.1.4 Before use for work
7.1.5 Control the collection of harvest material
7.2 Cereal harvest
7.2.1 Adjust the header for cereal harvesting
7.2.2 Bolting the table
7.2.3 Assemble the grain probe*
7.3 Soybean harvest
7.3.1 Adjust the header for soybean harvesting
7.3.2 Dismantle the grain sensor stirrup*
7.3.3 Unlocking the table
7.4 Address
7.4.1 Deploy LASER PILOT*
7.5 Harvest harvest
7.5.1 Remove the tip of the crop divider
7.5.2 Assemble the tip of the crop divider
7.5.3 Assemble the outer separator*
7.5.4 Adjust reel tine
7.6 Power supply unit
7.6.1 Adjusting the feed auger scraper strips
7.6.2 Adjust the position of the feeding auger
7.6.3 Adjust the feed auger fingers
7.6.4 Dismantle the extension of the auger plate
7.6.5 Assemble the auger plate extension
7.6.6 Modify the speed of the feeding auger
7.7 Mowing device
7.7.1 Adjust the cutting height to the soybean crop
7.8 Guided by the ground
7.8.1 Adjust the skates
8 Incident and solution
8.1 Causes and solution
8.1.1 Improve flow
8.1.2 Harvest harvest
8.1.3 Feed auger
8.1.4 Mowing device
8.1.5 Ground guidance
8.2 Harvest harvest
8.2.1 Carry out the basic adjustment of the height of the reel
8.2.2 Change the reel tines
8.2.3 Adjust the reel speed sensor
8.2.4 Bleed the reel hydraulic cylinders
Bleed horizontal hydraulic cylinders
Bleed the vertical hydraulic cylinders
8.3 Power supply unit
8.3.1 Change feed auger fingers
8.4 Mowing device
8.4.1 Renew the blade drive overload protection
9 Maintenance
9.1 Maintenance intervals
9.1.1 Every 10 hours of service or daily
9.1.2 After the first 100 hours of service
9.1.3 Every 100 hours of service
9.1.4 Every 250 hours of service
9.1.5 Every 500 hours of service or annually
9.1.6 Preserve the head
9.2 Greasing scheme
9.2.1 Grease points – 100 h
9.2.2 Grease points – 250 h
9.3 Transmission, clutch and cardan shaft
9.3.1 Check the oil level of the bevel spur gear
9.3.2 Change the bevel spur gear oil
Drain oil
Fill oil
9.3.3 Check the timing gear oil level
9.3.4 Change the timing gear oil
Drain oil
Oil chamber 1
Oil chamber 2
Fill oil
Oil chamber 1
Oil chamber 2
9.4 Hydraulic installation
9.4.1 Check the hydraulic hoses
9.5 Harvest harvest
9.5.1 Clean the table
9.5.2 Adjust the chain (K02)
9.6 Mowing device
9.6.1 Change blades
9.6.2 Change the blade section
9.6.3 Adjust the blade guides
9.6.4 Replacing short double fingers
9.6.5 Align double fingers
9.7 Guided by the ground
9.7.1 Clean the skates
9.7.2 Adjust the skid discharge
9.7.3 Adjusting the relief of the transverse swing arms
9.7.4 Replacing the wear pads
9.7.5 Change the shooting belt
10 Decommissioning and waste disposal
10.1 General information
10.1.1 Decommissioning and waste disposal
11 Declaration of conformity
11.1 MAXFLEX
11.1.1 EC declaration of conformity
00 0297 292 1.pdf:
VARIO 1250 / 1050MAXFLEX 1250 / 1050MAXFLO 1250 / 1050C900 – C450V900 – V540
1. Introduction
1.1 Information on the instruction manual
1.1.1 Validity of the manual
1.1.2 Information on the instruction manual
2 Security
2.1 Recognize warning signs
2.1.1 Danger symbols
2.1.2 Keyword
2.2 Safety instructions
2.2.1 Instruction manual and other sources of information
Meaning of the instruction manual
2.2.2 Invisible laser beam of 1M laser category
2.2.3 Proper machine application
3 Technical data
3.1 LASER PILOT
3.1.1 LASER PILOT
4 Management
4.1 Address
4.1.1 Deploy the LASER PILOT
4.1.2 Adjust the LASER PILOT
Preparing the terrain
Adjust the LASER PILOT to the harvesting material
Adjust the LASER PILOT to the harvesting material
Prepare the adjustment process
Check the LASER PILOT setting
Vertically adjust the LASER PILOT
Control the horizontal preset of the LASER PILOT
Perform horizontal fine adjustment of the LASER PILOT
5 Incident and solution
5.1 Incident summary
5.1.1 LASER PILOT
John Deere Repair Technical Manual PDF
John Deere Repair Technical Manual PDF
John Deere Parts Catalog PDF
John Deere Harvesters 8500 and 8700 Parts Catalog CPCQ24910 Spanish
John Deere Repair Technical Manual PDF
John Deere 16, 18, 20 and 24HP Onan Engines Component Technical Manual CTM2 (19APR90)
John Deere Repair Technical Manual PDF
John Deere Repair Technical Manual PDF
John Deere Diesel Engines POWERTECH 2.9 L Component Technical Manual CTM126 Spanish
John Deere Repair Technical Manual PDF
John Deere Repair Technical Manual PDF
John Deere Transmission Control Unit Component Technical Manual CTM157 15JUL05


