- Claas
- Grove
- New Holland
- Komatsu
- Kubota
- John Deere
- Linde
- Bomag
- CASE
- Clark
- JCB
- Jungheinrich
- Linde
- Yale
- Yanmar
- Manitou
- Manitowoc
- CNH
- Doosan
- Fiatagri
- Fiatallis
- Fiatallis Other Manual PDF
- Flexi Coil
- Ford New Holland
- Ford New Holland Other Manual PDF
- Huyndai
- Hypac
- Hyster
- Hyster Service Manual PDF
- Isuzu
- Kobelco
- Kohler
- Krupp
- Lombardini
- Mahindra
- Nuvera
- Perkins
- Sperry New Holland
- Utilev
- Versatile
- ZF
 Telehandlers Operator Manual ES 1")
 Telehandlers Operator Manual ES 2")
 Telehandlers Operator Manual ES 3")
 Telehandlers Operator Manual ES 4")
Claas Scorpion 6030 (K01) Telehandlers Operator Manual ES
$50.00
- Model: Scorpion 6030 (K01) Telehandlers
- Type Of Manual: Operator Manual
- Language: ES
- Format: PDF(s)
- Size: 26.1 MB
File List:
00 0290 780 1.pdf
00 0295 116 2.pdf
00 0295 430 0.pdf
00 0290 780 1.pdf:
Subject index
CE declaration of conformity
1. Introduction
1.1 General information about the instruction manual
1.2 General information on the safe use of the machine
1.3 Global view of the machine
1.4 Model name – commercial name
1.5 Synoptic description of the telehandler
1.6 Telehandler Warranty
1.7 Scope of application and use of the telehandler with implement
1.8 Provisions regarding driving and working with the telescopic handler
1.9 Nameplates and equipment numbers
1.10 Description: labels and symbols
2 Safety instructions
2.1 Identification of warning and danger statements
2.2 Appropriate use and exclusion of liability
2.3 Rules of conduct and general safety instructions
2.4 Safety instructions for operation
2.5 Safety instructions for maintenance and care
2.6 Maintenance work on ROPS/FOPS protection structures
2.7 Information on special hazards
3 Management
3.1 General information regarding the description of the control elements
3.2 Overview of the cabin interior
3.3 Overview: instrument panel, multifunction lever, switch consoles
3.4 Description of witnesses and pilots
3.5 Commissioning
3.6 Cabin
3.7 Emergency exit
3.8 Hood
3.9 Starting the diesel engine
3.10 Main battery switch
3.11 Electronic immobilizer with key system (option)
3.12 Electronic immobilizer with code entry (option)
3.13 Oil and fuel preheater (option)
3.14 Starting the engine with jumper cables (external battery)
3.15 Before starting the journey
3.16 Address
3.17 Accelerator
3.18 Throttle interlock (option)
3.19 Brake pedal/inching
3.20 Parking brake
3.21 Moving forward with the telehandler
3.22 Inching device (option)
3.23 Differential lock
3.24 Load stabilizer
3.25 Backup warning (option)
3.26 Machine lighting
3.27 Signaling system
3.28 Cabin heating and ventilation
3.29 Rear defroster (option)
3.30 Air conditioning system (option)
3.31 Windshield washer/rear window washer system
3.32 Seat
3.33 Seat belt (lap belt)
3.34 Fire extinguisher (option)
3.35 Reversible fan (option)
3.36 Towing the machine
3.37 Putting the machine out of service
3.38 Loading and transporting the telescopic handler in a transport vehicle
3.39 Load the machine with a crane
3.40 Overview of the telescopic arm control lever
3.41 Telescopic arm overload warning
3.42 Control and interlocking of the 3rd control circuit
3.43 Telescopic arm control
3.44 Emergency lowering of the telescopic arm in case of diesel engine failure
3.45 Assemble a standard bucket
3.46 Working with the standard bucket
3.47 Assemble a pallet fork
3.48 Working with the pallet fork
3.49 “Break valve” safety device
3.50 Mount hydraulic implements on the quick hitch
3.51 Tiltiyer interlock (option)
3.52 Continuous operation of the 3rd front control circuit (option)
3.53 Electrical switching valve for controlling the 3rd control circuit as an additional front control circuit (option)
3.54 Additional rear hydraulic control circuit (option)
3.55 Connecting a tipping trailer (option)
3.56 Autohitch trailer coupling control (option)
3.57 Automatic trailer coupling (option)
3.58 Compressed air brake system (option)
3.59 Hydraulic trailer brake (option)
3.60 Mount implements on quick couplers from other manufacturers (option)
3.61 Final put out of service of the machine
4 Malfunctions
4.1 Diesel engine malfunctions
4.2 Malfunctions in the air conditioning system (option)
5 Maintenance
5.1 General information on maintenance work
5.2 Safety shoring of the telescopic arm
5.3 Fuel system
5.4 Engine lubrication system
5.5 Engine and hydraulic cooling system
5.6 Air filter
5.7 V-belts
5.8 Hydraulic system
5.9 Check the hydraulic pressure lines
5.10 Greasing work
5.11 Grease with the central lubrication system (option)
5.12 Brake system maintenance
5.13 Maintenance of the compressed air brake system (option)
5.14 Tires
5.15 Maintenance of the heating and ventilation system
5.16 Air conditioning system maintenance (option)
5.17 Maintenance of the electrical system
5.18 Maintenance of the automatic trailer coupling (option)
5.19 General conservation work
5.20 Diesel particulate filter maintenance (option)
5.21 Maintenance and conservation of implements
5.22 Maintenance and care work “Aggressive media” (option)
5.23 Maintenance program (overview)
5.24 Fuels and lubricants
5.25 Maintenance sticker and maintenance guide in preparation
6 Technical data
6.1 Synopsis of models and commercial names
6.2 Frame
6.3 Engine
6.4 Propulsion
6.5 Oil/water radiator fan
6.6 Axes
6.7 Service brake and parking brake
6.8 Address
6.9 Wng hydraulics
6.10 Electrical system
6.11 Tires
6.12 Pesos
6.13 Trailer couplings: towed load/drawbar load
6.14 Noise measurement
6.15 Vibrations
6.16 Coolant Mixing Table
6.17 Tightening torques
6.18 Payload: load diagram
6.19 Dimensions with bucket
6.20 Dimensions with pallet fork
00 0295 116 2.pdf:
Materials index
1. Introduction
1.1 Observations to the Instruction Manual
Abbreviations/symbols
1.2 Global view of the vehicle
1.3 Synoptic description
Hydrostatic propulsion
Working hydraulics and steering on all 4 wheels
Refrigeration system
1.4 Areas of application
1.5 Model name – commercial name
1.6 Use: implement
1.7 Specifications
Driving license
equipment
Vehicle inspections
Documents on board the vehicle
Vehicle warning signs
1.8 CE declaration of conformity model 400-01
1.9 CE declaration of conformity model 401-01
1.10 Declaration of conformity CE model 402-01
1.11 Declaration of conformity CE model 403-01
1.12 Nameplates and equipment numbers
Serial number
Cabin number
Engine number
Hydraulic pump number
variable engine number
Variable engine number (quick change option)
N_x001E_ front and rear axle
1.13 Labels and symbols
Signs on the outside of the vehicle
Signs inside the vehicle
2 Safety instructions
2.1 Identification of warning and danger statements
2.2 Warranty
2.3 Appropriate use and exclusion of liability
2.4 General rules of conduct and safety instructions
Organizational measures
Selection and qualification of personnel; basic obligations
2.5 Safety instructions for operation
Normal functioning
Lifting tackle
Trailers and implements
Transport
2.6 Safety instructions for maintenance and care
Maintenance and conservation work on ROPS/FOPS structures (ROPS bar)
2.7 Information on special hazards
Electric power
Gas, dust, steam, smoke
Hydraulics
Oils, greases, and other chemicals
3 Management
3.1 Control elements: overview
3.2 Cabin overview
3.3 Overview: instrument panel, multifunction switch, switch consoles
3.4 Description of witnesses and pilots
Witnesses and pilots – instrument panel
Witnesses and pilots – instrument panel
3.5 First start-up
Security instructions
Important information
Break-in time
Checklists
“Startup” checklist
“Operation” checklist
“Vehicle Stopping” Checklist
3.6 Cabin
Open the door from outside and inside
Side window
3.7 Emergency exit through the rear window
3.8 Electric mirror adjustment (option)
3.9 Start the engine
Before starting the engine
Generalities
To start the engine
3.10 Electronic immobilizer with transponder key (option)
ate (unlock) theimmobilizer
Activate (lock) the electronic immobilizer
3.11 Electronic immobilizer with key system (option)
Deactivate (unlock) the electronic immobilizer
Activate (lock) the electronic immobilizer
Oil and fuel preheater (option)
3.12 Starting the engine with jumper cables (external battery)
Security instructions
Procedure
3.13 Before starting the journey
Special instructions for driving on public roads
Lock the control lever (joystick) and the 3rd control circuit (implements)
Steering column height and tilt adjustment
Steering control
Synchronized wheel position
Joystick Bracket Height Adjustment
Throttle
Brake/Inching pedal
Parking break
3.14 Advance
Changing direction of travel (forward/reverse)
Driving speed selection (0 – 20 km/h)
Driving speed selection 0 – 30/40 km/h (option)
Creep potentiometer (option)
3.15 Load stabilizer
3.16 Backup warning (option)
3.17 Differential lock
3.18 Synchronize address
3.19 Changing the steering mode
Front axle steering
4 wheel steering
Switch to diagonal direction (dog step option)
3.20 Stop/park the vehicle
3.21 Lighting
Lighthouse
working headlight
Interior lighting
3.22 Signaling system
direction indicator
Emergency flashers
Rotating warning light (option)
3.23 Cabin heating and ventilation
3.24 Air conditioning system (option)
3.25 Windshield washer/rear window washer system
Windshield washer/windscreen washer system reservoir
3.26 Seat
Seat adjustment
Weight adjustment
Backrest adjustment
Longitudinal adjustment with joystick support (option)
Longitudinal adjustment without joystick support
3.27 Seat belt (lap belt)
Fasten the seat belt:
Release the seat belt
Lengthen/shorten the hip belt:
3.28 Hood
3.29 Fire extinguisher (option)
3.30 Main battery switch (option)
3.31 Reverse fan (option)
3.32 Towing and transporting the vehicle
Preparatory work for towing
Tow the vehicle
3.33 Loading and transporting the telescopic handler
Security instructions
Vehicle loading
Tie down the vehicle
3.34 Load the vehicle with a crane
Security instructions
Crane loading
3.35 Telescopic equipment control: overview
Joystick control for lift, tilt and push cylinders
Command of the 3rd command circuit
3.36 Telescopic equipment control
General safety instructions
Overload warning
Overload warning indicator
Operation control of the overload warning
Raise/extract telescopic equipment
Enter/lower the telescopic equipment
3.37 Reequip implements
Pick up an implement on the hydraulic quick hitch
Retrofit: implement on the hydraulic quick hitch
Retrofit: implements on the mechanical quick hitch (option)
3.38 “Break valve” safety device
3.39 Assembling/disassembline pallet fork
Pick up the pallet fork
Place the pallet fork by removing it from the quick coupler
Driving on public roads with the pallet fork
3.40 Adjustment of the fork arms
3.41 Working with the pallet fork
General safety instructions
Brief instructions on using the fork arms
Specific safety instructions
Load diagram for pallet forks (EN 1459/1998)
Payload for buckets
Bring the vehicle closer to the material
Pick up material
Pick up material and deposit it in an elevated position
3.42 Working with the standard bucket
General indications
Practical instructions for excavation
Bucket tipping position
Bucket transport position
Transport tour with full bucket
Loose material loading
Load material that is difficult to penetrate
Pulling/digging in soft soil
Pulling/digging in hard ground
Vehicle loading
Vehicle release
3.43 Assembly/disassembly of the multi-purpose bucket
Relieve pressure on quick hitch quick couplings
Hydraulic connections: telehandler – multi-use bucket
Deposit the multipurpose bucket by removing it from the quick hitch
3.44 Working with the multipurpose spoon
Driving on public roads with the multi-purpose bucket
Level and equalize
Clearing in flat layers
Spreading material in thin layers
Remove material from slopes
Push material with greater reach
Complete collection of residual material in clamp service
Pick up bulky material
Pick up bulky objects
Extraction and driving of piles
Dosed discharge in clamp service
Round gravel embankment in drainage ditches
Bottom emptying for higher discharge heights
3.45 Working with a crane arm (option)
3.46 Control of the 3rd control circuit in continuous operation (option)
3.47 Switching from the 3rd control circuit to the front additional control circuit (option)
3.48 Front/rear hydraulic additional control circuit control (option)
3.49 Dump trailer control (option)
3.50 Connection of electrical implements (option)
3.51 Autohitch trailer coupling control (option)
3.52 Trailer coupling control (option)
3.53 Compressed air brake system (option)
General safety instructions
Coupling and uncoupling the compressed air hoses (dual circuit brake system)
Compressed air pressure gauge
3.54 Connecting the hydraulic trailer brake (option)
4 Malfunctions
4.1 Engine faults
4.2 Malfunctions in the air conditioning system (option)
5 Maintenance
5.1 Introduction
5.2 Safety shoring of telescopic equipment
5.3 Fuel system
Special safety instructions
Service stations
Diesel specification
Check/replace the fuel prefilter (water separator)
Replace the fuel filter
Bleed the fuel system
5.4 Engine lubrication system
Check the oil level
Add engine oil
Replace the engine oil every 500 h/s (service hours)
Replace the engine oil filter cartridge every 500 h/s (service hours)
5.5 Engine and hydraulic cooling system
Special safety instructions
Check the level and quality of the coolant
Add coolant
Bleed/replace coolant
Clean the radiator fins
Clean the radiator with the reverse fan (option)
5.6 Air filter
Control of dirt in the air filter
Replace the filter cartridge at 500 h/s (service hours)
5.7 V-belts
5.8 Hydraulic system
Special safety instructions
Checking hydraulic oil and return filter
Check the hydraulic oil level every day
Add hydraulic oil
Important indications for the use of biodegradable oil
5.9 Check the hydraulic pressure lines
Special safety instructions
5.10 Greasing work
Central lubrication system (option)
General safety instructions
Grease the rear axle swing bearings
Grease the planetary bearing
Synopsis of grease points on telescopic equipment
Grease the telescopic equipment
Check and adjust the sliding plates
5.11 Brake system maintenance
Special safety instructions
Check/add brake fluid
5.12 Maintenance of the compressed air brake system (option)
Check the tank and compressed air ducts
Check the fastening and operation of the compressor
5.13 Tires
Check the tires every day
Change wheels
5.14 Heating with fresh air
Clean/replace fine dust filter
Clean/replace recirculated air filter
5.15 Air conditioning system maintenance (option)
General safety instructions
Functional and visual control every day
5.16 Maintenance of electrical equipment
Special safety instructions
Periodic maintenance and conservation work
Electrical cables, light bulbs and fuses
Three-phase current alternator
Adjust vehicle headlights
Check/replace the battery
5.17 Trailer coupling maintenance
Trailer coupling (option)
5.18 General conservation work
Special safety instructions
If washing solutions are used
If compressed air is used
If using a high pressure cleaner or steam jet:
If volatile and easily flammable corrosion protection sprays and products are used
Cleaning the interior of the cabin
Seat belt cleaning
Cleaning the exterior of the entire vehicle
Clean: engine and engine compartment
Threaded joints
Pivot points and hinges
5.19 Conservation and maintenance in salt applications
Aggressive media (option)
5.20 Maintenance and conservation of implements
5.21 Fuels and lubricants
5.22 Maintenance program (overview)
5.23 Maintenance sticker
Explanation of the symbols on the maintenance sticker
6 Technical data
6.1 Synopsis of models and commercial names
6.2 Frame
6.3 Engine
6.4 Oil/water radiator fan
6.5 Propulsion
variable pump
variable motor
6.6 Axes
front axle
Rear axle
6.7 Service brake and parking brake
6.8 Address
6.9 Working hydraulics
Hydraulic pump
Protection of hydraulic cylinders
Speed: lift, tilt and push cylinder
Hydraulic pre-control
Additional control circuit (option)
6.10 Electrical system
Fuse overview
electrical groups
Main fuse box with relays
Synopsis of the relays
6.11 Tires for models 400-01/401-01
6.12 Tires for models 402-01/403-01
6.13 Weights
6.14 Noise measurement
6.15 Vibrations
6.16 Coolant mixing table
6.17 Tightening torques
General tightening torques
Special tightening torques
6.18 Trailer couplings: towed load/drawbar load
6.19 Payload: load diagram up to serial number 400 01 0033
6.20 Payload: load diagram from serial number 400 01 0034
6.21 Payload: load diagram up to serial number 401 01 0046
6.22 Payload: load diagram from serial number 401 01 0047
6.23 Payload: load diagram from serial number 402 01 0001
6.24 Payload: load diagram up to serial number 403 01 0015
6.25 Payload: load diagram from serial number 403 01 0016
6.26 Dimensions with bucket
6.27 Dimensions with pallet fork
00 0295 430 0.pdf:
Materials index
1. Introduction
1.1 Information to the instruction manual
Abbreviations/symbols
1.2 Global view of the machine
1.3 Model name – commercial name
1.4 Synoptic description of the telehandler
Hydrostatic propulsion
Working hydraulics and steering on all 4 wheels
Refrigeration system
1.5 Areas of application
1.6 Implements
1.7 Provisions
Driving license
equipment
Machine inspections
Documents on board the machine
Machine warning signs
1.8 CE declaration of conformity model 400-01
1.9 CE declaration of conformity model 401-03
1.10 Declaration of conformity CE model 402-03
1.11 CE declaration of conformity model 403-03
1.12 Nameplates and equipment numbers
Serial number
Cabin number
Engine number
Hydraulic pump number
variable engine number
Variable engine number (quick change option)
N_x001E_ front and rear axle
1.13 Labels and symbols
Labels on the outside of the machine
Labels inside the machine
2 Safety instructions
2.1 Identification of warning and danger statements
2.2 Warranty
2.3 Appropriate use and exclusion of liability
2.4 General rules of conduct and safety instructions
Organizational measures
Selection and qualification of personnel; basic obligations
2.5 Safety instructions for operation
Normal functioning
Lifting tackle
Trailers and implements
Transport
2.6 Safety instructions for maintenance and care
Maintenance and conservation work on ROPS/FOPS structures (ROPS bar)
2.7 Information on special hazards
Electric power
Gas, dust, steam, smoke
Hydraulic system
Oils, greases, and other chemicals
3 Management
3.1 Control elements: overview
3.2 Cabin overview
3.3 Overview: instrument panel, multifunction switch, switch consoles
3.4 Description of witnesses and pilots
Witnesses and pilots – indicator instrument
Witnesses and pilot lights – front instrument panel
3.5 First start-up
Security instructions
Important information
Break-in time
Checklists
“Startup” checklist
“Operation” checklist
“Machine Stop” Checklist
3.6 Cabin
Open the door from outside and inside
Open/close the side window
Open the side window
Open the side window completely and lock it
Open/close the rear window
Emergency exit through the rear window
Interior lighting
3.7 Before starting the engine
Generalities
3.8 Start the engine
3.9 Function: warning light on the button (103 kW diesel engine)
Flashing code reading
Warning limit – coolant temperature
Warning limit – charge air temperature
Warningine oil pressure
Error code overv Electronic immobilizer with key system (option)
Coding (“instructing”) new ignition keys
Activate (lock) the electronic immobilizer
Deactivate (unlock) the electronic immobilizer
Delete coded keys
Security features
3.11 Electronic immobilizer with code entry (option)
Enter/modify your personal code
Activate the electronic immobilizer
Deactivate the electronic immobilizer
Putting the electronic immobilizer out of service
Put the immobilizer back into service
Disconnect the power supply to the electronic immobilizer
Electronic immobilizer maintenance
3.12 Oil and fuel preheater (option)
Oil preheating (option)
Fuel preheating (option)
3.13 Starting the engine with jumper cables (external battery)
Security instructions
Procedure
3.14 Before starting the journey
Special instructions for driving on public roads
3.15 Lock the control lever (joystick) and the 3rd control cir (implements)
3.16 Steering column height and tadjustment
3.17 Steering control
3.18 Synchronized wheel position
3.19 Height adjustment of the joystick support
3.20 Accelerator
3.21 Manual throttle (option)
3.22 Brake/Inching pedal
3.23 Service brake
3.24 Parking brake
3.25 Move forward with the telehandler
Changing direction of travel (forward/reverse)
Driving speed selection (0 – 20 km/h, standard)
Driving speed selection 0 – 30/40 km/h (option)
Inching device (option)
3.26 Electric mirror adjustment (option)
3.27 Load stabilizer
3.28 Backup warning (option)
3.29 Differential lock
Connect the differential lock
Disconnect the differential lock
3.30 Synchronize address
3.31 Changing the steering mode
Front axle steering
4 wheel steering
Switch to diagonal direction (dog step option)
3.32 Stop/park the machine
3.33 Lighting
Lighthouse
working headlight
3.34 Signaling system
Flashing
Emergency flashers
Rotating warning light (option)
3.35 Cabin heating and ventilation
3.36 Air conditioning system (option)
3.37 Windshield washer/rear window washer system
Windshield washer/rear window washer system reservoir
3.38 Seat
Seat adjustment
Weight adjustment
Height adjustment (air suspension seat, option)
Backrest adjustment
Longitudinal adjustment
3.39 Seat belt (lap belt)
Fasten the seat belt
Release the seat belt
Lengthen/shorten lap belt
3.40 Hood
3.41 Fire extinguisher (option)
3.42 Main battery switch (option)
3.43 Reversible fan (option)
3.44 Towing and transporting the machine
Preparatory work for towing
Tow the machine
After towing
3.45 Loading and transporting the telescopic handler
General safety instructions
Machine loading
Tie down the machine
3.46 Load the machine with a crane
Security instructions
Crane loading
3.47 Telescopic equipment control: overview
Joystick control for lift, tilt and push cylinders
Command of the 3rd command circuit
3.48 Telescopic equipment control
General safety instructions
Overload warning
Overload warning indicator
Deactivate/activate the overload warning interlock function
Operation control of the overload warning
Raise/extract telescopic equipment
Enter/lower the telescopic equipment
Lower the emergency telescopic equipment in case of diesel engine failure
3.49 Retrofit implements
Driving on public roads with an implement
Relieve pressure on quick hitch quick couplings
Mounting an implement on the hydraulic quick hitch
Retrofit: implements on the mechanical quick hitch (option)
3.50 “Break valve” safety device
3.51 Assembling/disassembling the pallet fork
Driving on public roads with the pallet fork
3.52 Adjustment of the fork arms
3.53 Working with the pallet fork
General safety instructions
Specific safety instructions
Brief instrucs on using the fork arms
Load diagram for pallet fo(EN 1459/1998)
Bring the machine closer to the material
Pick up material
Pick up material and deposit it in an elevated position
3.54 Working with the standard bucket
General indications
Payload for buckets
Practical instructions for excavation
Bucket tipping position
Bucket transport position
Transport tour with full bucket
Loose material loading
Load material that is difficult to penetrate
Pulling/digging in soft soil
Pulling/digging in hard ground
Vehicle loading
Machine release
3.55 Working with a crane arm (option)
3.56 Control of the 3rd control circuit in continuous operation (option)
3.57 Electrical switching valve control for front additional control circuit (option)
3.58 Front/rear hydraulic additional control circuit control (option)
3.59 Dump trailer control (option)
3.60 Connection of electrical implements (option)
3.61 Autohitch trailer coupling control (option)
3.62 Trailer coupling control (option)
3.63 Compressed air brake system (option)
General safety instructions
Coupling and uncoupling the compressed air hoses (dual circuit brake system)
Compressed air pressure gauge
3.64 Connecting the hydraulic trailer brake (option)
3.65 Mounting implements from other manufacturers on the quick hitch (option)
Example: Test plan for implements from other manufacturers
4 Malfunctions
4.1 Diesel engine malfunctions
4.2 Malfunctions in the air conditioning system (option)
5 Maintenance
5.1 Important information about maintenance work
5.2 Safety shoring of telescopic equipment
5.3 Fuel system
Specific safety instructions
Service stations
Diesel specification
Check/replace fuel prefilter (water separator)
Replace the fuel filter
Bleed the fuel system
5.4 Engine lubrication system
Check oil level
Add engine oil
Replace the engine oil every 500 h/s (service hours)
Replace the engine oil filter cartridge every 500 h/s (service hours)
5.5 Engine and hydraulic cooling system
Specific safety instructions
Check the level and quality of the coolant
Add coolant
Bleed/replace coolant
Clean the radiator fins
Clean the radiator with the reversible fan (option)
5.6 Air filter
Control of dirt in the air filter
Replace the filter cartridge at 500 h/s (service hours)
5.7 V-belts
Check V-belts
Belt retensioning
5.8 Hydraulic system
Specific safety instructions
Checking hydraulic oil and return filter
Check the hydraulic oil level every day
Add hydraulic oil
Important indications for the use of biodegradable oil
5.9 Check the hydraulic pressure lines
Specific safety instructions
5.10 Greasing work
General safety instructions
Grease the rear axle swing bearings
Grease the planetary bearing
Synopsis of grease points on telescopic equipment
Grease the telescopic equipment
Check and adjust sliding plates
5.11 Grease with the central lubrication system (option)
General Functional Description
Adjust greasing and pause times
Fill the central lubrication system
5.12 Brake system maintenance
Specific safety instructions
Check/add brake fluid
5.13 Maintenance of the compressed air brake system (option)
Check the tank and compressed air lines
Check fixation and drive of the compressor
5.14 Tires
Check the tires every day
Change wheels
5.15 Heating with fresh air
Clean/replace fine dust filter
Clean/replace recirculated air filter
5.16 Air conditioning system maintenance (option)
General safety instructions
Functional and visual control every day
5.17 Maintenance of electrical equipment
Specific safety instructions
Periodic maintenance and conservation work
Electrical cables, light bulbs and fuses
Three-phase current alternator
Adjust the headlights of the machine
Check/replace battery
5.18 Trailer coupling maintenance
Trailer coupling (option)
5.19 General conservation work
Specific safety instructions
If washing solutions are used
If compressed air is used
If using a high pressure cleaner or steam jet:
If volatile and easily flammable corrosion protection sprays and products are used
Cleaning the interior of the cabin
Seat belt cleaning
Cleaning the exterior of the complete machine
Clean: engine and engine compartment
Threaded joints
Pivot points and hinges
5.20 Maintenance and care work “Aggressive media” (option)
Factory applied corrosion protection
Components provided with anti-corrosion protection
Measures to take to ensure long-lasting anti-corrosion protection
Application of the anticorrosive layer
Treatment of rusty surfaces
5.21 Maintenance and conservation of implements
5.22 Maintenance program (overview)
5.23 Fuels and lubricants
5.24 Maintenance sticker
Explann of the symbols on the maintenance sticker
maintenancecker
6 Technical data
6.1 Synopsis of models and commercial names
6.2 Frame
6.3 Engine
6.4 Oil/water radiator fan
6.5 Propulsion
variable pump
variable motor
6.6 Axes
front axle
Rear axle
6.7 Service brake and parking brake
6.8 Address
6.9 Working hydraulics
Hydraulic pump
Protection of hydraulic cylinders
Speed: lift, tilt and push cylinder
Hydraulic pre-control
Additional control circuit (option)
6.10 Electrical system
Fuse overview
electrical groups
Main fuse box with relays (88 kW diesel engine)
Main fuse box with relays (103 kW diesel engine)
Synopsis of the relays
6.11 Tires for models 400-01 / 401-03 / 402-03 / 403-03
6.12 Pesos
6.13 Noise measurement
6.14 Vibrations
6.15 Coolant mixing table
6.16 Tightening torques
General tightening torques
Special tightening torques
6.17 Trailer couplings: towed load/drawbar load
6.18 Payload: load diagram model 400-01
6.19 Payload: load diagram model 401-03
6.20 Payload: load diagram model 402-03
6.21 Payload: load diagram model 403 03
6.22 Dimensions with bucket
6.23 Dimensions with pallet fork


John Deere Repair Technical Manual PDF
John Deere Repair Technical Manual PDF


John Deere Repair Technical Manual PDF


John Deere Repair Technical Manual PDF
John Deere 16, 18, 20 and 24HP Onan Engines Component Technical Manual CTM2 (19APR90)


John Deere Repair Technical Manual PDF
John Deere Diesel Engines POWERTECH 2.9 L Component Technical Manual CTM126 Spanish


John Deere Repair Technical Manual PDF
John Deere Parts Catalog PDF
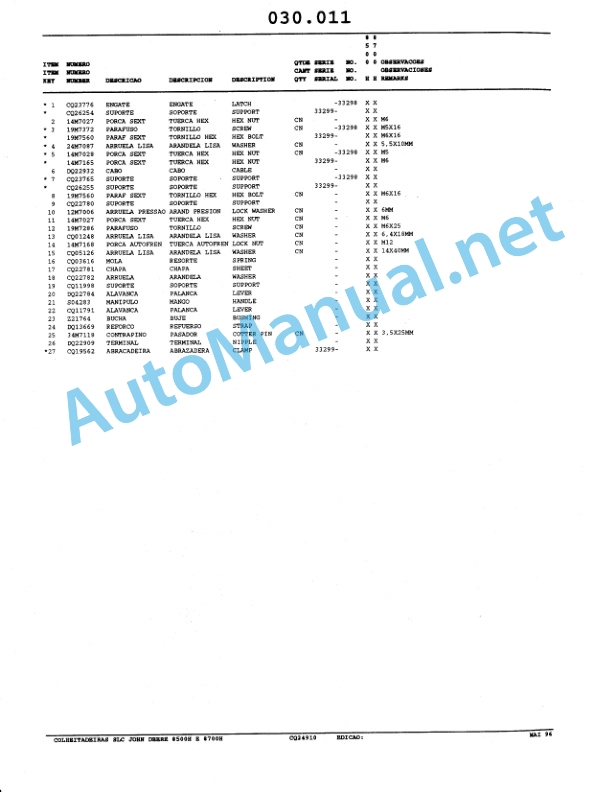
John Deere Harvesters 8500 and 8700 Parts Catalog CPCQ24910 Spanish


%20Telehandlers%20Operator%20Manual%20ES&url=https://automanual.net/doc/claas-scorpion-6030-k01-telehandlers-operator-manual-es/&media=https://automanual.net/wp-content/uploads/2024/04/claas-scorpion-6030-k01-telehandlers-operator-manual-es-1.jpg)
&url=https://automanual.net/doc/john-deere-16-18-20-and-24hp-onan-engines-component-technical-manual-ctm2-19apr90/&media=https://automanual.net/wp-content/uploads/2023/08/john-deere-16-18-20-and-24hp-onan-engines-component-technical-manual-ctm2-19apr90-1.jpg)


John Deere Repair Technical Manual PDF
John Deere POWERTECH E 4.5 and 6.8 L Diesel Engines TECHNICAL MANUAL 25JAN08


John Deere Repair Technical Manual PDF
John Deere Application List Component Technical Manual CTM106819 24AUG20
- Claas
- Grove
- New Holland
- Komatsu
- Kubota
- John Deere
- Linde
- Bomag
- CASE
- Clark
- JCB
- Jungheinrich
- Linde
- Yale
- Yanmar
- Manitou
- Manitowoc
- CNH
- Doosan
- Fiatagri
- Fiatallis
- Fiatallis Other Manual PDF
- Flexi Coil
- Ford New Holland
- Ford New Holland Other Manual PDF
- Huyndai
- Hypac
- Hyster
- Hyster Service Manual PDF
- Isuzu
- Kobelco
- Kohler
- Krupp
- Lombardini
- Mahindra
- Nuvera
- Perkins
- Sperry New Holland
- Utilev
- Versatile
- ZF