Claas Scorpion 9040 (K05) Telehandlers Technical System EN
$300.00
- Model: Scorpion 9040 (K05) Telehandlers
- Type Of Manual: Technical System
- Language: EN
- Format: PDF(s)
- Size: 102 MB
File List:
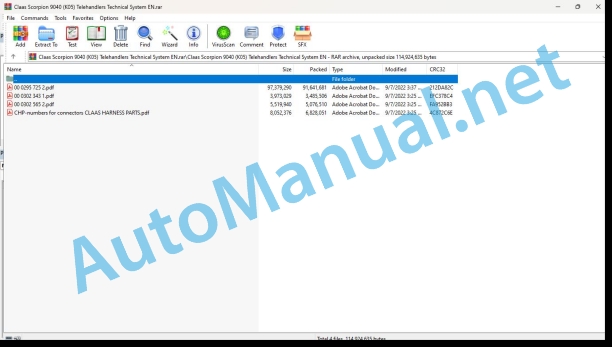
00 0295 725 2.pdf
00 0302 343 1.pdf
00 0302 565 2.pdf
CHP-numbers for connectors CLAAS HARNESS PARTS.pdf
00 0295 725 2.pdf:
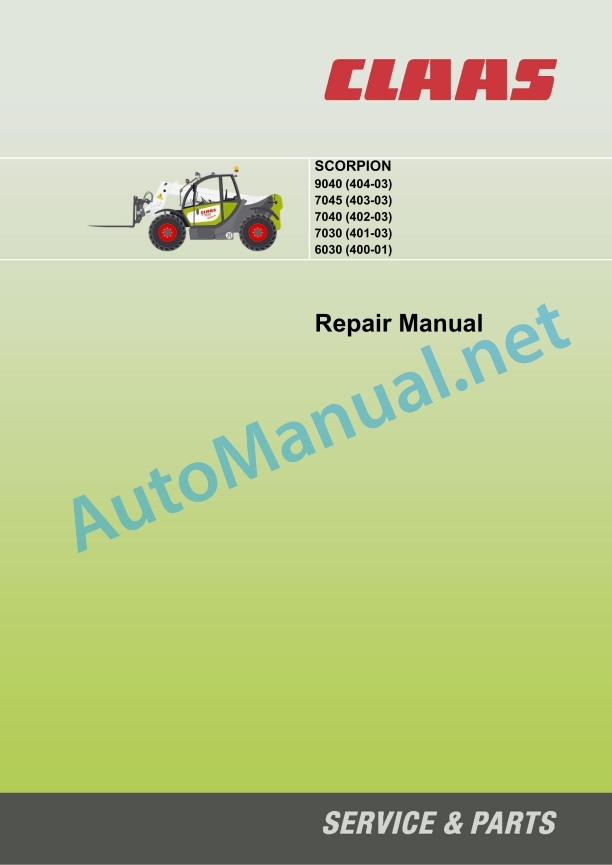
Repair Manual
1 Machine, applications, operation (overview)
1.1 Machine outside view
1.2 Inside of cab (overview)
1.3 Instrument panel, multifunctional lever, switch consoles (overview)
1.4 Fields of application and using a telehandler with an attachment
1.5 Legal regulations regarding telehandler operation
1.6 Type labels and component numbers
2 Specifications
2.1 Model and trade names (overview)
2.2 Frame
2.3 Engine
2.4 Oil/water fan
2.5 Drive
2.6 Axles
2.7 Service and parking brake
2.8 Steering system
2.9 Work hydraulics
2.10 Electrical system
2.11 Tyres for models 401-03/402-03/403-03
2.12 Tyres for model 404-03
2.13 Machine weights, axle loads
2.14 Noise levels
2.15 Vibrations, oscillation and acceleration value
2.16 Coolant compound table
2.17 Tightening torques
2.18 Trailer couplings: trailer weight/drawbar load
2.19 Pallet forks model 400-01
2.20 Load on pallet forks model 401-03 (without counterweight)
2.21 Load on pallet forks model 401-03 (with counterweight 2 x 150 kg)
2.22 Pallet forks model 402-03 (with counterweight 2 x 150 kg)
2.23 Pallet forks model 402-03 (with counterweight 2 x 300 kg)
2.24 Load on pallet forks model 403-03
2.25 Payloads model 404-03
2.26 Dimensions with bucket
2.27 Dimensions with bucket
2.28 Dimensions with pallet forks
2.29 Dimensions with pallet forks
3 Maintenance and servicing work
3.1 Explanation of symbols on the maintenance label
3.2 Maintenance label
3.3 Fluids and lubricants (overview)
3.4 Maintenance plan
3.5 Introduction
3.6 Safety prop for telescopic boom
3.7 Fuel system
3.8 Maintenance of engine lubrication system
3.9 Maintenance of the engine and hydraulics cooling system
3.10 Cleaning the radiator with the reversing fan (option)
3.11 Air filter maintenance
3.12 Maintenance: V-belts
3.13 Gearbox and axle maintenance
3.14 Safety instructions regarding the hydraulic system
3.15 Monitoring the hydraulic oil and the return filter
3.16 Checking the hydraulic oil level
3.17 Filling up hydraulic oil
3.18 Replacing the return filter of the hydraulic system
3.19 Replacing the microfilter of the hydraulic system
3.20 Replacing the microfilter in the LS line
3.21 Replacing hydraulic oil
3.22 Important notices on the use of biodegradable oil
3.23 Checking hydraulic pressure lines
3.24 Lubrication work
3.25 Maintenance of the brake system
3.26 Replacing/bleeding the service brake fluid with bleed equipment
3.27 Maintenance of compressed-air brake system (option)
3.28 Tyre maintenance
3.29 Heating and ventilation maintenance
3.30 Maintenance of air conditioning (option)
3.31 Maintenance of the electrical system
3.32 Maintenance of trailer coupling
3.33 General maintenance work on the machine
3.34 Cleaning inside the cab
3.35 Cleaning the seat belt
3.36 Cleaning the exterior of the machine
3.37 Checking screw connections
3.38 Checking pivots and hinges
3.39 Cleaning the engine compartment
3.40 Maintenance and servicing work “Aggressive Media”
3.41 Maintenance and servicing of attachments on the quickhitch
4 Engine
4.1 Electrical system/hydraulics – fan (electrical diagram)
4.2 Fan (functional description)
4.3 Fan connector assignment for models 402, 403, 404
4.4 Diesel engine connector assignment (88 kW)
4.5 Diesel engine connector assignment (103 kW)
4.6 Fuel preheater connector assignment
4.7 Diagnosis connector assignment
4.8 88 kW diesel engine electrical system (electrical diagram)
4.9 103 kW diesel engine electrical system (electrical diagram)
4.10 Fuel preheater (electrical diagram)
4.11 Engine diagnosis (electrical diagram)
4.12 Engine er side (88 kW) (overview)
4.13 Engine drive side (88 kW) (overview)
4.14 Engine turbocharger side (88 kW) (overview)
4.15 Engine oil cooler side (103 kW) (overview)
4.16 Fuel: high-pressure unit
4.17 Engine drive side (103 kW) (overview)
4.18 Engine turbocharger side (103 kW) (overview)
4.19 Electronics overview (103 kW)
4.20 Electronic engine speed setting (103 kW) (overview)
4.21 Function: warning indicator light in tip switch (103 kW diesel engine)
4.22 Engine drive – clutch (88/103 kW) (overview)
4.23 Installing the fan pump
4.24 Fuel system (88/103 kW) (overview)
4.25 Bleeding the fuel system (88/103 kW)
4.26 Fan circuit (not in reversing operation)
4.27 Fan circuit with reversing fan
4.28 Reversing valve block
4.29 Setting maximum fan speed (reversing fan)
4.30 Setting maximum fan speed (without reversing fan)
4.31 Cleaning the radiator with the reversing fan (option)
4.32 Function: reversing fan operation
5 Power train
5.1 40 kph drive hydraulic diagram for models 400, 401, 402
5.1 30 – 40 kph drive hydraulic diagram for models 402, 403, 404
5.2 40 kph drive hydraulic diagram for models 402 – 404
5.3 Drive hydraulic diagram (designations)
5.4 40 kph drive electrics diagram for models 402, 403, 404
5.5 30 – 40 kph drive electrics diagram for models 400 – 404
5.6 Electrical diagram (designations)
5.7 Functional despcription of drive hydraulics and electrical system
5.8 Drive electrics connector assignment for models 400 – 404
5.9 Towing and transporting the machine
5.10 Hydraulic pump TMP 89 (models 402, 403, 404)
5.11 Hydraulic pump H1 P078 (models 400, 401, 402)
5.12 High speed gearbox (0 – 40 kph)
5.13 High-speed gearbox with auxiliary motor (0 – 40 kph)
5.14 Function without auxiliary motor (0 – 40 kph)
5.15 Function with auxiliary motor (0 – 40 kph)
5.16 Gearbox overview (0 – 40 kph)
5.17 Overview of control cover and diagram up to serial no. (0 – 40 kph)
5.18 Overview of control cover and diagram from serial no. (0 – 40 kph)
5.19 Control cover component parts for gearbox (0 – 40 kph)
5.20 Hydraulic drive circuit (0 – 40 kph)
5.21 Legend for gearbox circuit diagram (0 – 40 kph)
5.22 Gearbox circuit diagram (0 – 40 kph)
5.23 Legend for gearbox circuit diagram with auxiliary motor (0 – 40 kph)
5.24 Gearbox circuit diagram with auxiliary motor (0 – 40 kph)
5.25 Measurement reports
5.26 Test report for model 400/401/402 with H1 pump without auxiliary motor (0 -40 kph)
5.27 Test report for model 403/404/402 with TMP89 pump and auxiliary motor (fixed displacement motor) (0 – 40 kph)
5.28 Test report for model 403/404 diesel engine 103 kW and TMP89 pump and auxiliary motor (variable displacement motor) (0 – 40 kph)
5.29 Test report for model 402/403/404 (30 kph)
5.30 Error description for test report
5.31 Checking and setting boost pressure (0 – 40 kph gearbox)
5.32 Checking high pressure (0 – 40 kph)
5.33 Checking engine droop (pump) (0 – 40 kph)
5.34 Checking driving direction identification (0 – 40 kph)
5.35 Setting engine droop on the gearbox with/without auxiliary motor (fixed displacement motor 0 – 40 kph)
5.36 Control initiation set screw (0 – 40 kph gearbox)
5.37 Checking the cardan shaft speed (0 – 40 kph gearbox)
5.38 Troubleshooting work on drive
5.39 Hydraulic pump report
5.40 Report for measurement 1 of hydraulic pump (engine speed and boost pressure)
5.41 Report for forward/reverse measurement 2 of hydraulic pump
5.42 Report for measurement of forward driving direction of hydraulic pump:
5.43 Report for forward measurement 3 of hydraulic pump:
5.44 Variable displacement pump test for models 400/401 and 402
5.45 Variable displacement pump test for models 402/403/404
5.46 Checking the high-speed gearbox
5.47 Measurement 1 (driving direction identification)
5.48 Measurement 2 (M4 pressure at shuttle throttle)
5.49 Measurements 3 and 4 (proportional solenoid and proportional regulator)
5.50 Measurement 5 (pressure relief valve M3, PCOR valve)
5.51 High-speed gearbox report: measurement 1 (driving direction identification)
5.52 High-speed gearbox report: measurement 2 (M4 shuttle pressure)
5.53 High-speed gearbox report: measurements 3 and 4 (proportional solenoid and proportional regulator)
5.54 Report: measurement 5 (pressure relief valve M3, PCOR valve)
5.55 Repair work on the high-speed gearbox
5.56 Repair work on the high-speed gearbox
5.57 Repair work on the high-speed gearbox
5.58 Checking or replacing the shuttle throttle
5.59 Removing the shuttle throttle
5.60 Installing the shuttle throttle
5.61 Checking the auxiliary motor
5.62 Switching off rear axle/4 wheel drive
5.63 Disabling 4 wheel drive (overview)
5.64 Installation position
5.65 Drive electronics Operator’s Manual (SUSMIC)
5.66 Error table
5.67 Checking the proportional valves by means of crent asurement
5.68 Removing the consumers circuit from the hydraulic drive
5.69 Sealing work on the drive shaft (0 – 40 kph gearbox)
5.70 Mounting the rotary shaft seal (0 – 40 kph gearbox)
5.71 Mounting the drive flange (0 – 40 kph gearbox)
5.72 Sealing the Ecospeed gearbox
5.73 Removing the control cover (old) from the Ecospeed gearbox
5.74 Travelling drive with reduced engine speed
5.75 Overview: auxiliary motor (variable displacement motor)
5.76 Overview: auxiliary motor (variable displacement motor)
5.77 Checking control initiation/engine droop of auxiliary motor (variable displacement motor)
5.78 Drive (electrical diagram)
5.79 20 kph hydraulic drive diagram for models 400 – 404
5.80 Drive hydraulic diagram (descriptions)
5.81 Functional despcription of drive hydraulics and electrical system
5.82 Drive electrics connector assignment for models 400 – 404
5.83 Variable displacement motor 110 cm3/rev (20 kph)
5.84 Variable displacement motor 110 cm3/rev (20 kph, seen from the side)
5.85 Variable displacement motor 160 cm3/rev (20 kph)
5.86 Test report for model 400 – 404 (20 kph)
5.87 Error description for test report models 400/401 (20 kph)
5.88 Hydraulic circuit: drive with hydraulic pump H1 P078 (20 kph)
5.89 Hydraulic circuit: drive with hydraulic pump TMP 89 (20 kph)
5.90 Setting boost pressure (20 kph)
5.91 Checking high pressure (20 kph)
5.92 Checking engine droop – variable displacement pump (20 kph)
5.93 Setting engine droop – hydraulic motor (20 kph)
5.94 Setting final speed (20 kph)
6 Axles/differential lock
6.1 Differential lock diagrams (serial no.)
6.2 Designations: differential lock electrical diagram
6.3 Differential lock diagrams
6.4 Functional description of differential lock
6.5 Differential lock connector assignment
6.6 20 kph gearbox (overview)
6.7 Removing the 20 kph gearbox
6.8 Installing the 20 kph gearbox
6.9 Front and rear axle flanges
6.10 Type label and oil filler neck (overview)
6.11 Conversion table and tightening torques
6.12 Removing the joint housing
6.13 Installing the joint housing
6.14 Removing the double cardan shaft
6.15 Mounting the double cardan shaft
6.16 Remove the planetary drive
6.17 Replacing the seals of the planetary drive
6.18 Installing the planetary drive
6.19 Installing the planetary drive
6.20 Sealing the front axle differential
6.21 Removing the front axle differential lock
6.22 Installing the front axle differential lock
6.23 Differential lock: hydraulic circuit
6.24 Special tools (overview)
7 Brakes
7.1 Brake (20 kph) diagrams (electric/hydraulic)
7.2 Brake (40 kph) diagrams (electric/hydraulic)
7.3 Hydraulic diagram – trailer brake valve
7.4 Designations: hydraulic brake diagram
7.5 Designations: electric brake diagram
7.6 Functional description of brakes
7.7 Brakes connector assignment
7.8 40 kph brake circuit (overview)
7.9 20 kph brake circuit (overview)
7.10 Disabling (releasing) the parking brake in the front axle
7.11 Enabling (adjusting) the parking brake in the front axle
7.12 Wear check: service brake discs
7.13 Setting the brake linkage – master brake cylinder
7.14 Service and parking brake (overview)
7.15 Removing the brake discs
7.16 Brake discs (overview)
7.17 Installing the brake pistons of the service and parking brake
7.18 Installing the belleville spring washers and the brake cylinder housing
7.19 Installing the service brake
7.20 Towing and transporting the machine
7.21 Hydraulic trailer brake circuit (option)
7.22 Air compressor
7.23 Air compressor overview
7.24 Air compressor components
7.25 Valves (air compressor)
7.26 Circuit (air compressor)
8 Steering system
8.1 Electrical/hydraulic diagrams for steering system up to serial no. 400 01 0167, 401 03 0195, 402 03 0176, 403 03 0145, 404 03 0146
8.2 Electrical/hydraulic diagrams for steering system from serial no. 400 01 0168, 401 03 0196, 402 03 0177, 403 03 0146, 404 03 0147,
8.3 Designations: electric steering diagram
8.4 Designations: hydraulic steering diagram
8.5 Functional description of steering system
8.6 Steering system connector assignment
8.7 Steering circuit with variable displacement pump (LS = load sensing)
8.8 Hydraulic steering diagram: priority valve – variable displacement pump (LS = load sensing)
8.9 Steering circuit with gear pump
8.10 Hydraulic steering diagram: priority valve – gear pump
8.11 Hydraulic steering diagram: 4 wheel steering/front axle steering
8.12 Diagonal steering circuit (crab steering)
8.13 Hydraulic steering diagram: front axle steering with diagonal steering valve (crab steering)
8.14 Hydraulic steering diagram: diagonal steering with diagonal steering valve (crab steering)
8.15 Hydraulic steering diagram: 4 wheel steering with diagonal steering valve (crab steering)
8.16 Steering system goes out of line (20/40 kph)
8.17 Steering valve (overview)
8.18 Pressure relief valve – servostat: settings
8.19 Front and rear axle steering sensor (magnetic sensor)
8.20 Removing the steering rams
8.21 Installing the steering rams
8.22 Adjusting the steering angle
9 Work hydraulics
9.1 Work hydraulics fixed displacement pump (diagram) – raising/lowering the telescopic boom (HUSCO)
9.2 Work hydraulics fixed displacement pump (diagram) – raising/lowering the telescopic boom (Bucher)
9.3 Work hydraulics variable displacement pump (diagram) – raising/lowering the telescopic boom (HUSCO)
9.4 Work hydraulics variable displacement pump (diagram) – raising/lowering the telescopic boom (Bucher)
9.5 Raising/lowering the telescopic boom (electrical diagram)
9.6 Load stabiliser (electrical diagram)
9.7 Work hydraulics (diagram) – extending/retracting the telescopic boom, fixed displacement pump (HUSCO)
9.8 Work hydraulics fixed displacement pump (diagram) – extending/retracting the telescopic boom
9.9 Work hydraulics variable displacement pump (diagram) – extending/retracting the telescopic boom (HUSCO)
9.10 Work hydraulics variable displacement pump (diagram) – extending/retracting the telescopic boom (Bucher)
9.11 Work hydraulics variable displacement pump (diagram) – extending/retracting the telescopic boom
9.12 Extending/retracting the telescopic boom (electrical diagram)
9.13 Retracting/extending the telescopic boom (designations)
9.14 Work hydraulics fixed displacement pump (diagram) – dumping in/out (HUSCO)
9.15 Work hydraulics fixed displacement pump – dumping in/out (diagram)
9.16 Work hydraulics variable displacement pump (diagram), dumping in/out (HUSCO)
9.17 Work hydraulics variable displacement pump (diagram) – dumping in/out (Bucher)
9.18 Dumping in/out (electrical diagram)
9.19 4 wheel drive OFF (electrical diagram)
9.20 Dumping in/out (electrical diagram)
9.21 Bucket repositioning (electrical diagram)
9.22 Work hydraulics fixed displacement pump (diagram) – locking/unlocking (HUSCO)
9.23 Work hydraulics fixed displacement pump (diagram) – locking/unlocking (Bucher)
9.24 Work hydraulics variable displacement pump (diagram) – locking/unlocking (HUSCO)
9.25 Work hydraulics variable displacement pump (diagram) – locking/unlocking (Bucher)
9.26 Locking/unlocking (electrical diagram)
9.27 Work hydraulics fixed displacement pump (diagram) – rear additional control circuit (HUSCO)
9.28 Work hydraulics fixed displacement pump (diagram) – additional control circuit (Bucher)
9.29 Work hydraulics variable displacement pump (diagram) – rear additional control circuit (HUSCO)
9.30 Work hydraulics variable displacement pump (diagram) – additional control circuit (Bucher)
9.31 Work hydraulics fixed displacement pump (diagram) – rear additional control circuit, Autohitch (HUSCO)
9.32 Work hydraulics fixed displacement pump (diagram) – additional control circuit, Autohitch (Bucher)
9.33 Work hydraulics variable displacement pump (diagram) – rear additional control circuit, Autohitch (HUSCO)
9.34 Work hydraulics variable displacement pump (diagram) – additional control circuit, Autohitch (Bucher)
9.35 Work hydraulics fixed displacement pump (diagram) – rear additional control circuit, Autohitch, tipping trailer (HUSCO)
9.36 Work hydraulics fixed displacement pump (diagram) – additional control circuit, Autohitch, tipping trailer (Bucher)
9.37 Work hydraulics variable displacement pump (diagram) – rear additional control circuit, Autohitch, tipping trailer (HUSCO)
9.38 Work hydraulics variable displacement pump (diagram) – additional control circuit, Autohitch, tipping trailer (Bucher)
9.39 Work hydraulics fixed displacement pump (diagram) – rear additional control circuit, tipping trailer (HUSCO)
9.40 Work hydraulics fixed displacement pump (diagram) – additional control circuit, tipping trailer (Bucher)
9.41 Work hydraulics variable displacement pump (diagram) – rear additional control circuit, tipping trailer (HUSCO)
9.42 Work hydraulics variable displacement pump (diagram) – additional control circuit, tipping trailer (Bucher)
9.43 Work hydraulics fixed displacement pump (diagram) – Autohitch (HUSCO)
9.44 Work hydraulics fixed displacement pump (diagram) – Autohitch (Bucher)
9.45 Work hydraulics variable displacement pump (diagram) – Autohitch (HUSCO)
9.46 Work hydraulics variable displacement pump (diagram) – Autohitch (Bucher)
9.47 Work hydraulics fixed displacement pump (diagram) – Autohitch, tipping trailer (HUSCO)
9.48 Work hydraulics fixed displacement pump (diagram) – Autohitch, tipping trailer (Bucher)
9.49 Work hydraulics variable displacement pump (diagram) – Autohitch, tipping trailer (HUSCO)
9.50 Work hydraulics variable displacement pump (diagram) – Autohitch, tipping trailer (Bucher)
9.51 Work hydraulics fixed displacement pump (diagram) – tipping trailer (HUSCO)
9.52 Work hydraulics fixed displacement pump (diagram) – tipping trailer (Bucher)
9.53 Work hydraulics variable displacement pump (diagram) – tipping trailer (HUSCO)
9.54 Work hydraulics variable displacement pump (diagram) – tipping trailer (Bucher)
9.55 Work hydraulics variable displacement pump (diagram) – additional control circuit for quick couplers on telescopic boom (HUSCO)
9.56 Work hydraulics fixed displacement pump (diagram) – additional control circuit for quick couplers on telescopic boom
9.57 Work hydraulics (diagram) – safe load indicator
9.58 Work hydraulics (diagram) – safe load indicator (HUSCO)
9.59 Front/rear additional control circuit for quick couplers, Autohitch, tipping trailer (electrical diagram)
9.60 Front socket, safe load indicator (electrical diagram)
9.61 Front socket, safe load indicator (electrical diagram)
9.62 Work hydraulics variable displacement pump (diagram) – additional control circuit for quick couplers on quickhitch (HUSCO)
9.63 Work hydraulics variable displacement pump (diagram) – work platform with radio control
9.64 Work hydraulics variable displacement pump (diagram) – work platform with radio control
9.65 Work platform with radio control: electrical diagram
9.66 Remote radio controls (diagram designations)
9.67 Work platform with radio control (electrical diagram) with common rail
9.68 Work platform with radio control (electrical diagram) without common rail
9.69 Tilt ram lock (electrical diagram)
9.70 Tilt ram lock (electrical diagram)
9.71 Work hydraulics variable displacement pump (diagram) – frame levelling, oscillating axle interlock
9.72 Frame levelling, oscillating axle interlock (electrical diagram)
9.73 Frame levelling, oscillating axle interlock (electrical diagram)
9.74 Oscillating axle interlock (electrical diagram)
9.75 Work hydraulic diagram (designations)
9.76 Functional description of work hydraulics
9.77 Work hydraulics connector assignment
9.78 Test report: models 400/401 Husco control valve
9.79 Test report: models 400/401 Bucher control valve
9.80 Test report: models 402/403/404 Husco control valve
9.81 Test report: models 402/403/404 Bucher control valve
9.82 Work hydraulics test ports
9.83 Variable displacement pump (hydraulic pump)
9.84 Checking and setting the work hydraulics
9.85 Work hydraulics circuit (gear pump)
9.86 Work hydraulics circuit (variable displacement pump LS)
9.87 Control valve connections (4-fold) HUSCO
9.88 Control valve (4-fold) (overview) HUSCO
9.89 Control valve connections (5-fold) HUSCO
9.90 Control valve (5-fold) (overview) HUSCO
9.91 Control valve connections (5-fold) Bucher
9.92 Control valve (5-fold) (overview) Bucher
9.93 Lift ram circuit
9.94 Tilt ram circuit
9.95 Compensating ram circuit
9.96 Push-out ram circuit
9.97 3rd control circuit
9.98 Control valve (4-fold) pilot control circuit
9.99 Valve block connections (overview)
9.100 Pilot control unit, pilot valve
9.101 Load stabiliser
9.102 Load stabiliser circuit
9.103 Changeover valve: Autohitch/tipping trailer connection/additional control circuit
9.104 Autohitch, rear additional control circuit
9.105 Tipping trailer connection circuit
9.106 Front additional control circuit
9.107 Frame levelling with oscillating axle interlock (option) telehandler 404 (overview)
9.108 Bleeding the hydraulic ram of the oscillating axle interlock
9.109 Frame levelling circuit
9.110 Frame levelling valve overview
9.111 Lift ram with hose burst valve (overview)
9.112 Tilt ram (overview)
9.113 Push-out ram with final position damping (overview)
9.114 Compensating ram (overview)
9.115 Quickhitch
9.116 Installing the telescopic boom
9.117 Replacing the flexible line in the telescopic boom
9.118 Replacing the control valve
9.119 Replacing the priority valve
9.120 Replacing the fan pump
9.121 Replacing the A 10 work hydraulics pump
9.122 Replacing the pilot valve
10 Electrical systems
10.1 Machine lights (electrical diagram)
10.2 Machine lights (electrical diagram)
10.3 Turn indicators/horn/rotating beacon (electrical diagram)
10.4 Turn indicators, horn, rotating beacon (electrical diagram)
10.5 Mirror adjustment/heating (electrical diagram)
10.6 Mirror adjustment/heating (electrical diagram)
10.7 Wiper/washer diagram
10.8 Hydraulics monitoring diagram
10.9 Hydraulics monitoring (electrical diagram)
10.10 Wiper/washer diagram
10.11 Washer system (electrical diagram)
10.12 Heating – air conditioning system/air-suspension seat (electrical diagram)
10.13 Multimedia/cigarette lighter (electrical diagram)
10.14 Multimedia/cigarette lighter (electrical diagram)
10.15 Cab legend (SLP II)
10.16 Cab wiring diagram (SLP II)
10.17 Cab legend (SLP II)
10.18 Cab wiring diagram (SLP III)
10.19 Cab legend (SLP III)
10.15 Cab wiring harness
10.16 Cab option wiring harness
10.17 Armrest wiring harness
10.18 Mirror adjustment wiring harness
10.19 Engine vat signals wiring diagram (SLP IV)
10.20 Engine vat wiring harness
10.21 Engine compartment legend
10.22 Frame signal wiring diagram (SLP V)
10.23 Frame wiring harness
10.24 Frame legend
10.25 Options signals wiring diagram (SLP VI)
10.26 Socket wiring harness X3
10.27 Additional valves wiring harness
10.28 Mirror/preheating option wiring harness
10.29 Overall diagrams legend
10.30 Electric machine components (overview)
10.31 Electrical diagram designations and positions
10.32 Connector positions on machine
10.33 Functional description of hydraulics monitoring
10.34 Hydraulics monitoring connector assigment
10.35 Lights connector assignment
10.36 Turn indicator/horn connector assignment
10.37 Rotating beacon connector assignment
10.38 Mirror adjustment connector assignment
10.39 Mirror heating connector assignment
10.40 Window wiper/wash connector assignment
10.41 Heating/air conditioning connector assignment
10.42 Air-suspension seat connector assignment
10.43 Multimedia connector assignment
10.44 Cigarette lighter connector assignment
10.45 Ohm’s Law (current, voltage, resistance); power
10.46 Multifunction measuring device
10.47 Terminal description
10.48 Cable colour coding
10.49 Electric components
10.50 Fuses (overview)
10.51 Electronic components (overview)
10.52 Functional description of the steering electronics
10.53 Proportional controls (overview and connections)
10.54 Proportional electronics
10.55 Hold electronics
10.56 Retrofitting the front right and rear right working lights
10.57 Retrofitting a rotating beacon
10.58 Retrofitting a radio
10.59 Retrofitting the low-speed control
10.60 Retrofitting the air conditioning system
10.61 Retrofitting a front or rear socket
10.62 Retrofitting a load stabiliser
10.63 Wiring harness disconnect ab – maine frame)
10.64 Radio control system (transmitter) operation
10.65 Overview of transmitter and receiver system control elements
10.66 “STOP switch” safety feature on the transmitter
10.67 Indications regarding the transmitter battery
10.68 Taking the transmitter into service
10.69 Emergency lowering of the telescopic boom
10.70 Removing the work platform from the quickhitch
10.71 Maintenance work on the work platform
10.72 Maintenance work on the transmitter and receiver system
10.73 Charging the transmitter battery
10.74 Troubleshooting the transmitter and receiver system
10.75 Transmitter and receiver system specifications
10.76 List of frequencies for radio control system
10.77 Specifications – work platform
10.78 Inspection and maintenance work report
10.79 Remote radio control (hydraulic circuit)
10.80 Relays (overview)
10.81 Remote radio control valves (overview)
10.82 Safe load indicator
10.83 Safety instructiregarding safe load indicator
10.84 Overview of displays
10.85 Safe load indicator for telescopic boom (version A)
10.86 Safe load indicator for telescopic boom (version B)
10.87 Safe load indicator for telescopic boom (version C)
10.88 Setting the safe load indicator (version C)
10.89 Safe load indicator settings for telescopic boom (version B)
10.90 Setting the safe load indicator (100 % point stability)
10.91 Removing the load sensor
10.92 Overload control in bucket mode
10.93 Overload control in fork lift mode
10.94 Disabling the overload control manually
10.95 Adjustment work on the overload control
10.96 Circuit diagram: overload control enabled
10.97 Circuit diagram: overload control disabled
10.98 Overview of valves
10.99 Overview of valve connections and ports
10.100 Circuit diagram: raising/lowering, switch S116 actuated (bucket operation)
10.101 Circuit diagram: raising/lowering under 36° and at 80 – 100 % load
10.102 ircuit diagra: raising/lowering over 100 % load and angle detection under 36°
10.103 Circuit diagram: raising/lowering, switch S84 actuated (overload control OFF)
10.104 Circuit diagram: raising/lowering, switch S125 retract (pallet forks operation)
10.105 Circuit diagram: raising/lowering, switch S125 ON (bucket operation)
10.106 Circuit diagram: extend telescopic boom, load less than 100 %
10.107 Circuit diagram: extend telescopic boom, load over 100 %
10.108 Circuit diagram: retract telescopic boom
10.109 Circuit diagram: retraction/extension switch S84 (telescopic boom extension)
10.110 Cab wiring harness (overload control)
10.111 Legend: cab wiring harness (overload control)
10.112 Frame wiring harness (overload control)
10.113 Relay wiring harness (overload control)
10.114 Legend: relays (overload control)
10.115 Electric components (overload control)
A Appendix
A.1 4-fold control valve (Bucher), fixed displacement pump (overall hydraulic diagrm)
A.1 4-fld control valve (Bucher), variable displacement pump (overall hydraulic diagram)
A.2 4-fold control valve (HUSCO) (overall hydraulic diagram)
A.3 Hydraulics – 4-fold control valve: overall diagram
A.4 Fixed displacement pump – 5-fold control valve (Bucher) (overall hydraulic diagram)
A.5 Fixed displacement pump – 5-fold control valve (HUSCO) (overall hydraulic diagram)
A.6 Variable displacement pump – 5-fold control valve (Bucher) (overall hydraulic diagram)
A.7 Variable displacement pump – 5-fold control valve (HUSCO) (overall hydraulic diagram)
00 0302 343 1.pdf:
PROFI CAM 3
Table of contents
General information
Marking of warnings and hazard prevention notes
First-aid measures
CCN explanation
CCN (CLAAS Component Number)
Electric system standard
Overview
Hydraulic system standard
Overview
CCN (CLAAS Component Number)
10 Electrical / Electronic equipment
1030 Board computer / Indicators
Camera system
Description of function
1097 Testing / Measuring / Adjusting
Testing / measuring / adjusting the PROFI CAM
Checking the fuse in the video channel select box (C102)
Testing the video camera connector (C055)
1098 Fault / remedy
Fault / remedy PROFI CAM
The video monitor (C101) shows no image or cannot be switched on (indicator light fails to light up)
Video monitor (C102) displays a blue image either permanently or temporarily
The video monitor image is blurred
Replacing the fuse in the video channel select box (C102)
Connection and connecting cable with video camera (C055)
00 0302 565 2.pdf:
Sensor system
Table of contents
CCN explanation
CCN (CLAAS Component Number)
Electric system standard
Overview
Hydraulic system standard
Overview
CCN (CLAAS Component Number)
Introduction
Safety rules
Safety and hazard information
10 Electrical / Electronic equipment
1097 Testing / Measuring / Adjusting
Test report of the angle sensor (0011780.x)
Application of test report
Required tools
Test report of the angle sensor (0011780.x)
Testing / Measuring / Adjusting of angle sensor (0011780.x)
1. Reason for test
2. Mechanical test of angle sensor
3. Electric test with CDS
4. Electric test with multimeter
5. Mechanical test of connecting cable
Completing the machine
Test report of position and speed sensors
Application of test report
Required tools
Sensor variants
Part numbers of speed sensors
Part number of position sensor
Test report of position and speed sensors
Testing / measuring / adjusting of position and speed sensors
1. Reason for test
2. Mechanical test
3. Electric test with CDS
4a. Installation dimensions
John Deere Repair Technical Manual PDF
John Deere Repair Technical Manual PDF
John Deere DF Series 150 and 250 Transmissions (ANALOG) Component Technical Manual CTM147 05JUN98
John Deere Repair Technical Manual PDF
John Deere Application List Component Technical Manual CTM106819 24AUG20
John Deere Repair Technical Manual PDF
John Deere Repair Technical Manual PDF
John Deere Parts Catalog PDF
John Deere Tractors 6300, 6500, and 6600 Parts Catalog CQ26564 (29SET05) Portuguese
New Holland Service Manual PDF
John Deere Repair Technical Manual PDF
John Deere Repair Technical Manual PDF
John Deere 16, 18, 20 and 24HP Onan Engines Component Technical Manual CTM2 (19APR90)
John Deere Repair Technical Manual PDF

