Claas V1380-1080 (540) Combines Repair Manual EN
$300.00
- Model: V1380-1080 (540) Combines
- Type Of Manual: Repair Manual
- Language: EN
- Format: PDF(s)
- Size: 264 MB
File List:
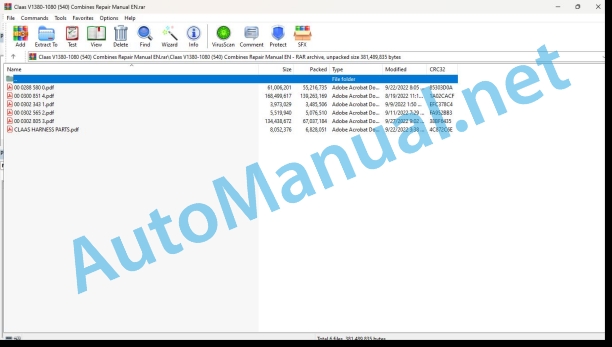
00 0288 580 0.pdf
00 0300 851 4.pdf
00 0302 343 1.pdf
00 0302 565 2.pdf
00 0302 805 3.pdf
CLAAS HARNESS PARTS.pdf
00 0288 580 0.pdf:
VARIO 1380VARIO 1230VARIO 1080
Table of contents
Introduction
General information
Validity of manual
Using the manual
Text and figures
Layout with assembly group structure
Search and find
Directional indicators
Abbreviations
Technical terms
CCN (CLAAS Component Number)
Electric systems standard
Hydraulic system standard
Conversion of metric units into US units
Pressure
Performance
Velocity
Acceleration (oscillation intensity)
Viscosity
Temperature
Electric system
General repair instructions
Technical specifications
Information on technically correct repairs
Self-locking bolts
Liquid locking compound
Steel roller chains
Tensioning
Chain connector
Taper ring fasteners
Dismounting
Installing
Gib head key joints
Dismounting
Installation
Lock collar bearing
Dismounting
Installing
Adapter sleeve bearings
Dismounting
Installation
Chuck bushing
Removing version A
Removing version B
Installation
Version A chuck bushing
Version B chuck bushing
Circlips
Ferrule joints
Screwing in
Leaky ferrule joints
Sealing cone joints
Hydraulic hoses
Hose placement
Treatment of sealing faces
Spare parts
Lubricants
Torque settings
Tightening torques for metric standard threads
Tightening torque for metric fine threads
Tightening torques for hydraulic screw fittings with ferrule according to DIN 3861
Tightening torques for hydraulic screw fittings and air conditioner screw fittings with sealing cone and O-ring according to DIN 3865
Tightening torques for SDS hydraulic male connectors
Tightening torques for direction-adjustable SDE hydraulic male connectors
Tightening torques for hydraulic swivel fittings
Tightening torques for hollow screws DIN 7643
Tightening torques for brake line screw fittings
Tightening torque for tubes with O-ring
Tightening torques for worm-type threaded clips
Tightening torques for hose clamps with round pins
Tightening torques for tyres
Technical specifications
Lubricants
General information
Important
Signal word
General safety and accident prevention regulations
First aid measures
Danger of injury from hydraulic liquid
Leaving the machine
Putting the machine out of operation
Jacking up the machine
Adjusting and maintenance work
Welding work
02 Gearbox / Clutch / Universal drive shaft
0215 Mechanical clutch
Cam-type cut-out clutch
0230 Mechanical gearbox
Cylindrical angle gear
Technical specifications
Work preparation
Special tool
Disassembly
Assembly
Installation
Pump flange
Technical specifications
Work preparation
Disassembly
Assembly
Installation
0260 Universal drive shaft
Main drive universal drive shaft
Technical specifications
Work preparation
Assembly
Installation
05 Steering
0510 Automatic steering
LASER PILOT bracket
Technical specifications
Work preparation
Installation instructions
Installation
08 Drives
0800 Drive diagram
Drive diagram
Technical specifications
Installation instructions
0814 Countershaft
Intermediate drive shaft
Technical specifications
Work preparation
Disassembly
Assembly
Installation
09 Hydraulic system
0900 Hydraulic system – General
Damage to hydraulic system
Special tool
Hydraulic system – General
Work preparation
Special tool
Filling / venting the hydrostatic system
Filling the pressure accumulator
0915 Hydraulic lines
Multi-coupler
Technical specifications
Installation instructions
0920 Valves
General valve block
Special tool
Pulling out the valve insert
Unscrewing the iron core
Removing the seal
Main valve block
Technical specifications
Installation instructions
0980 Hydraulic circuit diagram
Front attachment hydraulics circuit diagrams
Reel drive hydraulic system circuit diagram
Reel function hydraulic system circuit diagram
Table function hydraulic system circuit diagram
Rape cutter hydraulic system circuit diagram
10 Electrical / Electronic equipment
1000 Electrical / Electronic equipment general
Electrical / electronic equipment – General
Special tool
1012 Modules / sensors
1035 Operation / Multifunction control lever
Technical specifications
Installation instructions
20 Crop feeding
2010 Cutterbar table
VARIO cutterbar table
Technical specifications
Installation
Feed plates
Technical specifications
Installation
Intermediate plates
Technical specifications
Installation
Cutterbar table adjustment hydraulic cylinder (3049)
Technical specifications
Work preparation
Installation
2015 Reel / Crop guard
Technical specifications
Removing the left reel
Installing the left reel
Removing the right reel
Installing the right reel
Control spider
Technical specifications
Installation
Cam rollers
Technical specifications
Installation
Reel spider
Technical specifications
Installation
Reel tine tubes
Technical specifications
Installation
Replacing the pull-in nut
Reel shaft bearing
Technical specifications
Work preparation
Removing the left reel shaft bearing
Installing the left reel shaft bearing
Removing the right reel shaft bearing
Installing the right reel shaft bearing
Removing the centre reel shaft bearing
Installing the centre reel shaft bearing
Reel support arms
Technical specifications
Work preparation
Removing the left supporting arm
Only for VARIO:
Only for VARIO:
Installing the left supporting arm
Only for VARIO:
Only for VARIO:
Removing the right support arm
Installing the right supporting arm
Removing the centre supporting arm
Installing the centre supporting arm
Reel drive
Technical specifications
Work preparation
Installation
Horizontal reel adjustment sensor
Technical specifications
Installation instructions
Vertical reel adjustment sensor
Technical specifications
Reel drive hydraulic motor
Technical specifications
Work preparation
Installation
Vertical reel adjustment hydraulic cylinder
Technical specifications
Work preparation
Removing the outer cylinders
Installing the outer cylinders
Removing the inner cylinders
Installing the inner cylinders
Horizontal reel adjustment hydraulic cylinder
Technical specifications
Work preparation
Installation instructions
Safety distance of reel support arms
Technical specifications
Installation instructions
2030 Oilseed rape equipment
Auxiliary hydraulic system oil tank
Technical specifications
Special tool
Installation instructions
Generating a vacuum
Rape cutter drive valve block
Technical specifications
Special tool
Special tool
Pulling out the valve insert
Removing the seal
Unscrewing the iron core
Installation instructions
Rape cutter drive hydraulic pump (2022)
Technical specifications
Installation
21 Feeder unit
2140 Intake auger
Intake auger
Technical specifications
Work preparation
Installation instructions
Installation
Intake auger outer bearing
Technical specifications
Work preparation
Special tool
Disassembly
Determining the installation dimension
Assembly
Installation
Intake auger centre bearing
Technical specifications
Work preparation
Installation
Intake auger drive shaft
Technical specifications
Work preparation
Installation
Left intake auger tensioning device
Technical specifications
Installation instructions
Installation
Right intake auger tensioning device
Technical specifications
Installation instructions
Installation
Adjusting shaft
Technical specifications
Work preparation
Special tool
Installation
Driven sprocket (K01 / K03)
Technical specifications
Work preparation
Special tool
Disassembly
Assembly
Installation
Control shafts
Technical specifications
Installation
Fingers of intake auger
Technical specifications
Installation instructions
23 Mower unit
2305 Cutter bar
Mower head – General
Installation instructions
Knife drive universal drive shaft
Technical specifications
Work preparation
Installation instructions
Installation
Planetary gear
Technical specifications
Work preparation
Special tool
Disassembly
Assembly
Installation
26 Ground guidance
2605 Auto-Contour
AUTO CONTOUR sensors
Technical specifications
Installation instructions
Centre CAC sensor band sensor
Technical specifications
Installation instructions
Sensing unit
Technical specifications
Installation instructions
Removing the right sensing unit
Installing the right sensing unit
80 Various components / Machine body
8005 Frame / Trough
Technical specifications
Installation instructions
Grain splash protection
Technical specifications
Installation instructions
Technical specifications
Installation instructions
Installation
Adjustment
8010 Locking
Front attachment lock
Technical specifications
Installation instructions
8020 Rails / Safety devices
Protective flap / sliding protection
Technical specifications
Installation instructions
Installation
Protective flap
Technical specifications
Installation instructions
Sliding protection
Technical specifications
Installation instructions
CCN (CLAAS Component Number)
00 0302 343 1.pdf:
PROFI CAM 3
Table of contents
General information
Marking of warnings and hazard prevention notes
First-aid measures
CCN explanation
CCN (CLAAS Component Number)
Electric system standard
Overview
Hydraulic system standard
Overview
CCN (CLAAS Component Number)
10 Electrical / Electronic equipment
1030 Board computer / Indicators
Camera system
Description of function
1097 Testing / Measuring / Adjusting
Testing / measuring / adjusting the PROFI CAM
Checking the fuse in the video channel select box (C102)
Testing the video camera connector (C055)
1098 Fault / remedy
Fault / remedy PROFI CAM
The video monitor (C101) shows no image or cannot be switched on (indicator light fails to light up)
Video monitor (C102) displays a blue image either permanently or temporarily
The video monitor image is blurred
Replacing the fuse in the video channel select box (C102)
Connection and connecting cable with video camera (C055)
00 0302 565 2.pdf:
Sensor system
Table of contents
CCN explanation
CCN (CLAAS Component Number)
Electric system standard
Overview
Hydraulic system standard
Overview
CCN (CLAAS Component Number)
Introduction
Safety rules
Safety and hazard information
10 Electrical / Electronic equipment
1097 Testing / Measuring / Adjusting
Test report of the angle sensor (0011780.x)
Application of test report
Required tools
Test report of the angle sensor (0011780.x)
Testing / Measuring / Adjusting of angle sensor (0011780.x)
1. Reason for test
2. Mechanical test of angle sensor
3. Electric test with CDS
4. Electric test with multimeter
5. Mechanical test of connecting cable
Completing the machine
Test report of position and speed sensors
Application of test report
Required tools
Sensor variants
Part numbers of speed sensors
Part number of position sensor
Test report of position and speed sensors
Testing / measuring / adjusting of position and speed sensors
1. Reason for test
2. Mechanical test
3. Electric test with CDS
4a. Installation dimensions
Check of installation dimension
Installation dimensions of gearbox speed sensor (0011 799.x) and cam speed sensor (0011 810.x)
Installation dimension of position sensor (0011 815.x)
4b. Installation position
Centring of sensor
Metal-free zone
5. Electric test with multimeter
Voltage measurement
Direction of rotation and speed sensor (0011 605.x)
Measured values table
6. Mechanical test of connecting cable
Completing the machine
Test report of the urea sensor (00 0773 207 x)
Application of test report
Required tools
Parts number of the urea sensor
Test report of the urea sensor
Testing / measuring / adjusting urea sensor
1. Reason for test
2. Mechanical test
3. Mechanical test of connecting cable
4. Electric test with multimeter
5. Component test with the CDS
CLAAS HARNESS PARTS.pdf:
CLAAS HARNESS PARTS
Table of contents
10 Electrical / Electronic equipment
1081 Overview of connectors
CLAAS HARNESS PARTS (CHP)
John Deere Repair Technical Manual PDF
John Deere Diesel Engines PowerTech 4.5L and 6.8L – Motor Base Technical Manual 07MAY08 Portuguese
John Deere Repair Technical Manual PDF
John Deere Application List Component Technical Manual CTM106819 24AUG20
John Deere Repair Technical Manual PDF
John Deere Repair Technical Manual PDF
John Deere 18-Speed PST Repair Manual Component Technical Manual CTM168 10DEC07
John Deere Repair Technical Manual PDF
John Deere 16, 18, 20 and 24HP Onan Engines Component Technical Manual CTM2 (19APR90)
John Deere Repair Technical Manual PDF
John Deere PowerTech M 10.5 L and 12.5 L Diesel Engines COMPONENT TECHNICAL MANUAL CTM100 10MAY11
John Deere Repair Technical Manual PDF
John Deere Repair Technical Manual PDF
John Deere Repair Technical Manual PDF
John Deere Parts Catalog PDF
John Deere Tractors 6300, 6500, and 6600 Parts Catalog CQ26564 (29SET05) Portuguese

