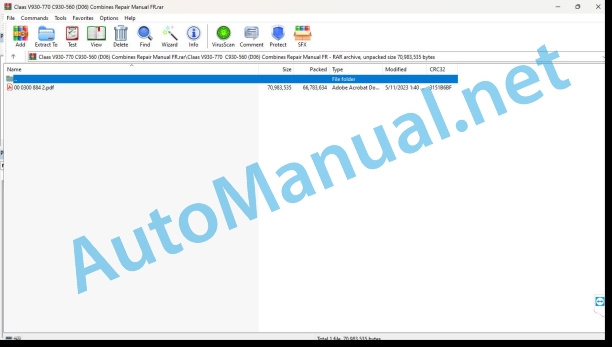
Claas V930-770 C930-560 (D06) Combines Repair Manual FR
$300.00
- Model: V930-770 C930-560 (D06) Combines
- Type Of Manual: Repair Manual
- Language: FR
- Format: PDF(s)
- Size: 63.7 MB
File List:
00 0300 884 2.pdf
00 0300 884 2.pdf:
VARIO 930 / 770 / 680 / 620 / 560 / 500CERIO 930 / 770 / 680 / 620 / 560
Contents
Introduction
General instructions
Validity of the notice
Use of the instructions
Texts and illustrations
Plan with module structure
Seek and find
Steering Specifications
Abbreviations
Specialized terminology
General repair instructions
Technical characteristics
Tips for correct repair
Self-locking screws
Liquid screw brake
Steel roller chains
Quick hitch
Type E quick coupler with spring
Type G quick coupler with wire
Type S quick coupler with pins
Assemblies using conical ring
Disassembly
Assembly
Heel pin assemblies
Assembly
Clamp ring bearing
Disassembly
Assembly
Clamp sleeve bearing
Assembly
Clamping sleeve
Removal of version A
Submission of version B
To set down
Clamping sleeve version A
Clamping sleeve version B
Circlips
Cutting ring fittings
To screw
Leaky cutting ring fittings
Sealing Cone Fittings
Hydraulic flexible lines
Passage of hoses
Treatment of sealing surfaces
Spare parts
Operating consumables
Tightening torques
Tightening torques for metric ISO threads
Tightening torques for metric fine pitch threads
Tightening torques for hydraulic connections with cutting ring
Tightening torques for screw connections with bicone connection and hydraulic connections with flexible sealing gasket
Tightening torques for hydraulic screwed coupling SDS form B and E
Tightening torques for hydraulic screwed coupling SDE form H, adjustable
Tightening torques for hydraulic swivel screw connections
Tightening torques for hollow screws (with copper seal)
Tightening torques for brake line screw connections
Tightening torques for tubular structures with O-ring and union nuts
Tightening torques for tangent screw clamps
Tightening torques for hose clamps with round bolts
Tire tightening torques
Technical characteristics
Operating consumables
CCN explanation
CCN (CLAAS Component Number – CLAAS part number)
Electrical standard
Overview
Hydraulic standard
Overview
CCN (CLAAS Component Number – CLAAS part number)
Security
General instructions
To respect
Signal word
General safety and accident prevention instructions
First aid measures
Risk of injury from hydraulic fluid
Exit the machine
Stop the machine
Adjustment and maintenance work
Welding work
02 Transmission – Clutch – Cardan shaft
0215 Mechanical clutch
Disengageable cam limiter
0230 Mechanical gearbox
Angle gear box with straight gears
Technical characteristics
Preparing for work
Auxiliary tool
Special tool
Disassemble
To assemble
To set down
Pump flange
Technical characteristics
Preparing for work
Disassemble
To assemble
To set down
0260 Cardan shaft
Main drive cardan shaft with disengageable cam limiter
Technical characteristics
Preparing for work
Assembly tips
VARIO / CERIO chain attachment points 22 ft – 16 ft
Disassemble the disengageable cam limiter
Assemble the disengageable cam limiter
To assemble
To set down
Main drive cardan shaft with star cam limiter
Technical characteristics
Preparing for work
VARIO / CERIO chain attachment points 22 ft – 16 ft
To assemble
To set down
05 Management
0510 Automatic steering
LASER PILOT support
Technical characteristics
Preparing for work
Assembly tips
To set down
08 Orders
0800 Drive scheme
Training scheme
Technical characteristics
Assembly tips
0814 Intermediate shaft control
Intermediate shaft
Technical characteristics
Preparing for work
Assembly tips
Disassemble
To assemble
To set down
09 Hydraulic system
0900 Hydraulic system General
Risks of damage to the hydraulic system
Special tool
Hydraulics, general
Preparing for work
Special tool
0915 Hydraulic circuit
Multicoupler
Technical characteristics
Assembly tips
Preparing for work
Repair kit
Auxiliary tool
Remove the coupling fitting
Disassemble the coupling fitting
Assemble the coupling fitting
Install the coupling fitting
0920 Valves
General valve block
Special tool
Extract the valve packing
Unscrew the iron core
Remove the seal ring
Distribution block
Technical characteristics
Assembly tips
10 Electrical/electronic system
1000 Electrical system / Electronics general
Electrical system / electronic system, general
Special tool
Prepare for welding work
1012 Modules – Sensors
1035 Use / Multifunction lever
Technical characteristics
Welding assembly instructions
20 Harvest feeding
2010 Cutting deck extension
VARIO cutting apron
Technical characteristics
Remove the axis of the cutting deck adjustment hydraulic cylinder
To set down
Install the axis of the cutting deck adjustment hydraulic cylinder
CERIO cutting apron
Technical characteristics
To set down
Power plates
Technical characteristics
To set down
Intermediate sheets
Technical characteristics
To set down
Hydraulic cutting deck adjustment cylinders (3049)
Technical characteristics
Preparing for work
To set down
Cutting table position sensor (B070)
Technical characteristics
Assembly tips
2015 Reel / Equalizer
Technical characteristics
To set down
Command Star
Technical characteristics
To set down
Control rollers
Technical characteristics
To set down
Reel hub star
Technical characteristics
To set down
Tooth holder tubes
Technical characteristics
To set down
Replace the special nut
Reel bearing
Technical characteristics
Remove the bearing on the left side of the reel
Install the bearing on the left side of the reel
Remove the bearing on the right side of the reel
Install the bearing on the right side of the reel
Reel support arm
Technical characteristics
Preparing for work
Remove the left side support arm
Install the left side support arm
Remove the right side support arm
Install the right side support arm
Reel drive
Technical characteristics
Preparing for work
To set down
Reel drive output gear
Technical characteristics
Preparing for work
Disassemble
To assemble
To set down
Reel, drive, drive sprocket
Technical characteristics
Preparing for work
Install/adjust
Hydraulic reel drive motor
Technical characteristics
Preparing for work
To set down
Reel horizontal adjustment sensor
Technical characteristics
Assembly tips
Reel vertical position sensor
Technical characteristics
Assembly tips
Hydraulic cylinder for vertical adjustment of the reel
Technical characteristics
Preparing for work
To set down
Purge the air
Hydraulic cylinder for horizontal adjustment of the reel
Technical characteristics
Preparing for work
Assembly tips
Safety distance of the reel support arms
Technical characteristics
Assembly tips
2030 Rapeseed equipment
Oil tank, auxiliary hydraulic system
Technical characteristics
Special tool
Assembly tips
Generate depression
Rapeseed saw drive distribution block
Technical characteristics
Special tool
Extract the valve packing
Unscrew the iron core
Assembly tips
Rapeseed saw drive pump (2022)
Technical characteristics
To set down
21 Power group
2140 Feed screw
Feed auger
Technical characteristics
To set down
Feed screw, left side bearing
Technical characteristics
Preparing for work
Special tool
Determine the mounting dimension
To set down
Feed screw, right side bearing
Technical characteristics
To set down
Feed auger drive shaft
Technical characteristics
Preparing for work
Special tool
Disassemble
To assemble
To set down
Output gear (K01)
Technical characteristics
Preparing for work
Auxiliary tool
Disassemble
To assemble
To set down
Adjustment shaft
Technical characteristics
To set down
Control trees
Technical characteristics
To set down
Fingers, feed screw
Technical characteristics
Assembly tips
23 Reaper
2305 Cutting bar
Cutting bar, general
Assembly tips
Knife drive cardan shaft
Technical characteristics
Preparing for work
Assembly tips
To set down
Planetary gear
Technical characteristics
Preparing for work
Special tool
Disassemble
To assemble
To set down
Planetary gear
Technical characteristics
Preparing for work
Disassemble
To assemble
Check gearbox clearance
To set down
26 Ground guidance
2605 AUTO CONTOUR
AUTO CONTOUR sensors
Technical characteristics
Assembly tips
Probing device
Technical characteristics
Assembly tips
Remove the right side sensing device
Install the sensing device on the right side
80 Assembly / body parts
8005 Chassis
Technical characteristics
Assembly tips
Anti-splash protection
Technical characteristics
Assembly tips
Technical characteristics
Assembly advice
To set down
8010 Lock
Front tool lock
Technical characteristics
Assembly tips
8020 Balustrades / Safety devices
Protective hatch / slide protection
Technical characteristics
To set down
Protective hatch
Technical characteristics
Assembly tips
Slide protection
Technical characteristics
Assembly tips
Protective hatch
Technical characteristics
Assembly tips
Protective hatch
Technical characteristics
Assembly tips
John Deere Repair Technical Manual PDF
John Deere Parts Catalog PDF
John Deere Harvesters 8500 and 8700 Parts Catalog CPCQ24910 Spanish
John Deere Parts Catalog PDF
John Deere Tractors 7500 Parts Catalog CPCQ26568 30 Jan 02 Portuguese
John Deere Repair Technical Manual PDF
John Deere Repair Technical Manual PDF
John Deere Diesel Engines POWERTECH 2.9 L Component Technical Manual CTM126 Spanish
John Deere Repair Technical Manual PDF
John Deere Repair Technical Manual PDF
John Deere Diesel Engines PowerTech 4.5L and 6.8L – Motor Base Technical Manual 07MAY08 Portuguese
John Deere Repair Technical Manual PDF
John Deere Repair Technical Manual PDF


