Claas Variant 280 Rc (730) Baler Operator Manual ES
$50.00
- Model: Variant 280 Rc (730) Baler
- Type Of Manual: Operator Manual
- Language: ES
- Format: PDF(s)
- Size: 20.4 MB
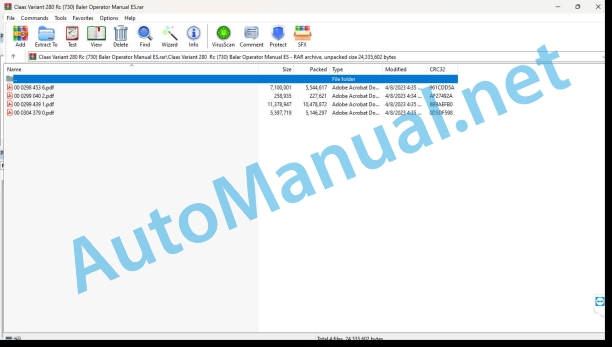
File List:
00 0298 453 6.pdf
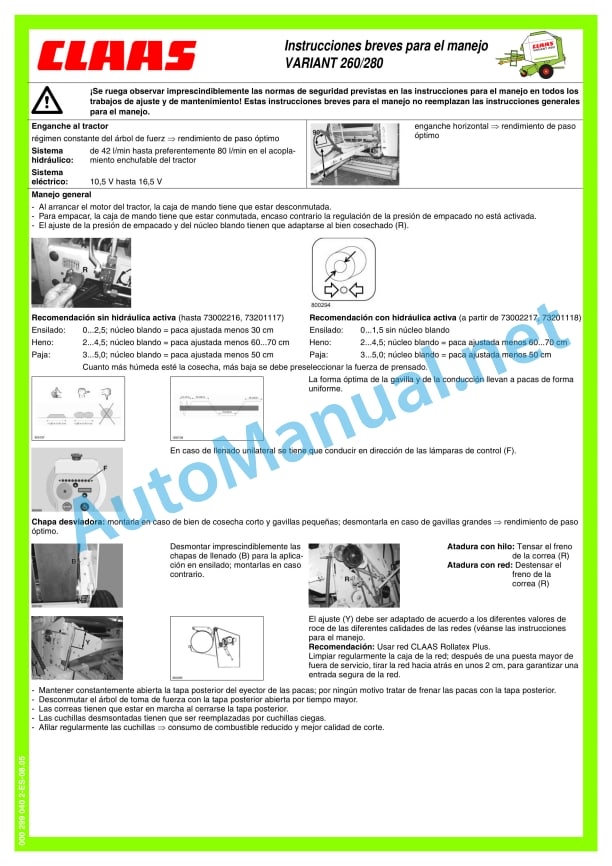
00 0299 040 2.pdf
00 0299 439 1.pdf
00 0304 379 0.pdf
00 0298 453 6.pdf:
Introduction
Introduction
General indications
Road Traffic
Observe especially
Type indicator plate
Machine number
For security
For security
Warning and indication signs
Proper use
General safety and accident prevention requirements
Trailed machines
Service with PTO shaft
Hydraulic system
Maintenance
Machine working noises, information “D”
wheel chock
Fire extinguisher (Optional depending on country)
Main gear protective cover
Safety stickers with warning symbols
Technical characteristics
CLAAS Variant_x0011_260/280 / Variant_x0011_260/280_x0011_RC
Admission bodies
cutting device
Compaction of the pressed good
Tying mechanism
rolling wheels
Hydraulic system
Tractor hydraulic system required
Hydraulic pressure
Electric system
CLAASiant 260/280 / Vari260/280 RC
Dimensions of the round bale baler
CLAAS Variant 260/280 / Variant 260/280 RC
Safety devices
Cutting screws
Overload clutch
Configuration and way of working
Machine overview
Force transmission
Cutting coupling and free-running articulated shaft
Cam clutch articulated shaft
collecting drum
cutting device
Blind blade support (option)
pressing chamber
Tying the bales
bale ejector
Storage of round bales
Rotor Disengage Clutch
Rotor reverse turning device, manual
yarn drawer
Fire extinguisher (Optional depending on country)
Active hydraulics
Automatic chain lubrication
Address indication (option)
control box
Before commissioning
Check and observe before first start-up
Hook up the baler
Install the drive shaft on the machine side
Transmission shaft with tightening cone closure
Assemble the drive shaft with clamping cone lock
Stop support
Before unhitching the round baler
After attaching the round baler
Hook on the traction pendulum
Grease the traction eye
Mount the transmission shaft on the tractor side (by coupling with a traction pendulum)
Check the meshing of the drive shaft halves:
Reduce drive shaft
Secure the drive shaft protection tubes against simultaneous rotation
Hitch in the hitch mouth
Install the drive shaft on the tractor side
Attachment to the labeled pivot
Splice the pipes
handling box
Power supply
Translation lighting
Splice the hydraulic oil hoses
Back cover opening speed
Before transportation
Arrange the press
Collected
Pickup height adjustment
Adjust the working height of the pickup (pickup without support wheels)
Pickup with training wheels
Support wheels
Cutting device (VARIANT 260/280 RC)
blind blade
Assembling and disassembling the blades
Insert the blades into the blade holder
Fit the blade
Bale compaction
Pressing pressure regulation
Adjust the diameter of the bale
Adjust the diameter of the soft core
Net binding
Put the network
Regulate the number of network wraps
Tying with thread
Thread the thread
Regulate the number of thread wraps
Adjust the twine wraps on the outer edges of the bale
Tie with three threads
Prepare the eyelet for the thread
Introduce the three wires
Press adjustment for extreme silage cases
Removing the belt guides
Assembling the belt guides
Round bale press with twine and net tying
Switch to thread tying
Drive for tying with thread
Put the V-belt brake on
Switch to net tethering
Adjust the drive for tying with net
Release the V-belt brake
Silage pressing
Mount the blind knife holder (option) on VARIANT ROTO_x0011_CUT
Commissioning the round baler
Filling the pressing chamber
Indication of the direction of travel
Automatic binding
Tether delay
delay function
Thread Tying: Delay Adjustment
Net Tying: Delay Adjustment
Tying and ejecting the bales.
Deposit the bales
Ejecting bales without the bale ejector
bale counter
Round baler with net tying
Baler for round bales with twine and net tying
Round baler with twine tying
Manual overregulation of automatic fastening
Activate the binding process early
Slow down the binding process
Cutting device (ROTO CUT)
Turn the blades inward
Rotate the blades outward
Adjust the volume of the acoustic warning signal
Blockages in the round bale baler
Cam clutch articulated shaft
Rotor reverse turning device (VARIANT_x0011_260/280 / 260/280_x0011_RC)
Fault, reason or solution
Tying with thread
Net binding
After service
Uncouple the baler
wheel chocks
Stop support
control box
Hydraulic oil hoses and electrical connection cables
Transmission tree
Support wheels
Dirt cleaning
Maintenance
Important maintenance instructions
General maintenance instructions
Maintenance and lubrication tables
Maintenance tables
Lubricant table
Cutting screw, main drive
Cutting screw, collector drive
angular gear
Retension drive chains
Tension the collector drive chain
Tension the drive chain of the transverse conveyor thread
Adjust compression springs for pressure roller
Adjust the clamping device for the network meter
Adjust disc brakes
Tension the tension spring for the chain drive (belts and rotor)
Tension the tension spring for the chain drive on the rear cover
Adjust tension springs for clamping arm
Adjust the tension springs for the lower clamping arm
Tension the tension spring of the net roll braking bracket
Adjust spring cylinder for freewheel drive
Adjust the bale ejector tension springs
Adjust linkage to bale ejector end switch
Drive brake on twine tie
Adjust compression springs on disengagement clutches
Adjust the compression springs on the slip coupling (ratchet wheel) (attachment…
Adjust the thread tensioners
Inductive sensor settings
Inductive sensor “maximum ball diameter”
Inductive “door closed” sensor
Hydraulic oil filter (machines with filter installation)
Automatic chain lubrication
Adjust the Linatex guide plate
Fire extinguisher (option)
flat strap
Release the flat belt
Check flat belts
Repair flat belts
Lay the straps flat
Adjust the belt travel
Adjust the lower roller scraper
Check the seat of the wheel nuts
Check the wheel hub bearing clearance
Adjust bearing clearance
Proposals for preparing for winter
Lubrication plan
Lubricants and information
Reference word index
Reference word index
00 0299 439 1.pdf:
Notice de montage eton
Kit « lin – lin court » and Kit « Li Introduction
Introduction
Consignes de sécurité
Important
Characterization of indications sur les dangers
Consignes générales de sécurité et de prévention des accidents
Stationnement de la machine
Utilization conforme à la destination
Installation notice
Kit lin et lin court
Introduction
Lot de pièces (0843 001.0)
Reduction of the number of belts
Détente des courroies
Coupe des courroies
Ajustage de la longueur des corroies
Agrafage des courroies
Préparation du pick-up
Démontage du tasseur
Démontage du carter de protection du pick-up
Montage de la roue à chain « Kit lin »
Démontage des vis de recentrage
Remontage du carter du pick-up
Démontage des dents du pick-up
Préparation des parois du pick-up
Prémontage du kit lin
Mounting the wheel on the frame
Montage des guides-fourrage sur le cadre
Graisseur
Montage du kit lin
Fixation du c presse
Montage du ski sur le cadre
Fixation du crochet sur la machine
Preparation of the Lin court kit
Variant 260
Perçage de la chambre de pressage
Prémontage du kit lin court
Variant 280
Perçage de la chambre de pressage
Prémontage du kit lin court
Guides-ficelle et couteau
Montage des guides-ficelle « Lin »
Montage du knife Lin
Démontage du couteau d’origine
Montage du knife «Lin»
Électrique
Montage de l’interrupteur
Préparation de la tôle
Fixation de l’interrupteur
Configuration du module pour le lin
Verification of information
Fixation du module lin sur le support
Montage du support sur la presse
Montage du faisce électrique
Fixing the cable on the chassis
Setting the proximity detector
Mise en place du capot
Installation notice
Kit lin trèsduction
Lot de pièces (0843 592.0)
Préparation du kit « lin très cour260
Perçage de la chambre de pressage
Prémontage du kit « lin très court »
Variant 280
Perçage de la chambre de pressage
Prémontage du kit « lin très court »
Notice d’utilisation
Introduction
Principle and function
Vitesse de la prise de force
Pressage
Sens de pressage
Pressure de pressage
Liage des tiges de lin
Principle
Vitesse d’avancement et rapport de nappe
Avant utilization
Adjustment of the frame before the kit lin
Hauteur de la roue centrale
Hauteur des guides-fourrage
Hauteur du ski
Adjustment of the press
Nombre de tours de ficelle
Guides-ficelle « Lin »
Mise en place de la ficelle
Pressure de pressage
Diamètre de balls
Utilization pour le pressage du lin
Generalities
Pisur terrain non pierreux
Récolte sur terrain pierreux
Utilization pour le pressage du lineralities
Preparation of the pressing chamber
Montage des glissières sur la paroi – Variant 260
Montage des glissières sur la paroi – Variant 280
Mise en place de la tôle lin court
Fixation de la tôle lin court
Adjustment of the slide mobile
Récolte sur terrain non pierreux
Récolte sur terrain pierreux
Utilization pour le pressing du lin très court
Generalities
Preparation of the pressing chamber
Montage des glissières sur la paroi – Variant 260
Montage des glissières sur la paroi – Variant 280
Mise en place de la tôle lin très court
Fixation de la tôle lin très court
Adjustment of the slide mobile
Récolte sur terrain non pierreux
Récolte sur terrain pierreux
Use of the press for other harvests
Chambre de pressage
iintenance
Graisseur
Assembly and operating instructions
Set linen – short line and set very short line
Introroduction
Safety instructions
The important information
Description of warning signs
General instructions on safety techniques and accident prevention
Car parking
Use as intended
Assembly instruction
Set for linen and short linen
Introduction
Lot of parts (0843 001.0)
Reducing the number of drive belts
Belt slack
Trimming belts
Belt length adjustment
Belt fastening
Preparing the baler
Dismantling the rammer
Dismantling the baler protection casing
Assembly of stars from the Len set
Dismantling of centering screws
Installation of the baler crankcase
Dismantling fingers with the baler
Preparing the on-board baler
Pre-assembly of the Len set
Installing wheels on a frame
Installation of feed guides on the frame
Setting the proximity detector
Lubrication hole
Assembling the Len set
Fastening the assembled frame to the press
Installing skis on a shoulder
Fixing the grip on the car
Preparation of the set «Short linen»
Variant 260
Perforating press camera
Pre-assembly of the «Short Linen» set
Variant 280
Perforating press camera
Pre-assembly of the «Short Linen» set
String guide and knife
Installation of the guide string of the Len set
Installation of the Len knife
Dismantling the standard blade
Installation of the Len knife
Electronics
Installation of the circuit breaker
Preparation sheet
Mounting the circuit breaker
Cleaning module setting
Check information
Fixation of the «Len» module on a support
Press support installation
Installation of electrical wiring
Fixing the cable to the casing
Setting detector approximations
Hood installation
Assembly instruction
Set «very sh?
Introduction
Lot of parts (0843 592.0)
Preparation of the set ?Very short linen?
Variant 260
Perforatinamera
Pre-assembly of the set ?Very Short Linen?
Variant 280
Perforating press camera
Pre-assembly of the set ?Very Short Linen?
Operating instructions
Introduction
Principle and operation
Power take-off speed
Pressing
Making presses
Pressure presses
Bundle of stems
A principle
Speed _x000B__x000B_advances and layer coefficient
Preparation for use
Adjusting the front frame of the Len kit
Center wheel height
Height of feed guides
Ski height
Press setup
Number of windings
Guide cords Flax
Seasoning strings
Pressure presses
Bundle diameter
Use for pressing flax
General information
Baler picker
Harvesting of non-rocky soil
Harvesting stony soil
Use for pressing short flax
General information
Preparation of the press camera
Installation of guides on the wall – Variant 260
Installation of guides on the wall – Variant 280
Installation of welded sheet Short linen
Fixation of welded sheet Short flax
Adjustment of the movable guide
Harvesting of non-rocky soil
Harvesting stony soil
Use for pressing short flax
General information
Preparation of the press camera
Installation of guides on the wall – Variant 260
Installation of guides on the wall – Variant 280
Installation of welded sheet «Very short linen»
Fixation of welded sheet «Very short linen»
Adjustment of the movable guide
Harvesting of non-rocky soil
Harvesting stony soil
Using a press for harvesting other crops
Baler picker
Connection
Press camera
Electric current
Technical service
Lubricat
John Deere Repair Technical Manual PDF
John Deere Repair Technical Manual PDF
John Deere Repair Technical Manual PDF
John Deere DF Series 150 and 250 Transmissions (ANALOG) Component Technical Manual CTM147 05JUN98
John Deere Repair Technical Manual PDF
John Deere 18-Speed PST Repair Manual Component Technical Manual CTM168 10DEC07
John Deere Parts Catalog PDF
John Deere Tractors 6300, 6500, and 6600 Parts Catalog CQ26564 (29SET05) Portuguese
John Deere Repair Technical Manual PDF
John Deere Repair Technical Manual PDF
John Deere Repair Technical Manual PDF
John Deere Parts Catalog PDF
John Deere Harvesters 8500 and 8700 Parts Catalog CPCQ24910 Spanish
John Deere Repair Technical Manual PDF
John Deere 16, 18, 20 and 24HP Onan Engines Component Technical Manual CTM2 (19APR90)

