


Hyster H36.00-48.00E to HR45H Four-Speed Powershift Transmission Maintenance And Repair
$30.00
- Type Of Manual: Maintenance And Repair
- Number of Pages: 1208
- Size: 60.5MB
- Format: PDF
Category: Hyster Service Manual PDF
-
Model List:
- H36.00-48.00E, H40.00-52.00XM-16CH, RS45-27CH, RS45-30CH, RS45-27IH, RS46-33CH, RS46-30IH, RS46-36CH, RS46-33IH, HR45-25, HR45-27, HR45-31, HR45-40S, HR45-36L, HR45-40LS, HR45-45LSX, HR45H
- 1. RM0634-(03-2005)-US-EN
- 1.1. Four-Speed Powershift Transmission
- 1.2. Safety Precautions Maintenance and Repair
- 1.3. General
- 1.4. Automatic Powershift Control
- 1.5. Transmission Control System
- 1.6. Transmission Control Lever
- 1.7. Mechanical Description and Operation
- 1.8. General
- 1.9. Torque Converter
- 1.10. Description
- 1.11. Operation
- 1.12. Clutch Assemblies
- 1.13. Description
- 1.14. Operation
- 1.15. Transmission Operation in Neutral
- 1.16. Input Shaft, Forward Shaft, and Clutch Assembly
- 1.17. Description
- 1.18. Operation
- 1.19. Reverse, Second-Speed, and First-Speed Shaft and Clutch Assembli
- 1.20. Description
- 1.21. Operation
- 1.22. Third-Speed Shaft, Gear, and Clutch Assembly
- 1.23. Description
- 1.24. Operation
- 1.25. Fourth-Speed Shaft and Clutch
- 1.26. Description
- 1.27. Operation
- 1.28. Output Shaft
- 1.29. Description
- 1.30. Operation
- 1.31. Hydraulic Description and Operation
- 1.32. Sump, Filter, and Pump
- 1.33. Transmission Charge Pump
- 1.34. Pressure Regulator Valve
- 1.35. Relief Valve
- 1.36. Transmission Control Valve
- 1.37. Solenoid Valves
- 1.38. Direction Spools
- 1.39. Range Spools
- 1.40. Modulator Valves
- 1.41. Table 1. Solenoid Controls
- 2. RM0635-(06-2007)-US-EN
- 2.1. Four-Speed Powershift Transmission
- 2.2. Safety Precautions Maintenance and Repair
- 2.3. General
- 2.4. Torque Converter Repair
- 2.5. Torque Converter, Remove
- 2.6. Torque Converter, Disassemble
- 2.7. Clean and Inspect
- 2.8. Torque Converter, Assemble
- 2.9. Torque Converter (Turbine) Housing, Disassemble
- 2.10. Relief Valve for Lube Pressure, Disassemble and Assemble
- 2.11. Oil Sealing Rings Sleeve, Replace
- 2.12. Torque Converter Housing, Assemble
- 2.13. Torque Converter, Install
- 2.14. Transmission Repair
- 2.15. Remove, Transmission Only
- 2.16. Transmission and Engine Assembly, Remove
- 2.17. Transmission, Disassemble
- 2.18. Output Shaft, Disassemble and Assemble
- 2.19. Fourth-Speed Shaft, Disassemble and Assemble
- 2.20. Third-Speed Shaft, Disassemble and Assemble
- 2.21. Forward Shaft and Clutch, Disassemble and Assemble
- 2.22. Reverse and Second-Speed Shaft and Clutch, Disassemble and Assem
- 2.23. First-Speed Shaft and Clutch, Disassemble and Assemble
- 2.24. Input Shaft, Disassemble and Assemble
- 2.25. Speed Sensor, Install
- 2.26. Transmission, Clean and Inspect
- 2.27. Transmission, Assemble
- 2.28. Control Valve
- 2.29. Clean and Inspect
- 2.30. Assemble and Install
- 2.31. Install, Transmission
- 2.32. Install, Transmission and Engine Assembly
- 2.33. Clean Oil System of Transmission After Major Repair
- 2.34. Automatic Powershift Control (APC 100)
- 2.35. Functional Description
- 2.36. Transmission Control Lever
- 2.37. First-Speed Shaft Bearings Adjustment
- 2.38. Torque Converter Stall Speed Check
- 2.39. Transmission Oil Pressures Check
- 2.40. Clutch Pressures Check
- 2.41. Torque Converter (Torque Converter Regulator) Oil Pressure Check
- 2.42. Troubleshooting
- 2.43. Transmission Controller (APC 100)
- 2.44. Table 1. Flange Nut Torque
- 2.45. Table 2. APC 100 Control Module (Pin Connections)
- 2.46. Table 3. Hobbs Gear Selector Connections
- 2.47. Table 4. Example Torque Values at Dimensions Shown
- 2.48. Table 5. Transmission Pressures
- 3. RM0046-(11-2014)-US-EN
- 4. RM0097-(05-2012)-US-EN
- 4.1. Hydraulic Gear Pumps
- 4.2. Safety Precautions Maintenance and Repair
- 4.3. Description
- 4.4. Operation
- 4.5. Flow Control Valve
- 4.6. Relief Valve
- 4.7. Hydraulic Gear Pump Repair
- 4.8. Disassemble
- 4.9. Inspect
- 4.10. Assemble
- 4.11. Install
- 4.12. Pump Output Check
- 4.13. Method No. 1
- 4.14. Method No. 2
- 4.15. Hydraulic System Air Check
- 4.16. Troubleshooting
- 5. RM0231-(01-2016)-US-EN
- 5.1. General
- 6. RM0723-(07-2014)-US-EN
- 7. RM1036-(01-2012)-US-EN
- 7.1. Brake Accumulator
- 7.2. Safety Precautions Maintenance and Repair
- 7.3. General
- 7.4. Description and Operation
- 7.5. Accumulator Maintenance
- 7.6. Pre-Charge Check
- 7.7. Pre-Charge Filling
- 7.8. Disassemble
- 7.9. Inspect
- 7.10. Assemble
- 7.11. Replace
- 7.12. Table 1. Accumulator Pressures
- 8. RM1038-(01-2012)-US-EN
- 8.1. Service Brake
- 8.2. Safety Precautions Maintenance and Repair
- 8.3. General
- 8.4. Description and Operation
- 8.5. A917, E117, and F117 Only
- 8.6. B222 Only
- 8.7. General
- 8.8. Drive Wheels and Tires
- 8.9. Brake Housing
- 8.10. Spindle and Brake Cover
- 8.11. Disassemble
- 8.12. Ground and Polished Parts
- 8.13. Parts With Rough Finish
- 8.14. Wet Disc Brake and Axle Assembly
- 8.15. Inspect
- 8.16. Face Seals
- 8.17. Replace
- 8.18. Assemble
- 8.19. Brake Housings
- 8.20. Install
- 8.21. Hub Oil Seals
- 8.22. Spindle and Brake Cover
- 8.23. Brake Housing
- 8.24. Drive Wheels and Tires
- 8.25. Pressure Switch
- 8.26. Replace
- 8.27. Accumulator
- 8.28. Brake Pedal Valves (Treadle Valves) Repair
- 8.29. All Models Except A917, B222, E117, and F117
- 8.30. Clean and Inspect
- 8.31. Install
- 8.32. A917, B222, E117, and F117
- 8.33. Clean and Inspect
- 8.34. Install
- 8.35. Brake System Air Removal
- 8.36. Specifications
- 8.37. Brake Coolant
- 8.38. Coolant Change Intervals
- 8.39. Hydraulic Fluid
- 8.40. Troubleshooting
- 8.41. Measurements and Adjustments
- 8.42. Table 1. Friction Disc
- 8.43. Table 2. Stationary Disc
- 8.44. Table 3. Wheel Hub and Brake Housing Torque Chart
- 8.45. Table 4. Brake Housing Cover Torque Chart
- 9. RM1102-(08-2004)-US-EN
- 9.1. Hydraulic System
- 9.2. Safety Precautions Maintenance and Repair
- 9.3. General
- 9.4. Description and Operation
- 9.5. Hydraulic Plate
- 9.6. Hydraulic Pumps
- 9.7. Cab Manifold
- 9.8. Oil Cooled Brakes (Service Brakes)
- 9.9. Lift/Tilt Functions
- 9.10. Over Lower Interrupt
- 9.11. Lift Interrupt
- 9.12. Heat Exchanger System
- 9.13. Steering Control System
- 9.14. Brake System
- 9.15. Hydraulic Pump Repair
- 9.16. Disassemble
- 9.17. Tandem Gear Pump
- 9.18. Tri-Section Gear Pump
- 9.19. Clean and Inspect
- 9.20. Assemble
- 9.21. Tandem Gear Pump
- 9.22. Tri-Section Gear Pump
- 9.23. Install
- 9.24. Pump Output Check
- 9.25. First Method
- 9.26. Second Method
- 9.27. Cab Manifold
- 9.28. Disassemble Valves and Pressure Switches
- 9.29. Clean and Inspect
- 9.30. Assemble Valves and Pressure Switches
- 9.31. Install
- 9.32. Lift and Lower Circuit
- 9.33. Description
- 9.34. Operation
- 9.35. Lift Circuit
- 9.36. Lowering
- 9.37. Lowering Control Valves
- 9.38. Repairs
- 9.39. General
- 9.40. Remote Control Valve
- 9.41. Lift Manifold
- 9.42. Checks and Adjustments
- 9.43. Tilt Control Circuit
- 9.44. Description
- 9.45. Operation
- 9.46. Tilt/Lift Spool
- 9.47. Relief Valves in Main Control Valve
- 9.48. Relief Valves, Tilt Lock
- 9.49. Repairs
- 9.50. General
- 9.51. Relief Valves, Tilt Lock, Disassemble
- 9.52. Clean and Inspect
- 9.53. Checks and Adjustments
- 9.54. Attachment Circuit Valves
- 9.55. General
- 9.56. Selector Valves Auxiliary Functions
- 9.57. Carriage Solenoid Valve
- 9.58. Repairs
- 9.59. Carriage Solenoid Valve
- 9.60. Checks and Adjustments
- 9.61. Other Hydraulic Components
- 9.62. Description and Operation
- 9.63. Relief Valves in Steering and Lift Circuits
- 9.64. Reducer Valve
- 9.65. Hydraulic Filters
- 9.66. Hydraulic Filters
- 9.67. Suction Filters
- 9.68. High Pressure Filter
- 9.69. Brake Filter
- 9.70. Return Line Filters
- 9.71. Hydraulic Hose Repair
- 9.72. Checks and Adjustments
- 9.73. Pilot Setting, Check
- 9.74. Return Pressure, Check
- 9.75. Main Function Relief Valve Pressure, Check
- 9.76. Hydraulic Tank Breathers
- 9.77. Specifications
- 9.78. Hydraulic Pumps Output at 2100 rpm (Governed Speed)
- 9.79. Cummins 290 Hp (216 kW) Engine
- 9.80. Cummins 330 Hp (246 kW) Engine
- 9.81. Relief Valves (Approximate Operating Pressures)
- 9.82. Check Port Pressures
- 9.83. Main Hydraulic Filters
- 9.84. Tank Capacity
- 9.85. Torque Specifications
- 9.86. Remote Control Valves
- 9.87. Attachment Control Valve
- 9.88. Carriage Solenoid Valve
- 9.89. Troubleshooting
- 9.90. Lift and Lower Circuit
- 9.91. Tilt Circuit
- 9.92. Attachment Circuit Valves
- 9.93. Attachment Control Valve
- 9.94. Carriage Solenoid Valve
- 9.95. Other Hydraulic Components
- 9.96. Accumulator Circuit
- 9.97. MPa ( 725 psi) Pilot Circuit
- 9.98. Park Brake Circuit
- 9.99. Table 1. Brake Treadle Settings
- 9.100. Table 2. Gauge Ranges
- 9.101. Table 3. Pressure Settings
- 10. RM1108-(08-2004)-US-EN
- 10.1. Hydraulic Plate
- 10.2. Safety Precautions Maintenance and Repair
- 10.3. General
- 10.4. Description and Operation
- 10.5. Hydraulic Oil Supply
- 10.6. Manifold, Section 1 of Hydraulic Plate
- 10.7. Main Control Valve, Section 2 of Hydraulic Plate
- 10.8. Description
- 10.9. Operation
- 10.10. Return Manifold, Section 3 of Hydraulic Plate
- 10.11. Brake Manifold, Section 4 of Hydraulic Plate
- 10.12. Cooling Circuit
- 10.13. Service Brake
- 10.14. Parking Brake
- 10.15. Flow Amplifier, Section 5 of Hydraulic Plate
- 10.16. Manifold, Section 1 of Hydraulic Plate
- 10.17. General
- 10.18. Valves and Pressure Switches
- 10.19. Main Control Valve, Section 2 of Hydraulic Plate
- 10.20. Disassemble
- 10.21. Auxiliary Section
- 10.22. Lift Section
- 10.23. Lift/Tilt Section
- 10.24. Clean and Inspect
- 10.25. Assemble
- 10.26. Auxiliary Section
- 10.27. Lift Section
- 10.28. Lift/Tilt Section
- 10.29. Install
- 10.30. Return Manifold, Section 3 of Hydraulic Plate
- 10.31. Disassemble
- 10.32. Clean and Inspect
- 10.33. Assemble
- 10.34. Install
- 10.35. Brake Manifold, Section 4 of Hydraulic Plate
- 10.36. Clean and Inspect
- 10.37. Install
- 10.38. Flow Amplifier, Section 5 of Hydraulic Plate
- 10.39. Hydraulic Hose Repair
- 10.40. Hydraulic Hose Identification
- 10.41. Torque Values
- 10.42. Measurements and Adjustments
- 10.43. Measurements
- 10.44. Adjustments
- 10.45. Troubleshooting
- 10.46. Table 1. Pilot Hoses
- 10.47. Table 2. Brake Hoses
- 10.48. Table 3. Auxiliary Hoses With Alternating P and T
- 10.49. Table 4. Steer Hoses
- 10.50. Table 5. Pressure Settings at 2100 RPM
- 11. RM1109-(07-2014)-US-EN
- 12. RM1110-(08-2004)-US-EN
- 12.1. Instrument Panel Indicators and Senders
- 12.2. Safety Precautions Maintenance and Repair
- 12.3. General
- 12.4. Description
- 12.5. General
- 12.6. Instrument Panel Meters, Indicators, and LCD Display
- 12.7. Error Code Display
- 12.8. Connector
- 12.9. Seat Switch Logic
- 12.10. Central Warning Light Output
- 12.11. Buzzer Output
- 12.12. Instrument Panel Component Replacement
- 12.13. Instrument Panel
- 12.14. Replace
- 12.15. Sender Replacement
- 12.16. Fuel Level Sender
- 12.17. Pressure Sender
- 12.18. Temperature Sender
- 12.19. Low Coolant Sender
- 12.20. Vacuum Switch
- 12.21. Crankshaft Position Sensor
- 12.22. Table 1. Instrument Panel and Indicators
- 12.23. Table 2. Switches Description
- 12.24. Table 3. Pin Description
- 12.25. Table 4. Sender Description
- 13. RM1114-(07-2014)-US-EN
- 14. RM1116-(11-2014)-US-EN
- 15. RM1117-(01-2012)-US-EN
- 15.1. Parking Brake
- 15.2. Safety Precautions Maintenance and Repair
- 15.3. General
- 15.4. Description and Operation
- 15.5. Parking Brake Valve Replacement
- 15.6. Clean and Inspect
- 15.7. Install
- 15.8. Parking Brake Caliper Repair
- 15.9. Disassemble
- 15.10. Inspect
- 15.11. Install
- 15.12. Bleed Brakes
- 15.13. Brake Pad Repair
- 15.14. Inspect
- 15.15. Install
- 15.16. Seals Repair
- 15.17. Install
- 15.18. Specifications
- 15.19. Torque Requirements
- 15.20. Wear Limits
- 15.21. Lining to Disc Clearance
- 15.22. Troubleshooting
- 15.23. Table 1. Brake Pad Adjustment
- 15.24. Table 2. Torque Requirements
- 15.25. Table 3. Wear Limits
- 15.26. Table 4. Lining to Disc Clearance
- 16. RM1118-(01-2011)-US-EN
- 16.1. Safety Precautions Maintenance and Repair
- 16.2. General
- 16.3. Description
- 16.4. Counterweight Repair
- 16.5. Main Counterweight (Cast)
- 16.6. Counterweight
- 16.7. Rear Counterweight (Cast)
- 16.8. Install
- 16.9. Main Counterweight (Fabricated)
- 16.10. Install
- 16.11. Install
- 16.12. Floor Plates, Handrails, and Steps
- 16.13. Hydraulic Tank Repair
- 16.14. Small Leaks
- 16.15. Large Leaks
- 16.16. Steam Method
- 16.17. Chemical Solution Method
- 16.18. Other Methods of Preparation for Repair
- 16.19. Install
- 16.20. Suction Screen and Inspection Cover
Rate this product
You may also like


Hyster Service Manual PDF
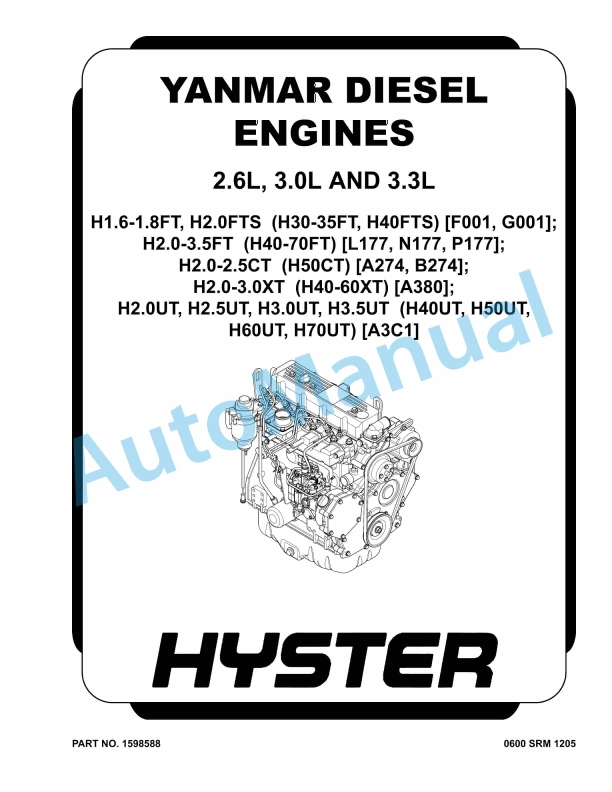
Hyster 2.6L, 3.0L, 3.3L Yanmar Diesel Engines Maintenance And Repair
$30.00

%20Service%20Manual&url=https://automanual.net/doc/hyster-b168-j2-00-3-00xl-service-manual/&media=https://automanual.net/wp-content/uploads/2026/01/hyster-b168-j200-300xl-service-manual-1.jpg)
%20Service%20Manual&url=https://automanual.net/doc/hyster-c005-h60-90c-service-manual/&media=https://automanual.net/wp-content/uploads/2026/01/hyster-c005-h60-90c-service-manual-1.jpg)
%20Service%20Manual&url=https://automanual.net/doc/hyster-c004-s3-00-5-50e-service-manual/&media=https://automanual.net/wp-content/uploads/2026/01/hyster-c004-s300-550e-service-manual-1.jpg)
%20Service%20Manual&url=https://automanual.net/doc/hyster-b160-j25-35bs-service-manual/&media=https://automanual.net/wp-content/uploads/2026/01/hyster-b160-j25-35bs-service-manual-1.jpg)
%20Maintenance%20Schedule&url=https://automanual.net/doc/hyster-c098-e3-50-5-50xl-e4-50xls-maintenance-schedule/&media=https://automanual.net/wp-content/uploads/2026/01/hyster-c098-e350-550xl-e450xls-maintenance-schedule-1.jpg)
Hyster Service Manual PDF
$30.00