


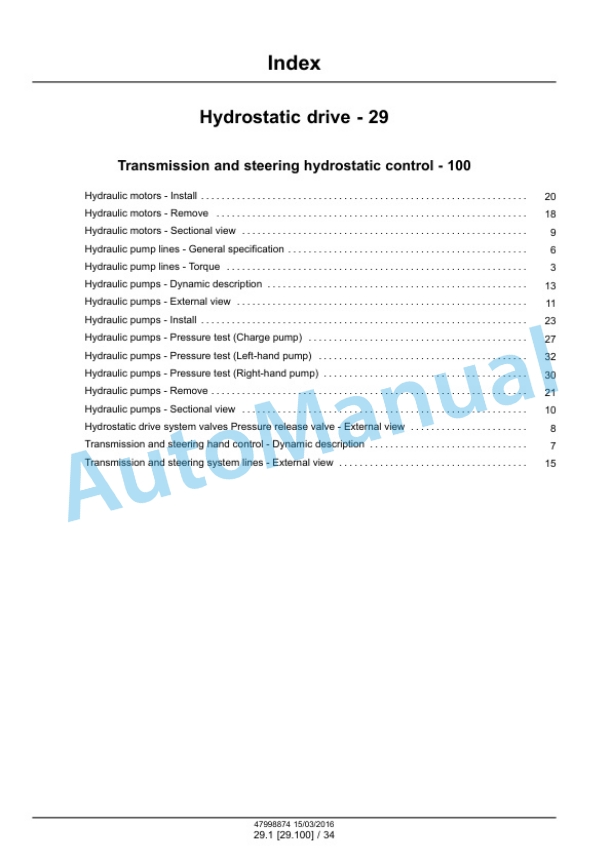
New Holland Service Manual PDF
New Holland 102, 103, 105 StackCruiser Tier 4B Final Bale Wagon Service Manual 48190534
$30.00
New Holland Service Manual PDF
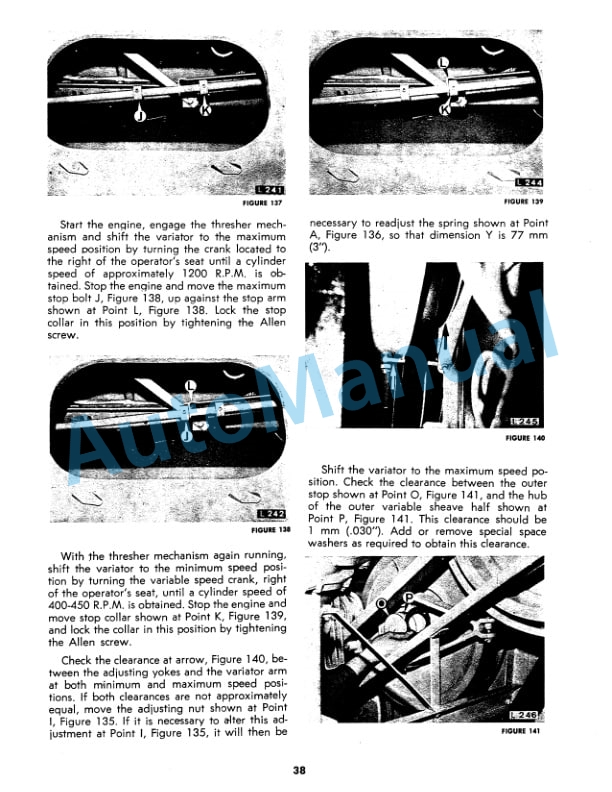
New Holland 1400, 1500 Combine Tractor Service Manual 40481300
$30.00
New Holland Service Manual PDF
New Holland 107M, 108M, 109M DuraDisc Disc Mower Service Manual 51594690
$30.00