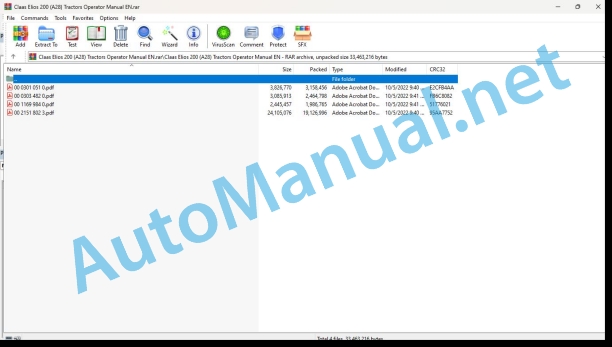
Claas Elios 200 (A28) Tractors Operator Manual EN
$50.00
- Model: Elios 200 (A28) Tractors
- Type Of Manual: Operator Manual
- Language: EN
- Format: PDF(s)
- Size: 25.5 MB
File List:
00 0301 051 0.pdf
00 0303 482 0.pdf
00 1169 984 0.pdf
00 2151 802 3.pdf
00 0301 051 0.pdf:
PROFI CAM 3
Table of contents
1 Introduction
1.1 Notes on the manual
1.1.1 Validity of manual
1.1.2 Information about this Operator’s Manual
1.1.3 Symbols and notes
1.1.4 Optional equipment
1.1.5 Qualified specialist workshop
1.1.6 Maintenance information
1.1.7 Warranty notes
1.1.8 Spare parts and technical questions
1.2 Intended use
1.2.1 Intended use
1.2.2 Reasonably foreseeable misuse
2 Safety
2.1 Identifying warnings
2.1.1 Hazard signs
2.1.2 Signal word
2.2 Safety rules
2.2.1 Meaning of Operator’s Manual
2.2.2 Observing safety decals and warnings
2.2.3 Optional equipment and spare parts
3 Product description
3.1 Overview and method of operation
3.1.1 How the PROFI CAM works
3.2 Identification plates and identification number
3.2.1 Position of identification plates
3.2.2 Explanation of PROFI CAM identification plate
3.3 Information on the product
3.3.1 CE marking
4 Operating and control elements
4.1 Camera system
4.1.1 Camera system monitor
4.2 Menu structure
4.2.1 Main menu
4.2.2
4.2.3
4.2.4
4.2.5
4.2.6
5 Technical specifications
5.1 PROFI CAM
5.1.1 Monitor
5.1.2 Camera
5.1.3 Switch box
5.1.4 Degree of protection against foreign bodies and water
6 Preparing the product
6.1 Shutting down and securing the machine
6.1.1 Switching off and securing the machine
6.2 Prior to operation
6.2.1 Carry out prior to operation
6.2.2 Installing the sun protection
6.2.3 Aligning the camera
6.2.4 Connecting the camera electrics
7 Operation
7.1 Monitor
7.1.1 Switching on the monitor
7.1.2 Calling up the menu
7.1.3 Setting a menu item
7.1.4 Setting the image orientation
7.1.5 Setting automatic screen darkening
7.1.6 Image mirroring
7.1.7 Setting the trigger view
7.1.8 Setting the follow-up time for trigger view
7.1.9 Setting the display mode
7.1.10 Activating/deactivating a display mode
8 Faults and remedies
8.1 Electrical and electronic system
8.1.1 Overview of problems on PROFI CAM camera system
8.1.2 Replacing the switch box fuse
9 Maintenance
9.1 Maintenance intervals
9.1.1 Every 10 operating hours or daily
9.2 Camera system
9.2.1 Checking the camera system for dirt
9.2.2 Cleaning the camera
9.2.3 Cleaning the switch box
9.2.4 Cleaning the monitor
10 Placing out of operation and disposal
10.1 General Information
10.1.1 Putting out of operation and disposal
11 Technical terms and abbreviations
11.1 Abbreviations
11.1.1 Units
11.1.2 Abbreviations
11.1.3 Technical terms
00 0303 482 0.pdf:
PROFI CAM 4
Table of contents
1 Introduction
1.1 Notes on the manual
1.1.1 Validity of manual
1.1.2 Information about this Operator’s Manual
1.1.3 Symbols and notes
1.1.4 Optional equipment
1.1.5 Qualified specialist workshop
1.1.6 Maintenance information
1.1.7 Notes on warranty
1.1.8 Spare parts and technical questions
1.2 Intended use
1.2.1 Intended use
1.2.2 Reasonably foreseeable misuse
2 Safety
2.1 Identifying warnings
2.1.1 Hazard signs
2.1.2 Signal word
2.2 Safety rules
2.2.1 Meaning of Operator’s Manual
2.2.2 Structural changes
2.2.3 Optional equipment and spare parts
2.2.4 Operation only following proper putting into operation
2.2.5 Technical status
2.2.6 Respecting technical limit values
Respecting technical limit values
2.2.7 Hazards when driving on roads and fields
3 Product description
3.1 Overview and method of operation
3.1.1 How the PROFI CAM works
3.2 Identification plates and identification number
3.2.1 Identification plates
3.3 Information on the product
3.3.1 CE marking
4 Operating and display elements
4.1 Camera system
4.1.1 Camera system monitor
4.1.2 CEBIS
4.2 Menu structure
4.2.1 Main menu
4.2.2
4.2.3
4.2.4
4.2.5
4.2.6
5 Technical specifications
5.1 PROFI CAM
5.1.1 Monitor
5.1.2 Camera
5.1.3 Switch box
6 Preparing the product
6.1 Switching off and securing the machine
6.1.1 Switching off and securing the machine
6.2 Prior to putting into operation
6.2.1 Carry out prior to operation
6.2.2 Installing the sun protection
6.2.3 Aligning the camera
7 Operation
7.1 Monitor
7.1.1 Switching on the monitor
7.1.2 Calling up the menu
7.1.3 Setting a menu item
7.1.4 Setting the image orientation
7.1.5 Setting automatic screen darkening
7.1.6 Image mirroring
7.1.7 Setting the trigger view
7.1.8 Setting the follow-up time for trigger view
7.1.9 Setting the display mode
7.1.10 Activating/deactivating a display mode
8 Faults and remedies
8.1 Electric and electronic system
8.1.1 Overview of problems on PROFI CAM camera system
9 Maintenance
9.1 Maintenance intervals
9.1.1 Every 10 operating hours or daily
9.2 Camera system
9.2.1 Checking the camera system for dirt
9.2.2 Cleaning the camera
9.2.3 Cleaning the switch box
9.2.4 Cleaning the monitor
10 Putting out of operation and disposal
10.1 General information
10.1.1 Putting out of operation and disposal
11 Technical terms and abbreviations
11.1 Abbreviations
11.1.1 Units
11.1.2 Abbreviations
11.1.3 Technical terms
00 1169 984 0.pdf:
Sensor case for tractors Stage IIIB, IV and VSensor case for tractors Stage IIIB, IV and VSensor case for Stage IIIB, IV and V tractors
Contents
1 Sensorkoffer – Sensor case – Sensor suitcase – Stage IIIB, IV & V
1.1 Auflistung Kofferinhalt
1.1 Listing case content
1.1 Presentation of the contents of the suitcase
00 2151 802 3.pdf:
. bout this operator’s manual
. Validity of the operator’s manual
. Chapter symbols
Contents
A – Identification – Certification – Safety
1. Tractor information plate
2. Motor information plate
3. Front axle information plate
4. Cab identification plate
5. European regulation
6. Safety
6.1. Safety instructions
6.1.1. Use conforming with the purpose
6.1.2. Use non conformant with the purpose
6.1.3. Precautions to be taken before starting up
6.1.4. Tractor state
6.1.5. Adjustment or maintenance tasks – repairs
6.1.5.1. General rule
6.1.5.2. Use of axle stands
6.1.5.3. Electrical services
6.1.5.4. Fuel
6.1.5.5. Coolant
6.1.6. Road use – Use for transport
6.1.7. Using the tractor
6.1.7.1. General rule
6.1.7.3. Hitching tools
6.1.7.4. Driving
6.1.7.5. Work in a fixed position
6.1.7.6. Work with tools driven by the power take-off
6.1.7 6.1.8. Toxic products
6.1.9. Air conditioner
6.1.10. Cab
6.1.11. Protecting the environment
6.1.12. Using a front loader
6.1.13. Forest applications
6.2. Safety stickers with warning pictograms
6.2.1. Recommendations
6.2.2. Operator’s manual
6.2.3. Coolant
6.2.4. Engine
6.2.5. Transmission oil
6.2.6. External controls
6.2.7. Rear hitch
6.2.8. Seat belt
6.2.9. Fan
6.2.10. Engine belt
6.2.11. Folding roll bar
6.2.12. Front tow hook
6.2.13. FOPS roof
B – Driving position
1. Operating and working environment
1.1. Right side controls
1.2. Left side controls
1.3. Instruments and controls (panel)
1.4. STOWAGE AND ACCESSORIES
2. Lighting, incription
2.2. Low/high beams and horn
2.3. Adjustment of dipped lights
2.4. Working lights and rotating beacon
2.5. Overhead light
2.6. Rear view mirrors
3. Starti 5. Steering wheel
6. Instrument panel
6.1. Description
6.2. Operation
6.3. Operation
6.4. Parameterisation
6.4.1. Procedure
6.4.2. Speed parameters table
7. Hinged panels and windows
8. Sight
9. Heating – ventilation – manual air conditioning
9.1. Description
9.2. Operation
Platform
1. Operating and working environment
1.1. Right side controls
1.2. Left side controls
1.3. Instruments and controls (panel)
2. Lighting, indicators and safety
2.1. Description
2.2. Low/high beams and horn
2.3. Adjustment of dipped lights
2.4. Working lights and rotating beacon
2.5. Rear view mirrors
3. Starting contact
4. Driver’s seat
ment panel
7. Folding roll bar
C – Electrical system
1. Characteristics
2. Trailer/implement light socket
3. Electric cabinet supply socket
4. Battery
5. Fuses and relays
5.1. Recommendations
5.2. Fuse box ucompartment fuse box
5.3.1. Preheating fuse
5.3.2. Fuse and relays – electronic linkage
5.3.3. Main cab fuse
5.4. Main fuse and relay box
5.5. Right-hand post fuse box
5.6. Left post relays
5.7. Fuses and relays of the electro-hydraulic valves
D – Engine
1. Characteristics
2. Displays
2.1. Instrument panel
3. Safety
3.1. Instrument panel
3.2. Recommendations
4. Engine hood
4.1. One-piece hood
4.2. Side panels
5. Engine control
5.1. Starting the engine
5.1.1. Preliminary operations
5.1.2. Start up
5.2. Using the accelerator pedal and lever
5.2.1. Operation
5.2.2. Accelerator pedal
5.2.3. Hand accelerator
5.3. ?Recommendations
6.2.?Bleeding air from the injection system
E?-?Transmission
1.?Characteristics
2.?Forward speeds
3.?Display?
3.1.?Instrument panel
4.?Safety
4.1.?Reverser neutral
4.1.1.?OPERATION
4.1.2.?Operation
5.1.?Clutch
5.1.1.?Recommendations
5.1.2.?Clutch pedal
5.1.3.?Switch
5.2.?Selection of movement direction
5.2.1.?Mechanical drive reverser
5.2.2.?Electro-hydraulic reverser (ISC)
5.3.?Gear selection
5.4.?Doubler
5.4.1.?Mechanical range doubler
5.4.2.?Electro-hydraulic range doubler
5.5.?Range selection
Rear axle
1.?Characteristics
2.?Protection of mechanical parts
3.?Differential lock
3.1.?Recommendations
3.2.?Operation
4.?Brakes
4.1.?Service brakes
4.2.?Parking brake
4.2.1.?Requirements
4.2.2.?Handbrake (auxiliary and parking brake)
5.?Trailer brake
5.1.?Hydraulic brake
F – Front axle
1. Characteristics
2. Front/Rear inter-axle ratio
3. Front axle engagement
3.1. General
3.2. Automatic mode
3.2.1. Operation
3.2.2. Operation
3.3. Permanent mode
3.3.1. Operation
3.3.2. Operation
G – Rear equipment
Hydra 1. Characteristics
2. Mechanical command auxiliary valves
2.1. Association between controls/rear pressure connectors
2.2. Pressure connectors
2.2.1. Recommendations
2.2.2. Operation
2.2.3. Free return to the tank
2.3. Dual acting/single acting conversion
3. Electrohydraulic spool valves
3.1. Association between controls/rear pressure connectors
3.2. Pressure connectors
3.2.1. Recommendations
3.2.2. Operation
3.2.3. Free return to the tank
3.3. Controls
3.4. Start up
3.5. Linear controls
3.6. Joystick
3.7. Flow adjustments
3.8. Hydraulic timer
4. Statiohanical linkage
1.1. Characteristics
1.2. Controls
1.3. Position control
1.4. Force control
1.5. Mixed control
1.6. Floating linkage
1.7. External controls
1.8. Sensitivity
2. Electro-hydraulic lifting TCE6
2.1. Characteristics
2.2. Control. Warning light
2.3.2. Road transport safety
2.4. Using the linkage
2.5. MODE SELECTION
2.6. Position control
2.7. Force control
2.8. Upper limit
2.8.1. Operation
2.8.2. Operation
2.9. Lowering speed
2.10. Rapid entry function
2.11. External controls
2.11.1. Operation
2.11.2. Operation
Rear power take-off
1. Characteristics
2. Recommendations
3. Operation
4. Display
5. PTO speed selection
6. Selecting ground-speed power take-off
7. Connecting implements to the power take-off
8. Stationary working
Rear hitch
1. Chara 3. Adjustable links
4. Upper link
5. Automatic hooks
6. Mechanical stabilisers
7. Draw bar couplings
8. Swinging drawbar
9. Automatic pick-up hitch
H – Front equipment
Front linkage
1. Characteristics
2. Front linkage controlled by spool valve 2
2.1. Controls
2.2. Preliminary operations
hanical control valve
2.3.2. Electrohydraulic spool valve (DEH)
3. 3-point hitch
3.1. Lower links
3.2. Upper link
3.3. Hitching and unhitching the tool
Front power take-off
1. Characteristics
2. Recommendations
3. Front power take-off engagement
4. Stop of the front power take-off
Front loader
1. Fitting a frontal loader adaptation frame
2. OPERATION
J – Wheels and tyres
1. Tyres
1.1. Recommendations
1.2. Inflation pressure
1.2.1. Characteristics
1.2.2. Recommendations
1.3. Load index
1.4. Speed code
2. Track widths
ont tracks
2.2.1. Front axle
2.2.2. Tables of front tracks
2.2.3. Front axle steering lock stops
2.2.3.1. Check
2.2.3.2. Adjustment
2.3. Rear tracks
2.3.1. Rear axle
2.3.2. Tables of rear tracks
2.4. Tyre combinations
K – Characteristics
1. Dimensions
1.1. Cab
1.2. Platform
2. Weight
2.1. Cab
4. Maximum tow weight authorized
5. Capacities
6. Ballast
6.1. Ballasting available
6.2. Tractor balancing
6.3. Compatibility of weights with the tires
7. Cab comfort
7.1. Sound level
7.2. Vibration level
L – Maintenance
1. Recommendations
2. Towing
3. Transport
4. Using a jack
5. Replacing a wheel
6. Loading and stowing the tractor
7. Storage
8. Decommissioning and destruction
9. Frequencies
9.1. Summary table
9.2. Operations
9.2.1. Operation n° 1
9.2.2. Operation n° 2
9.2.3. Operation n peration n° 5
9.2.6. Operation n° 6
9.2.7. Operation n° 7
9.2.8. Operation n° 8
9.2.9. Operation n° 9
9.2.10. Operation n° 10
9.2.11. Operation n° 11
9.2.12. Operation n° 12
9.2.13. Operation n° 13
9.2.14. Operation n° 14
9.2.15. Operation n° 15
9.2.16. Operation n° 16
9.2.17. Operation n° 17
9.2.18. Operation n° 18
9.2.21. Operation n° 21
9.2.22. Operation n° 22
9.2.23. Operation n° 23
9.2.24. Operation n° 24
9.2.25. Operation n° 25
9.2.26. Operation n° 26
9.2.27. Operation n° 27
9.2.28. Operation n° 28
9.2.29. Operation n° 29
9.2.30. Operation n° 30
9.2.31. Operation n° 31
9.2.32. Operation n° 32
9.2.33. Operation n° 33
9.2.34. Operation n° 34
9.2.35. Operation n° 35
9.2.36. Operation n° 36
9.2.37. Operation 9
9.2.40. Operation n° 40
9.2.41. Operation n° 41
9.2.42. Operation n° 42
9.2.43. Operation n° 43
9.2.44. Operation n° 44
9.2.45. Operation n° 45
9.2.46. Operation n° 46
9.2.47. Operation n° 47
9.2.48. Operation n° 48
9.2.49. Operation n° 49
9.2.50. Operation n° 50
9.2.51. Operation n° 51
9.2.52. Operation n° 52
9.2.53. Operation n° 53
9.2.54. Operation n° 54
2.57. Operation n° 57
10. Bleeding air from the injection system
11. Maintenance logbook
M – Operations that are mandatory under the guarantee
1. OPERATIONS MANDATORY UNDER THE TERMS OF THE CONTRACTUAL GUARANTEE
1.1. Pre-delivery inspection
1.2. Handing over to the customer
1.3. MANDATORY ROUTINE MAINTENANCE
1.4. Mandatory inspections
1.4.1. Mandatory service after the first 100 hours
1.4.2. Mandatory service after theth
John Deere Repair Technical Manual PDF
John Deere Repair Technical Manual PDF
John Deere Repair Technical Manual PDF
John Deere Repair Technical Manual PDF
John Deere 16, 18, 20 and 24HP Onan Engines Component Technical Manual CTM2 (19APR90)
John Deere Parts Catalog PDF
John Deere Tractors 6300, 6500, and 6600 Parts Catalog CQ26564 (29SET05) Portuguese
John Deere Repair Technical Manual PDF
New Holland Service Manual PDF
John Deere Repair Technical Manual PDF
John Deere Repair Technical Manual PDF
John Deere Diesel Engines PowerTech 4.5L and 6.8L – Motor Base Technical Manual 07MAY08 Portuguese
John Deere Repair Technical Manual PDF

