Claas Nectis 237-217 Ve 2+4Wd (A12) Tractors Operator Manual EN
$50.00
- Model: Nectis 237-217 Ve 2+4Wd (A12) Tractors
- Type Of Manual: Operator Manual
- Language: EN
- Format: PDF(s)
- Size: 21.2 MB
File List:
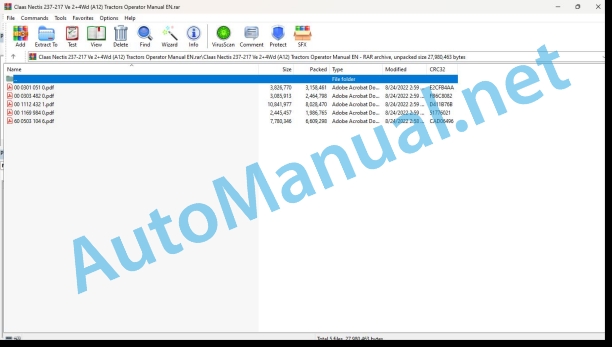
00 0301 051 0.pdf
00 0303 482 0.pdf
00 1112 432 1.pdf
00 1169 984 0.pdf
60 0503 104 6.pdf
00 0301 051 0.pdf:
PROFI CAM 3
Table of contents
1 Introduction
1.1 Notes on the manual
1.1.1 Validity of manual
1.1.2 Information about this Operator’s Manual
1.1.3 Symbols and notes
1.1.4 Optional equipment
1.1.5 Qualified specialist workshop
1.1.6 Maintenance information
1.1.7 Warranty notes
1.1.8 Spare parts and technical questions
1.2 Intended use
1.2.1 Intended use
1.2.2 Reasonably foreseeable misuse
2 Safety
2.1 Identifying warnings
2.1.1 Hazard signs
2.1.2 Signal word
2.2 Safety rules
2.2.1 Meaning of Operator’s Manual
2.2.2 Observing safety decals and warnings
2.2.3 Optional equipment and spare parts
3 Product description
3.1 Overview and method of operation
3.1.1 How the PROFI CAM works
3.2 Identification plates and identification number
3.2.1 Position of identification plates
3.2.2 Explanation of PROFI CAM identification plate
3.3 Information on the product
3.3.1 CE marking
4 Operating and control elements
4.1 Camera system
4.1.1 Camera system monitor
4.2 Menu structure
4.2.1 Main menu
4.2.2
4.2.3
4.2.4
4.2.5
4.2.6
5 Technical specifications
5.1 PROFI CAM
5.1.1 Monitor
5.1.2 Camera
5.1.3 Switch box
5.1.4 Degree of protection against foreign bodies and water
6 Preparing the product
6.1 Shutting down and securing the machine
6.1.1 Switching off and securing the machine
6.2 Prior to operation
6.2.1 Carry out prior to operation
6.2.2 Installing the sun protection
6.2.3 Aligning the camera
6.2.4 Connecting the camera electrics
7 Operation
7.1 Monitor
7.1.1 Switching on the monitor
7.1.2 Calling up the menu
7.1.3 Setting a menu item
7.1.4 Setting the image orientation
7.1.5 Setting automatic screen darkening
7.1.6 Image mirroring
7.1.7 Setting the trigger view
7.1.8 Setting the follow-up time for trigger view
7.1.9 Setting the display mode
7.1.10 Activating/deactivating a display mode
8 Faults and remedies
8.1 Electrical and electronic system
8.1.1 Overview of problems on PROFI CAM camera system
8.1.2 Replacing the switch box fuse
9 Maintenance
9.1 Maintenance intervals
9.1.1 Every 10 operating hours or daily
9.2 Camera system
9.2.1 Checking the camera system for dirt
9.2.2 Cleaning the camera
9.2.3 Cleaning the switch box
9.2.4 Cleaning the monitor
10 Placing out of operation and disposal
10.1 General Information
10.1.1 Putting out of operation and disposal
11 Technical terms and abbreviations
11.1 Abbreviations
11.1.1 Units
11.1.2 Abbreviations
11.1.3 Technical terms
00 0303 482 0.pdf:
PROFI CAM 4
Table of contents
1 Introduction
1.1 Notes on the manual
1.1.1 Validity of manual
1.1.2 Information about this Operator’s Manual
1.1.3 Symbols and notes
1.1.4 Optional equipment
1.1.5 Qualified specialist workshop
1.1.6 Maintenance information
1.1.7 Notes on warranty
1.1.8 Spare parts and technical questions
1.2 Intended use
1.2.1 Intended use
1.2.2 Reasonably foreseeable misuse
2 Safety
2.1 Identifying warnings
2.1.1 Hazard signs
2.1.2 Signal word
2.2 Safety rules
2.2.1 Meaning of Operator’s Manual
2.2.2 Structural changes
2.2.3 Optional equipment and spare parts
2.2.4 Operation only following proper putting into operation
2.2.5 Technical status
2.2.6 Respecting technical limit values
Respecting technical limit values
2.2.7 Hazards when driving on roads and fields
3 Product description
3.1 Overview and method of operation
3.1.1 How the PROFI CAM works
3.2 Identification plates and identification number
3.2.1 Identification plates
3.3 Information on the product
3.3.1 CE marking
4 Operating and display elements
4.1 Camera system
4.1.1 Camera system monitor
4.1.2 CEBIS
4.2 Menu structure
4.2.1 Main menu
4.2.2
4.2.3
4.2.4
4.2.5
4.2.6
5 Technical specifications
5.1 PROFI CAM
5.1.1 Monitor
5.1.2 Camera
5.1.3 Switch box
6 Preparing the product
6.1 Switching off and securing the machine
6.1.1 Switching off and securing the machine
6.2 Prior to putting into operation
6.2.1 Carry out prior to operation
6.2.2 Installing the sun protection
6.2.3 Aligning the camera
7 Operation
7.1 Monitor
7.1.1 Switching on the monitor
7.1.2 Calling up the menu
7.1.3 Setting a menu item
7.1.4 Setting the image orientation
7.1.5 Setting automatic screen darkening
7.1.6 Image mirroring
7.1.7 Setting the trigger view
7.1.8 Setting the follow-up time for trigger view
7.1.9 Setting the display mode
7.1.10 Activating/deactivating a display mode
8 Faults and remedies
8.1 Electric and electronic system
8.1.1 Overview of problems on PROFI CAM camera system
9 Maintenance
9.1 Maintenance intervals
9.1.1 Every 10 operating hours or daily
9.2 Camera system
9.2.1 Checking the camera system for dirt
9.2.2 Cleaning the camera
9.2.3 Cleaning the switch box
9.2.4 Cleaning the monitor
10 Putting out of operation and disposal
10.1 General information
10.1.1 Putting out of operation and disposal
11 Technical terms and abbreviations
11.1 Abbreviations
11.1.1 Units
11.1.2 Abbreviations
11.1.3 Technical terms
00 1112 432 1.pdf:
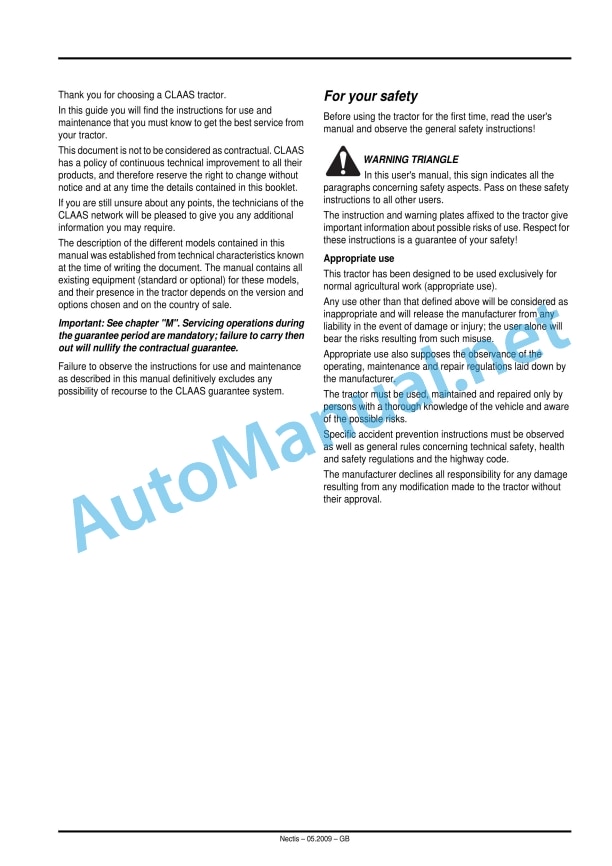
For your safety
Warning triangle
Appropriate use
Chapter symbols
A – IDENTIFICATION – CERTIFICATION – SAFETY
IDENTIFICATION A.2
Certification A.2
SAFETY A.3
Controls and driver’s post B.2
Right side controls B.3
Left side controls B.3
INSTRUMENTS AND CONTROLS (panel) B.4
Indicator and control lights B.5
ALARMS B.6
DIGITAL DISPLAYS B.8
DRIVER’S SEAT B.9
Controls and accessories in the cab roof B.10
Various controls and accessories B.10
Recommendation B.15
B – Roll bar
DRIVER’S SEAT B.17
Folding roll bar B.18
C – Electrical services (cab)
CHARACTERISTICS C.2
Lighting – indicators C.3
CONTROLS C.4
Fuses C.6
C – Electrical services (roll bar)
Lighting – indicators C.12
D – ENGINE
CHARACTERISTICS D.2
Operations before start D.3
STARTING THE ENGINE D.4
STOPPING THE ENGINE D.4
OPERATION D.5
Bleeding air from the injection system D.8
E – Transmission
NECTIS 227-237 VE, 227-237-247 VL, 227-247 F E.2
GEAR BOX – 12/12 (30 km/h) E.2
NECTIS 257-267 VL, 257-267 F E.3
GEAR BOX – 12/12 (30 km/h) E.3
NECTIS 227-237 VE, 227-237-247 VL, 227-247 F E.4
Gearbox with mechanical doubler – 24/24 (30 km/h) E.4
NECTIS 227-237 VE, 227-237-247 VL, 227-247 F E.5
Gearbox with mechanical doubler – 24/24 (40 km/h) E.5
NECTIS 257-267 Vl, 257-267 F E.6
Gearbox with mechanical doubler – 24/24 (40 km/h) E.6
NECTIS 227-237 Ve, 227-237-247 VL, 227-247 F E.7
Gearbox with TWINSHIFT and REVERSHIFT – 24/12 (30 km/h) E.7
NECTIS 227-237 Ve, 227-237-247 VL, 227-247 F E.8
Gearbox with TWINSHIFT and REVERSHIFT – 24/12 (40 km/h) E.8
NECTIS 257-267 Vl, 257-267 F E.9
Gearbox with TWINSHIFT and REVERSHIFT – 24/12 (40 km/h) E.9
Clutch E.10
Gearbox E.11
Range selection E.13
Differential E.13
Brake system E.14
Power take-off (PTO) E.15
Towing the tractor E.18
F – Front axles – driven and undriven
Characteristics F.2
Front axle engagement F.5
G – Hydraulics – rear linkage and hitch
Characteristics G.2
Rear lift G.3
Linkage (Electronic Tracto-Control) TCE 6 G.6
Automatic hitching G.12
Instructions for adjusting the rear hitch G.13
J – WHEELS AND TYRES
General J.2
Inflation pressure J.2
Tyres and tracks J.4
Adjusting front track J.12
STEERING STOPS J.13
Adjusting rear track J.14
K – Dimensions, weights, capacities and ballast
Dimensions cab version K.2
Dimensions roll bar version K.3
Weight K.4
Ballast K.6
Capacities K.7
L – Maintenance
General L.2
M – Operations that are mandatory under the guarantee
OPERATIONS MANDATORY UNDER THE TERMS OF THE CONTRACTUAL GUARANTEE M.2
A – IDENTIFICATION – CERTIFICATION – SAFETY
IDENTIFICATION
Certification
FOREWORD
PRECAUTIONS BEFORE STARTING
CONDITION OF THE TRACTOR
ADJUSTMENT OR MAINTENANCE – REPAIRS
AXLE STANDS
HYDRAULIC SYSTEMS
ELECTRICAL SYSTEM
Re-fuelling
ROAD USE – USE FOR TRANSPORT
OPERATION
GENERAL RULE
WHEEL TRACK
ATTACHING IMPLEMENTS
STATIONARY WORK
USE OF TOOLS DRIVEN BY THE PTO
TOXIC PRODUCTS
IMPORTANT
Air conditioning
RECOMMENDATIONS:
IMPORTANT
SAFETY CABS
ENVIRONMENTAL SAFETY
Safety stickers with warning pictograms
D – ENGINE
CHARACTERISTICS
Operations before start
STARTING THE ENGINE
STOPPING THE ENGINE
OPERATION
RUNNING-IN
Recommendations:
1 – Avoid operating lightly loaded or for long periods at idle. Lack of load during the first 100 hours can cause glazing of the cylinder liners. This leads to excessive oil consumption and loss of power.
2 – Avoid overloading the engine: The engine suffers overload when too high a gear ratio is used and engine speed drops to about 1 600 to 1 800 rpm, with maximum throttle applied. This causes mechanical and thermal stress which is harmful dur…
3 – Pay particular attention to fluid levels (oil and coolant) as well as engine temperature.
Operating temperature
OPERATING RPM
Maximum off-load rpm
Specific consumption
Operating at intermediate power
Full power operation
Quality requirement
Filling the tank
1 – Clean the area around the fuel filler cap.
2 – Remove the filler cap (1) and put it in a clean dry place
3 – After refuelling, replace and tighten the filler cap.
Handling the fuel
Bleeding air from the injection system
E – Transmission
NECTIS 227-237 VE, 227-237-247 VL, 227-247 F
GEAR BOX – 12/12 (30 km/h)
NECTIS 257-267 VL, 257-267 F
GEAR BOX – 12/12 (30 km/h)
NECTIS 227-237 VE, 227-237-247 VL, 227-247 F
Gearbox with mechanical doubler – 24/24 (30 km/h)
NECTIS 227-237 VE, 227-237-247 VL, 227-247 F
Gearbox with mechanical doubler – 24/24 (40 km/h)
NECTIS 257-267 Vl, 257-267 F
Gearbox with mechanical doubler – 24/24 (40 km/h)
NECTIS 227-237 Ve, 227-237-247 VL, 227-247 F
Gearbox with TWINSHIFT and REVERSHIFT – 24/12 (30 km/h)
The reverse speed is between the ‘tortoise’ and ‘hare’ values of the forward speed.
NECTIS 227-237 Ve, 227-237-247 VL, 227-247 F
Gearbox with TWINSHIFT and REVERSHIFT – 24/12 (40 km/h)
The reverse speed is between the ‘tortoise’ and ‘hare’ values of the forward speed.
NECTIS 257-267 Vl, 257-267 F
Gearbox with TWINSHIFT and REVERSHIFT – 24/12 (40 km/h)
The reverse speed is between the ‘tortoise’ and ‘hare’ values of the forward speed.
Tables of forward speeds
Mechanical drive reverser
I Forward.
II Reverse.
Electro-hydraulic reverser (ISC)
I Forward
II Neutral
III Reverse
IV De-clutched
Gear selection
Mechanical range doubler
Electro-hydraulic range doubler
Range selection
I Reduced speed
II Slow speed [fi]
III Normal speed
N Neutral
Differential
Brake system
Brake pedal (1)
Trailer brake
Hydraulic braking
Handbre (3)
To apply the hand brake:
To release:
Power take-off (PTO)
Power take-off with mechanical engagement
De-clutching
Hydraulically-engaged power take-off
Selection of the standard or proportional PTO range
Selection of PTO speeds
Hitching-up and towing PTO attachments
Important
Stationary working
Towing the tractor
F – Front axles – driven and undriven
Characteristics
Front/Rear inter-axle ratio
Front axle engagement
Version with electro-hydraulic control
Operating mode
Choice of operating mode
Override mode
Automatic mode
Brake system
Version with mechanical operation (lever)
G – Hydraulics – rear linkage and hitch
Characteristics
Hydraulic pump
Single pump system
Double pump system
Triple pump system
Fluid capacities
See chapter K.
Hydraulic lift
Lift with draft and position control.
Rear hitch
Models VL and F
Model VE
Rear lift
Position control
Operation
Force control
Operation
Adjustment
Implement handling at end of row
Position control
Force control
Implement control using force control
Mixed control
Operation
Adjustment
Implement handling at end of row
Floating linkage
Implement handling at end of row
Adjustment valve (A)
Adjustment valve (B)
Sensitivity
1 – Bottom hole: Maximum sensitivity.
2 – Centre hole: Medium sensitivity.
3 – Upper hole: Minimum sensitivity.
SPECIAL CASES
Linkage (Electronic Tracto-Control) TCE 6
Control panel
1 – Stop position indicator light.
2 – Linkage movement indicator light (up).
3 – Linkage movement indicator light (down).
4 – Control mode setting adjuster (force / position).
5 – Upper limit adjustment selector.
6 – Setting adjustor (mixed or force position).
7 – Lowering speed adjustor.
8 – Transport lock button.
9 – 3-position memory button.
10 – Quick entry button.
Using the linkage
Position control
OPERATION
Force control
Upper limit adjustment
OPERATION
Rate of descent adjustment
Rapid entry function
Function of external control buttons
3-position memory button
High position
Stop position
Working position
Transport lock mode function
Motion indicator warning light
Linkage emergency and safety warning light
Regular flashing
Slow/rapid flashing
Automatic hitching
Automatic hooks
Coupling the implement
Uncoupling the implement
Maintenance
Instructions for adjusting the rear hitch
Influence of hitch geometry on lifting capacity
A – Top link (upper link attachment point with respect to the centre line of the wheels and the length of the link). In all cases remember that the different rod attachment positions available with the three holes offer different linkage seni…
B – Lower bars (linkage rod attachment points to the lower bars, depending on the version).
C – Lifting rods (length of lifting rods).
Maximum mechanical advantage
Minimum mechanical advantage
Adjusting the lifting rods
Adjustment of the upper rod
Adjustment
Adjustment of lateral stabilisers
Mechanical adjustment of lateral stabilisers
Hydraulic adjustment of the lateral stabilisers
Hydraulic adjustment of the stabilsers with lateral offset
1 – With switch (C) in position (A), lever (D) offers the following settings:
2 – With switch (C) in position (B), lever (D) offers the following settings:
Vertical hydraulic strut
Trailer towing
Track-mounted height-adjustable tow fork
Height-adjustable tow fork (pin attachnment)
Oscillating tow bar (E)
Auxiliary spool valves
Control levers and pressure connectors
Combinations of auxiliary spool valves
Single pump system
Double pump system
Triple pump system
Single pump system
Double pump system
Triple pump system
Adjustment of flow regulator
Dual acting/single acting conversion
Free return
J – WHEELS AND TYRES
REPLACEMENT OF TYRES, USE OF DIFFERENT TYPES OF TYRE
Special case of tractors with four wheel drive
Front/Rear inter-axle ratio
Inflation pressure
Operating on soft ground (to improve grip)
Operating on hard ground (on the road, towing, etc.)
Tyres and tracks
The front track is the distance at ground level between the centres of the front tyres. The rear track is the distance between the centres of the rear tyres at ground level.
Tyre combinations
Nectis VE
Nectis VL
Nectis F
Tables of front tracks (2 wheel drive) Nectis VE, VL & F
Tables of front tracks (4 wheel drive)
Nectis VE & VL (with narrow front axle)
Nectis 227 VL – 237 VL – 247 VL
Tables of front tracks (4 wheel drive)
Nectis 257-267 VL
Nectis 227-247 F
Tables of front tracks (4 wheel drive)
Nectis 247-257-267 F
Tables of rear tracks
Nectis VE
Nectis VL
Tables of rear tracks
Nectis F
Adjusting front track
Front axle (2 wheel drive)
Driven front axle
STEERING STOPS
Adjustment
Adjusting rear track
K – Dimensions, weights, capacities and ballast
Dimensions cab version
Dimensions roll bar version
Total permissable laden weight
When they leave the production line, tractors are ballasted to behave normally in most operating situations.
Capacities
The following table gives lubricant and fluid quantities required in each component.
Only use recommended lubricants and fluids.
When topping up, the oil or fluid category must not be changed.
Regular oil changes are essential.
L – Maintenance
General cleaning
High-pressure cleaning systems
ROUTINE MAINTENANCE
Touching up paintwork
FAILURES OR MALFUNCTIONS
Decrease in fluid level
Quantity and type of oil
Grease quality
Cab air filter: Cleaning
Windscreen washer fluid level: Check
Diesel fuel strainer: Replace
Wheel drive mechanical clutch clearance: Check
Engine oil level: Check
Elimination of water in the fuel: Cleaning
Coolant level: Check
Service brake fluid level: Check
Hydraulic fluid level: Check
Important: – The fluid level must never fall below the lower mark (III). – If using hydraulic implements that require a large quantity of fluid in their power supply system (hydraulic motors, large capacity cylinders), top the fluid up to the…
Transmission oil cooler: Cleaning
Air conditioning compressor: Lubricating the compressor
Radiator grills: Cleaning
Front axle swing bearings (4 wheel drive): Lubrication
Rear lift: Lubrication
Front axle final drive oil level: Check
Front axle differential unit oil level: Check
Front driven axle king pins: Lubrication
Front axle steering actuator: Lubrication
Clean the grease nipples (C) and grease.
Wheel disc and rim nuts: Check
Tyre inflation pressure: Check
Front weight attachment bolts: Check
Cab air filter: Replacement
Battery terminals: Cleaning – greasing
Engine oil: Replace
Engine oil filter cartridge: Replace
Diesel fuel filter cartridges
3 cylinder model
4 cylinder model
Alternator and water pump drive belt
Compressor drive belt: Check
Third hydraulic pump drive belt: Check
Front axle king pins: Lubrication
Front axle swing hinge pin: Lubrication
Front axle final drive oil: Replace
Hydraulic/transmission system filter cartridges:
Replacing the high pressure filter
Electro-hydraulic reverser filter
Bleeding air from the circuit
PTO clutch mechanical control: Check
Foot brake clearance: Check
Hydraulic system accumulator (version with reverser under torque): Check
safety patch solenoid valve (version with reverser under torque): Check
Front axle differential casing oil: Replace
Hydraulic/transmission oil: Replace
Hydraulic strainer: Replace
Hand brake clearance: Check
Front axle breather: Replace
Engine air filter: Replace
Brake system fluid: Replace
Diesel fuel strainer: Replace
Engine maintenance
Hydraulic system accumulator
Air conditioning dehumidifier: Replace
MAINTENANCE RECORD
Operations to be carried out every 500 h
Operations to be carried out every 1 000 h
Operations to be carried out every 2 000 h
M – Operations that are mandatory under the guarantee
OPERATIONS MANDATORY UNDER THE TERMS OF THE CONTRACTUAL GUARANTEE
Pre-delivery inspection – Handing over to the customer
à) Pre-delivery inspection
Your CLAAS agent is responsible for preparing your tractor before delivery:
He must stamp and sign it after checking and confirming the service handbook inspections.
If you wish, he can also install any certified equipment or after-sales options (air-conditioning, front powe take-off and linkage, radio, etc.).
b) Handing over to the customer
Your supplier must provide you with the use and servicing handbook on delivery. Hemust explain this document and carry out a test, with you, in the field in order to familiarise you with your new tractor, and to answer all your questions.
The Acknowledgement of receipt, Pre-delivery inspection and Delivery to the customer sheets (to be found in the service handbook) must be filled in and signed by the technician responsible for the handover, and signed by the user.
On of the copies of the acknowledgement of receipt remains in the service handbook which is given to the user. The other copies are intended for CLAAS.
MANDATORY ROUTINE MAINTENANCE
HYDRAULIC SYSTEM
HYDROSTATIC STEERING
FRONT DRIVE TRAIN – FRONT AXLE
TRANSMISSION – LINKAGE
WHEELS AND TYRES
ELECTRICAL SYSTEM
Battery:
Instrument panel:
Heating, ventilation, cooling:
HYDRAULIC SYSTEM
HYDROSTATIC STEERING
FRONT DRIVE TRAIN – FRONT AXLE
TRANSMISSION – LINKAGE
WHEELS AND TYRES
ELECTRICAL SYSTEM
Battery:
Instrument panel:
Heating, ventilation, cooling.
B_GB.pdf
Controls and driver’s post
Installation A: Installation with electro-hydraulic doubler and on-torque reverser (ISC).
Installation B: Installation with mechanical doubler and mechanical reverser.
1 – PTO clutch lever (hydraulic engagement version ).
2 – Clutch pedal.
3 – Dog-clutch engagement lever for standard or proportional PTO.
4 – Electro-hydraulic reverse selector lever.
5 – Height-adjustable steering wheel.
6 – Instrument panel.
7 – Multifunction control (direction indicators, lighting and horn).
8 – Main switch (key operated).
9 – Brake pedals.
10 – Gear lever and hydraulic doubler control.
11 – Accelerator pedal.
12 – Driver’s seat.
13 – Range lever.
14 – Auxiliary spool valves contol lever.
15 – Mechanical drive reverser lever.
16 – Mechanical doubler control lever.
17 – Gear lever.
Right side controls
Installation A: Installation with electronic linkage. Installation B: Installation with mechanical linkage.
1 – Control lever for 2nd auxiliary spool valve.
2 – Manual accelerator lever.
3 – Electronic linkage unit.
4 – Hydraulic lift rod control lever.
5 – Control lever for linkage arm sweep spool valve.
6 – Selector button for linkage arm sweep or central position.
7 – Position control lever.
8 – Force control lever.
Left side controls
1 – PTO clutch lever (mechanical engagement version)*.
2 – 4 wheel drive dog clutch lever (mechanical engagement version)*.
INSTRUMENTS AND CONTROLS (panel)
1 – Unused location.
2 – Rotating light control button (roll bar).
3 – Emergency alarm button.
4 – Instrument panel.
5 – Unused location.
6 – Front axle engage button.
7 – Differential lock engage button.
8 – On-board computer button.
9 – Multifunction control (direction indicators, lighting and horn).
10 – Main switch (key operated).
Indicator and control lights
1 – Fuel low level warning light.
2 – Main beam indicator.
3 – Direction indicators 2nd trailor.
4 – 1st trailer direction indicators repeater.
5 – Tractor direction indicators repeater.
6 – Rear power take-off indicator.
7 – Front power take-off indicator.
8 – Brake fluid level warning light.
9 – Hand brake warning light.
10 – Battery charge warning light.
11 – Emergency stop light.
12 – Engine oil pressure warning light.
13 – Hydraulic doubler oil pressure warning light.
14 – Transmission oil temperature warning light.
15 – Blocked dry type air filter warning light
16 – Preheat indicator (option).
17 – Not used.
18 – Transmission computer defect warning.
19 – Hydraulic doubler warning (reduced speed).
20 – Front axle engagement indicator light.
21 – Engine coolant temperature warning light.
22 – Differential lock indicator.
23 – Fuel collector tank low-level warning light.
A – Fuel gauge.
B – Engine tachometer
C – Engine coolant temperature gauge.
D – Theoretical forward speed indicator in km/h or mph.
E – Display:
RED PRIMARY ALARM LIGHTS
Emergency stop light
Battery charge warning light*
Engine oil pressure warning light*
Engine coolant temperature warning light*
1 – Clean the radiator and radiator cover grills.
2 – Check that the water pump belt is not stretched or broken.
3 – Check the coolant level.
Hydraulic circuit (doubler) oil pressure warning light*
Transmission oil temperature warning light*
Hand brake warning light*
ORANGE CAUTION LIGHTS
Preheat indicator (option)
Blocked dry type air filter warning light
Fuel low level warning light
Transmission computer defect light
DIGITAL DISPLAYS
Digital display d
Digital display e
Zeroing the trip hour meter
Setting the digital clock
DRIVER’S SEAT
Pneumatic seat (A)
1 – Vertical suspension (stiffness adjustment).
2 – Longitudinal positions.
Comfort seat (B)
3 – Longitudinal adjustment.
4 – Suspension adjustment.
5 – User weight adjustment.
Safety belts (C)
Controls and accessories in the cab roof
RIGHT-HAND SIDE
1 – Rotating light switch.
2 – Location for car radio.
3 – Loudspeaker.
4 – Front working lights switch.
5 – Rear working lights switch.
6 – Overhead light.
7 – Windscreen wiper switch.
8 – Rear window wiper switch.
Equipment provision
Various controls and accessories
Natural ventilation
Rear opening window (A)
Opening windscreen (A)
Adjustable steering column
Outside rear view mirrors
Adjustment
Adjustment
Interior rear view mirror
Sun blind
Operation
Heating – ventilation – cooling system
1 – Adjusting forced ventilation.
2 – Turning on the air conditioning.
3 – Adjusting the air temperature.
Adjusting forced ventilation
Adjusting the air temperature
Air conditioning
Cable aperture (1)
Recommendation
Cleaning
B – Roll bar
DRIVER’S SEAT
Waterproof seat
1 – Longitudinal adjustment.
2 – Suspension adjustment.
3 – User weight adjustment.
Rear view mirrors
Adjustment
Folding roll bar
C_GB.pdf
C – Electrical services (cab)
Characteristics
Towing socket
Trailer/implement light socket (A)
1 – Left direction indicators.
2 – Available.
3 – Earth.
4 – Right direction indicators.
5 – Right side lights + number plate light.
6 – Brake light.
7 – Left side lights.
Electric cabinet power socket (B)
Lighting – indicators
At the front
1 – Main beam lights.
2 – Dipped headlights.
3 – Side indicator repeaters:
4 – Working lights.
At the rear
5 – Rotating beacon.
6 – Side indicator repeaters:
7 – Number plate light.
8 – Working lights.
9 – Reflectors.
Controls
Direction indicators
Horn (III)
Headlights
To flash headlights
Rotating beacon
Hazard warning lights
Working lights
Windscreen wiper
Screen washer
Overhead light (D)
Key operated ignition
Position of the ignition
Allocation of fuses
Removable fuse
1 – The removable fuse (tractor section) is located near the alternator.
2 – The removable fuse (cab section) is located near the battery compartment.
3 – The starter relay is located near the alternator.
Fuse and relays – electronic linkage
Fuse box
In version with ISC transmission, tractors can be equipped with fuse box (A) or fuse box (B).
Version with ISC transmission : Fuse box (A)
The fuse box (A) is located under the left panel of the instrument panel.
The fuse box (B) is located under the left panel of the instrument panel.
Fuse box (cab)
Version with mechanical transmission
Fuse box
C – Electrical services (roll bar)
Lighting – indicators
1 – Rotating beacon.
2 – Working lights.
3 – Side indicator repeaters:
Side indicator repeaters
Working light
00 1169 984 0.pdf:
Sensor case for tractors Stage IIIB, IV and VSensor case for tractors Stage IIIB, IV and VSensor case for Stage IIIB, IV and V tractors
Contents
1 Sensorkoffer – Sensor case – Sensor suitcase – Stage IIIB, IV & V
1.1 Auflistung Kofferinhalt
1.1 Listing case content
1.1 Presentation of the contents of the suitcase
60 0503 104 6.pdf:
CONTENTS
For your safety
Warning triangle
Appropriate use
Chapter symbols
CONTENTS
A – IDENTIFICATION – CERTIFICATION – SAFETY
IDENTIFICATION A.2
Certification A.2
SAFETY A.3
Controls and
John Deere Parts Catalog PDF
John Deere Tractors 6300, 6500, and 6600 Parts Catalog CQ26564 (29SET05) Portuguese
John Deere Parts Catalog PDF
John Deere Harvesters 8500 and 8700 Parts Catalog CPCQ24910 Spanish
John Deere Repair Technical Manual PDF
John Deere Parts Catalog PDF
John Deere Tractors 7500 Parts Catalog CPCQ26568 30 Jan 02 Portuguese
John Deere Repair Technical Manual PDF
John Deere Repair Technical Manual PDF
John Deere Diesel Engines POWERTECH 2.9 L Component Technical Manual CTM126 Spanish
John Deere Repair Technical Manual PDF
John Deere Repair Technical Manual PDF

