Claas Lexion 570 Montana (581) Combines Operator Manual FR
$50.00
- Model: Lexion 570 Montana (581) Combines
- Type Of Manual: Operator Manual
- Language: FR
- Format: PDF(s)
- Size: 77.0 MB
File List:
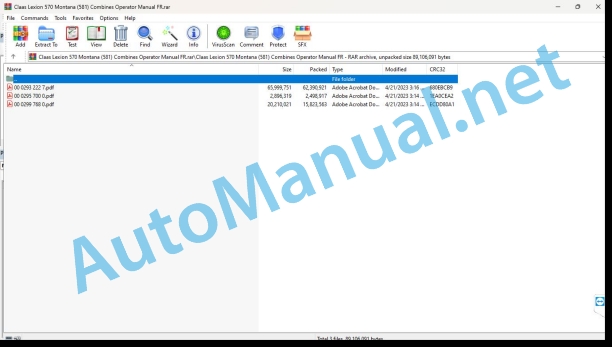
00 0293 222 7.pdf
00 0295 700 0.pdf
00 0299 768 0.pdf
00 0295 700 0.pdf:
Contents
1 Introduction
1.1 General advice
1.1.1 Validity of the notice
2 CEBIS use
2.1 CLAAS CEBIS on-board information system
2.1.1 CEBIS general advice
2.2 Control elements and displays
2.2.1 Keypad
2.2.2 Selector and direct menu
2.2.3 Color screen
2.2.4 Harvest indicator
2.2.5 Main menu
2.2.6 Before first commissioning
2.2.7 Settings menu / Front tool
2.2.8 Settings menu / Diesel engine
2.2.9 Settings / Modes menu
2.2.10 Settings menu / Separation of remainder
2.2.11 Settings / Autopilot menu
2.2.12 Settings menu / CEBIS
2.2.13 Front tool menu
2.2.14 Reel Menu
2.2.15 Menu Number of partial widths
2.2.16 Drive Menu
2.2.17 Cereal setting menu
2.2.18 Performance measurement menu
2.2.19 Counter Menu
2.2.20 Maintenance menu
2.2.21 Indicative values for 100m pulses
3 Befoommining
3.1 CRUISE PILOT
3.1.1 Learn the flow zero point
3.1.2 Preselect the CRUISE PILOT strategy
3.1.3 Connect the CRUISE PILOT
3.1.4 Disconnect the CRUISE PILOT
3.1.5 Cruise control – store speed (km/h)
3.1.6 Change (km/h) the speed of the automatic cruise control
3.1.7 Memorize the flow rate (t/h) of the harvest
3.1.8 Modify the flow rate (t/h) of the harvest
3.1.9 CRUISE PILOT – driving behavior when emptying the hopper
4 Use – basic machine
4.1 Cabin / driving position
4.1.1 Cutting height control
4.1.2 Memorize the ground support pressure
4.1.3 Memorizing the cutting height
Alphabetical index
00 0299 768 0.pdf:
Introduction
Introduction
Contents
Contents
General advice
Driving on the road
Important
Nameplate / Serial number
Nameplate
Machine number
Engine number CATERPILLAR C-12
Nameplate – straw chopper
Cabin serialber
Safety tips
Safety tips
Safety stand
Extinguisher
ttery cut-off switch
Brake blocks
Placement of wedges
Hydraulic
Hydraulic fluid poses a risk of injury
Pressure accumulators
Reduce the pressure in the Auto-Contour accumulator
Reduce the pressure in the Autopilot accumulator
Reduce the pressure in the concave adjustment accumulator
Reduce the pressure in the radial distributor accumulator
Reduce the pressure in the standard distributor accumulator
Safety stickers with warning pictograms
Technical characteristics
CLAAS LEXION 570 Montana
Front tools – weight / dimensions
Security devices
Before commissioning
Necessary work before initial commissioning
Cabin with automatic air conditioning
Automatic air conditioning
Control and indication elements
Switching on automatic air conditioning
Cabin temperature adjustment
Manual adjustment of fan-evaporator speed
Connecting the ECON service
Disconnecting from the ECON service
REHEAT operation (remove fog from cabin windows)
Outdoor temperature display
Switching the temperature display to ˚Fahrenheit
Heating of the foot area
Fault display, F0 temperature sensor error (passenger compartment, blue)
Fault display, error temperature sensor F1 (output, yellow)
Fault display, F2 temperature sensor error (external, red)
Cabin with air conditioning (Standard version)
Commissioning the air conditioning
Heating of the foot area
Reheat system (fogged windows)
Incident, cause or possible remedy – Air conditioning
Refrigerated compartment
Refrigeration unit (optional equipment)
Cooler (optional equipment)
Ice cube tray (optional equipment)
Windshield washer system
Control of the harvested product
Opening and closing the cabin roof
Overview of the driving position
Control console
Screen (progress figure)
Screen (harves figure)
C key area
Rotary selector D
Tilt compensatio device
Control console for the tilt compensation device
Screen (work)
Use of the machine
Axle (wheel angle)
Cutting apron
Axle (wheel angle) and cutting deck
Cutting deck adjustment button block (yellow)
Axle adjustment button block (green)
Calibration
Inclinometer calibration
Wheel cylinder calibration
Cutting angle calibration
Transverse tilt calibration
Calibration of the straw channel (feed channel)
Info system
Inclinometer information
Steering column
Ignition lock
Multifunction switch
Driving informant
Multifunction handle
Steering column adjustment
Swivel the steering column up
Steering wheel height adjustment
Power plant
Driver’s seat
Mechanical driver’s seat
Driver’s seat cushioned by compressed air (optional equipment)
Lighting and connector boxes
Driving lights, working lights, mirrors
Side accessory headlights (Sidefinder) (optional equipment)
Exit lighting
Parking lights in case of excess width
Connector boxes
Access ladder
Ladder access and extension
Front ladder
Ladder assembly
Fold the ladder steps
Rotate the ladder
Rear ladder
Other uses of the rear ladder
Side hatches
Opening and closing the side hatches and the rear hatch
Open the rear hatch_x0011_:
Adjust the height of the side hatch handle
Adjust the closing of the side hatch
Tool cabinet
Open the tool cabinet
Setting the wings
Steering axles
Adjustable steering bridge (2.60 m – 3.20 m)
Move the adjustable steering bridge 2.60 m – 3.20 m from the transport position to the tr…
Track adjustment
Steering axle (2.71 m – 3.16 m)
Move the steering axle 2.71 m – 3.16 m from the transport position to the working position
Track adjustment
Additional steering axle weights
Additional weights for steering axle LEXION 570 Montana
Filling fluid for steering axle wheels
Installing the steering axle ballast
Cutting deck hydraulic cylinders
Cutting deck hydraulic cylinders
Third cutting deck cylinder
Grain hopper
Close the hopper flow openings
Driving the combine
Checking the indicator lights
Driving the combine
Rotary engine speed selector
Average engine idle speed
Start the engine
Stop the engine
Changing gears
Maneuvers
Hydrostatic transmission
Adjusting the difficulty of maneuvering the forward control lever
Driving characteristics
Driving characteristics with cutting deck trailer
Direction
Foot brake
Parking brake
Mechanical release of the parking brake
Shifting gears – emergency control
Bring the reports to “_x0011_0_x0011_” (neutral position)
Tow the machine
Differential lock
Connect differential lo Disconnect differential lock
Autopilot CLAAS (corn picker)
Commissioning CLAASopilot
Autopilot CLAAS (grain cutting apron)
Adjusting the rectilinear movement of the combine harvester
Adapt the laser sensor to the field
Approximate adjustment
Precise adjustment
Laser sensor (edge of cereals out of field of vision)
Adjust the right laser sensor (optional equipment)
Commissioning CLAAS Autopilot
Use in rapeseed with left side blade
Incident, cause or possible remedy – Tilt compensation device
Installation and removal of the cutting deck
Installation of the cutting deck
Tilting the cutting deck from the transport position
Adjustment of the hydraulic cylinder for transverse adjustment of the cutting deck
Machines with Auto-Contour
Locking of cutting aprons and corn pickers (cutting aprons without Auto-Contour)
Connect the cardan shaft
Place the crutches
Removing the cutting deck
Disconnect the threshing/cuttilutch
Remove the cardan shaft
Open cutting deck lock
Removing the cutting deck frhe ground
Removing the cutting deck on the cutting deck trailer
CEBIS use
Contents
Claas CEBIS on-board informant
CEBIS Monitor and selector
C key area
Selector D
Multifunction lever M
Screen area E (harvest indicator)
Flag box
Selector D
Before the first start-up
Travel indicator
Harvest indicator
Placement of flags
ON/OFF mapping
Mapping indication
Load GPS data
Reel Presets
Horizontal position of the reel
Reel circumferential speed
Reel height
Front camera presets
Distance between picking plates
Cutting deck extension length
CAC setting
CAC adjustment for LEXION Montana
Partial width
Performance measuring device
Components
Basic setting and calibration
Preparing for performance measurement
Humidity measurement ON/OFF, humidity correction, storage humidity
Fast process for meaningful measurement data
Performance measurement
Calibration factor
Zero point yield
Counterweighing
Humidity correction
Humidity measurement ON/OFF
Zero tilt
Storage humidity
Dry product indication
Adjustment depending on the product
List of products that can be beaten
Load CLAAS values
Load own values
Memorize your own values
Print values
Show CLAAS values
Show own values
Cleaning by blowing
Projected construction sites
Next planned construction site
Previous planned construction site
New planned construction site
Modify a projected construction site
Name / Parcel / Product / Driver:
Data recorded:
Projects completed
Next or previous site completed
Reactivate a fixed site
Surface correction
Daily counter
Print the daily meter
Clear the daily counter
Global counter
Print global counter
Product counter
Copy smart card
Cutting apron
CAC sensitivity
cutting height stops
Partial width scaling
Working position
Working width
Reel height automation
Reel height stops
Cutting deck automation
Cutting deck extension stops
Reel horizontal position stops
Varioautomatic ON/OFF
Picker plate end stops
Rotation schemes
Learning rotation regimes
Learning the max speed. empty
Belt slippage
Bale spreader monitoring
Monitoring of the return elevator speed
Tachometer
Calibration step
Pulses/100
Autopilot sensitivity
ATP zero point frontal device
Zero point direction
Separation
Testing the sensors
Upper and lower grill stops
Adjusting the upper and lower racks
Potato limit
Zero point removed
Language
Date hour
Pos./neg. display
Units of measurement
Time indication:
Clean display
Maintenance
XXh Work list
Instructions for use
Basic setting
General standard settings:
Special standard settings:
Adjustment aids
Problems/Solution
Checklist
Safety tips
Code saving
Disconnecting the security code:
Motor load
Engine diagnosis
Messages
Problems / Solution – efficiency measuring device
Indicative values for pulses / 100 m
Yield mapping
Use – basic machine
Feed channel
Supply chains
Beater hatch
Front tool reversing device
Front tool flexibility springs
Checking the adjustment of the flexibility springs
Cutting height display
Cutting flexibility display
Lock the flexibility springs of the front tool (mechanical locking)
Unlock the flexibility springs of the front tool (mechanical locking)
Adjusting the front implement lowering speed
Switching on the front tool (control panel)
Stopping the front tool (control console)
QUICK STOPnt tool (control console)
Stopping the front tool (multifunction handle)
QUICK STOP froool (multifunction handle)
Threshing bodies
Destoner bin
Switching on the threshers
Shutdown of the threshers
Cleaning the threshing bodies
Adjusting the concave
Adjust the concave centrally
Adjust the concave to the left
Adjusting the concave adjustment pressure accumulator oil pressure
Basic concave adjustment
Adjusting the concave position sensor
Drummer’s Diet
Drummer Controls
Two-position dimmer
Removing and installing segments of the pre-separation concave
Threshing segment
Removing the threshing segment
Installation of the piling segment
Trimming
Undo the winding at the beater
Axial rotors LEXION 570 Montana
Axial rotors
Axial rotor variator (Optional equipment)
Driven by stepped pulleys of the axial rotors
Close separation bins
Replacement of separation baskets with blind baskets (Optional equipment)
Electrically close the separation bins with shutters (Optional equipment)
Removal and installation of blind baskets / separation baskets
Removal of blind baskets / separation baskets
Installation of blind baskets / separation baskets
Warning signal
Cleaning
Cleaning box
Preparation table
Slatted grilles
Electric grid adjustment
Removing the grilles
Dismantling the upper grilles
Disassembly of the lower grilles
Installation of grids
Tightening torque of axial screw connections for upper and lower grilles
Grids – Basic setting
Use without bottom rack
Cover the return of the potatoes
Cleaning ventilation
Fan speed adjustment
Ventilated waterfall
Adjusting the ventilation nozzle – pre-separation
Wind orientation plate
Accumulation traps for threshing grasses or similar (optional equipment)
Dynamic slope compensation (3D system cleaning)
Return of the oats
Control of the return of harvest
Flow control device
Rotor sensors
Cleaning the rotor sensors_x0011_:
Cleaning shoe sensor
Clean the cleaning shoe sensor_x0011_:
Harvest conditioning
Auger and auger buckets
Elevators
Grain hopper
Safety sticker (0516 275.1)
Hopper fairing sheet
Emptying the hopper
Hopper emergency drain hatch
Hopper emptying assistance (optional equipment)
Hopper drain tube
Pivot the hopper drain tube out and in
Pivot the hopper drain tube_x0011_:
Transport position of the hopper discharge tube
Hopper drain tube discharge hatches
Hopper Drain Shear Bolt
On/off hopper emptying
Access to the hopper
Automatic chain lubrication – hopper emptying (optional equipment)
LEXION 570 Montana straw chopper
Straw chopper
Checks to be carried out before putting the straw chopper into service
Straw chopper with radial distributor
Commissioning the straw chopper (Turn the radial distributor to the chopping position)
Stopping the straw cutter (Turn the radial distributor to the windrowing position)
Swivel the radial distributor into the cutting deck trailer transport position
Cross blade adjustment
Adjusting the hash length
Connect the friction bar (optional equipment)
Adjusting the projection width of the radial distributor
Adjust the setting to half the projection width of the radial distributor
Straw chopper with standard dispenser
Commissioning the straw chopper (Turn the standard distributor to the chopping position)
Stopping the straw chopper (Turn the standard distributor to the windrowing position)
Swivel the standard distributor into the cutting deck trailer transport position
Cross blade adjustment
Adjusting the hash length
Connect the friction bar (optional equipment)
Adjusting the projection width of the standard dispenser
Adjust the height of the standard dispenser
Adjust setting to half the projection width of the standard dispenser
Reduce the speed of the straw chopper
Chaff spreader / LEXION 570 Montana straw spreader
LEXION 570 Montana chaff spreader
Unfold the chaff spreader
Fold the chaff spreader (working position)
Straw spreader LEXION 570 Montana
Adjusting the spreading width
Installing the spreader rotors
LEXION 570 Montana grid and threshing tables
LEXION 570 Montana grill table
LEXION 570 Montana piling table
Trimming hatches
Threshing segment
Incident, cause or remedy – basic machine
Maintenance – basic machine
Important maintenance tips
Important Maintenance and Safety Tips
Maintenance and lubricant tables
Maintenance tables
Lubricant tables
Hydraulic system
Pressure accumulators
Check the oil level
Changing the hydraulic oil
Replace the hydraulic oil filter
Replacement of return filters
Filling instructions when changing hydraulic oil (Sauer 90 R 130 / 90 M 100)
Bleed the hydraulic cylinders for transverse regulation of the cutting deck
Gearboxes / Housings
2 speed gearbox
Check the oil level
Oil drain
Differential and axle support
Check the oil level
Oil drain
Compensating arms
Check the oil level
Oil drain
Reducers (planetary gears)
Check the oil level
Oil drain
Beater speed reducer housing
Oil drain
Check the oil level
Transfer case (engine)
Check the oil level
Oil drain
Hopper emptying gearbox
Check the oil level
Oil drain
Rotor drive
Check the oil level
Oil drain
Lubrication of the crowns to turn the balls of the wheel slides
Instructions for lubricating ball turning crowns
Feed channel
Tighten the supply chains
Sensor adjustment for cutting angle adjustment
Cleaning the intake ventilation (optional equipment)
Drive axle
Adjustment of sensors for adjusting the compensator arms
Elevator chains
Tighten the grain elevator chain (machine without flow meter)
Tighten the grain elevator chain (machine with flow meter)
Tighten the grain elevator chain
Drive belts/drive chains – basic machine
General advice
Left drive diagram (LEXION 570 Montana)
Drive belts, drive chains
Right drive diagram (LEXION 570 Montana)
Drive belts, drive chains
2nd level front tool drive (without_x0011_variator) – tension the belt (2)
Front tool drive 3rd level (with_x0011_variator) – tension the belt (3)
Straw puller drive – tension the belt (5)
Reel hydraulic pump drive – tension belt (6)
Front tool drive 1st level – tension the belt (7) (Machines without QUICK STOP or…
Front tool drive 1st level – tension the belt (7) (Machines with QUICK STOP or…
Hydraulic pump drive of the straw spreader / chaff spreader /…
Threshing gear drive – tension the belt (9)
Hopper emptying drive 1st level – tension the belt (10)
Hopper emptying drive 2nd level – remove chain (11)
Hopper emptying drive 2nd level – install and adjust chain (11)
Straw chopper drive 1st level – tension the belt (12)
Straw chopper drive 2nd and 3rd level – tension the belts (13) and (14)
Cleaning shoe drive 1st_x0011_level – tension the belt (18)
Cleaning shoe drive 2nd_x0011_level – tension the belt (19)
Cleaning shoe drive 3rd_x0011_level – tension the belt (20)
Drive by stepped pulleys of the axial rotors 2nd level – tension the belt (40)
Axial rotor drive 1st level – tension the belt (42)
Fan drive 1st level – tension the belt (46)
Radiator cage intake fan drive – tension belt (51)
Beater drive – tension belt (53)
Preliminary throttle drive – tension belt (54)
Radiator cage drive – tension belt (57)
Cabin / Air conditioning
Cleaning the filters
Cleaning the parts in the cabin roof
Cleaning cabin windows
Air conditioner
Clean the capacitor
Check the refrigerant level
Replace the filter dryer
Filling quantity of refrigerant R 134 a
Compressor oil
Maintenance work to be carried out before harvest
Extinguisher
Compressed air system (optional equipment)
Compressed air connection points
Air gun and woven hose
Draining water from the compressed air tank
Pressure regulator
Check the safety valve
Straw chopper (LEXION 570 Montana)
Replacement of articulated cereal knives
Removing the straw guide plate (radial distributor)
Installation of the straw guide plate (radial distributor)
Adjust the straw guide plate to the chopping position_x0011_:
Adjust the straw guide plate to the swathing position:
Removing the straw guide plate (standard distributor)
Installation of the straw guide plate (standard distributor)
Adjust the straw guide plate to the swathing position:
Adjust the straw guide plate to the chopping position_x0011_:
Unscrew the articulated cereal knives
Screw the articulated knives for cereals
Replace the counter blades
Winterizing Tips for Combines
Maintenance – engine
Important maintenance tips
Important Maintenance and Safety Tips
Maintenance and lubricant tables
Maintenance table
Lubricant table
Maintenance – engine
Engine overview
Fuel System / Engine Oil
Fuel system
Fuel tank
Fuel shut-off valve
Water decanter / fuel pre-filter (standard equipment – small model)
Exploded view of fuel pre-filter_x0011_:
Water decanter / fuel pre-filter (optional equipment, replaces pre-filter Fig._x0011_4)
Exploded view of water decanter / fuel pre-filter_x0011_:
Filter cartridge replacement
Bleed the air from the fuel system
Checking the engine oil level
Engine oil change
Drain used oil
Oil filter
Filling the engine oil
Cooling system
Cooling liquid
Engine block water drain plugs
Water radiator
Fill with coolant
Overpressure
Anti-corrosion and anreeze protection
Warning sign
Cooling water temperature
Stopping an overheating engine
Radiator cage
Cleaning the water radiator
Dry air filter
Alarmtem
Cleaning the suction grille
Clean the air filter with plastic housing
Disassemble the main air filter cartridge
Cleaning the main air filter cartridge
Installing the main air filter cartridge
Clean the air filter with metal housing
Disassemble the main air filter cartridge
Cleaning the main air filter cartridge
Installing the main air filter cartridge
Security cartridge
Removing and installing the safety cartridge (plastic housing)
Removing and installing the safety cartridge (metal casing)
Alternator
Cleaning the three-phase alternator
Electricity
Alternator
Engine problems, cause or remedy
Winterizing Tips for Engines
Engine conservation
Lubrication plan
Lubricants and advice
Alphabetical index
Alphabetical index
John Deere Parts Catalog PDF
John Deere Tractors 6300, 6500, and 6600 Parts Catalog CQ26564 (29SET05) Portuguese
John Deere Repair Technical Manual PDF
John Deere 18-Speed PST Repair Manual Component Technical Manual CTM168 10DEC07
John Deere Repair Technical Manual PDF
John Deere Parts Catalog PDF
John Deere Tractors 7500 Parts Catalog CPCQ26568 30 Jan 02 Portuguese
John Deere Repair Technical Manual PDF
John Deere Repair Technical Manual PDF
John Deere Application List Component Technical Manual CTM106819 24AUG20
John Deere Repair Technical Manual PDF
John Deere Parts Catalog PDF
John Deere Harvesters 8500 and 8700 Parts Catalog CPCQ24910 Spanish
John Deere Repair Technical Manual PDF
John Deere Repair Technical Manual PDF
John Deere Diesel Engines PowerTech 4.5L and 6.8L – Motor Base Technical Manual 07MAY08 Portuguese


