Claas Jaguar 900-830 (492) Forage Harvesters Repair Manual ES
$300.00
- Model: Jaguar 900-830 (492) Forage Harvesters
- Type Of Manual: Repair Manual
- Language: ES
- Format: PDF(s)
- Size: 122 MB
File List:
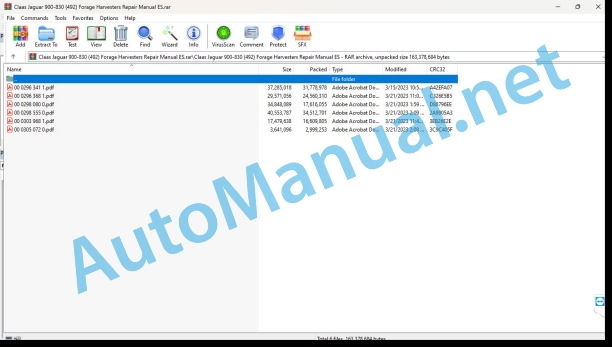
00 0296 341 1.pdf
00 0296 368 1.pdf
00 0298 080 0.pdf
00 0298 555 0.pdf
00 0303 968 1.pdf
00 0305 072 0.pdf
00 0296 341 1.pdf:
Mercedes-Benz OM502LA
Introduction
General information
Manual validity
Using the manual
Texts and figures
Index with the structure of constructive groups
Search and find
Direction signs
Abbreviations
Technicalities
General repair instructions
Technical data
Indications for correct repair
Self-locking screws
Liquid screw insurance
Steel roller chains
connecting link
Tapered ring joints
Disassembly
Mounting
Head key joints
Disassembly
Mounting
Bearings with tension ring
Disassembly
Mounting
Bearings with tensioner sleeve
Disassembly
Mounting
Tension bushing
Disassembly
Mounting
Safety rings
Threadings with adjustment ring
Screw in
Non-tight joint with adjusting ring
Screw connections with sealing cone
Hydraulic hoses
Laying the hoses
Joint surface work
Replacement parts
Tightening torques
Tightening torques for normal metric threads
Tightening torques for metric fine threads
Tightening torques for hydraulic threads and air conditioning threads with sealing cone and O-ring DIN 3865
Tightening torques for hydraulic threads with adjusting ring DIN 3861
Tightening torques for threaded fittings of the SDS hydraulic system
Tightening torques for oscillating hydraulic threadings
Tightening torques for hollow screws DIN 7643
Tightening torques for threaded fittings of the SDE hydraulic system with adjustable direction
Tightening torques for brake line joints
Tightening torques for helical thread clamps
Tightening torques for spring-loaded helical thread clamps
CCN Explanation
CCN (CLAAS Component Number)
General indications
Electrical regulations
Hydraulic regulations
CCN (CLAAS Component Number)
Security
General information
To especially take into account
Signaling of warning and alarm indications
Rules to avoid accidents with personal injury
General indications
Check, adjustment and repair work
Engine operation
Suspended loads
Work on pipes and hoses
Electrical installation work
Work in the hydraulic installation
Electric welding
lacquer work
Works on urea solution
Tips on how to avoid damage and premature wear
General indications
Limitation of liability
General indications
Immobilization and storage
Prescriptions to avoid damage to health and the environment
Prevention measures to protect against health and environmental damage
Disposal of consumables and auxiliary consumables
Instructions for working on the diesel engine
Protection against accidents
Cleaning
Assembly instructions
Engine check
Commissioning after an engine overhaul
First aid
01 Engine
0102 Complete component
Engine characteristic data
Engine Description
engine components
Power-on sequence
turn the engine
Special tool with motor mounted
Special tool with the engine removed
Turn the engine in assembled state
Turn the engine in disassembled state
0105 Engine suspension
Hooking rings
Technical instructions
0110 Engine casing
special tool
Technical instructions
Disassemble
Front crankshaft gasket
special tool
Technical instructions
Remove the seal
Install the seal
Remove the cassette seal ring
Install the cassette seal ring
Rear crankshaft gasket
special tool
Technical instructions
Disassemble
Crankshaft housing cover
special tool
Technical instructions
Disassemble
Control box cover
special tool
Technical instructions
Disassemble
Valid for type: 942.993
Valid for type: 942.993
control box
Preparation for work
Technical instructions
Disassemble
control box
Preparation for work
Technical instructions
Disassemble
0115 Engine propulsion
special tool
Technical instructions
Disassemble
Disassemble
Measure the overhang
Connecting rod
Technical instructions
Disassemble
Cylinder shirt
special tool
Technical instructions
Disassemble
Valid for type: 458.99x
Measure the overhang
Measure the cylinder bore
Crankshaft
special tool
Technical instructions
Disassemble
crankshaft bearing ring
special tool
Technical instructions
Disassemble
Oscillation damper
special tool
Technical instructions
Disassemble
flywheel
special tool
Technical instructions
Disassemble
Replace the ring gear
Replace the bearing ring
0120 Cylinder head / valves / distributor wheel
cylinder head cover
Technical instructions
special tool
Technical instructions
Disassemble
special tool
Technical instructions
Assembly instructions
Replace the roller pusher
special tool
Technical instructions
Assembly instructions
Check the valves
Adjust valve clearance
Valve springs and valve stem seals
special tool
Mercedes Benz
Technical instructions
Disassemble
valve guide
Preparation for work
special tool
Technical instructions
Disassemble
Camshaft
special tool
Technical instructions
Disassemble
0125 Fuel/injection system
Combustion system
Cylinder head injection pipe
special tool
Technical instructions
Assembly instructions
Cylinder head leak pipes
Technical instructions
Nozzle support combination
special tool
Technical instructions
Disassemble
Protective cap
special tool
Technical instructions
Assembly instructions
Insertable pump
special tool
Preparation for work
Technical instructions
Disassemble
fuel pump
Preparation for work
Technical instructions
Disassemble
fuel filter housing
Technical instructions
0130 Lubricating oil system
Lubricating oil system
special tool
Oil injection nozzle
Technical instructions
Assembly instructions
oil filter housing
Preparation for work
Technical instructions
Disassemble
Oil radiator
Technical instructions
Assembly instructions
Oil overpressure valve
Technical instructions
Assembly instructions
Oil pump
Technical instructions
Assembly instructions
0135 Cooling system
Cooling agent
special tool
Technical instructions
Fill out
Clean the coolant circuit
Coolant pump
special tool
Technical instructions
Disassemble
Coolant thermostat
Preparation for work
Technical instructions
Disassemble
0140 Exhaust gas system
exhaust gas elbow
Technical instructions
Disassemble
exhaust gas elbow
Technical instructions
Disassemble
exhaust gas manifold
Technical instructions
Assembly instructions
Exhaust gas turbocharger intake pipe
Technical instructions
Assembly instructions
Exhaust gas turbocharger
special tool
Technical instructions
Disassemble
Check axial play
Check radial play
Exhaust gas turbocharger
special tool
Technical instructions
Disassemble
Check axial play
Check radial play
Catalyst
Preparation for work
Technical instructions
Assembly instructions
0145 Air suction
Suction housing
Technical instructions
Disassemble
Valid for type with an exhaust gas turbocharger
Valid for type with two exhaust gas turbochargers
Valid for type with two exhaust gas turbochargers
Valid for type with an exhaust gas turbocharger
0150 Engine coupled parts
Starting motor
Preparation for work
Technical instructions
Disassemble
Remove the magnetic drive switch
Assemble the magnetic actuation switch
Remove the starter motor pinion
Install the starter motor pinion
Generator
special tool
Technical instructions
Disassemble
Remove the pulley
Assemble the pulley
Generator
special tool
Technical instructions
Disassemble
Generator (G002)
Generator (G002)
Generator (G003)
Generator (G003)
Generator (G003)
Generator (G002)
Generator (G002)
Generator (G003)
Generator (G003)
Generator (G003)
Remove the pulley
Assemble the pulley
Belt tensioner for generator drive belt
Technical instructions
Assembly instructions
Air compressor
special tool
Technical instructions
Check the oil outlet
Remove the drive wheel
Install the drive wheel
Disassemble the cylinder head
Valid for type: 942.993
Disassemble the cylinder head
Assemble the cylinder head
Assemble the cylinder head
Valid for type: 942.993
Remove the piston and cylinder liner
Assemble the piston and cylinder liner
Disassemble the crankshaft and connecting rod
Assemble the crankshaft and connecting rod
0155 Engine adjustment
MR/PLD control knob
Technical instructions
Assembly instructions
0165 Exhaust gas aftertreatment
Exhaust gas after-processing system
Preparation for work
special tool
Technical instructions
Check the urea solution (purity)
Control the urea solution (density)
urea heating valve
Preparation for work
special tool
Technical instructions
Disassemble
urea pump
Preparation for work
special tool
Technical instructions
Disassemble
Remove the pressure accumulator
Install the pressure accumulator
Remove the instantaneous pressure reduction valve
Install the instantaneous pressure reduction valve
Remove the suction filter
Install the suction filter
Check the set of electrical conduits
Fill the pressure accumulator
urea dosing unit
Preparation for work
special tool
Technical instructions
Assembly instructions
urea injector
Technical instructions
Assembly instructions
0190 Accessories
motor insulation
Preparation for work
Technical instructions
Disassemble
Disassemble
motor insulation
Preparation for work
Technical instructions
Disassemble
00 0296 368 1.pdf:
Mercedes-Benz OM460LA
Introduction
General information
Manual validity
Using the manual
Texts and figures
Index with the structure of constructive groups
Search and find
Direction signs
Abbreviations
Technicalities
General repair instructions
Technical data
Indications for correct repair
Self-locking screws
Liquid screw insurance
Steel roller chains
connecting link
Tapered ring joints
Disassembly
Mounting
Head key joints
Disassembly
Mounting
Bearings with tension ring
Disassembly
Mounting
Bearings with tensioner sleeve
Disassembly
Mounting
Tension bushing
Disassembly
Mounting
Safety rings
Threadings with adjustment ring
Screw in
Non-tight joint with adjusting ring
Screw connections with sealing cone
Hydraulic hoses
Laying the hoses
Joint surface work
Replacement parts
Tightening torques
Tightening torques for normal metric threads
Tightening torques for metric fine threads
Tightening torques for hydraulic threads and air conditioning threads with sealing cone and O-ring DIN 3865
Tightening torques for hydraulic threads with adjusting ring DIN 3861
Tightening torques for threaded fittings of the SDS hydraulic system
Tightening torques for oscillating hydraulic threadings
Tightening torques for hollow screws DIN 7643
Tightening torques for threaded fittings of the SDE hydraulic system with adjustable direction
Tightening torques for brake line joints
Tightening torques for helical thread clamps
Tightening torques for spring-loaded helical thread clamps
CCN Explanation
CCN (CLAAS Component Number)
General indications
Electrical regulations
Hydraulic regulations
CCN (CLAAS Component Number)
Security
General information
To especially take into account
Signaling of warning and alarm indications
Rules to avoid accidents with personal injury
General indications
Check, adjustment and repair work
Engine operation
Suspended loads
Work on pipes and hoses
Electrical installation work
Work in the hydraulic installation
Electric welding
lacquer work
Works on urea solution
Tips on how to avoid damage and premature wear
General indications
Limitation of liability
General indications
Immobilization and storage
Prescriptions to avoid damage to health and the environment
Prevention measures to protect against health and environmental damage
Disposal of consumables and auxiliary consumables
Instructions for working on the diesel engine
Protection against accidents
Cleaning
Assembly instructions
Engine check
Commissioning after an engine overhaul
First aid
01 Engine
0102 Complete component
Engine characteristic data
Engine Description
engine components
Power-on sequence
turn the engine
Special tool with motor mounted
Special tool with the engine removed
Turn the engine in assembled state
JAGUAR twin engine (A)
JAGUAR twin engine (B)
Turn the engine in disassembled state
0105 Engine suspension
Hooking rings
Technical instructions
0110 Engine casing
special tool
Technical instructions
Disassemble
Front crankshaft gasket
special tool
Technical instructions
Remove the seal
Install the seal
Remove the cassette seal ring
Install the cassette seal ring
Rear crankshaft gasket
special tool
Technical instructions
Disassemble
Crankshaft housing cover
special tool
Technical instructions
Disassemble
Camshaft wheel cover
Technical instructions
Assembly instructions
control box
Preparation for work
Technical instructions
Disassemble
Oil separator
Technical instructions
0115 Engine propulsion
special tool
Technical instructions
Disassemble
Disassemble
Measure the overhang
Connecting rod
Technical instructions
Disassemble
Cylinder shirt
special tool
Technical instructions
Disassemble
Valid for type: 458.99x
Measure the overhang
Measure the cylinder bore
Crankshaft
special tool
Technical instructions
Disassemble
crankshaft bearing ring
special tool
Technical instructions
Disassemble
Oscillation damper
Technical instructions
Assembly instructions
flywheel
special tool
Technical instructions
Disassemble
Replace the ring gear
Replace the bearing ring
0120 Cylinder head / valves / distributor wheel
cylinder head cover
Technical instructions
special tool
Technical instructions
Disassemble
special tool
Technical instructions
Assembly instructions
Replace the roller pusher
special tool
Technical instructions
Assembly instructions
Check the valves
Adjust valve clearance
Valve springs and valve stem seals
special tool
Mercedes Benz
Technical instructions
Disassemble
valve guide
Preparation for work
special tool
Technical instructions
Disassemble
Camshaft
special tool
Technical instructions
Disassemble
Camshaft wheel
Technical instructions
0125 Fuel/injection system
Combustion system
Cylinder head injection pipe
special tool
Technical instructions
Assembly instructions
Cylinder head leak pipes
Technical instructions
Nozzle support combination
special tool
Technical instructions
Disassemble
Protective cap
special tool
Technical instructions
Assembly instructions
Insertable pump
special tool
Preparation for work
Technical instructions
Disassemble
fuel pump
Preparation for work
Technical instructions
Disassemble
Dismantle the bearing
Install the bearing
fuel filter housing
Technical instructions
0130 Lubricating oil system
Lubricating oil system
special tool
Oil injection nozzle
Technical instructions
Assembly instructions
oil filter housing
Technical instructions
Disassemble
Oil radiator
Technical instructions
Assembly instructions
Oil pump
Technical instructions
Assembly instructions
Oil overpressure valve
Technical instructions
Assembly instructions
0135 Cooling system
Cooling agent
special tool
Technical instructions
Fill out
Clean the coolant circuit
Coolant pump
Technical instructions
Disassemble
Coolant thermostat
Preparation for work
Technical instructions
Disassemble
0140 Exhaust gas system
exhaust gas elbow
Technical instructions
Disassemble
Exhaust gas turbocharger
special tool
Technical instructions
Disassemble
Check axial play
Check radial play
Cover nozzle
Technical instructions
Disassemble
Catalyst
Preparation for work
Technical instructions
Assembly instructions
0145 Air suction
Suction housing
Technical instructions
Disassemble
0150 Engine coupled parts
Starting motor
Preparation for work
Technical instructions
Disassemble
Remove the magnetic drive switch
Assemble the magnetic actuation switch
Remove the starter motor pinion
Install the starter motor pinion
Generator
special tool
Technical instructions
Disassemble
Remove the pulley
Assemble the pulley
Generator
special tool
Technical instructions
Disassemble
Remove the pulley
Assemble the pulley
Belt tensioner for generator drive belt
Technical instructions
Assembly instructions
Air compressor
Technical instructions
Disassemble
Valid for type: 458,992
Valid for type: 458,992
Check the oil outlet
0155 Engine adjustment
MR/PLD control knob
Technical instructions
Assembly instructions
0165 Exhaust gas aftertreatment
Exhaust gas after-processing system
Preparation for work
special tool
Technical instructions
Check the urea solution (purity)
Control the urea solution (density)
urea heating valve
Preparation for work
special tool
Technical instructions
Disassemble
urea pump
Preparation for work
special tool
Technical instructions
Disassemble
Remove the pressure accumulator
Install the pressure accumulator
Remove the instantaneous pressure reduction valve
Install the instantaneous pressure reduction valve
Remove the suction filter
Install the suction filter
Check the set of electrical conduits
Fill the pressure accumulator
urea dosing unit
Preparation for work
special tool
Technical instructions
Assembly instructions
urea injector
00 0298 080 0.pdf:
JAGUAR 900 – 830
Introduction
General data
Manual validity
Using the manual
Texts and figures
Index with the structure of constructive groups
Search and find
Direction signs
Abbreviations
Technicalities
General repair instructions
Technical data
Indications for correct repair
Self-locking screws
Liquid screw insurance
Steel roller chains
connecting link
Tapered ring joints
Disassembly
Mounting
Head key joints
Disassembly
Mounting
Bearings with tension ring
Disassembly
Mounting
Bearings with tensioner sleeve
Disassembly
Mounting
Tension bushing
Disassembly
Mounting
Threadings with adjustment ring
Screw in
Non-tight joint with adjusting ring
Screw connections with sealing cone
Hydraulic hoses
Laying the hoses
Joint surface work
Replacement parts
Tightening torques
Tightening torques for normal metric threads
Tightening torques for metric fine threads
Tightening torques for hydraulic threads and air conditioning threads with sealing cone and O-ring DIN 3865
Tightening torques for hydraulic threads with adjusting ring DIN 3861
Tightening torques for threaded fittings of the SDS hydraulic system
Tightening torques for oscillating hydraulic threadings
Tightening torques for hollow screws DIN 7643
Tightening torques for threaded fittings of the SDE hydraulic system with adjustable direction
Tightening torques for brake line joints
Tightening torques for helical thread clamps
Tightening torques for spring-loaded helical thread clamps
Tire tightening torques
CCN Explanation
CCN (CLAAS Component Number)
General indications
Electrical regulations
Hydraulic regulations
CCN (CLAAS Component Number)
Security
General data
To especially take into account
Signaling of warning and alarm indications
General protection and safety rules at work
First aid
Risk of injury from hydraulic fluid
Leave the machine
Put the machine out of service
Raise the machine on supports
Adjustment and maintenance work
Welding work
03 Chassis
0330 Rear drive steering axle
Drive steering axle
Preparation for work
special tool
Technical instructions
Disassemble
shaft body
Preparation for work
special tool
Technical instructions
Preparation for work
special tool
Technical instructions
Disassemble
Conical drive
Preparation for work
special tool
Technical instructions
Disassemble
Check the play of the toothed sides
Differential
Preparation for work
special tool
Technical instructions
Disassemble
If the measured clearance is equal to the indicated clearance value (a), skip this work step!
If the measured torque equals the specified value for torque (b), skip this work step!
Bearings
Technical instructions
Disassemble
wheel hub
Preparation for work
special tool
Technical instructions
Completely remove the wheel hub
Install the complete wheel hub
Steering bars
Technical instructions
Adjust tread and steering angle
05 Address
0505 Address
Hydraulic steering cylinder (3023)
Technical instructions
Disassemble
0510 Automatic steering
AUTO PILOT steering angle sensor (B006)
Technical instructions
00 0298 555 0.pdf:
General indications
General indications
Introduction
Introduction to the manual_x0011_de_x0011_reparaciones_x0011_CLAAS
Explanation of symbols
Security measures
Especially important
Warning and danger signs
Proper machine application
General prescriptions for safety and accident prevention
Get off the machine
Air conditioning equipment
Entertainment
Fundamental rule
pressure accumulator
General repair instructions
Cause of the fault
Replacement parts
Three phase generator
Tension of steel roller chains
Tapered ring joints
Self-locking screws
Liquid screw insurance
Correct mounting of bearings with retaining ring
Correct assembly of bearings with tensioner sleeve
Threaded joints with adjusting ring in hydraulic pipes
Threaded joints with progressive ring in hydraulic pipes
Threaded joints with sealing cone in hydraulic pipes
Welding work
The repair will be carried out quickly and correctly if the following is observed:
Tightening torques
Hydraulic unions
Brake pipe threaded joints
Wheel studs/wheel bolts
Technical data
Lubricants table
Hydraulic pressure
Engine data
Driver’s platform
Remove the front frame
Assemble the front frame
Remove the radiator
Install the radiator
Remove the regulating valve
Install the regulating valve
Air conditioner installation
Air conditioning installation – Fill the cooling agent
Disassemble the vaporizer
Air conditioning installation (cab side) disassembled
Assemble the vaporizer
Remove the expansion valve
Install the expansion valve
Remove the thermoswitch
Install the thermoitch
Disassemble the filter dryer
Disassembled filter dryer
Assemble the filter dryer
Disassemble the condenser
Assemble the condenser
Remove the compressor clutch
Install the compressor clutch
Disassemble the compressor
Assemble the compressor
Driver’s seat
Remove the driver’s seat
Disassembled driver’s seat (Isringhausen, pneumatically adjustable)
Disassembled driver’s seat (Grammer, pneumatically adjustable)
Install the driver’s seat
Control elements
Disarm the drive regulation
Disarmed gear regulation
Assemble the gear adjustment
Remove the drive lever cable
Install the drive lever cable
Remove the steering rod
Disassemble the steeringar
Disassembled steering bar:
Assemble the steering rod
Install the steering rod
Remove the steering bar (adjustable)
Disassemble the steering bar (adjustable)
Steering bar (adjustable) disassembled:
Assemble the steering rod (adjustable)
Mount the steering rod (adjustable)
Remove the steering unit (rigid steering rod)
Install the steering unit (rigid steering rod)
Remove the steering unit (adjustable steering rod)
Assembling the steering unit (adjustable steering rod)
Check/adjust steering unit
Remove the parking brake pull rope
Install the parking brake pull rope
Remove the brake cylinder
Install the brake cylinder
Electric system
central electrical system
Disassemble the monitor (CIS)
Mount the monitor (CIS)
Power supply
Disassemble the alternator
Install the alternator
Remove the starter motor
Install the starter motor
Power housing
Remove the power supply casing
Assemble the power housing
Remove the lower transport roller and magnetic box
Disassemble the lower transport roller and magnetic box
Lower transport roller and magnetic box disassembled:
Assemble the lower transport roller and magnetic box
Assemble the lower transport roller and magnetic box
Remove the upper pre-pressing roller
Dismantle the upper pre-pressing roller
Disassembled upper pre-press roller:
Assemble the upper pre-press roller
Install the upper pre-pressing roller
Remove the upper rear pressure roller
Disassemble the upper rear pressure roller
Rear upper pinch roller disassembled:
Assemble the rear upper pinch roller
Install the rear upper pinch roller
Remove the lower smooth roller
Disassemble the lower smooth roller
Disassembled lower smooth roller:
Assemble the lower smooth roller
Install the lower smooth roller
Tension the pull springs for the rollers
chopper device
cylinder casing
Remove the cylinder casing
Install the cylinder casing
Adjust cylinder flange
Bedknife
Remove the bedknife
Assemble the bedknife
Remove the bedknife support
Disassembled bedknife support
Install the bedknife support
Remove the bedknife adjustment
Adjustment of the disassembled bedknife
Assemble the bedknife adjustment
Carry out the basic adjustment of the bedknife
Adjust the bed knife
chopper drum
Change and adjust the chopper blade
Disassemble the chopper drum
Disassemble the chopper drum
Disassembled chopper drum:
Assemble the chopper drum
Assemble the chopper drum
sharpening device
Change the sharpening stone
Disassemble the sharpening device
Disassemble the sharpening device
Disassembled sharpening device:
Assemble the sharpening device
Assemble the sharpening device
Corn Cracker
Corn Cracker
Disassemble the corn cracker
Assemble the corn-cracker
Remove the front roller
Disassemble the front roller
Disassembled front roller:
Assemble the front roller
Install the front roller
Remove the rear roller
Disassemble the rear roller
Rear roller disassembled:
Assemble the rear roller
Install the rear roller
Adjustment of the distance between the corn-cracker rollers
Dismantle the adjustment of the distance between the corn-cracker rollers
Dismantle the adjustment of the distance between the corn-cracker rollers
Adjustment (electrical) of the distance between the corn-cracker rollers disassembled:
Assemble the adjustment of the distance between the corn-cracker rollers
Install the distance adjustment between the corn-cracker rollers
Union piece
Remove the guide plate
Assemble the guide plate
Download
Paddle-wheel
Remove the paddle wheel support on the left
Disassemble the p
John Deere Repair Technical Manual PDF
John Deere Transmission Control Unit Component Technical Manual CTM157 15JUL05
John Deere Repair Technical Manual PDF
John Deere 18-Speed PST Repair Manual Component Technical Manual CTM168 10DEC07
John Deere Repair Technical Manual PDF
John Deere Repair Technical Manual PDF
John Deere Repair Technical Manual PDF
John Deere Repair Technical Manual PDF
John Deere Parts Catalog PDF
John Deere Tractors 7500 Parts Catalog CPCQ26568 30 Jan 02 Portuguese
John Deere Repair Technical Manual PDF
New Holland Service Manual PDF

