- Claas
- Grove
- New Holland
- Komatsu
- Kubota
- John Deere
- Linde
- Bomag
- CASE
- Clark
- JCB
- Jungheinrich
- Linde
- Yale
- Yanmar
- Manitou
- Manitowoc
- CNH
- Doosan
- Fiatagri
- Fiatallis
- Fiatallis Other Manual PDF
- Flexi Coil
- Ford New Holland
- Ford New Holland Other Manual PDF
- Huyndai
- Hypac
- Hyster
- Hyster Service Manual PDF
- Isuzu
- Kobelco
- Kohler
- Krupp
- Lombardini
- Mahindra
- Nuvera
- Perkins
- Sperry New Holland
- Utilev
- Versatile
- ZF
 Combines Operator Manual ES 1")
 Combines Operator Manual ES 2")
%20Combines%20Operator%20Manual%20ES&url=https://automanual.net/doc/claas-avero-160-450-combines-operator-manual-es/&media=https://automanual.net/wp-content/uploads/2024/04/claas-avero-160-450-combines-operator-manual-es-1.jpg)
Claas Avero 160 (450) Combines Operator Manual ES
$50.00
- Model: Avero 160 (450) Combines
- Type Of Manual: Operator Manual
- Language: ES
- Format: PDF(s)
- Size: 26.4 MB
File List:
00 0291 254 4.pdf
00 0291 254 4.pdf:
AVERO 240 / 160
1 Regarding this instruction manual
1.1 Information regarding the instruction manual
1.1.1 Validity of the manual
1.1.2 Handling of instructions
1.1.3 Technical data
2 Security
2.1 Safety instructions
2.1.1 General safety warnings
2.1.2 General instructions
2.1.3 Especially important
2.1.4 Proper Machine Application
2.1.5 Logically foreseeable inappropriate application
2.1.6 Safety and accident prevention measures
2.1.7 Safety and accident prevention measures for the combine
2.1.8 General instructions before start-up
2.1.9 Warning and danger signs
2.1.10 Road traffic
2.1.11 General driving instructions
2.1.12 Driving the combine
2.1.13 Driving on slopes
2.1.14 Carry people
2.1.15 Leave the machine
2.1.16 Diesel engine
2.1.17 Information regarding the diesel engine
2.1.18 Information regarding electronic engine management
2.1.19 Antifreeze agents
2.1.20 Risk of injury from hydraulic fluids
2.1.21 Air conditioning equipment
2.1.22 Header and trailer
2.1.23 Deposit the material / deposit the straw
2.1.24 Grain collection
2.1.25 Additional weights
2.1.26 Pressure accumulator
2.1.27 Adjustment and maintenance work
2.1.28 First aid measures
2.2 Safety instructions on the machine
2.2.1 General instructions regarding graphic hazard symbols
2.2.2 Engine
2.2.3 Chassis
2.2.4 Hydraulic installation
2.2.5 Driver’s cabin/platform
2.2.6 Power set
2.2.7 Threshing organs
2.2.8 Separation
2.2.9 Cleaning
2.2.10 Deposit the material / deposit the straw
2.2.11 Grain collection
2.2.12 Assembly parts / machine body
2.3 Security stickers
2.3.1 General instructions on safety stickers
2.3.2 Chassis
2.3.3 Hydraulic installation
2.3.4 Parts for assembly / machine body
2.4 Safety devices
2.4.1 Place the safety support in the feed channel
2.4.2 Remove the safety support in the feed channel
2.4.3 Secure the machine so that it cannot roll
2.4.4 Battery separator switch
2.4.5 Fire extinguisher
2.4.6 Emergency exit
3 Machine Description
3.1 Summary and operation
3.1.1 Overview of the machine front and left
3.1.2 Summary of the machine behind and right
3.1.3 Machine operating mode
3.1.4 Summary of CATERPILLAR C-6.6 engines
3.1.5 Summary of refrigeration groups
3.2 Identification plates and vehicle identification number
3.2.1 Spare parts and technical questions
3.2.2 Machine identification plate
Machine identification plate according to ECE-R 24
Machine identification plate according to ECE-R 24
Machine identification plate according to ECE-R 120
3.2.3 CATERPILLAR C-6.6 engine identification plate
3.2.4 Drive axle identification plate
3.2.5 Steering axle identification plate
3.2.6 Identification plate of the hitch mouth
3.2.7 Hitch block identification plate
3.2.8 Cab identification plate
3.2.9 Straw chopper identification plate
3.2.10 Identification number position
4 Control and display instruments
4.1 Driver’s cabin/platform
4.1.1 Driver’s position summary
4.1.2 Control desk
4.1.3 Column B control desk
4.1.4 Cab roof control elements
4.1.5 Switching the forward lighting
4.1.6 Fold the cutting mechanism into working position / transport position
4.1.7 Ignition contact
4.1.8 Multifunctional control
4.1.9 Central clock
4.1.10 Multifunctional switch
4.1.11 Adjusting the mechanically damped driver’s seat (optional equipment)
4.1.12 Adjusting the driver’s cushioned seat (optional equipment)
4.1.13 Air conditioning equipment
4.1.14 Automatic air conditioning system
4.2 On-board computer / display devices
4.2.1 Validity of CIS software
4.2.2 General CIS instructions
4.2.3 CIS screen
4.2.4 CIS Main Menu
Main menu operation summary
Main menu
4.2.5 Types of CIS errors
4.2.6 CIS fault indications
4.2.7 Guideline values for 100 m pulses
5 Technical data
5.1 AVERO 240 / 160 – type 451 / 450
5.1.1 General instructions
5.1.2 CATERPILLAR C-6.6 Engine
5.1.3 Chassis
5.1.4 Advance device tire air pressure
5.1.5 Chassis track width
5.1.6 Brake
5.1.7 Address
5.1.8 Electrical/electronic installation
5.1.9 Driver’s cabin/platform
5.1.10 Power Assembly
5.1.11 Threshing organs
5.1.12 Separation
5.1.13 Cleaning
5.1.14 Grain collection
5.1.15 Dimensions of grain delivery
5.1.16 Dimensions of mounting parts/machine body
5.1.17 Assembly parts / machine body, weights
6 Preparation of the machine
6.1 Turn off the machine and secure it
6.1.1 Turn off the machine and secure it
6.2 Access to jobs and maintenance
6.2.1 Access to the workplace and maintenance stations
6.3 Before commissioning
6.3.1 Perform before first start-up
6.3.2 Perform before each start-up
6.4 Adjust the mae 6.4.1 Adjust the machine to cereal harvest
6.4.2 Adjust the machine to harvest corn
6.4.3 AVERO 240 threshing table
6.4.4 Threshing table (AVERO 160)
6.4.5 Screen table
6.4.6 Threshing segment
6.4.7 Sheller plates
6.4.8 Clean the machine for a fruit change
6.5 Machine loading
6.5.1 Load and tie down the machine
6.5.2 Unscrew the hook rings
6.6 Head
6.6.1 Assemble the head
6.6.2 Disassemble the head
6.6.3 Assemble the cardan shaft
6.6.4 Dismantle the cardan shaft
6.6.5 Installing the multiple coupling
6.6.6 Dismantling the multiple coupling
6.6.7 Attach the head
6.6.8 Lock the head
6.6.9 Unlock the head
6.6.10 Unhook the head
6.7 Engine
6.7.1 Refuel the machine
6.8 Chassis
6.8.1 Adjusting the driving resistance of the gear lever
6.8.2 Removing/installing the wheels
6.8.3 Raise the machine on supports
Raise the machine below the axles
Lift the machine from behind under the chassis
6.8.4 Steering axle summary
6.8.5 Transfer the steering axle from transport position to working position
6.8.6 Steering axle 00 0694 220
Check the free movement of the steering axle
Flange width 2239 mm
Flange width 2439 mm
Flange width 2639 mm
6.8.7 Steering shaft 00 0694 220
6.9 Brake
6.9.1 Adjust the parking brake
6.9.2 Check the foot brake
6.10 Towing device
6.10.1 Assemble the coupling mouth (supplementary equipment)
6.10.2 Couple a trailer
6.10.3 Uncouple the trailer
6.11 Hydraulic system
6.11.1 Check/fill the head damping pressure accumulator
6.12 Electrical/electronic installation
6.12.1 Install the air conditioning compressor fuse
6.12.2 Adjust spotlights for folding heads
6.12.3 Check the reversing horn
6.13 Driver’s cabin/platform
6.13.1 Mount the approach mirror (supplementary equipment)
6.13.2 Remove the transport lock from the cabin
6.14 Power Assembly
6.14.1 Check the anti-slip strips on the feed channel
6.14.2 Assembling/disassembling the head latch
6.14.3 Adjust the height of the feed chain
6.14.4 Adjust the head lowering speed
6.15 Threshing organs
6.15.1 Open/close the stone collecting device
6.15.2 Remove/install the stone collection device cover (AVERO 240) (supplementary equipment)
6.15.3 Remove / assemble the cover of the stone collection device (AVERO 160) (supplementary equipment)
6.15.4 Open/close cylinder flap
6.15.5 Dismantle / assemble the pre-concave segments (AVERO 240)
6.15.6 Disassembling / installing the concave segments (AVERO 160) (Multicrop concave)
6.15.7 Adjusting the basic concave setting (AVERO 240)
6.15.8 Check the basic adjustment of the concave (AVERO 160)
6.15.9 Assemble/dismantle the sheller cylinder cover plates (supplementary equipment)
6.15.10 Assemble/dismantle the comb/concave plate (supplementary equipment)
6.16 Separation
6.16.1 Assembling/disassembling the side ridges (walker machine)
6.16.2 Assemble/dismantle the cockscombs for mixing corn grain and cob CCM (walker machine)
6.16.3 Assembling/disassembling the central crest (shaker machines)
6.16.4 Assembling/disassembling rice ridges (walker machines)
6.17 Cleaning
6.17.1 Dismantle the sieves
6.17.2 Assemble the screens
6.17.3 Assemble the screen cores (machines without 3-D cleaning)
6.17.4 Cover/open return
6.18 Deposit the material / deposit the straw
6.18.1 Adjust the speed of the straw chopper
6.18.2 Dismantle the straw guide plate (straw chopper with spreader plate distributor)
6.18.3 Assemble the straw guide plate (straw chopper with spreader plate distributor)
6.18.4 Assembling/disassembling the rubber cloth of the straw chopper (supplementary equipment)
Assemble the rubber cloth
Remove the rubber cloth
6.18.5 Remove / assemble the cover plate of the straw chopper counterblade (supplementary equipment)
Install the cover plate
Remove the cover plate
6.18.6 Straw chopper, sieve mounting position
6.19 Grain collection
6.19.1 Access / leave the grain deposit
6.19.2 Open/close the grain tank lid
6.19.3 Adjust the grain tank full indicator
6.19.4 Check/screw the drain screw into the grain tank discharge tube
6.20 Attached parts, machine housing
6.20.1 Mount the additional weight to the machine
Stuff extra weight into tires
Mount the additional weight to the steering axle
Check additional weight by mounted straw chopper
6.20.2 Select additional weight for the machine
Steering axle type assignment
Machine and head assignment
6.20.3 Select additional weight for tires
6.20.4 Select the additional weight for the steering axle
6.20.5 Open/close the side covers
6.20.6 Open/close the engine space side cover
6.20.7 Open/close the tailgate
6.20.8 Open/close the side cover of the 2nd level grain tank discharge drive
7 Management
7.1 Driving the machine
7.1.1 Prepare for road traffic
7.1.2 Prepare the field trip
7.1.3 Driving the machine with gear lever
Drive the machine forward
Brake the machine
Stop the machine
Drive the machine in reverse
7.1.4 Hook the straw guide bib high
7.2 Engine
7.2.1 Adjust the diesel engine speed
7.2.2 Starting the diesel engine
7.2.3 Turn off the diesel engine
7.3 Chassis
7.3.1 Shift into gear
7.3.2 Running characteristics
7.3.3 Towing the machine
7.3.4 Towing forward
7.3.5 Towing in reverse
7.4 Brake
7.4.1 Connect the parking brake
7.4.2 Disengage the parking brake
7.4.3 Foot brake
7.4.4 Park the machine
7.5 Address
7.5.1 Driving
7.5.2 Adjust the steering column
7.6 Driver’s cabin/platform
7.6.1 Put on the seat belt*
7.6.2 Adjusting the mechanically cushioned driver’s seat (optional equipment)
7.6.3 Adjusting the driver’s cushioned seat (optional equipment)
7.6.4 Put the air conditioning equipment into operation
7.6.5 Connect the air conditioning automation
7.6.6 Automatically adjust cabin temperature
7.6.7 Manually adjust the cabin temperature
7.6.8 Adjust the air flow of the air conditioning unit
7.6.9 Defogging the cabin windshields
7.6.10 Show outside temperature
7.6.11 Change the temperature indicator to °Fahrenheit
7.6.12 Adjusting the approach mirror (supplementary equipment)
7.7 Power set
7.7.1 Reverse head/feed unit
7.7.2 Connect the power supply unit (control desk)
7.7.3 Disconnect the power supply unit (control desk)
7.7.4 Disconnect the power supply unit (multifunctional controller)
7.8 Floor guide
7.8.1 Above-ground guidance variants
CONTOUR variant
AUTO CONTOUR variant
7.8.2 Cutting height adjustment – recording cutting height/support pressure
7.8.3 Cutting height preselection – recording cutting height
7.8.4 Read position indicator – support pressure
7.8.5 Position indicator – read cutting height
7.9 Threshing organs
.9.1 onnect the threshing units
7.9.2 Disconnect the threshing devices
7.9.3 Adjust the concave (AVERO 240)
7.9.4 Adjust the concave (AVERO 160)
7.9.5 Connect/disconnect the sheller plate (AVERO 240)
7.9.6 Assembling/disassembling sheller strips (AVERO 160) (supplementary equipment)
7.9.7 Assembling/disassembling the threshing segment (AVERO 240)
7.9.8 Unroll the shelling cylinder (AVERO 240)
7.9.9 Unroll the shelling cylinder (AVERO 160)
7.9.10 Adjust the speed of the shelling cylinder (shelling cylinder variator)
7.9.11 Adjust the speed of the shelling cylinder (chain drive of the shelling cylinder)
7.10 Separation
7.10.1 Adjust the canvas bib
7.10.2 Observe the straw jam warning behind the separation
7.10.3 Adjust the separation grain passage control indicator
7.11 Cleaning
7.11.1 Manually graduate the sieves
7.11.2 Adjust the fan speed
7.11.3 Adjusting the air guide plate
7.11.4 Adjust the cleaning grain passage control indicator
7.12 Deposit the material / deposit the straw
7.12.1 Put the straw chopper into operation (turn the spreader plate distributor to the chopping position)
7.12.2 Putting the straw chopper out of service (turn the spreading plate spreader into the windrowing position)
7.12.3 Turn the spreader plate distributor
Rotate the spreader plate distributor
7.12.4 Adjusting the bed knife (standard straw chopper)
7.13 Grain collection
7.13.1 Adjusting the grain tank auger cover plates (from machine no. …)
7.13.2 Adjust the grain tank filling auger cover plate (AVERO 160)
7.13.3 Control return
7.13.4 Remove/insert the grain tank discharge tube
7.13.5 Connect/disconnect grain tank discharge
7.14 Attached parts, machine housing
7.14.1 Rotate the front ladder
Front ladder transport position
Until machine no. …
Starting with machine no. …
Front ladder access position
7.14.2 Change the position of the rear ladder
8 Incident and solution
8.1 Engine
8.1.1 Diesel engine
8.1.2 Empty fuel from the fuel tank
8.1.3 Bleeding the fuel system
8.1.4 Incident and solution Diesel engine
8.1.5 Starting aid (12 V)
Starting aid (12 V)
Externally starting the diesel engine
8.2 Electrical/electronic installation
8.2.1 Open the base central electrical system
8.2.2 Shut down the base central electrical system
8.2.3 Open the roof central electrical system
8.2.4 Close the roof central electrical system
8.2.5 Base central electrical system
8.2.6 Roof central electrical system
8.2.7 Vehicle main fuse
8.2.8 Base/roof central electrical system prefuse
8.3 Driver’s cabin/platform
8.3.1 Air conditioning automation, error code table
8.3.2 Incidents and solutions in the air conditioning equipment
8.4 Head
8.4.1 Head
8.5 Power set
8.5.1 Incidents and solutions in the power supply unit
8.6 Threshing organs
8.6.1 Incidents and solutions in threshing equipment
8.6.2 Sheller cylinder
8.7 Separation
8.7.1 Incidents and solution in separation
8.8 Cleaning
8.8.1 Cleaning incident and solution
8.9 Depositing the material / depositing the straw
8.9.1 Harvest discharge / straw discharge incident and solution
8.10 Grain collection
8.10.1 Incidents and solutions in grain collection
8.10.2 Assemble the grain tank emptying safety screw
9 Maintenance
9.1 General data
9.1.1 General maintenance warnings
9.1.2 Diesel engine
9.1.3 Clean engine space and danger areas
9.1.4 Straps
9.1.5 Drives
9.1.6 Correct chain tension
9.1.7 Screws
9.1.8 Lubrication
9.1.9 Cleaning of lubricants
9.1.10 Brake
9.1.11 Wheels / tires
9.1.12 Hydraulic system
9.1.13 Electrical equipment
9.1.14 Air conditioning equipment
9.1.15 Protection devices
9.1.16 Spare parts
9.1.17 Imbalance
9.1.18 Welding work on the combine
9.1.19 Cleaning surfaces with adhesives
9.1.20 Recommendations for preparing the combine for wintering
9.1.21 Coolant
9.2 Inputs
9.2.1 Lubricants
9.3 Maintenance intervals
9.3.1 Behavior regarding maintenance intervals
9.3.2 Before starting the harvest
9.3.3 After the first 10 hours of service
9.3.4 After the first 100 hours of service
9.3.5 After the first 500 hours of service
9.3.6 Every 10 hours of service or daily
9.3.7 Every 50 hours of service
9.3.8 Every 100 hours of service
9.3.9 Every 250 hours of service
9.3.10 Every 500 hours of service or annually
9.3.11 Every 1000 hours of service
9.3.12 Every 2 years
9.3.13 Every 5 years
9.3.14 After harvest
9.4 Engine
9.4.1 Clean the surroundings of the diesel engine
9.4.2 Open/close the fuel system shut-off cock
9.4.3 Clean the fuel precleaning filter
9.4.4 Empty the condensation water in the fuel prefilter (standard equipment)
9.4.5 Change the fuel prefilter (standard equipment)
9.4.6 Empty the condensation water in the fuel pre-filter (supplementary equipment)
9.4.7 Change the fuel prefilter (supplementary equipment)
9.4.8 Change the additional fuel filter (CATERPILLAR C-6.6) (supplementary equipment)
9.4.9 Change the CATERPILLAR C-6.6 fuel filter
9.4.10 Check the diesel engine oil level
9.4.11 Change diesel engine oil/oil filter
9.4.12 Check the coolant level of the water radiator
9.4.13 Check the coolant mixing ratio
9.4.14 Change the coolant in the water radiator
9.4.15 Drain the coolant from the water radiator
9.4.16 Fill the water radiator coolant
9.4.17 Prepare the air gun to clean the refrigeration groups
9.4.18 Clean the radiator screen
9.4.19 Clean the refrigeration group
9.4.20 Change the coolant pipes
9.4.21 Clean/change diesel engine air filter with plastic case
9.4.22 Change the safety cartridge of the diesel engine air filter with plastic case
9.4.23 Clean the air intake filter
9.4.24 Change the air intake hoses
9.4.25 Retighten the clamps of the air intake hoses
9.5 Chassis
9.5.1 Wheels / tires
9.5.2 Check the tightening torque of the wheel nuts / wheel studs
9.5.3 Clean the surroundings of the gearbox, drive axle
9.5.4 Check the oil level of the drive axle reducers
9.5.5 Drain oil from the drive axle reducers
9.5.6 Fill oil in the drive axle reducers
9.5.7 Check the oil level of the drive axle gearbox
9.5.8 Drain oil from the drive axle gearbox
9.5.9 Fill oil in the drive axle gearbox
9.6 Brake
9.6.1 Check the brake fluid level
9.6.2 Check the brake shoes
9.7 Drives
9.7.1 Left drive diagram AVERO 240 / 160
9.7.2 Right drive diagram AVERO 240 / 160
9.7.3 Adjust the belt (R01)
9.7.4 Adjust the belt (R02)
AVERO 240
AVERO 160
9.7.5 Adjust the belt (R03)
9.7.6 Adjust the belt (R04)
9.7.7 Adjust the belt (R05)
9.7.8 Adjust the belt (R06)
9.7.9 Adjust the belt (R07)
9.7.10 Adjust the belt (R08)
9.7.11 Adjust the belt (R09)
9.7.12 Adjust the belt (R10)
9.7.13 Adjust the belt (R11)
9.7.14 Adjust the belt (R12)
9.7.15 Adjust the belt (R15)
9.7.16 Adjust the belt (R16)
9.7.17 Remove the belt (R40)
9.7.18 Install the belt (R40)
9.7.19 Adjust the belt (R40)
9.7.20 Remove the belt (R41)
9.7.21 Install the belt (R41)
9.7.22 Adjust the belt (R41)
9.7.23 Remove the belt (R42)
9.7.24 Install the belt (R42)
9.7.25 Adjust the belt (R42)
9.7.26 Remove the belt (R43)
9.7.27 Install the belt (R43)
9.7.28 Adjust the belt (R43)
9.7.29 Remove the chain (K55)
9.7.30 Install the chain (K55)
9.7.31 Adjust the chain (K55)
9.7.32 Remove the chain (K56)
9.7.33 Install the chain (K56)
9.7.34 Adjust the chain (K56)
9.7.35 Remove the chain (K57)
9.7.36 Install the chain (K57)
9.7.37 Adjust the chain (K57)
9.7.38 Dismantle the chain (K58)
9.7.39 Install the chain (K58)
9.7.40 Adjust the chain (K58)
9.8 Hydraulic installation
9.8.1 Unload the pressure accumulator
9.8.2 Check the oil level of the hydraulic system
9.8.3 Change the oil / oil filter / suction filter / ventilation filter of the hydraulic system
9.8.4 Clean the hydraulic tank filler filter
9.8.5 Bleed the hydraulic cylinders for transversal regulation of the cutting mechanism
9.9 Electrical/electronic installation
9.9.1 Check the battery acid level
9.10 Driver’s cabin/platform
9.10.1 Clean/change the cabin air filter
9.10.2 Clean the cabin circulation air filter
9.10.3 Clean cab roof assemblies
9.10.4 Control the humidity saturation of the cooling agents of the air conditioning equipment
9.11 Power set
9.11.1 Adjust the feed chains
9.11.2 Adjust the feed chain friction clutch
9.11.3 Check the friction plates in the feed channel
9.12 Separation
9.12.1 Check the canvas bib
9.13 Deposit the material / deposit the straw
9.13.1 Check the straw chopper
9.13.2 Change the chopping blades of the straw chopper
Change worn chopper blades
Example: changing the outer chopper blades
Example: changing the inner chopper blades
Change the cereal chopper blades
Change the corn chopper blades
9.14 Grain collection
9.14.1 Adjust the return elevator chain
9.14.2 Adjust the grain elevator chain
9.14.3 Clean the auger trays
9.14.4 Clean the grain tank
9.14.5 Adjust the support for the transport position of the grain tank discharge pipe
9.15 Attached parts, machine housing
9.15.1 Check the fire extinguisher
9.15.2 Check the machine for dirt
9.15.3 Check the tightness of the hydraulic system
9.15.4 Check the tightness of the gear
9.16 Greasing scheme
9.16.1 Grease points – 10 o’clock left
9.16.2 Grease points – 10 o’clock right
9.16.3 Grease points – 50 h left
9.16.4 Grease points – 50 h right
9.16.5 Grease points – 100 h left
9.16.6 Grease points – 100 h right
9.16.7 Grease points – 500 h left
9.16.8 Grease points – 500 h right
10 Decommissioning and waste disposal
10.1 General data
10.1.1 End of operational life and waste disposal
11 EC declaration of conformity
11.1 AVERO 240 / 160 – type 451 / 450
11.1.1 EC declaration of conformity


John Deere Repair Technical Manual PDF
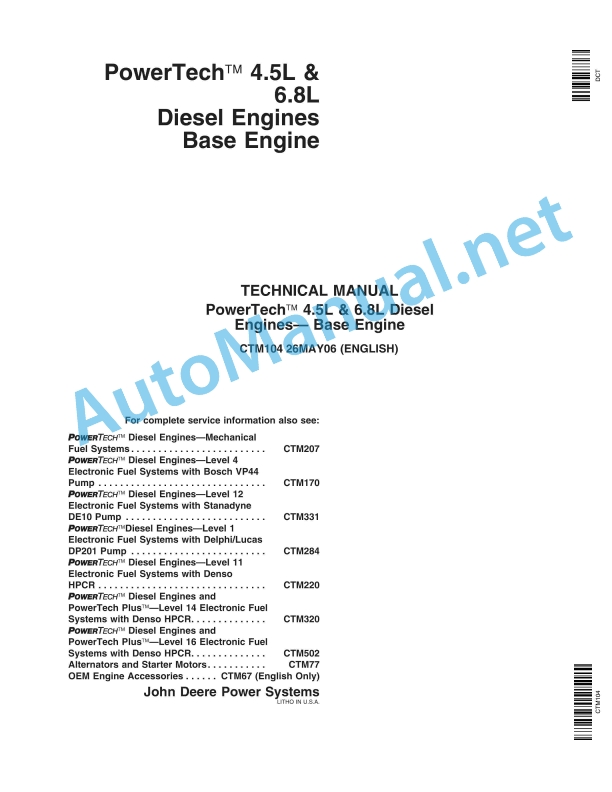
John Deere Application List Component Technical Manual CTM106819 24AUG20
John Deere Repair Technical Manual PDF
%20Portuguese&url=https://automanual.net/doc/john-deere-tractors-6300-6500-and-6600-parts-catalog-cq26564-29set05/&media=https://automanual.net/wp-content/uploads/2023/08/john-deere-tractors-6300-6500-and-6600-parts-catalog-cq26564-29set05-portuguese-1.jpg)


John Deere Parts Catalog PDF
John Deere Tractors 6300, 6500, and 6600 Parts Catalog CQ26564 (29SET05) Portuguese


John Deere Repair Technical Manual PDF
John Deere Transmission Control Unit Component Technical Manual CTM157 15JUL05
%20Interim%20Tier%204%20Stage%20III%20B%20Component%20Technical%20Manual%20CTM104754%2025%20July%202012%20Portuguese&url=https://automanual.net/doc/john-deere-powertech-m-6068-oem-diesel-engines-above-130-kw-174-hp-compo-technical-manual-ctm104754-25jul12-portuguese/&media=https://automanual.net/wp-content/uploads/2023/08/john-deere-powertech-6068-engines-above-130-kw-174-hp-interim-tier-4-stage-iii-b-component-technical-manual-ctm104754-25-july-2012-portuguese-1.jpg)

John Deere Repair Technical Manual PDF


John Deere Parts Catalog PDF
John Deere Tractors 7500 Parts Catalog CPCQ26568 30 Jan 02 Portuguese


John Deere Repair Technical Manual PDF
John Deere Diesel Engines POWERTECH 2.9 L Component Technical Manual CTM126 Spanish


John Deere Repair Technical Manual PDF


John Deere Repair Technical Manual PDF
John Deere Parts Catalog PDF
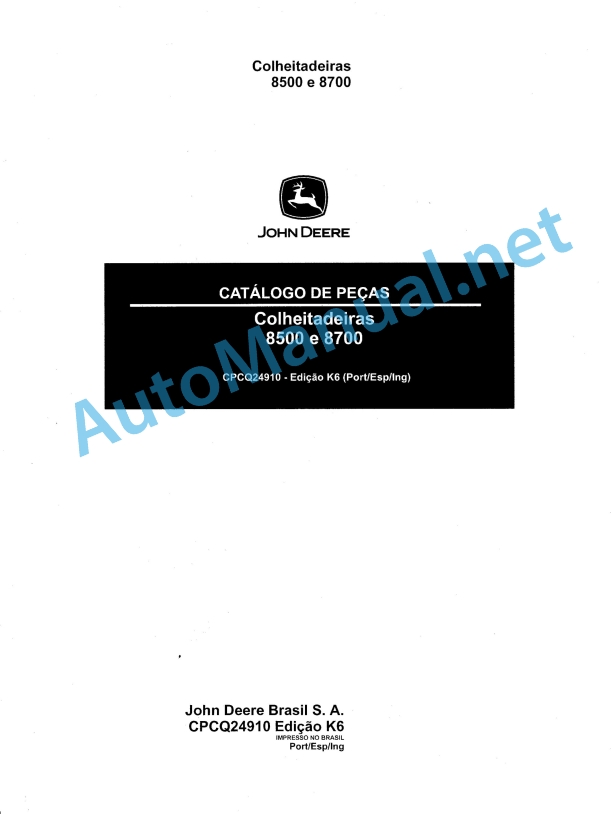
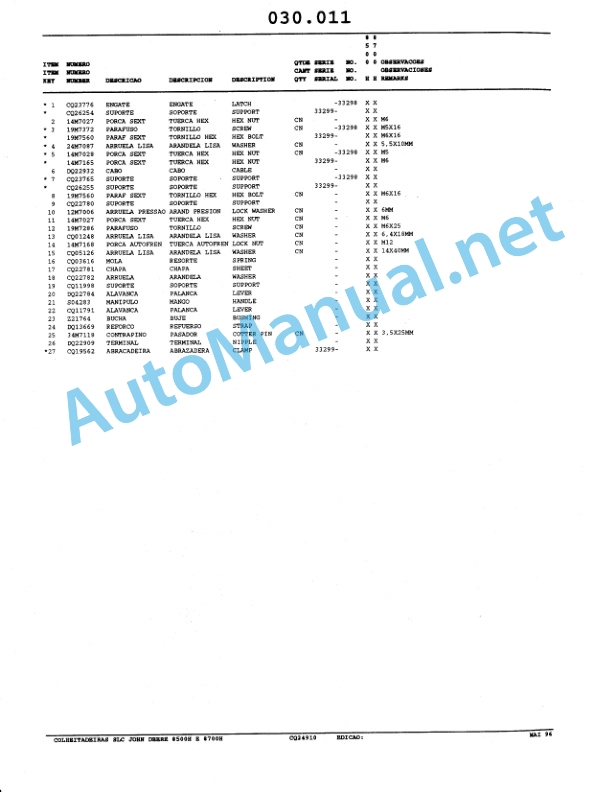
John Deere Harvesters 8500 and 8700 Parts Catalog CPCQ24910 Spanish
- Claas
- Grove
- New Holland
- Komatsu
- Kubota
- John Deere
- Linde
- Bomag
- CASE
- Clark
- JCB
- Jungheinrich
- Linde
- Yale
- Yanmar
- Manitou
- Manitowoc
- CNH
- Doosan
- Fiatagri
- Fiatallis
- Fiatallis Other Manual PDF
- Flexi Coil
- Ford New Holland
- Ford New Holland Other Manual PDF
- Huyndai
- Hypac
- Hyster
- Hyster Service Manual PDF
- Isuzu
- Kobelco
- Kohler
- Krupp
- Lombardini
- Mahindra
- Nuvera
- Perkins
- Sperry New Holland
- Utilev
- Versatile
- ZF