Claas Mega 370 360 (845) Combines Operator Manual FR
$50.00
- Model: Mega 370 360 (845) Combines
- Type Of Manual: Operator Manual
- Language: FR
- Format: PDF(s)
- Size: 36.2 MB
File List:
00 0293 192 2.pdf
00 0299 824 2.pdf
00 0299 824 2.pdf:
Introduction
Introduction
Contents
Contents
General advice
Driving on the road
Important
Nameplate / Serial number
Nameplate
Machine number
Engine number DAIMLER CHRYSLER OM 906 LA
Cutting deck nameplate
Straw chopper
Cabin serial number
Safety tips
Safety tips
Safety support/stand
Extinguisher
Battery cut-off switch
Brake chock (not for all countries)
Installing the brake block
Safety stickers with warning pictograms
Technical characteristics
CLAAS MEGA 370 / 360
CLAAS MEGA 370 / 360
CLAAS MEGA 370 / 360
CLAAS MEGA 350
CLAAS MEGA 350
CLAAS MEGA 350
Security devices
Front tools – weight / dimensions
Machine overview
Structure and operation
Cutting apron
Threshing bodies
Cleaning
Trimming
Basic rules of combining harvesting
Before commissioning
Necessary work befonl commissioning
Cabin with automatic air conditioning
Air conditioning automation
Control and indication elements
Commissioning the air conditioning automation
Cabin temperature adjustment
Manual adjustment of fan-evaporator speed
Connecting the ECON service
Disconnecting from the ECON service
REHEAT operation (remove fog from cabin windows)
Outdoor temperature display
Switching the temperature display to ˚Fahrenheit
Heating of the foot area
Fault display, F0 temperature sensor error (passenger compartment, blue)
Fault display, error temperature sensor F1 (output, yellow)
Fault display, F2 temperature sensor error (external, red)
Cabin with air conditioning
Cabin with fan
Cabin with fan and air conditioning
Cabin with fan and heater
Heating of the foot area
Reheat system (eliminates fogging on cabin windows)
Failure, possible cause or solution – air conditioning
Opening ad cloing the cabin roof
Open the cabin roof
Close the cabin roof
Steering column
Ignition lock
Driving informant
How the driving informant works
Harvest monitor informant
How the harvest informant works
Control console (up to machine no. …)
Control console (from machine No. …)
Multifunction lever (up to machine No. …)
Multifunction lever (from machine No. …)
Central electrical system
CLAAS Autopilot plug-in module (P)
Position of the corn cutting/picker apron during road transport
Changing the position of the steering column
“Air-cushioned” driver’s seat (optional)
Height adjustment
Weight adjustment
Seat tilt adjustment
Seat depth adjustment
Kidney support
Armrest tilt
Horizontal adjustment of the driver’s seat
Mechanical driver’s seat (optional equipment)
Weight adjustment
Height adjustment
Seat tilt adjustment
Seat depth adjus support
Armrest tilt
Horizontal adjustment of the driver’s seat
Safety switch integrated in the driver’s seat (from machine No. …)
Access ladder
Front ladder
Ladder access and extension
Rear ladder
Driving the combine harvester
Engine speed selector
Start the engine
Adjusting the difficulty of maneuvering the forward control lever
Speed ranges
Driving characteristics
Direction
Pedal brake
Hand brake
Stop the engine
Autopilot CLAAS
Steering axle
Adjust track of adjustable steering axle
Shift the steering axle from the road position to the working position
CLAAS 4-Trac system
Towing the machine with steering bridge
Cutting cylinders
Hydraulic cylinders
Hook up the hydraulic cylinders of the cutting deck
Installing the right hydraulic cylinder of the cutting deck
Third cutting deck cylinder required
Towing and gangway ramp
Forw Revers Gateway ramp
Take out the gangway ramp
Cabin and lighting
Driving lights, working lights and mirrors
Side hatches
Opening and closing the side hatches
Adjusting the hatch locks
Use – cutting apron
Assembly of the cutting deck
Adjusting the MEGA 350 scraper angles
Machines with CLAAS Auto-Contour
Align the receiving tenons (up to machine No. …)
Machines without Auto-Contour
Align the cutting deck
Connect the cardan shafts
Connecting hydraulic hoses
Connecting the cables
Place the crutches
Adjustments at the cutting deck
Dividers
Corn lifters
Cutting blade
Dismantling the blades
Installing the blades
Blade head height adjustment
Adjusting the blade clamps
Replacement blade
Cutting deck shoes
Reel fingers
Reel drive
Horizontal reel adjustment (mechanical)
Horizontal reel adjustment (hydraulic)
Reel variator
Feed screw
Adjusting the distance from the bottom plate
Adjusting the position of the feed fingers
Adjusting the scraper bars
Replace blades in the field
Use – Basic machine
Feed channel
Supply chains
Front tool reversing device
CLAAS Auto-Contour Automatic cutting height adjustment with transverse adjustment of the cutting deck
Cutting height preselection with automatic adjustment (machines with Auto-Contour)
Adjusting the cutting deck flexibility springs
Checking the cutting deck suspension and conveyor suspension mobility
Adjusting the cutting height display
Cutting flexibility display
Adjustment of the lowering speed of the front tool (to machine No. …)
Adjusting the lowering speed of the front tool (from machine No. …)
Starting the CLAAS Auto-Contour (up to machine no. …)
Starting the CLAAS Auto-Contour (from machine No. …)
Working with corn picker
Program the CLAAS Auto-Contour (up to machine No. …)
Program the CLAAS Auto-Contour (from machine No. …)
Table for automatic cutting height adjustment
Commissioning cutting height preselection with automatic regulation (machines with Auto-Contour)
CLAAS Contour system (ground support adjustment)
Adjustment of ground pressure (cutting deck flexibility)
Getting started with the CLAAS Contour system (up to machine no. …)
Getting started with the CLAAS Contour system (from machine No. …)
CLAAS cutting height preselection
Starting the pre-selection of cutting heights (up to machine No. …)
Starting the pre-selection of cutting heights (from machine No. …)
Cutting deck adjustment range
Lifting height
Cutting height adjustment range, without Auto-Contour
Lifting height lower edge of cutting deck shoes
Cutting deck clutch
Connect the front tool (to machine no. …)
Disconnect the front tool (up to machine No. …)
Connect the front tool (from machine No. …)
Disconnect the front tool / control panel (from machine No. …)
Disconnect the front tool / multifunction handle (from machine No. …)
Threshing bodies
Destoner bin
Start/stop of threshers
Connect the threshers (up to machine No. …)
Connect the threshers (from machine No. …)
Disengage the threshers
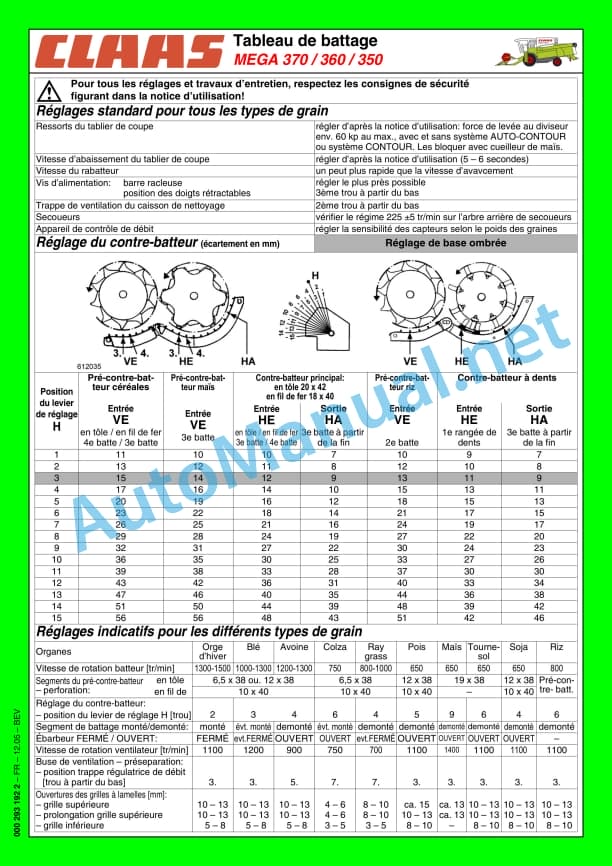
Adjusting the concave
Adjusting the concave
Cleaning the threshing bodies
Drummer’s Diet
Adjust the mixer speed (up to machine No. …)
Adjusting the mixer speed (from machine No. …)
Two-position dimmer
Preparation concave
Trimming
Threshing segment
Eliminate the beater windings
Straw puller
Anti-splash fabric
Shakers and cleaning
Aerator shakers
Cleaning the shakers
Cockscombs/Sawtooth Separators
Cleaning box
Preparation table
Cleaning ventilation
Electrical fan speed adjustment
Ventilated waterfall
Adjusting the throttle valve
Adjusting the wind orientation plate
Adjusting the slatted grilles
Guide plates (3-D no-clean machines)
Lower grilles
Dismantling the upper grilles
Mounting the upper grilles
Disassembly of the lower grilles
Mounting the lower grilles
Tightening torque of axial screw connections for upper and lower grilles
Dynamic slope compensation (3D cleaning)
Return of the oats
Flow control device
Adjustment for different crops
Adjusting sensor sensitivity
Commission the flow control device
Grain recovery
Auger and auger buckets
Elevators
Grain hopper
Hopper Covers
Emptying the hopper
Rear access ladder with safety switch (up to machine No. …)
Hopper drain tube
Connect and disconnect the hopper drain (to machine no. …)
Connecting and disconnecting the hopper drain (from machine No. …)
Hopper discharge tube road position
Evacuation hatch at the level of the hopper drain tube
Driving the hopper emptying augers
Hopper Drain Shear Bolt
Feed screw drive
Hopper fill level indicator 100%
Hopper 100% filling level indicator buzzer
Straw chopper / Chaff spreader
Straw chopper
Checks to be carried out before putting the straw chopper into service
Adjusting the hash length
Cross blade adjustment
Commissioning the straw chopper
Adjusting the spreading width
Electrical adjustment of the spreading plates (optional equipment)
Adjustment of the spreading plates
Stopping the straw chopper and adjusting to windrowing
Couple the transport trailer to the cutting deck
Change the speed of the straw chopper from threshing wheat to threshing corn
Replace the front pulley
Change the speed of the straw chopper from threshing corn to threshing wheat
Replace the front pulley
Chaff spreader
Adjusting the chaff spreader
Grid and threshing tables
Grid table
Threshing Table
Trimming hatches
Threshing segment
Place the machine on jack stands
Incident, cause or remedy – basic machine
Maintenance – basic machine, cutting deck
Important maintenance tips
Important Maintenance and Safety Tips
Maintenance and lubrication tables
Maintenance tables
Lubricant tables
Hydraulic system
Pressure accumulators
Check the oil level (hydrostatic transmission and operating hydraulic system)
Changing the hydraulic oil (hydrostatic transmission and operating hydraulics)
Replace the hydraulic oil filter
Replace the return filter (up to machine No….)
Replace the return filter (from machine No….)
Filling instructions when changing hydraulic oil
Hydraulic pump adjustment
Bleeding air from reel cylinders
Bleed the air from the hydraulic transversal regulation cylinders of the cutting deck (Machines with Auto-Contour, up to machine No. …)
Bleed the air from the cutting deck transverse regulation hydraulic cylinders
Foot brake / Brake fluid
Gearboxes / Housings
Adjusting the gearbox
Check the oil level
Oil drain
MEGA 370 / 360 gearboxes
Check the oil level
Oil drain
MEGA 350 gearboxes
Check the oil level
Oil drain
Planetary gears / steering axle CLAAS 4-Trac system
Check the oil level
Oil drain
Gearbox/blade drive
Oil level check / oil change
Beater speed reducer housing
Check the oil level
Oil drain
Corner gearboxes in the hopper
Feed channel
Tighten the supply chains
Elevator chains
Drive belts / drive chains – basic machine
General advice
Left drive scheme
Straight training scheme
Remove the belt (1)
Install the belt (1)
Remove the belt (2) (up to machine No. …)
Install the belt (2) (up to the machine No. …)
Remove the belt (3)
Install the belt (3)
Remove the belt (4) (up to machine No. …)
Install the belt (4) (up to machine No. …)
Remove the belt (4) (from machine No. …)
Install the belt (4) (from machine No. …)
Remove the belt (5)
Install the belt (5)
Remove the belt (6)
Install the belt (6)
Remove the belt (7)
Install the belt (7)
Remove the belt (8)
Install the belt (8)
Remove the belt (9)
Install the belt (9)
Remove the belt (10)
Install the belt (10)
Remove the belt (11)
Install the belt (11)
Remove the belt (12)
Install the belt (12)
Remove the belt (14)
Install the belt (14)
Remove the belt (15)
Install the belt (15)
Remove the belt (16)
Install the belt (16)
Remove the belt (17) (up to machine No. …)
Install the belt (17) (up to machine No. …)
Remove the belt (17) (from machine No. …)
Install the belt (17) (from machine No. …)
Remove the belt (20)
Install the belt (20)
Remove the belt (21) (up to machine No. …)
Install the belt (21) (up to the machine No. …)
Remove the belt (21) (from machine No. …)
Install the belt (21) (from machine No. …)
Remove the belt (22)
Install the belt (22)
Remove the belt (23)
Install the belt (23)
Remove the belt (24) (up to machine No. …)
Install the belt (24) (up to the machine No. …)
Remove and install the belt (24) (from machine No. …)
Remove the belt (26) (up to machine No. …)
Install the belt (26) (up to the machine No. …)
Remove the belt (27) (up to machine No. …)
Install the belt (27) (up to the machine No. …)
Remove the belt (28)
Install the belt (28)
Remove the belt (30)
Install the chain (30)
Remove chain (31)
Install the chain (31)
Remove chain (32)
Install the chain (32)
Remove chain (33)
Install the chain (33)
Remove the belt (35) (from machine No. …)
Install the belt (35) (from machine No. …)
Drive belts / drive chains – cutting deck
General advice
Cutting deck drive diagram
Tighten the blade drive belt (40)
Tighten the feed auger drive chain (41)
Tighten the reel drive chain (42)
Removing and installing reel drive belt (43)
Tighten the reel drive chain (44)
Tighten the reel drive chain (45)
Cabin / Air conditioning
Cleaning the filters
Air conditioner
Clean the capacitor
Check the refrigerant level
Replace the filter dryer
Required filling quantities of refrigerant R 134 a
Maintenance work to be carried out before harvest
Extinguisher
Have the fire extinguisher checked for proper operation
Checking the shaker crankshaft speed
Sensor adjustment
Machines with on-board computer
Straw chopper
Replace articulated knives
Dismantling the blades
Installing the blades
Replace the counter blades
Winterizing Tips for Combines
Maintenance – Engine
Important maintenance tips
Important tips and safety regulations
Maintenance and lubrication table
Maintenance table DAIMLER CHRYSLER OM 906 LA
DAIMLER CHRYSLER OM 906 LA lubricant table
Maintenance – engine
Overview of the DAIMLER CHRYSLER OM 906 LA engine (up to machine No. …)
Overview of the DAIMLER CHRYSLER OM 906 LA engine (from machine No. …)
Fuel system
Fuel tank
Fuel shut-off valve
Water decanter / fuel pre-filter (additional equipment – small model)
Exploded view of the water decanter / fuel pre-filter:
Fuel pre-filter
Water decanter / fuel pre-filter (additional equipment – large model)
Exploded view of the water decanter / fuel pre-filter:
Fuel filter (up to machine no….)
Clean the fuel pre-filter (from machine No….)
Replacing the fuel filter (from machine No. …)
Bleed the air from the fuel system
Checking the engine oil level
Engine oil change
Drain used oil
Oil filter
Filling the engine oil
Tighten the alternator V-belt
Cooling system
Cooling liquid
Engine block water drain plugs
Respect the quality of the coolant
Identifying coolant quality
Add coolant
Replace the coolant
Coolant mixing proportion
Radiator
Pour in coolant (up to machine no….)
Pour in coolant (from machine No….)
Overpressure
Anti-corrosion and anti-freeze protection
Warning sign
Cooling water temperature
Stopping an engine that has overheated
Radiator cage
Cleaning the radiator cage
Raise the radiator cage
Swivel the oil cooler upwards (up to machine no. …)
Swivel the oil cooler upwards (from machine no. …)
Cleaning the oil cooler
Cleaning the water radiator
Dry air filter
Alarm system
Clean the air filter suction grille
Cleaning the air filter
Cleaning the dry air filter with dust extraction
Removing the main air filter cartridge:
Installing the main air filter cartridge
Security cartridge
electricity
Three-phase alternator
Engine problems, cause or remedy
Winterizing Tips for Engines
Engine conservation
Lubrication plan
Lubricants and advice
Alphabetical index
Alphabetical index
John Deere Repair Technical Manual PDF
John Deere Repair Technical Manual PDF
John Deere Transmission Control Unit Component Technical Manual CTM157 15JUL05
John Deere Repair Technical Manual PDF
John Deere Repair Technical Manual PDF
New Holland Service Manual PDF
John Deere Repair Technical Manual PDF
John Deere Repair Technical Manual PDF
John Deere Diesel Engines POWERTECH 2.9 L Component Technical Manual CTM126 Spanish
John Deere Repair Technical Manual PDF
John Deere Repair Technical Manual PDF


